Anaconda_
-
Posts
1,507 -
Joined
-
Last visited
Content Type
Profiles
Forums
Articles
Posts posted by Anaconda_
-
-
1 hour ago, Andrew Reid said:
Did I miss any firmware updates on the Pocket 4K since I last bothered with it?
I don't know when you last updated, but the recent ones only add features for use with the ATEM Mini, turning it into an unmanned studio camera if you need it. There was also an update that adds a horizon level cross. Other than that, if you have Braw, you've had the last major update.
EDIT: that's not true - they've also added 120fps in 2.6k - 75fps at 4096 x 1720 - and 2.8k anamorphic up to 80fps
Have you had time to test the real world battery life with the grip? Is there any improvements on letting you know when the battery will die? I've been using a v-mount which has its own indicators, so pay little attention to what the camera tells me.
-
Thanks @kye - I'm going to mount the sensor with bolts and springs. Essentially your idea, but the springs will push the sensor away from the lens and a nut will push it towards the lens. Once I get the right distance, I'll use some glue to stop the sensor moving if the springs ever get loose or whatever. The whole front panel where the turret is mounted comes off the camera body, so to get it into position shouldn't be too hard with some time, a clamp and some careful positioning. The most difficult part will be positioning the sensor so it's centred in the image circle. From there is a case of tightening or loosening the nuts.
As for raw - I can technically record raw video, but I have no way to view it for now. For the time being I'm going to just shoot h264, but the beauty of the Pi is you can change the settings really easily. Over SSH from my phone it's possible to edit and load different scripts, so when the raw thing becomes more developed and supported, I can switch.
-
All good ideas. For my project, I'm mounting the camera and a Pi inside a Bolex. Essentially, the sensor will be more or less where the film would run past the lens.There will be a small difference to ensure infinity focus, but the theory is still the same. the 1m marking on the lens will still focus to 1m away.
Mounting it this way means I can keep the turret system, as the lenses screw into the body, not onto the sensor. It'll work much better for maintaining the whole look and feel of shooting on 8mm film. Of course, the files won't act or look like film, but using the camera will feel similar, and onlookers will think I'm really artistic.
The only difference, in usable terms, is the winder on the side, and the frame rate selector won't do anything. Everything else will work as it once did with film.

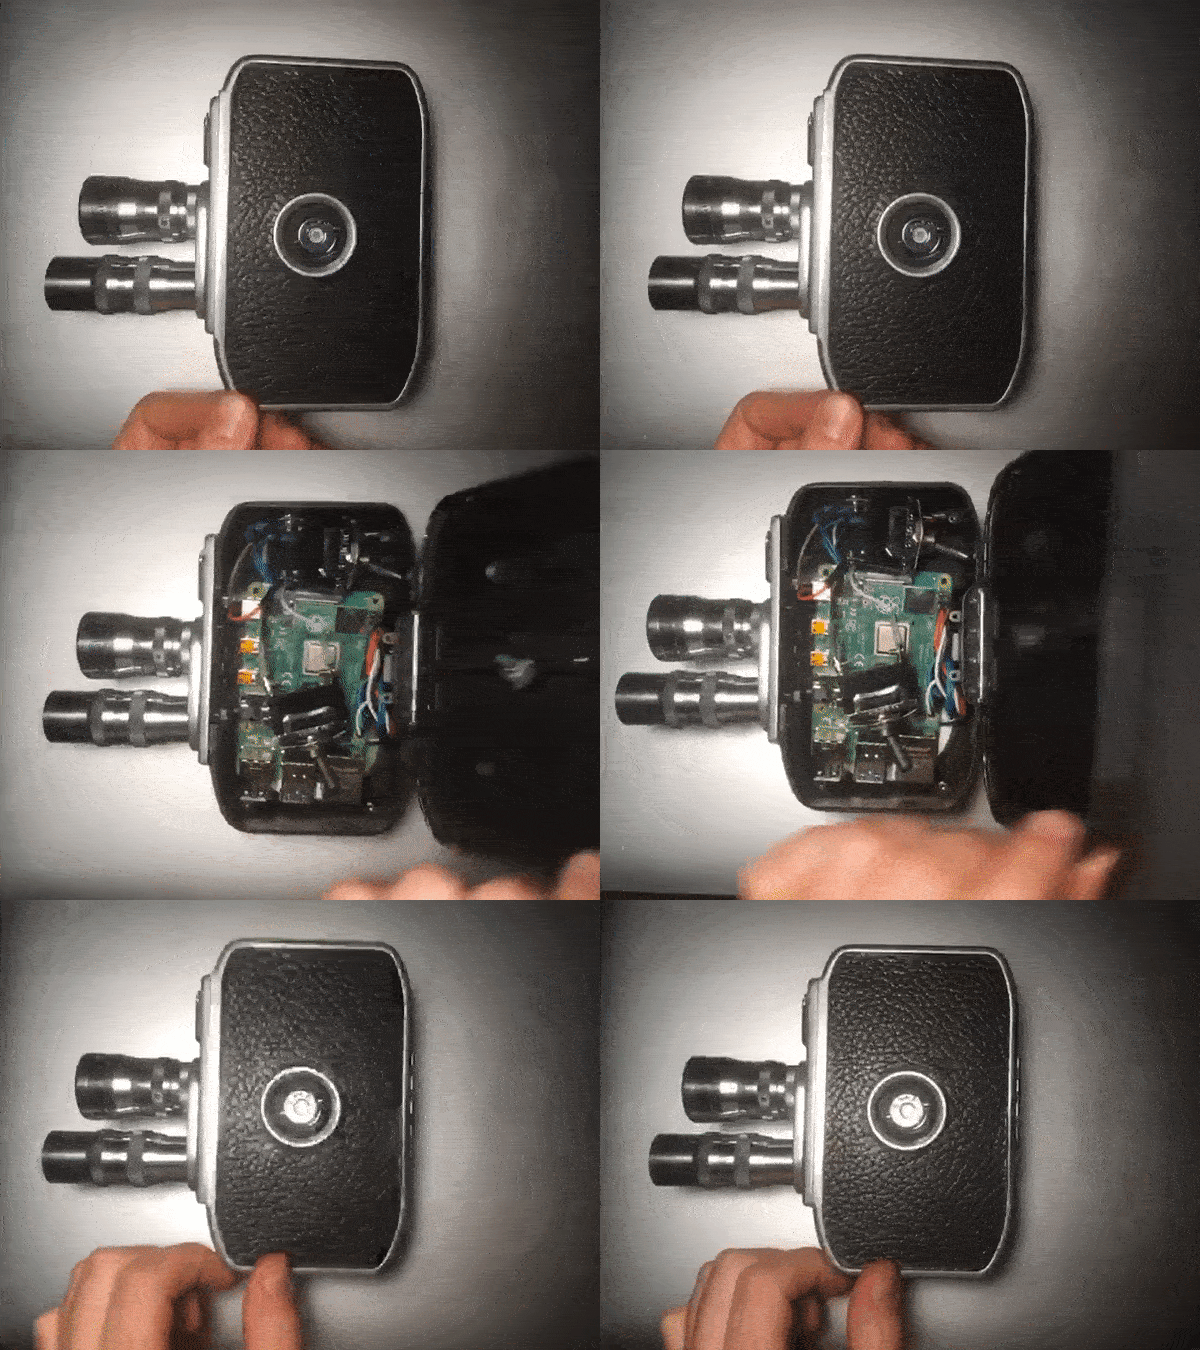
This is currently not working. I put the pi and switches inside the case to see how much room I have to play with. To give you an idea, I could probably put 2 more Pis in there. That said, this does not yet have the sensor or a battery in the case.
Before that though, I need to find time to mount the sensor and have it lined up. The weather here is too nice to be tinkering with that, but hope to have it done in the next few weeks. Once the sensor is in, it's then a case of securely mounting the pi, battery, LEDs and switches.
(the switches in the gif are only there for testing. I have smaller, more subtle ones that I'll mount onto the camera. From the outside I want it to look as original as possible.)
-
Yeah I read that. Only good for macro stuff really.
I’m talking the mount off my sensor though. Instead of mounting the lens on the sensor, I’m mounting the sensor on the lens of that make sense?
-
Thanks Kye, these .rgb files have been around since at least the first Pi camera, so I was hoping there would be something out there. Happy to wait though

As for glass... I'm building this to use D-mount lenses, of which I have a few. For now I don't have a way to mount them though, so all testing is with my funky 25mm, until I get my mount sorted out.
-
After doing some testing, I've recorded some raw rgb video, but have no way of viewing it. Does anyone know what to do with this kind of data?
Over on the RPi forum they suggest this software, but it's only for viewing. You can't export, so you can't use the files with any other software, which seems a shame. (It's also €30 for mac. I don't want to pay anything if it doesn't help me actually use the footage)
If anyone's interested, there's a few samples below. They're shot with my 25mm cctv lens, which on this sensor is very tele. It's the only c-mount lens I have and until finish my project, it's the only lens I can use... It's a soft lens at the best of times so keep that in mind when viewing.
FYI:
The .rgb file is raw data. I'd love to work out how to view this in a coherent way - or convert it into DNG frames.
The .264 files are straight out of the pi before any wrapping. You can only view these in VLC (as far as I know)
The .mkv files are unadjusted conversions to h.265 - this is only for viewing the files in an NLE
The 4x3 file was a stress test for how large a frame I could make using the basic settings. (1600 x 1200)
https://www.dropbox.com/sh/seddezwwymwnh4v/AAAU5es-RCWOXCj1Fpkbz3Dba?dl=0
-
-
Does this also apply to the E2c? I can't see anywhere that it does.
That's already very inexpensive for what it is - cheapest 4k raw camera available (I think)
-
-
Not mine, but there’s some sample footage in this video.
-
Ah of course, somehow I was thinking about the film mechanism while reading shutter system. My bad.
-
20 minutes ago, no_connection said:
Depending on the readout speed and option to trigger readout you could maybe keep the shutter system, would be pretty cool.
The problem is, the sensor will need to be exactly where the film is, but it’s obviously thicker than film, so some things for sure need to be taken out.
Im bracing myself for total disassembly and partial reassembly after testing.
like I say though, got to get a trigger working before any of that.
-
My camera and Pi has arrived and I'm happy to say it's going to fit very nicely in a (broken and unusable) Bolex B8 - by my calculations, the sensor size is similar to that of 8mm film, so I'm planning on taking off the C-mount from the sensor and placing to look through the D-mount lenses on the camera. Which will also let me hang onto the turret system.
As my camera is already broken, I'm going to have to gut it, so it's essentially the most hipster RPi case around, but I'm fine with that. There's tonnes of room for a power bank etc. to keep everything nicely held inside. Can possibly keep the mechanism too so I can make cool noises while filming.
I just need to wrap my head around some buttons and switches. I'm quite digging the idea of opening the side of the camera to turn the system on and off every time, but definitely need a trigger on the outside of the casing. I'm also toying with the idea of setting 15 second record limits to really embrace the annoyance of a wind-up system.
When all is said and done, it's going to look something like this:
-
I'm in the process of filling a shopping basket to get this delivered in the next few days... I'm totally new to Pi life, but from what I've read, getting the camera setup seems fairly easy. I already have a couple c-mount lenses and an SD card, so to start out I'm just buying the pi, the camera and a case (it's like €6 so I might as well get it now with the free shipping)
I am having a spot of trouble finding how to wire up a hardware button. Ideally it'll be like a trigger, hold it down to record, let it go to stop. Can someone point me in the right direction?
-
-
JVC LS300 (external only though)
Osmo Pocket
iPhone?
-
8 hours ago, Kisaha said:
Unfortunately they do not ship in my country, and anyway, it is a lot more than the 1.995$ U.S citizens pay.
I call it Euro-premium, why we do have to pay the premium anymore, I do not know..
Don't forget tax isn't included in he marked price in US. Not sure on the maths, but I think that will close the gap a little..
-
In Holland it's €2249, so a little less than CVP.
-
Huge price drop for the 6k! Now $1,995
-
Huge price drop for the 6k! Now $1,995
-
-
You could just do FCP7 - XML - Adobe PP
You'll lose any keyframes / opacity / audio work etc. - but the base edit should still translate fairly well.
- User and BenEricson
-
 2
2
-
Will more festivals follow suit?
https://www.sxsw.com/film/2020/amazon-prime-video-presents-the-sxsw-2020-film-festival-collection/
Cannes, perhaps the biggest film festival around has a big problem with streaming services, but I think it's about time they change their mind. Could this be the start? or even the end?
-
35 minutes ago, heart0less said:
I always thought this kind of machines only exist in cartoons.
The you should check this out! Also in one room... Imagine the mathematics that went into timing everything!
Speaking of maths to work out the timing, how about this one:
Behind the Scenes:


Blackmagic Pocket 4K battery grip
In: Cameras
Posted
@SteveV4D exactly that. I’ve always said the P4k is an editor’s camera. Post work is a breeze. even with a heavy grade it plays back super smooth on my old laptop. I have to make proxies to even watch untouched h265 clips.
@Andrew Reid As far as I know, if your camera shipped with a DNG firmware, it can roll back. If you got a camera that shipped after Braw, then no you can't. I tested it myself with the first two updates after Braw came out, but haven't tested since. There is a chance the new updates stop that from happening, but I doubt it.
Yes 2.6k is cropped.