Leaderboard


Popular Content
Showing content with the highest reputation on 06/08/2014 in all areas
-
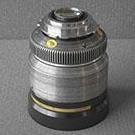
Like to share this one shot acoustic Music Video I created for Arctic Chanteur, North Star Blues singer, ex Madrugada frontman Sivert Hoyem. Shot with a Kowa Anamorphic. Tokina Diopter. Redstan Clamp. Canon 50mm FD 1.23 points
-

Will Canon EVER respond to competitors?
Tim Fraser and one other gave a reaction for a topic
Chris, obviously this is only my opinion but I feel quite strongly you should stick with Canon! Or at least not go with the GH4 ... The stuff you get out of the 5D h264 is really very nice and I think you've developed a particular look that works well for you. Knowing the stuff you shoot I think you also need a camera that's great in low light. If you're interested in the GH4 because you want a camera that's more video-orientated and sharper, I think a C100 would be a great upgrade (will hopefully drop in price again soon?). Or the A7s would be the other obvious option (FF sensor too). I really love this wedding film you made - for me it just wouldn't be the same without that full-frame, noise free, lovely Canon-colour aesthetic ...2 points -
I just bought a Sony DSC-RX100. After a couple years shooting my personal projects on a Canon 7D, I needed something more compact that I could carry with me at all times, and the Sony DSC-RX100 looked like it could be the one. The great reviews, the ability to shoot 1080p at 50fps with a fast Zeiss IS lens, full manual control in video mode, focus peaking and a 16mm sized sensor convinced me to go for it! My footage shot on the 7D improved quite a lot during the time I've been using it, knowing a camera's strong points and especially its limitations is very important to getting good images out of it, so the first thing I did with the Sony DSC-RX100 was to shoot some tests to help me decide which settings I'll be using when shooting video with it. Like most people around here I learn so much from online reviews and discussion forums, and those have been a great help deciding my gear purchases, so I'm sharing what I learned from my tests as a way to return the favor and give something back to the community. There's been some good reviews of the Sony DSC-RX100 online, and some useful info spread around the internet, but I think this post will cover a lot of useful information for whoever's interested in this camera for video, and much of this info will also apply for any other similar camera. I started by turning off all the automatic picture improvement options, as they usually degrade the quality of the image and make it less gradable, then I set the codec to AVCHD at 28mbits and 50p (PS). SHOOTING MODE For video shooting I'd recommend setting the top wheel to video mode and then selecting video-M for manual video shooting The RX100 does have a dedicated Movie Recording button, and can shoot video on any Stills mode, but you might get aspect ratio and exposure changes once you hit the Record button in these modes. In video-M mode you'll get what you see on screen. RECORD SETTINGS The Sony RX100 can shoot movies in two different formats, MP4 and AVCHD. All MP4 options are below 1080p resolution though, so I won't get into those. In AVCHD mode however, we get 3 different 1080 options: 50i 24M (FX) (50i @ 24Mbps, Blu-Ray AVCHD disc compliant) 50i 17M (FH) (50i @ 17Mbps, DVD AVCHD disc compliant) 50p 28M (PS) (50p @ 28Mbps, Progressive Scan) So it seems like we get 50i at 17Mbps and 24Mbps, and we get 50p at 28Mbps, but not really… The 50i mode is actually capturing 25p images out of the sensor and encoding them as 50i footage, this means that we do end up with interlaced footage, but since it was captured progressively, de-interlacing it will produce a clean 25p image! So if we're looking for the best possible video out of the RX100, we should use 50i 24M for 25fps video and 50p 28M for 50fps video. In theory, shooting 50i 24M gives us the best bitrate per frame in this camera, almost twice as much as shooting 50p 28M. Shooting 50fps however would have neighboring frames changing less than when shooting 25fps, helping the encoder do a better job, but still the per frame bitrate is lower, and here's a comparison that shows is. If you look at the darker areas in the back where the window is, you'll see that the 50i version is slightly cleaner. Here's an example of something in motion shot at 50i and 50p, the 50i frame was de-interlaced and as you can see there's no interlacing artifacts at all. Considering all of the above, I think it's safe to say that the 50i 24M mode, which is in fact 25p @ 24Mbps, will give you best video quality out of this camera. CREATIVE STYLES Creative Styles is the RX100's designation for Color Profiles. My first test was to choose the flattest Creative Style the camera had to offer, so I shot some footage of all the different styles. After looking at all these different images, I decided to go with the Portrait Creative Style, as it seems to be the flattest of them all. EXPLORING THE PORTRAIT CREATIVE STYLE Each Creative Style has settings for Contrast, Saturation and Sharpness that can be set from -3 to 3, so I shot some more footage using the Portrait Creative Style in a number of different settings. Using the Portrait Creative Style at the minimum settings (Contrast: -3, Saturation: -3, Sharpness: -3) definitely (and obviously) seems to be the flattest style in this camera, but I had to check how well it graded and how it compares to using the default values (Contrast: 0, Saturation: 0, Sharpness: 0). On the top left you have a frame shot using the Portrait Creative Style, with all the settings set to 0, on top right you have a frame shot using the Portrait Creative Style in its flattest settings (Contrast: -3, Saturation: -3, Sharpness: -3). On the bottom right frame I added some sharpness to the flat image, which responded quite well, and on the bottom left frame I added not only sharpness but also increased the Saturation and Contrast in order to match the top left frame (Contrast: 0, Saturation: 0, Sharpness: 0). The result is an image that matches in color saturation and contrast, but with a much nicer detail and less compression artifacts. It looks sharper and cleaner overall, which made me decide to use this Creative Style and these settings from now on. SHOOTING BLACK & WHITE The following test is something I've been wanting to do for a while, regardless of the camera. The thinking behind this test was: "If the camera is compressing B&W footage instead of color footage, maybe it can do a much better job at it since it doesn't have all the color information to process, so even using the same bit rate could give us better results." Of course I don't know the details on the cameras' inner workings, but assuming the B&W Creative Style is applied BEFORE the footage is compressed to AVCHD, then this should work. Maybe. So I shot some footage using the B&W Creative Style in its flattest settings (Contrast: -3, Saturation: -3, Sharpness: -3), which you can see on top left, and then some more footage using my new favorite Portrait Creative Style, also in its flattest settings (Contrast: -3, Saturation: -3, Sharpness: -3). On the middle left frame, I increased the sharpness and the contrast on the image to make it less flat, and on the middle right frame I did the same, and also desaturated it. As you can see both images are different, since the B&W Creative Style's color conversion is not merely desaturating the image to create a B&W version, it's using a more clever process that also looks better, but anyway, the point here is to test the image compression and figure out which one gives cleaner results, so on the last test frames I increased the exposure by 2 stops to find out how well the images handled it. On the bottom left frame you can see how much cleaner the image shot with the B&W Creative Style is, compared with the one shot using the Portrait Creative Style, it's actually beautifully clean and overexposing it by 2 stops didn't show any ugly artifacts at all. So my conclusion on this one is, if you're shooting for black and white, and you're sure that's the look you'll want (since it's kind of hard to color B&W footage if you change your mind afterwards), then using the B&W Creative Style will give you far superior results! DYNAMIC RANGE OPTIMIZER The Dynamic Range Optimizer works when writing to compressed formats, such as JPG, MP4 or AVCHD. It has no effect when shooting RAW. Its purpose is to capture more detail in the areas that are more prone to get lost when using compressed formats, such as dark shadows. It works in the darker areas of the image, making them brighter and producing a flatter image, which makes it easier on the image compression to achieve better results. Here's a test scene shot using all the DRO levels available. There's also an Auto Mode, but I suspect it wouldn't give predictable results when shooting manual video. The result is quite clear on every mode. Personally I think 5 is too much and might be actually degrading the image more than it helps, but lower settings definitely look not just useable but very useful in achieving a flat and clean image. I'd say using the DRO in its modes 2 and 3 would definitely help achieving a better flat image. I'll probably leave it at 2 all the time and increase it to 3 in situations with more contrast. 5DtoRGB I've used 5DtoRGB on Canon footage since the early beta versions, and I honestly don't understand how come it's not used by everyone. 5DtoRGB features one of the best YCbCr to RGB compression out there, and it's free!!! (the Pro version with batch capabilities costs $50 though) 5DtoRGB does a great job improving aliasing and compression artifacts and transcoding to 10-bit Prores (can also transcode do DPX image sequences and DNxHD files), or at least it did with Canon DSLR footage, so I thought I'd try it with the RX100. The top frame is from the original AVCHD file and the bottom frame is from the Prores transcoded file out of 5DtoRGB. 5DtoRGB automatically changed the Decoding Matrix setting to ITU-R BT.709, so I assume that's the one to use with the RX100 (Canon DSLRs like the 550D, 60D or 7D used the ITU-R BT.601 Decoding Matrix, the 5Dmk3 however used the ITU-R BT.709). Looking at it like this there's not much of a difference, so I went looking in the channels. The Red and Green channels looked quite clean in both versions, but looking closely at the Blue channel you can see how 5DtoRGB makes a pretty good job at smoothing out some of the compression blockiness, but mainly smoothing out the aliased lines you get on sharper edges. Using 5DtoRGB won't do any miracles, but when shooting to 8 bit compressed codecs, every little bit helps, and using it along with a flat Creative Style will definitely help you getting cleaner and better images. SHUTTER ANGLE / SHUTTER SPEED The Sony DSC-RX100 has the annoying feature of only shooting 50fps (or 60fps on NTSC markets). On one hand it's great to be able to shoot 50fps at 1080p, but on the other hand, shooting 25fps at the same bit rate would probably produce better results with less compression. One of the advantages of this could be that you'd always have the extra frames in case you needed the slow motion effect, but unfortunately that's not quite the case, since the ideal shutter speed for 25fps real time playback is different than the ideal shutter speed for 25fps slow motion playback. If you're planning on shooting for 25fps real time playback, then you should set your shutter to 1/50, but if you intend to shoot for slow motion playback at 25fps, then you should set your shutter speed to 1/100. Using a shutter speed of 1/100 for real time 25fps playback will not give you enough motion blur, and the motion playback will not be as smooth as it should. Also, playing back footage shot at 1/50 shutter speed at 25fps slow motion will have too much motion blur, making its motion look rather fuzzy. Here's a sample file you can download yourself. This was shot at AVCHD, 1080 50fps with a shutter speed of 1/50, meant to be used on a 25fps timeline, playing at real time: https://dl.dropbox.com/u/8569573/rx100review/RX100videoSample1.mov That's it for now, I really hope it helps some people out. I have some videos I can share later on if you're interested, and I also might update this review with tests of the different Steady Shot modes once I get to them. Keep in kind that these are only my findings and personal opinions, it would be great to hear from people with different opinions, or about settings you think would give better results. Enjoy!1 point
-

Panasonic GH4 footage shot with the EOSHD Shooter's Guide Cinema Settings
Luc reacted to Andrew Reid for a topic
YouTube version Music by Poplin via the >EOSHD Music Challenge I've been trying some run & gun shooting with no rig, just a gorilla pod and GH4 all handheld. In the process I developed three image profiles for the GH4 which I've assigned to the mode dial on my camera. This is the first footage to show what the GH4 is capable of with the EOSHD Cinema profile. Read the full article here1 point -
Tom Cruise's new movie is out. For those interested, check out the camera man's rig. http://www.imdb.com/media/rm2594688768/tt1631867?ref_=ttmd_md_pv http://www.imdb.com/media/rm3836202752/tt1631867?ref_=ttmd_md_pv And of course the cameras specs: Arriflex 235, Panavision G-Series Lenses Arriflex 435, Panavision G-Series Lenses Panavision Panaflex Millennium XL2, Panavision G-Series, ATZ and AWZ2 Lenses Panavision Panaflex Platinum, Panavision G-Series, ATZ and AWZ2 Lenses1 point
-
IMO the 4K on the GH4 isnt really about delivering/finishing in 4K. It's about getting really really good 1080p. The 100Mbps bitrate isn't really that large and it seems like any decent computer that's less than two years old or so will be able to handle editing and playback. The price difference between the GH4 and the other cams is indeed pretty large though; it's up to you to evaluate your gear situation and see if that money would be better spent on lenses, support, lighting, etc.1 point
-

Will Canon EVER respond to competitors?
dafreaking reacted to Christina Ava for a topic
the c100 is purely video, so you lose the photography feature correct?also i have used the 1dc and i know the camera i think in reviews its better than the c100 so i would say 1DC.1 point -
New video on my converted anamorfot - meopta anagon. Used lenses - Zenitar16, MIR1V Helios 44-2 Camera-BMPCC, shooting in RAW, post - divanchi. https://vimeo.com/976207851 point
-
GH4 4K Music Video with Kowa Anamorphic
yannis.zach reacted to Christina Ava for a topic
what a voice i was at this concert in athens.... very nice1 point -

Grading
nahua reacted to Michael Ma for a topic
Here's my quick and dirty guide to color correcting. 1. When a person is the subject, prioritize skin, especially faces when making any color choices. When people's skin look alien to the species in respect to the lighting of that shot, it can't be overlooked. 2. Correct lighting first. A good starting point is to have an even distribution of pixels from black all the way to white. Then color grade. 3. When cross processing, work with complementary colors for the highlights and shadows. A classic combination used in films today is beige and teal because beige is the color of skin (which can't be eliminated out of the palate), and teal complements it. A great tool to look up complementary colors is a free online tool called Adobe Kuler. 4. Grading is great but try to shoot without needing to grade/correct when possible. If lighting, set, props, wardrobe, makeup, and camera profiles are calibrated, then you shouldn't need to make any changes, and any minor changes will be effortless. 5. A common misconception going around today is that all detail in the highlights and shadows need to be recovered and preserved. Unnecessary detail in the shot can lead the eyes away from the subject. Don't be afraid to up the contrast to where you lose visible detail for the benefit of the overall image. 6. Instead of having a half dozen layers of adjustments which will take forever to process for the entire video, create custom LUTs by grading a single frame, then apply the LUT using Red Giant's LUT buddy. If you're using Premiere Pro CC, apply the LUTs you've created with Lumetri instead as it is much faster to process. 7. Blown out highlights are sometimes inevitable. One thing you can do to improve the image is to bring the whites down to the highlights and to add color to the highlights that match the lighting. 8. There are tools to grade within tools like Premiere Pro. For minor adjustments you may only need to play with RGB Curve and Levels. They don't take any processing time either. For more powerful plugins to grade the popular ones are Colorista II, FilmConvert. FilmConvert is faster, easier to use, but more limited in functionality. I heard Davinci Resolve is better but you need a Cuda compatible graphics card to use it.1 point -

Some interesting new info from the GH4 design team
nib187 reacted to Brellivids for a topic
If only we could transmit a message to Panasonic design team that panasonic should allso make wildlife glass (birding glass) I mean they have this marvelous focusing on the GH4 but neither Olympus nor panasonic have yet to announce pro level native longer focal lenght lenses for MFT. something like 250mm f 3.5 -or f 4 IS 400mm 5.6 IS 100-400 5.6 IS I bet panasonic could brake new ground with those and go after sports ppl as well. the up and coming 150 2.8 is only so and so. if it were 200 2.8 IS then it would be interesting.1 point -

Will Canon EVER respond to competitors?
Christina Ava reacted to jcs for a topic
The GH4 is a great camera but does not replace the 5D3. For stills the 5D3 is still King. IQ for RAW video 5D3 is still best in class (A7S might be a contender with 50Mbps compressed). GH4 has 4K, slomo, decent stills, all in a tiny package, especially if using m43 lenses (while excellent and sharp, not as good looking as FF L class lenses). A 4K 5D Mark 4 with AF video and XAVC-class codec would put Canon back on top. Will be unlikely with the 1DC still on the market.1 point -
topic locked.1 point
-
EOSHS forum should be re-named GH4HS
nib187 reacted to Andrew Reid for a topic
A lot of people are viewing the GH4 4K material on 2.5K or 1080p displays and there's crude downscaling going on which results in an over-sharp image and even some heavy aliasing. A lot of the YouTube stuff looks thin and sharp because of compression and bad downscaling. First time I graded the GH4 files I was pretty happy and yet we've only realised half the camera's potential so far. Once we get the Atomos Shogun we will be getting uncompressed 10bit 4:2:2 4K out of the HDMI port. DXOMark tested the raw output GX7's sensor (similar to the one in the GH4) and it rates for about 11.8 stops dynamic range, pretty much identical to the 5D Mark III. The GH2 and 5D2 have been around for ages and the GH4 is a far bigger step up from the GH2 than the 5D3 is from the Mk II. Michael - ignorance of the reason other people choose to shoot with the GH4 does not make a good debate. Also remember that the filmmaking world is small and you are using your real name on the forum, if you piss someone off, eventually it will come back round. There's no career advantage to behaving like a complete prat in front of half the digital filmmaking community.1 point -
1 point