

kye
-
Posts
7,882 -
Joined
-
Last visited
Content Type
Profiles
Forums
Articles
Posts posted by kye
-
-
11 hours ago, Towd said:
Yes, shared nodes are really useful for making a scene adjustment ripple across all shots in a scene. It's something more useful to me in the main grade after I get everything in my timeline's color space.
For me, what I like about pre and post-clips is that I typically have 2 or 3 nodes in my pre grade and the purpose of my pre-clip is just to prepare footage for my main grade. For example, a team I work with frequently really likes slightly lifted shadow detail, so I'll give a little bump to shadow detail then run the color space transform in my pre-clip. If one camera is set up really badly one day and I need two different pre-clips for that camera, I'll just make multiple incrementing numbered groups for that camera, so I've never had a reason to put a shot in multiple groups. The other thing, I really like about groups is that you get a little colored visual icon of all shots in a current group that appear on the thumbnails in the timeline. This makes for a nice visual sanity check when I'm scanning through a ton of footage on a long project. Usually, the camera used is fairly obvious from A cams, to drones, to body cams by the thumbnail on the timeline so the visual reference of thumbnail and colored group icon is a nice check that I've prepped all my footage correctly.
I know there is some extra flexibility in putting grading nodes before or after a color space transform, but for me on a large project, my main purpose in the pre-clip is to just get things close and into the proper color space. If I really need to do more adjustments that have to be done pre-color space transform, I'll flip around color spaces in my main grade. But my goal is to do all my shot to shot and scene balancing in my main grade with everything in my delivery color space. Keeps things sorted for me. ?
Ultimately, it all depends on the type of work you are doing. If I was doing feature work that is all shot on one camera type my system wouldn't be very useful. But I do a lot of doc work, and outdoorsy adventure stuff that are typically shot on all types of cameras and conditions, so it can be really useful for keeping things organized.
One last trick with the groups is that if I'm also mixing 6k, 4k, and 2k footage, I can throw a little sharpening or blurring into the post-clip section to match up visual detail between cameras. Then use the timeline grade to do any overall finishing if needed.
Ultimately, Davinci is just a wonderfully flexible system for developing custom workflows that works for you. I love that their are so many ways to organize and sort through the color process. ?
Nice to hear your workflow. If you were doing feature work with one camera then you might be using groups to match lenses! Or if not that, then you could use groups for scenes, which would be handy.
I really do like Resolve for how it is so flexible, but it really adds to the learning curve!
") 6 hours ago, Mark Romero 2 said:
6 hours ago, Mark Romero 2 said:Here is one example of a troublesome clip with a lot of mixed lighting (and different wall colors)
https://www.dropbox.com/s/9i16eqwqzosokob/C0096.MP4?dl=0
I am pretty sure I shot in SLOG 2 (although I usually shoot SLOG 2 at plus 2 and this doesn't look two stops over...)
I will post another example later
For reference, the window frames should be white. (or close to white).
The walls in the near room are green and the walls in the far room (with the round card table) are blue(ish)
As you can probably tell from the clip, I shoot with pretty low saturation. Maybe I need to bump saturation up???
I've had a go at grading this. It's probably terrible and I have no idea what you would consider a good grade in the business, but I've white balanced on the two windows and faded the shots between those two, so see how you go. Happy to share my settings if they are of interest.
(sigh, it's uploading with an ETA of over an hour... I'll post the link when it's done)
6 hours ago, Mark Romero 2 said:Wish there was a way to get the meta data for clips regarding the gamma / gamut / exposure value (meaning, exif for video clips).
That would be very handy!!
5 hours ago, Mark Romero 2 said:Yeah, the BMPCC4K is definitely on my list. Wish it had a tilting screen and / or was a little more gimbal friendly.
Still thinking about the X-T3 though... or the Pansonic S1 if they ever develop a reasonable 16-35mm lens.
Since 90% of my business is from stills so that means the BMPCC4K would have to be a video-only camera for me.
Could go the GH5 route but I think X-T3 might be a bit better for stills and - all things being equal - might give me a bit better low light performance / dynamic range than a GH5 with the aps-c size sensor of the X-T3.
If the Z6 had 10-bit internal I could live with that (even though it seems like there is no prospect of Z6 ever having 4K 60fps). Heck, my friend still shoots real estate video in glorious 1080p on his D750.
10-bit is really where it's at for that lovely thick colour look. I find that the look of RAW is wonderful, but to my eye 10-bit video with a half-decent codec and little-to-no-sharpening has most of the advantages of that look. You can take a sledge-hammer to the footage in post and it doesn't even bat an eyelid, which is great if you're shooting flat LOG profiles, because converting them to rec709 is the equivalent of a very large hammer.
-
1 hour ago, Towd said:
A big +1 on this for myself as well. Some people seem to get good results just pulling log curves until they look good and can get get nice results, but I find if I handle all the color transformations properly, I'm reducing the number of variables I'm dealing with and I have the confidence that I'm already working in the proper color space. Once in the proper color space, controls work more reliably, and it is also a big help if you are pulling material from a variety of sources.
I have not tried the Aces workflow, but since I'm pretty much always delivering in rec 709, I like to use that as my timeline colorspace. So, I just convert everything into that.
One feature I also really like about Resolve is the ability to use the "grouping" functionality that opens up "Pre-Clip" and "Post-Clip" grading. Then I group footage based on different cameras, and I can apply the Color Space Transform and any little adjustments I want to make per camera in the "Pre-Clip" for that group/camera. That way when I get down to the shot by shot balancing and grading, I already have all my source material happily in roughly the same state and I can begin my main balance and grade with a clean node graph. On a typical project, I may have material from a variety of Reds with different sensors, DSLRs, GoPros, Drones, and stock footage. If I had to balance everything shot by shot by just pulling on curves, I think I'd go crazy.
If you don't work in Resolve, you can do roughly the same thing by using adjustment layers in Premiere and just building them up. Use the bottom adjustment layer to get all your footage into Rec 709 with any custom tweaks, then build your main grade above that.
Even if you are not working from a huge variety of source material, many projects will at least have Drone and DSLR footage to balance. You can then develop your own LUTs for each camera you use, or just use the manufacturers LUTs to get you into a proper starting place.
One final advantage if you can use the Color Space Transform instead of LUTs is that LUTs will clip your whites and blacks if you make adjustments pre-LUT and go outside the legal range. The Color Space Transform node will hold onto your out of range color information if you plan to later bring it back further down the line.
I used to use those Pre-Clip and Post-Clip groups, but I got a bit frustrated with them because you couldn't have clips in multiple groups. Resolve has now gone one better and has Shared Nodes, which means you can combine treatments in any way that you feel you might want to.
I always think of the example of shooting two scenes with two cameras. You obviously want to grade the cameras differently to match them so you want all the shots from each camera to share the same processing. Now they all have the same kind of look, you want to apply a creative grade to them, and you actually want to grade the two scenes differently as they have different dramatic content. Previously you could use the grouping to combine the processing of either the cameras, or the scenes, but not both. Now with the shared nodes you can mix and match them however you like.
-
2 hours ago, John Matthews said:
I cannot speak for the GH5, but the GX80 seems quite good. What setting of NR have you been using?
I bought the GHa LUT pack that @Sage developed and he recommended -5, the lowest available as that's what matched his Alexa. I figured that whatever matches an Alexa is good enough for me!
I've just switched to the 5K Open Gate mode though, and I think that has less processing again, but I haven't shot anything real with it yet so I am yet to compare.
-
4 hours ago, mercer said:
@kye thanks for this. I may have to read a primer just to understand all of your references. Lol.
The plug-in seems to work well but I will look into the other options. Btw, in the Raw Tab, there are only 3 options for color and gamma unlike the regular CST.
I've just had a look over those settings and I'm a little confused. The manual seems to indicate that the colour space and gamma options in the Camera RAW tab are to specify how the clip was shot, and it specifically says that it supports footage from RED, ARRI, etc but I see no options for them in the ML RAW project I opened. I suspect footage from those cameras will have metadata and Resolve will recognise them and might add more options.
[Edit: on, hang on, no, those options are what colour space and gamma to convert the files to. I suspect that Resolve just works out what the RAW format is by looking at the files.]
Regardless, that looks like it doesn't have many options at all, so your current workflow seems to be the best strategy.
-
9 hours ago, mercer said:
This shot is with the Zeiss 25mm 2.8. I posted a similar shot a while ago that was taken with my Canon 28mm 1.8...
4 hours ago, mercer said:I think I may have posted this in my old “Midtone Detail” thread. I don’t really love the grade from either so it may be hard to tell any characteristics. But have it.
I'm noticing a bunch of stuff, but it's hard to know what the lens is contributing vs the other variables.
The Zeiss shot has a slightly greener tone overall, seems to have slightly less contrast. Any contemplations of comparing sharpness went with the movement blur. Out-of-focus areas seem similar. The Canon in a way seems wider, but I suspect that's the composition of the frames as the Zeiss shot has things front-to-back and the Canon has things side-to-side.
Interesting comparison though ???
-
1 hour ago, thebrothersthre3 said:
Is it easy to find APSC to M43 adapters though? Seems like a big advantage to a bigger sensor is you can use longer lenses with less crop.
Low rolling shutter is definitely nice too although its lower on the GH5 and even more so the GH5S than the Z cam. The A7S2 still seems to be the low light king, which is why it seems like the low MP 4k sensors seem to be the best way to go.
That would be awesome if they released a low budget video camera, though I don't think that would be a Canon thing to do. ??The MFT mount has one of the lowest flange distances of any mount, so you can adapt almost any lens onto it. With EF the distance is much larger and so there are a bunch of lenses you can't adapt to EF. it won't matter to most people, but if you happen to fall desperately in love with any of the lenses in that in-between range then it rules out the whole camera because of the mount.
https://en.wikipedia.org/wiki/Flange_focal_distance lists them.
[Edit: and specifically because those lenses can't be adapted to EF, and because EF is the standard mount for many people, those lenses in the 'gap' can be massive bargains!
]
-
1 hour ago, Mark Romero 2 said:
Also, would it be safe to assume he is using manual focus (meaning, focus about five feet out with a fairly deep DOF and just leave it there for most of the shots)?
Yeah, I do a color transform in Resolve color management using Avery Peck's suggestions and it seems to help, but I still get weird colors on neutral surfaces even after using the various hue-based curves... might have to try upping my game with masking which I haven't had too much success with in the past.
Yeah, likely a fixed focus with quite a small aperture. Which just reinforces the need to get plenty of light into the scene.
I'm far from the expert in colour grading, but I found that my problem was not getting the fundamentals right.
If you don't get WB right, or don't get your colour space right then no amount of the advanced tools in Resolve will help you. I don't know what your footage looks like but if you can share a troublesome clip SOOC then maybe we can see what you're looking at? I have heard that Sony colours aren't the easiest to process, but I haven't played with any Sony footage myself so can't really say if that's the problem or not.
-
Dave Dugdale with thoughts on HDMI cables. Not really any strong conclusions, but might be useful to some?
-
2 hours ago, mercer said:
This shot is with the Zeiss 25mm 2.8. I posted a similar shot a while ago that was taken with my Canon 28mm 1.8...
Any chance of posting that other shot? Seeing them side-by-side would be great and I went back 10 pages and couldn't find it lol.
If you go to Insert Other Media -> Insert Existing Attachment then you can choose between every image you've ever attached on the forums, it's quite useful for revisiting previous images
-
14 minutes ago, currensheldon said:
The EF to RF mount adapters (Canon has three different ones) are all excellent. I use all EF glass on my EOS R right now and the adapter stays on the camera and honestly feels as solid as a native EF mount. Autofocus seems just as snappy as a native EF mount as well. Very much looking forward to the adapter that has the variable ND in it that's supposed to be shipping in the next couple of weeks.
Canon has a done a great job with adapters for the RF Mount so I don't see any problem putting the RF Mount on new cinema or video cameras at all. Could even ship with an adapter to start (like the RP and R do now) - but it's a much better long-term solution to go with the RF Mount. I doubt I'll buy another EF video camera with a Super35 sensor due to the lack of solid lenses for that format. At least with the RF you have the potential for speedboosters and many more true Super35 lenses.
Makes sense to me. Of course, that's not always a predictor of what Canon will do, so who knows!! ???
-
Looks like a GH5 to me. The shot at 0:40 shows the red dot on the record button quite clearly.
10-bit video can help in mixed lighting, but I shoot in mixed lighting all the time and I found that the weak link was my colour correction skills. Knowing how to process the image and how to handle colour spaces in post really upped my game.
Here's some random thoughts:
- If you have a shot where you move from one WB to another, you can create two copies of the shot, one with the first WB and the second with the second, then just cross-fade between the two. It saves all kind of work trying to automate changes etc.
- Depending on what software you're using, you can try doing a manual WB adjustment before converting from whatever capture colour space (eg, LOG) vs afterwards.
- I used to try grading the LOG footage manually, without having anything convert between the colour spaces and I'd create awful looking images - using a technical LUT or Colour Space Transform to do the conversion really made a huge difference for me
- I don't know about you but I often shot in mixed lighting because that was the only lighting and because the camera just wasn't getting the right exposure levels or the ISO was straining (I use auto ISO) then that's a source of awful colours, maybe just use heaps of light
In a sense you can either pay the guy or just do a bunch of tests at home and try to figure it out yourself. I'd suggest:
- Work out how to change the WB in post by shooting a scene in a good WB and then in a wrong WB, then in post work out how to match the wrong one to the good one
- Then work out how to go between two scenes with different lighting by doing one shot that moves between two rooms with different WB and use the cross-fade technique above to figure that out
- Then work out how to deal with mixed lighting by having two different coloured light sources in the same room and moving between them and working out how to grade that.
Basically, start simple, then add more difficulty until you're comfortable shooting by the light of a xmas tree. You may find that shooting in a middle-of-the-range WB in-camera will give you the best results, but it might also be that one lighting source is the most difficult and you just set it to that and then adjust for the others in post. Experimentation is the key with this stuff.
But keep your head up - this shit is hard. Colour grading well shot footage in robust codecs is as easy as applying a LUT. Colour grading badly-lit footage from consumer codecs is the real challenge and will test all but the most seasoned colourists, so in a way we're operating at the hard end of the spectrum.
- IronFilm, Mark Romero 2 and Towd
-
 3
3
-
9 hours ago, currensheldon said:
Agreed - and if it's someone who can disrupt a bit (like Fuji), then throw in some IBIS while you're at it.
I agree about IBIS. Making a tiny camera and then having to pack a gimbal, shoulder rig, or tripod to go with it sure takes away a lot of the advantages of making it small and light.
5 hours ago, Mokara said:Anything further developments along the lines of the XC body would depend on how well the 10/15 sold. I doubt they would do significant new development other than updating the electronics if sales were low. I have never actually seen an XC physically, so I suspect that they did not sell too many of them.
The XC10 is an invisible camera. People who bought it don't talk online about their C-cameras and that's what the XC10/15 is. XC10 footage is as good as C300 footage for most shots, so as long as you're using it within its design limitations then you could be seeing the footage from it every day and not have a clue.
Canon said they sold more of them than expected and they are seen on Hollywood sets recording BTS and interviews.
4 hours ago, currensheldon said:Most of the XC-style posts are referencing the long-term rumor about an XC-style camera with interchangeable lens mount: https://www.canonrumors.com/patent-canon-xc-style-camera-with-interchangeable-lenses/ - there have also been quite a few rumors about a cinema camera unlike anything Canon has done before plus a rumor today that said to expect an “exciting” new cinema camera, possible ahead of NAB in April"
So, if there is an "XC-style cinema camera," it will probably be an APS-C RF mount camera that is a stop-gap where the C100 Mark II used to sit - somewhere between mirrorless/DSLR video and the C200/C300.
Since we have the C200 and pretty soon a new C300 to choose from, I think it would be smart to make a more mirrorless-like mini cinema camera.
Interesting observations and it would probably sell well. They practiced a bit with the XC10/15 so should know how to combine the C100, the XC10/15, and their lenses for a good product. If it was an RF mount then they'd have to make sure that an adapter was available and worked well. That form-factor really lends itself to people using the 18-35 f1.8 and other similar lenses, so EF support would be mandatory - no-one buying a C50 would want to re-buy all their lenses. The EF-M mount might be the better alternative.
-
I definitely like the grain from the GH5 - very film-like.
-
8 hours ago, seanzzxx said:
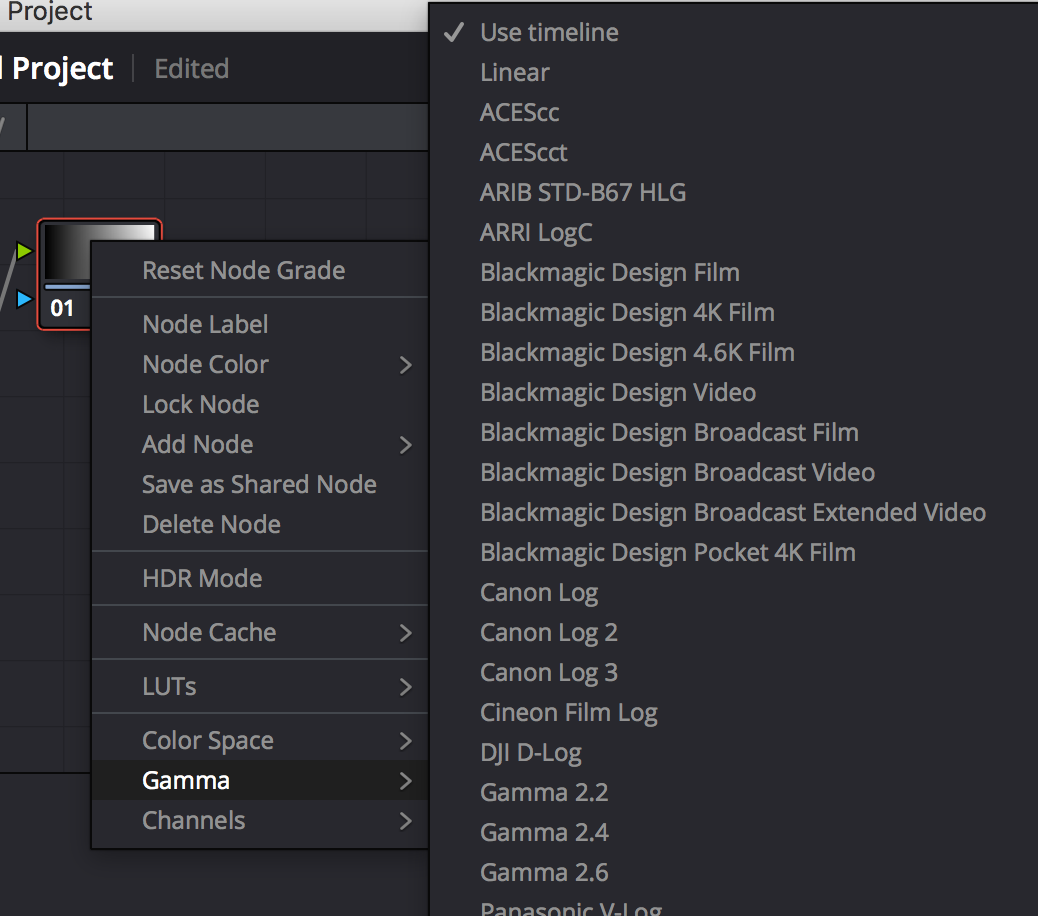
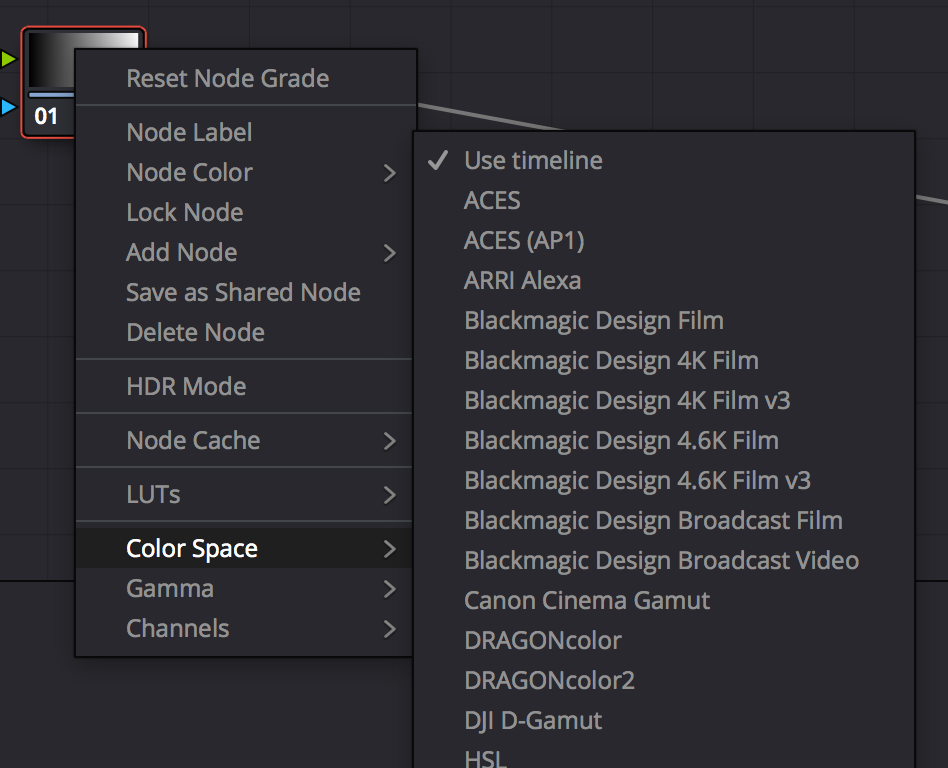
Just a quick question - in Davinci Resolve in Color Space Transform, Input Color Space still doesn't have a Pocket 4K FIlm option? Am I missing something? Thanks!
I think it uses the Blackmagic Design Film colour and gamma spaces? This would be for Prores clips. If you're shooting RAW then you would be using the RAW Tab and you wouldn't have to specify what the inputs were.
I haven't used this though, so maybe someone can confirm?
6 hours ago, Anaconda_ said:Think about putting it in and out of bags, I wouldn't want to leave any cables plugged into the camera while packing down, with or without clamps. Which means you also need to rebuild the kit when you get to the next location. So portability is affected.
There have been many reports of SSDs not mounting on the camera once connected. I've never had that issue with the internal cards. The fix is easy, just a quick restart, but the problem is easy to avoid in the first place.
----
It's all about how you like to use the camera, but don't judge others for using it differently. In most cases, I want to keep my camera as small and cable free as possible, others like to rig it up until it's as big as their torso. I do have a T5, and the only time I used it was to test the workflow the day my camera arrived. While it was very easy to go from camera to editing, you need to backup the files anyway, and you need to clear the drive for a shoot the next day, so I found that advantage was lost in an instant.
Now, I mostly use the T5 as a working project drive. After a shoot I instantly copy everything off my cards and format them in camera, so I know it's a fresh start every day. If I pick the camera up and see something on the card, I know it's not been backed up. I worry if I used the T5 to record, I would never know what's backed up and what's not. If anyone's interested, I use these very cheap C.fast 2.0 cards and they keep up very nicely with ProRes. I haven't tried RAW, but I'm sure they can at least handle 4:1.
https://www.mymemory.com/integral-128gb-ultimapro-x2-cfast-2-0-card-550mb-s.html
BM could have a major win with some tools that let you transfer files between media sources in the field. I'm not sure if that's possible, but if you could record to an internal card and then periodically download that card to a HDD to free up the card again that would be great. This would allow small fast cards to work with large slow HDDs and get the best of both worlds.
In the absence of the camera doing it, I recall @BTM_Pix was talking about such a device for transferring files from any media to and other media in the field?
-
7 hours ago, mercer said:
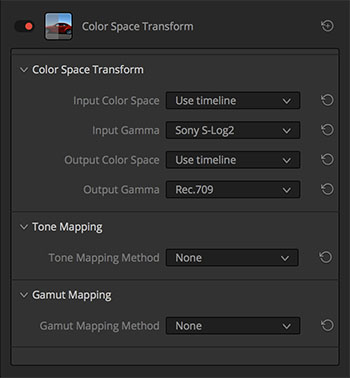
Is the Color Space Transform FX a new...ish feature of Resolve?
Basically, I use Resolve as an intermediary to get my DNG files to ProRes and then edit and do a final grade in FCPX.
Usually, in the Raw Tab I set up my color and gamut for Blackmagic Film and Blackmagic Film Log. I’ll also click the Highlight Box and then correct any WB if needed and add some Midtone Detail.
But after using the MLV App, I’ve noticed that 5D3 ML Raw responds well to a LogC workflow, so I am testing the CST FX in one node by setting the input color and gamut to BlackMagic Film and Log and the output to Alexa and LogC and then I exported to ProRes 444. In FCPX, I’ll use Alexa LogC Camera LUT in the inspector and then do a basic curve and saturation tweak.
So my question is... am I using the Color Space Transform function correctly? And should I be using any Luminance or Saturation Mapping when I do it?
The camera RAW tab is kind of like the CST plugin in a sense, because it forces you to change your RAW clips into some other format that Resolve can work with.
The controls are broadly the same too:
You could try decoding a clip straight to LogC and not doing the CST plugin and see if that has a different effect. In theory it shouldn't, but the RAW tab doesn't have all the nice Tone Mapping and Gamut Mapping rolloff features, so it might be in your interests to keep your current workflow.
6 hours ago, BrunoCH said:The most interesting article I've read about color management in DR:
https://www.provideocoalition.com/solutions-to-resolve-5-taming-color-management-part-1/
Good article. Resolve is so flexible that there are lots of ways to do the same thing.
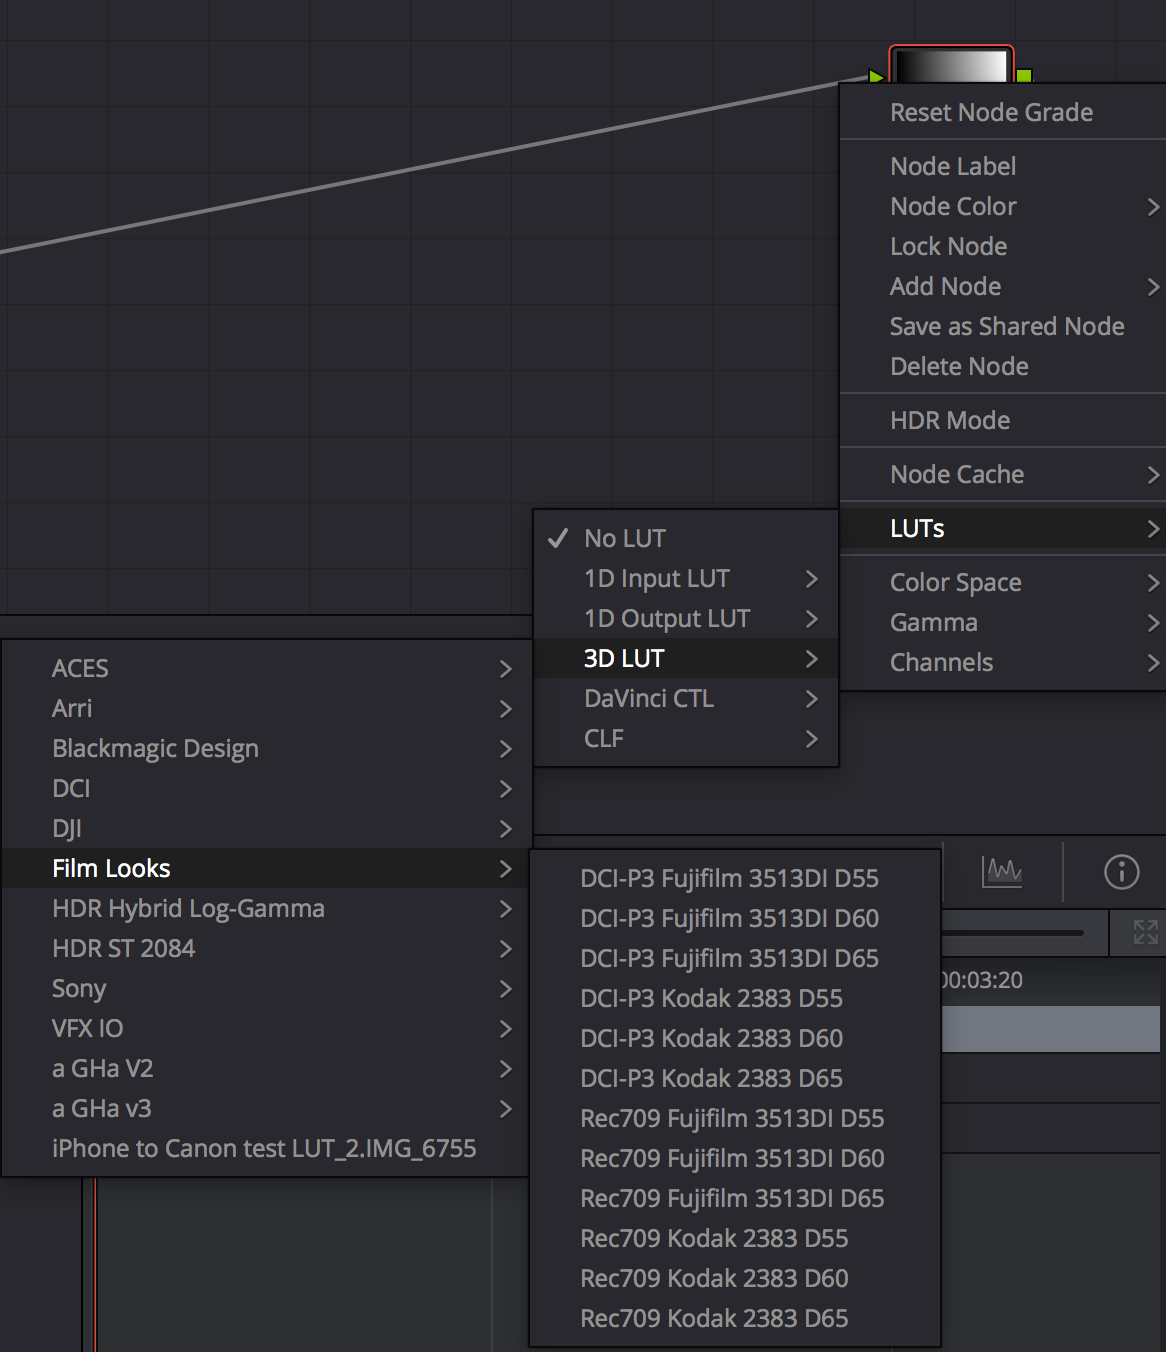
I tell people to use the CST plugin because it's the simplest and because it's the most flexible. If you adjust the colour space in the Media pool then you can't make adjustments before the conversion, and you only get a conversion at the start of the processing and then at the end for viewing or for export. Some people prefer workflows where you can adjust the clip before it gets converted (I do WB and exposure adjustments before the conversion) and sometimes you want to have multiple conversions and do different grading steps in different colour spaces. The Film Look LUTs included in Resolve work with a LogC input, but you probably don't want to grade in LogC, so you convert the clip to rec709, then need to convert it before you use these LUTs:
You can also hide the transforms within a node by changing the colour space that a single node operates in:
These work by changing the colour space, applying the node adjustments, and then changing the colour space back again. These don't take up extra nodes like the CST plugins do, but I think they can only change from the timeline space and then back to it afterwards, so they're not as flexible as the separate plugin. They can also confuse the hell out of you if you lose track of what colour spaces are being used where as it's not obvious the order of operations.
There are kind of two main types of colour work, the people that just want to convert the colour to something usable and move on with their lives, and those who have the time to have complex node trees. You can turn complex node trees into an efficient workflow if you know what you're doing and set everything up with presets etc, so there's no right answer.
I think Resolve is showing its age with things like colour management being everywhere, because it probably only used to exist in one place, and then they added it to another to make it more flexible, then another, etc. In some ways Resolve is like the plucky startup who is challenging the big players with new technical offerings, and in other ways they're the technical behemoth that has existed for 15 versions.
- mercer, thephoenix and KnightsFan
-
3
-
Ok, here's a thought. We've already found out that fungus spores are in the air and we can't keep them out of our lenses, so the solution is low humidity storage to prevent the fungus from growing.
So, this begs the question - if you have a lens with fungus growing in it, why use nasty chemicals to kill all the fungus when it's everywhere anyway?
I can't think of a reason to use chemicals at all. Unless I'm missing something really obvious, why not just use soap and water and non-abrasive cloths to physically remove the fungus, then just rinse in distilled water, air dry and reassemble?
-
9 hours ago, currensheldon said:
Maybe it's just me or there are true technical limitations that don't seem like they should be limitations (10-bit 4K, Canon), but it seems like manufacturers have been making some good, but not great cameras for awhile now. A lot of them are close (EVA-1, C200) but are just hindered by a few stupid mistakes or decisions... Just wanting someone to really throw all their muscle behind a small-ish cinema camera and try to go all out - like Fuji did with the X-T3. Surely for another $4,000 they could make a killer mini cinema camera.
I think the DSLR revolution caught most people by surprise, including the manufacturers themselves who mostly added video as a "why not" kind of feature. Random fact, but SMS messages were originally a technical feature and not designed as a consumer feature, and they only released them because "why not", not anticipating texting or deaf people being able to use telephones for the first time, etc.
Anyway, because the DSLR manufacturers were in the low margin stills photography business they created technical architectures that had all kinds of limitations that mostly didn't apply to stills photography. When the revolution hit they start the current race for a video market with legacy architectures and economies of scale that meant that everything was severely restricted. In a perfect world they would just re-design from the ground up, but that is the main reason that makes cinema cameras expensive, and combined with the lack of demand for video quality in this area of the market I suspect the economics doesn't stack up. There are additional barriers too, like protecting their cinema camera lines, organisational politics and power broking, and the same lack of vision that meant the DSLR revolution was a surprise in the first place.
-
-
Just found this thread about how to de-haze a lens: http://www.reduser.net/forum/showthread.php?160423-Lens-fog-haze-what-is-it
The summary is that you put the lens in a vacuum chamber under hard vacuum for about a minute at room temp.
This makes sense as fog/haze is typically stuff that has evaporated from the lens materials and then condensed onto the glass. Putting the lens under vacuum will force those things to evaporate again, and considering that the haze is all stuff that can evaporate (because that's how it got there), once it is evaporated again by the vacuum pressure there will be no residue on the lens elements.It won't fix fungus or any other lens problem, but considering it doesn't require any disassembly it is a very convenient treatment
-
23 hours ago, gwan said:
Gave the Lut a go on some FS7 footage I shot recently. It's not as good as it is on the GH5 but it still doesn't look too bad. This was Slog-3, GHa Daylight (Linear 33x) with exposure and wb adjustments in premiere nothing else:
@SageI would love it if you were able to work on a Sony Lut.
How did you convert from S-Log to the GHa? I'd suggest that an S-Log3 to V-Log conversion in Colour Space Transform plugin in Resolve should do a pretty good job. Or maybe this LUT calculator? https://cameramanben.github.io/LUTCalc/LUTCalc/index.html
-
GH6. Who knows what spec it would have, but to get GH5 owners to upgrade would take some serious changes. Maybe 8K, internal RAW, or both!
-
44 minutes ago, drm said:
Perhaps Blackmagic just has a weird way of generating their serial numbers, but I have three P4Ks that I purchased at the same time. The three serial numbers are tens of thousands apart. The first is 502xxxx and the other two are 509xxxx. By the way, the 502xxxx camera is the one with the glitching screen, which is back for repair. One of the 509 cameras had a battery door that wouldn't close. I gently filed the catch with a nail file and it works properly now.
So, I suspect that Blackmagic had produced 100,000 cameras by October or November of 2018. I think they just have a popular product on their hands. It may also be that they are constrained by a component, like say...the sensor.
They may also use the third digit in the serial as an identifier of some kind, like if they had multiple production lines, or something like that. Of course, 100K cameras might be right too. It is a spectacular camera if it suits your needs.
The problem with working out how many of these have been made or sold is that the typical buyer for something like this would basically be invisible. They are busy shooting real work, aren't visible on social media, or if they are then it's not to geek out about cameras, and when the footage ends up in something you'd never know. If every person with a RAW-shooting cinema camera bought two P4Ks then they'd sell a bunch of them and there would basically be no ripples to show it. This is the problem with the XC10, the people who wanted it as an A-cam found the fixed lens and high-ISO NR to be too restrictive. The people who use them for C-cameras or as BTS don't go online talking about it a lot, so it seems like they don't get used at all, but Cinematography Database YT channel kept seeing them in BTS pictures of big Hollywood productions and Canon said they sold more than they expected.
The cheaper cameras that can create great images could be 10% of all shots in every movie and TV series and we'd never know. The GH5 can be made to look like an Alexa, the P4K should be able to match basically anything.
-
3 hours ago, BTM_Pix said:
It is definitely useful to approach it that way if the goal is to provide it as a test for people looking to evaluate those particular lenses.
You could split hairs and say that even in RAW the camera will still be in play in terms of influence but every single lens test/example on this thread is subject to that (and worse because a majority are not shot in RAW) so you'll still be ahead of the game there!
More broadly though, I had interpreted, incorrectly I think, that what you were wanting to do was more in pursuit of how those lenses worked for your own personal taste/needs hence why I thought it would be appropriate to run a stepped variable parameter test under the colour profile(s) you would be using on your GH5 to give it a more representative context.
Unless you've found a way to shoot RAW video on it
That approach would also have had value if you were trying to create a cohesive matching set from a disparate bunch of lenses so, for example, you might find that you prefer overall performance of the Minolta 135mm over the Takumar 135mm but that it lacks a touch of contrast that would closer align it to the other Takumar focal lenses but with +1 contrast in the profile it can bring it into line etc etc
You may well find some magic combinations that way.
Or at least rule out the shit ones !
Ah, that makes a lot of sense
I shot a pre-test-test today with a few of the lenses and it was interesting. I might be different to other people, but I find it difficult to evaluate lenses without having them in a controlled comparison. Other people seem to be able to see random videos shot with different equipment / different lighting / different grading and be able to kind of triangulate the attributes of lenses and even compare them. I can't seem to see past the dozen or so other variables, at least not enough to spend hundreds of dollars on a lens. So in that sense the direct comparison is useful for me, even if no-one else.
I am trying to create a set of lenses for myself, which is why I'm testing the lenses I will definitely keep as well as the other candidates. I may end up choosing a lens I don't own, but I'd have to learn to work out how to evaluate without comparative tests, so I'm not sure about that.
My test today compared the 14/2.5 Panasonic, 17.5/0.95 Voigtlander, 37/2.8 Mir, and 58/2 Helios on 0.7x SB. I was curious about the performance of the Mir (it's meant to be apochromatic), to see how the Voigt compared to a modern lens and a vintage lens, and also what character the Mir had. The results were all over the place, with each lens winning outright in some aspect. Both the Voigt and the Mir were modern in some ways, vintage in others, and both had better performance than the 14mm at some things (kind of making them more modern than it), and the Helios is no slouch either, even with my cheap Chinese focal-reducer.
I think the complete test will be really interesting.
-
13 minutes ago, leslie said:
i read that the hezanons are nice lenses and bought one on further investigation found out they dont mount easily to the ef mount/ or at all
EF mount has a considerable flange distance, and there may well be mirrored lens systems with a smaller flange distance than it, which would mean that flawless adapting isn't possible.
I'd be surprised if the largest mirrorless flange distance was as large as the smallest mirrored flange distance. This is the beauty of mirrorless, basically every SLR lens system can be used.
I have non-SB MFT adapters for Minolta MD, Pentax PK, and M42, and a M42 SB 0.7x adapter. The Konica AR to MFT adapter is still in transit, and I bought a Nikon to MFT adapter by mistake because the auction title said M42, but unfortunately all the Nikon lenses have the focus ring the wrong way so I won't have any use for it.
I started reading about lenses and worked out that M42 was a common mount, so I got the adapter and then started looking at those lenses because I had worked out how to use them. If you're buying non-SB adapters then they're really cheap, so it's an easy way to do it.
")


")
The Resolve / Colour Grading resource thread
In: Cameras
Posted
If you have questions then ask away!")