

kye
-
Posts
8,213 -
Joined
-
Last visited
Content Type
Profiles
Forums
Articles
Posts posted by kye
-
-
1 hour ago, maxJ4380 said:
I’m just doing a bit of light stirring, I think you can handle it ok. I wouldn’t have bothered if I thought otherwise.
No worries at all from me!
1 hour ago, maxJ4380 said:Now a question for the group. I would like to film some smoke, I presume in front of a green screen although green colour may or may not work.
i do have smoke machine to create the smoke and I think the best option would be to video it as I think a bunch of photos would not give me the smoothness I’m looking for, as i intend to composite as a special effect.
im also wondering if i need to shoot a clean plate as well ? I suspect i need to watch a few more vids on compositing to help get my head around it.
Compositing used to be only green screens, but now you can do it in lots of ways.
Considering that smoke is (mostly) colourless, you could just film against a black backdrop and then use the Add blending mode to put it on top of a shot. The path to understanding compositing is to have a clear idea of what the different blend modes do mathematically and then you can film something to match the blend mode that you want to use. You'd probably be better off using different modes and shooting setups for different things.
-
2 hours ago, maxJ4380 said:
Cargo pants…🤔
In that case, I've heard about this excellent pocket camera called the RED Komodo!
-
6 hours ago, newfoundmass said:
If it had a decent camera I'd actually be interested. But the ones I've seen will all end up as e-waste eventually.
If it took photos (I don't really care if it takes video) that looked good on social media I'd be very interested though.
Yeah, definitely e-waste, although everything gets there eventually so it's all relative.
I was thinking more about this challenge of getting a not completely rubbish image from the smallest camera and it's probably getting an action camera and using it in a crop mode to get a tighter FOV and using the stabilisation features so it's not so jittery.
For example the GoPro 13 Black is 5599x4927 and 12-39mm FOVs. So the 39mm FOV will be a crop of 1722px wide, and I'm assuming you can have all the stabilisation etc enabled for normal video for that.
The DJI Action 4 is about a 16mm FOV and with its 3648×2736 sensor if you cropped to 2x (its max) then you'd have a FOV of about 35mm and about 1824px wide, so a similar story.Of course these are drastically more expensive and far less pocketable, especially if you are like me and only carry things in your front pockets and therefore the camera probably wouldn't have a pocket of its own.
-
12 hours ago, maxJ4380 said:
Plus there's the fact my dad had a stroke 2 weeks ago and is paralyzed on the right side
Really sorry to hear about this, hopefully it's temporary, the body can be more resilient than we think so fingers crossed for you and your family.
12 hours ago, maxJ4380 said:I have yet to try 8k and to me 8k, seems like complete overkill. I dont mind 4k reduced down to 1080 the stills seem a little sharper / cleaner perhaps. Although @kye might be a little nonplussed about that 😉
Everything is a look, and there are no right or wrong answers... I just take exception with the people who run around telling people that the look of cinema is 8K and razor sharp F1.4 prime lenses and "accurate" colour science. Sadly, there are so many of these people sitting around repeating this BS to each other that common sense is hardly able to be heard above the cacophony, and when it is heard the mob chases those voices from the discussion for fear they'll realise they've wasted all their money and spent years sitting around looking like idiots when they could have realised it with a few downloaded reference images and 20 minutes in Resolve!
Then the new people come in and see all the "experts" saying these things and because it's overwhelming they have to just swallow a bunch of it because no-one can possibly analyse and check every detail of what they're being told. -
1 hour ago, mercer said:
A couple will buy 30 of them and put then on the wedding guest's tables for people to snap photos and take some video.
I've heard that this is quite common, although from larger cameras with more camera-like shapes. I wonder how many people have done this...
-
10 hours ago, Clark Nikolai said:
Me too. I see them and they look fun but the picture examples are so bad. The sharpening is the worst part of it (but likely to make up for the low quality lens.) Being the age I am, I don't get any nostalgia for the look of early digital cameras. I want a better image (even if it's small by today's standards.) It doesn't have to be raw but a higher bitrate JPEG would be great. The option to save two files, one raw (or log high bitrate JPEG) and a JPEG with an in camera filter applied would be good. Unlike the days of early digital cameras, there's no need to save storage space anymore.
The example pictures online are actually cherry-picked. The images I'm seeing from mine are worse, to the extent I wondered if I got a fake. When I looked closer I just think they chose the nicest ones, which is really just how social media works!
You'd be forgiven for thinking it's the lens, but it's really not. Here is a sample image so you can see what I'm seeing.
Charmera - 1440x1080 - SOOC - 280K file size:

For reference, here's a 1440x1080 280K image from my GX85 with matched FOV:
The level of detail is incomparable.
What happens if I take the GX85 image and 2x downscale it to 720px then upscale it to 1440 280K again?
It's a lot closer, and obviously I haven't sharpened the crap out of it (just doing this quickly in Preview on Mac).
But what happens if I take a 3x downsample 480px, then upscale to 1440 280K again?
This is definitely lower resolution (the artefacts from the lower res are larger compared to the Charmera).
Charmera crop:
GX85 -> 3x downsample -> 1440px:
GX85 -> 2x downsample -> 1440px:
That's much closer.
What does all this mean? The limitation is the processor.
I believe that they're using a 1440x1080 processor (as they claim) but they're using it in a 720x576 20p readout mode, then sharpening the crap out of it, then upscaling it to 1440x1080, converting it from 20p to 30p, then compressing it to ~15Mbps.
The colour isn't that great either, this may be a processing thing too, I'm not sure.
The issue is that for them to use the sensor in a 1440 readout mode would require 4x the data rates, which is 4x the processing. If you want the file in real 30p instead of 20p padded out to 30p, that's another 50% again, so 6x the processing. As we know from compact cameras that try and be 4K or 6K and also small, that's overheating territory. It's also "batteries only last how long?!?!?!?!?!" territory.
So it would need to be 6x more powerful. I'm not really sure how much extra space those things would require, although GoPro can now do 8K30, which is 16x the data rates of a 2K30 camera, plus its doing all kinds of stabilisation processing etc on top of that, so I'd imagine there is room for these things in such a device if someone was to make one.
Someone said that this circuit is likely a very common circuit in all kinds of cameras like dash cams etc, so it's probably only through economies of scale that this can be done. There were quite a number of action cameras and other common cameras that had a real 1080p30 readout, so maybe the pro version could leverage one of those existing architectures of existing chips. That would be pretty awesome!
-
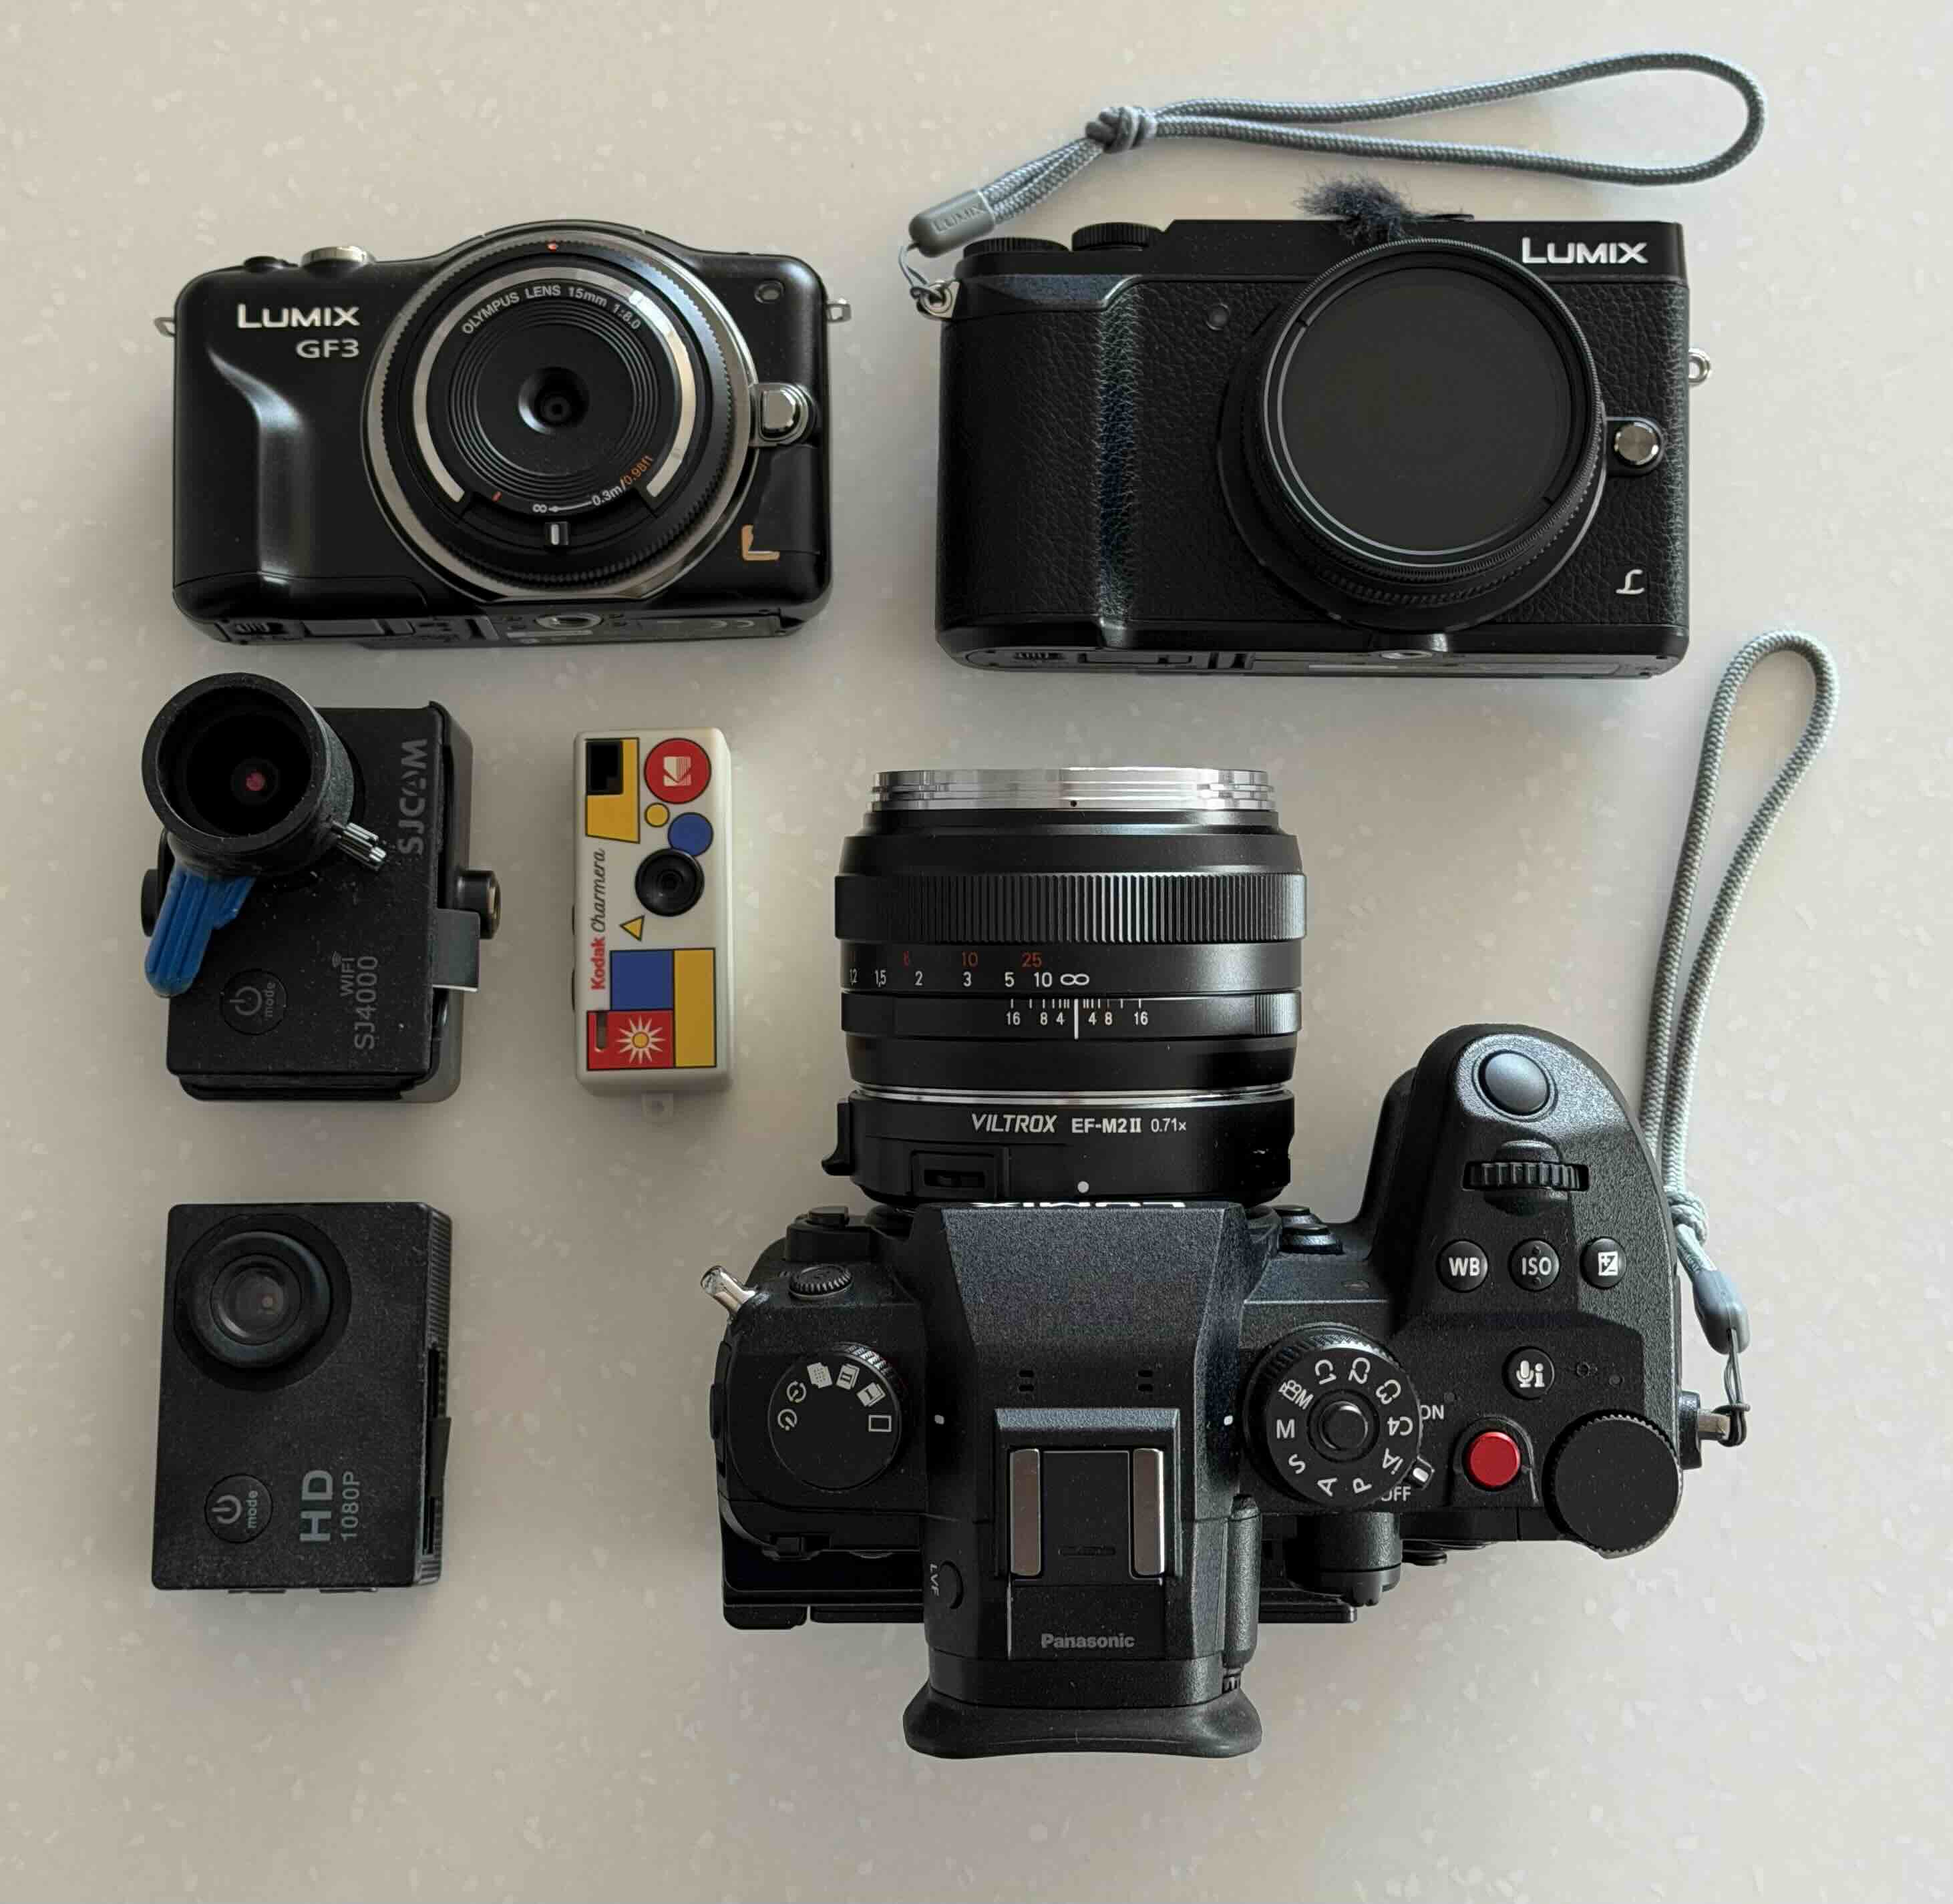
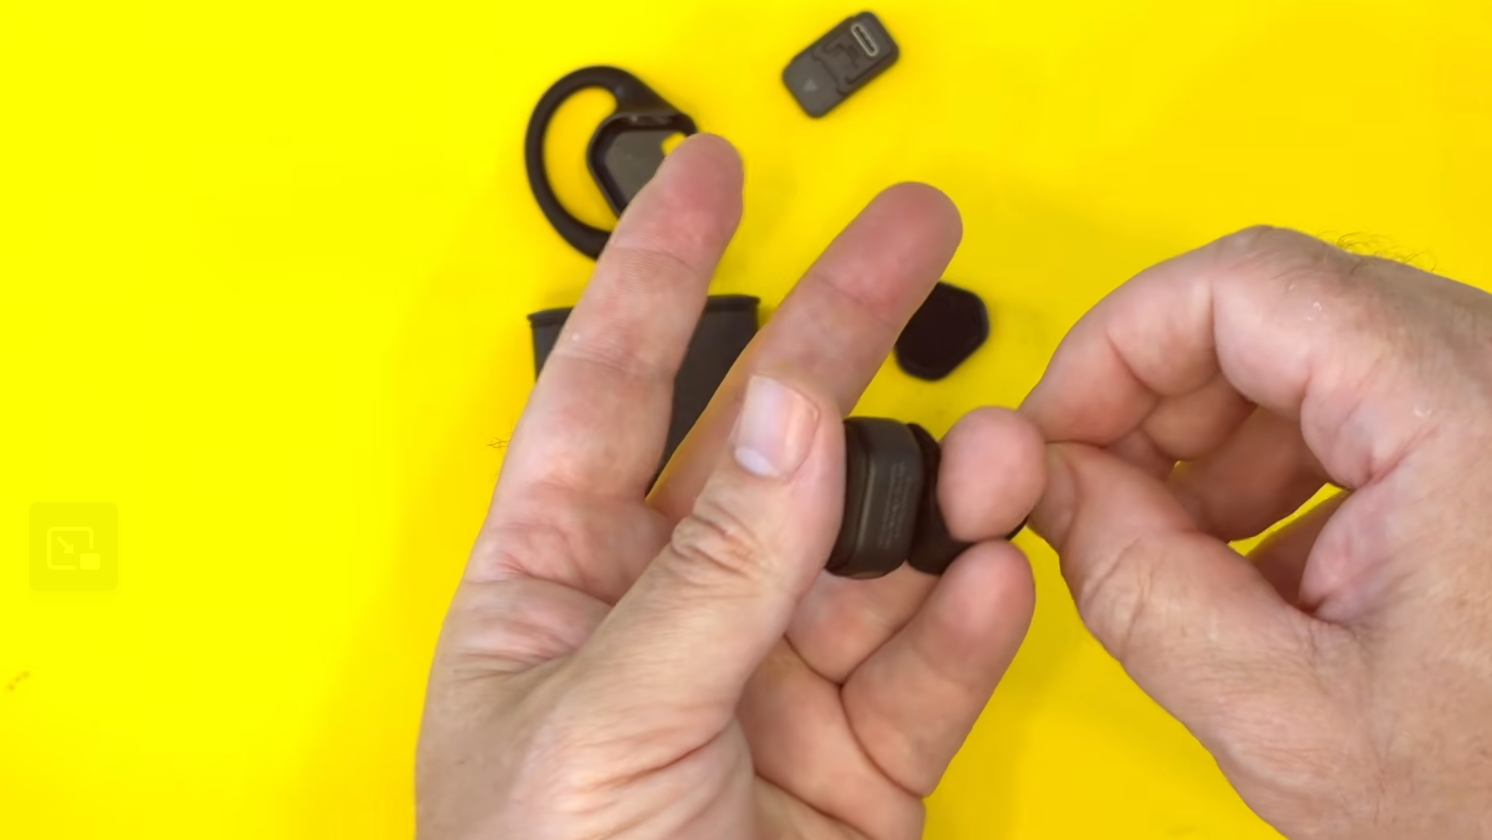
I got a Kodak Charmera keychain camera recently. It's terrible and you shouldn't buy one, but it is interesting.
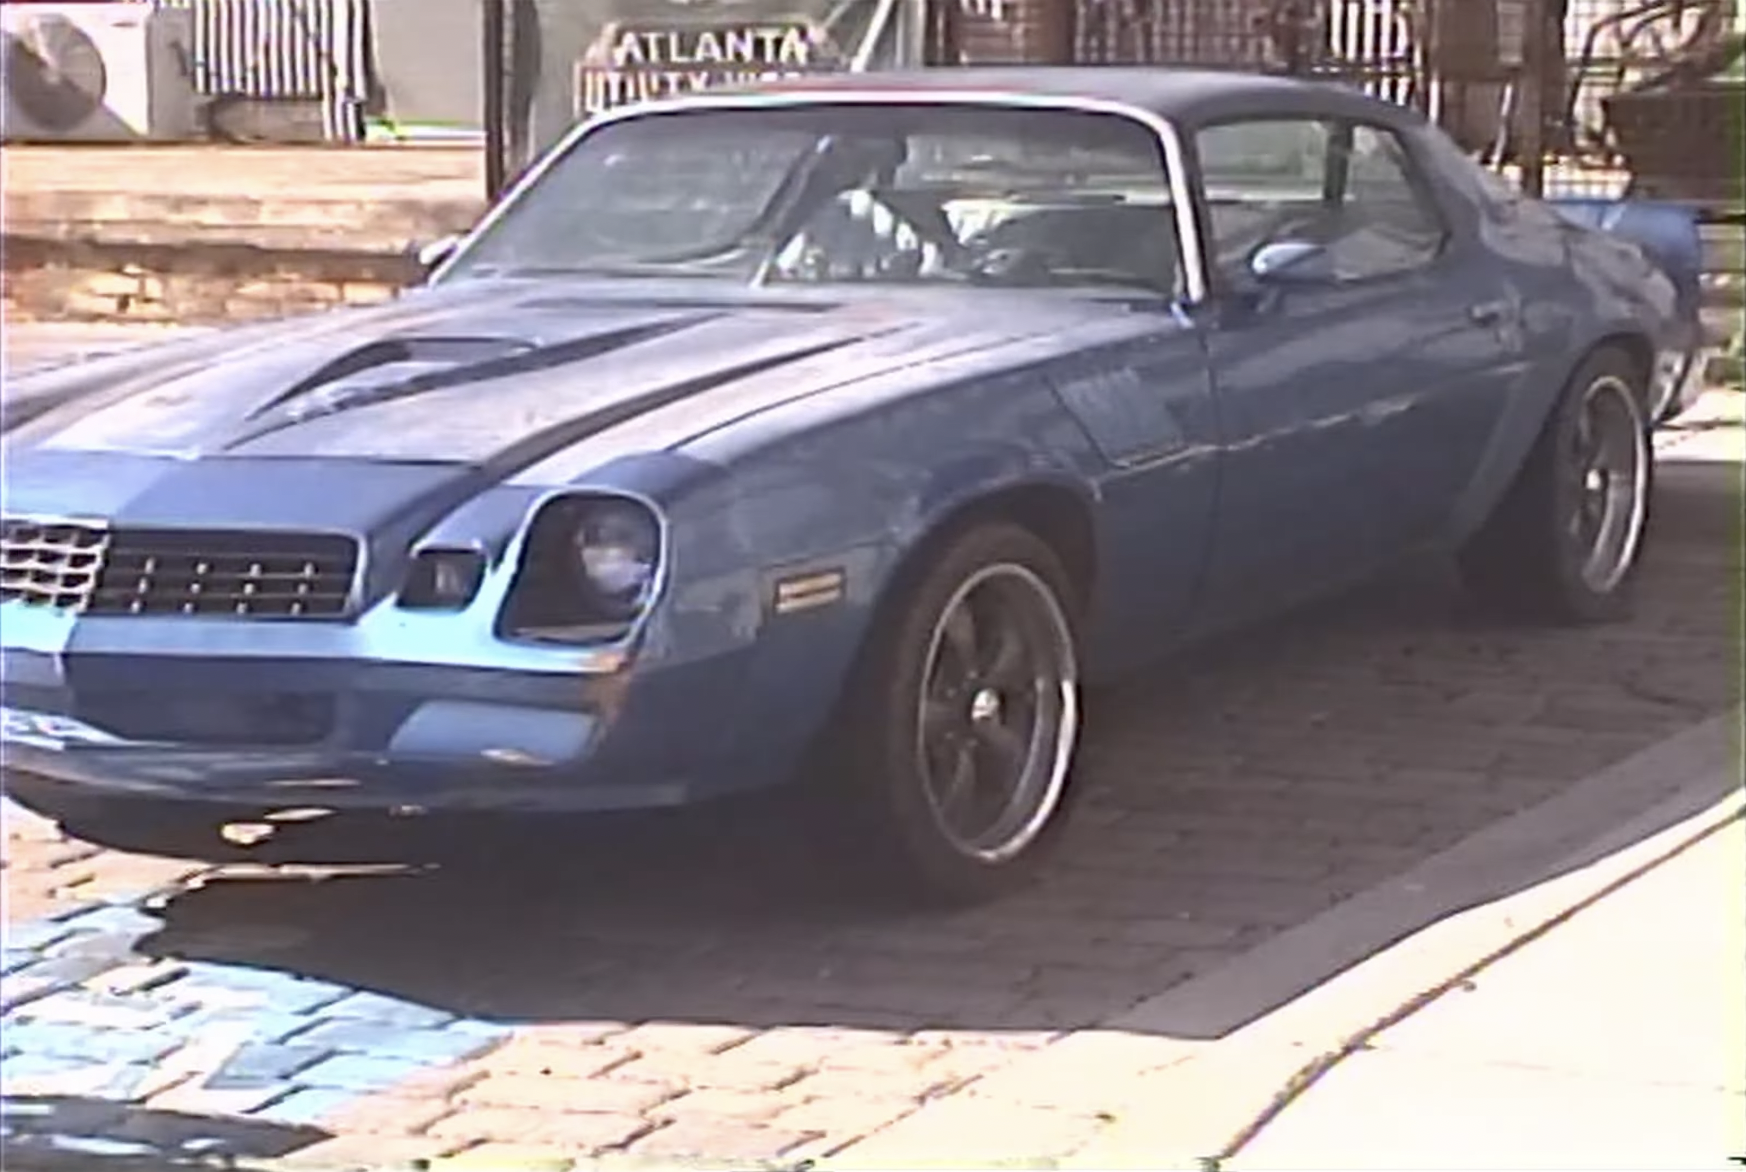
In case you don't know, keychain cameras are seriously tiny cameras (think smaller than a GoPro) and have gone viral in the last year or so. The Kodak Charmera is probably the most viral one, with multiple production runs being sold out very quickly and reissues etc. Here's mine in comparison to some other cameras, including a couple of GoPro-sized action cameras and some actually pocketable cameras (GF3 and GX85).
Why is the Charmera interesting? I think the design is essentially perfect:
- It's incredibly small (obviously) and ridiculously light but it's actually quite tough
- It's got a 35mm equivalent FOV lens
- It charges from USB-C
- With almost any MicroSD card it has practically infinite storage
- It has a rear screen that is just large enough to navigate the (very simple) menu and frame shots
- It's super-simple to use, if you plug it into a computer it turns on, mounts as a USB drive (without needing any software), charges the battery while connected, then when you unplug it it turns off again
- It's a ~15Mbps motion JPEG codec
- It's USD $30
Why aren't I recommending it?
- The image quality is terrible. TERRIBLE.
- It says it has a 1440x1080 sensor, and that's the resolution of the JPGs and video files, but I think it's 2x2 binned, and heavily sharpened too, so it's a very poor quality VGA camera. I shot a resolution chart - the moire was practically psychedelic.
- JPGs are just as bad as the video files
- No control over anything and with its AE it's perfectly happy to clip the crap out of decent chunks of the image
Why am I even bothering to write about it then?
It's a new class of camera.
We haven't really had cameras that were smaller than action cameras before, but not only have we got them now, but they sold out multiple times, so the world (or at least the trendy impulse buying world) has solidly suggested there is demand for them.
As far as I can tell, the competitors are action cameras, or those that are smaller like the Insta360 Go, and that's about it. Those are 10x the price though, and larger and not nearly as fun to use. The image quality of them is vastly superior, but in todays market where I wish I could get a camera that was smaller, had a quarter (or sixteenth) the resolution, and was drastically cheaper, this is the kind of thing that didn't used to exist really.
Even just playing with it around the house, I film things I wouldn't normally film. It feels different to use.
This is a new product in the market that smartphones basically killed.
Everyone used to have small point-n-shoot cameras but they all got killed by smartphones - the industry essentially got eaten from the bottom up. This is the first counter-example I'm aware of (other than action cameras). I would venture that everyone who bought one already had a smartphone, so this fulfils a niche that their expensive fragile dopamine-addicting smartphone doesn't.
Retro cameras have enjoyed a resurgence recently, but I would suggest that this is different as it's a new thing rather than an old thing limping along. This might make executives take note - it's not that small cameras are dying slower than they think - there is active demand and innovation in this space.
Tech gets better.
Assuming this form-factor remains popular, the video quality will get better. I don't know why it wouldn't remain around.. kids aren't likely to want to record themselves less in future, tiny things won't stop being cute, having something so small it takes up zero space in your pocket (it's a keychain camera!) won't stop being handy, etc.
What I'd really like to see is a 'pro' version of this camera.. one that takes real 1080p video and doesn't sharpen it like it's entering a butchering competition. Same size (or a little larger), same simple design, could be more expensive and still be interesting.
- eatstoomuchjam, mercer and Emanuel
-
 2
2
-
 1
1
-
I've been thinking about lenses a lot over the last few years, and just to be cheeky I've put some observations into a framework.
Level 1 is where we start - with zooms
The normal start to using lenses is with zoom lenses, probably the kit lens.
We know the thinking at this stage: its convenient, you stand in one place and zoom, hooray!
Level 2 is what most YT lens videos are about - primes are better than zooms
We all know the arguments. Primes make you "zoom with your feet", they make you learn about perspective, they're sharper, better in low-light, BOKEH!!!!1, you can learn the FOV and develop an instinct for it, vintage ones are cheap, "real photographers / cinematographers use primes!"
There are approximately 1000 billion videos and tutorials explaining this, but this seems to be where the thinking stops. I've not seen that much stuff that goes beyond this, but this is really just the start.
Level 3 is where understanding begins - zooms and primes have their uses
Almost none of the discussion up until this point acknowledges that lenses create images, and images have aesthetics, and aesthetics are what is actually being discussed.
Moving to talk about motion pictures now, and cinema especially, there is a bunch of nuance that Level 2 doesn't really discuss.
People have decided that FF sensors are the most 'cinematic' and typically are used with FF vintage lenses. This means that the FOVs are 24mm / 28 / 35 / 50 / 85 / 100 etc, with maybe a 40mm in there if you're getting fancy.
These weren't the FOVs of cinema though, because cinema was S35. So the FOVs of cinema using the 50/40/35/27/18 were really like 75mm/60mm/52.5mm/40.5mm/27mm.
It gets stranger when you add anamorphic into the mix. If I go to B&H anamorphic cinema lens category and sort by best sellers, we get:
- DZOFilm Arcana Anamorphic Prime 3-Lens Kit, which are FF and 32/45/75mm and 1.5x, so on FF they are: 21mm 30mm and 50mm
- BLAZAR LENS Talon 50mm T2.1 1.5x, which is FF and equivalent to a 33mm
- Sirui Saturn 35mm T2.9 1.6x which is FF and equivalent to 22mmIf you're using the standard FF lenses on a FF camera, you are using the FOVs that stills photographers used, rather than those that cinematographers used.
Shooting on S35 sensor size (or crop mode) with FF lenses can create some of these in-between FOVs too.
People at Level 2 thinking probably won't be swayed by the above. I would imagine the thinking is take a step forward or back, what's the difference?
Level 4 is where understanding begins to mature - enter the feedback loop
The feedback loop is where you realise that the focal length changes how you shoot.
A ridiculous example to illustrate it. You decide to shoot on only a 28mm on a FF camera, but when you frame up a close-up shot, the distortion makes the talent look awful, so you take a step back and now the footage feels more distant because we're not seeing the talents face so much because there are no close-ups.
We all know about perspective from level 2 thinking, but the level 3 thinking was that taking a step forward or back was no big deal, so which is it? This stuff is subtle, but (like all feedback loops) it pushes us to act differently and this can create a cascade of changes over time.
Level 4 thinking realises that this dynamic is powerful and pervasive.
I shoot in public, so I don't control the environment. I discovered that if I shoot with a 35mm FOV then I can get environmental portraits of my friends and family from close enough that people won't walk in-between me and them, but moving beyond a 45mm I'd either get shots of them that were tight and didn't really show their environment that well, or I'd step back and be struggling with people walking in-between me and the subject, which is a completely different situation. How would I respond to this? I might shoot from eye-level instead of chest height.
Now I've changed the shot angle because of a FOV change.
If I shot from eye-level for a while I might notice that I get more attention and now I find that the people interacting with my subject are more aware they're being filmed and keep looking at the camera.
Now my subjects are acting differently because of a FOV change.If I asked someone the difference between shooting with a 35mm and 45mm would they think it would change the shot angle and subject behaviour? Not with the Level 2 thinking of "primes are sharper! duh!!", or the Level 3 thinking of "just take a step back! duh!!".
What about controlled sets?
Sure, on a controlled set there aren't random people walking in-front of the camera, but now we're talking about actors and all the dynamics that goes on there.
Can great actors deliver amazing performances while the matte-box is only inches from their face? Sure. Do YOU have actors that are that good? I don't think so.
Can great production designers change a set to accommodate a camera being further away, while keeping the frame looking the same? We know that as we move the camera back the subject gets smaller in frame, and that as we do that the background gets smaller but not nearly as fast as the subject does. This is great if you are only filming the subject and don't really pay attention to the composition of the entire frame. But you're a talented cinematographer, so you want to move back a bit and keep the same composition, which means that production design needs to 'cheat the camera' and basically rearrange every item in frame that isn't in the very background. I remember shooting a student film in a cafe and every setup required moving the vase of flowers on the table the subject was sitting at. That vase probably used two-thirds of the area of the table!I watched a video recently where a street photographer tested a 40mm prime for the first time. They didn't know what to make of it, having only a week to shoot with it before they had to release their video review. What struck me wasn't that they didn't know what shooting with a 40mm was like, it was that they didn't seem to understand that there's a period of learning that goes on, they didn't understand that the feedback loop exists.
I realised they had 'learned' each focal length by memorising its attributes (which Level 2 photographers will crap on at great length about), rather than having learned them for himself by following a process where you explore the feedback loop and see how it makes you feel and how it makes you act and how the world responds to that, and how you respond in turn, and how the loop feels and matures over time, and how to make the loop go faster etc.I recently spent some time in a small town in rural Japan and shot the same location with FOVs equivalent to 71mm, 82mm, and 100mm. I went out for a walk each night with one of those lenses, going out for perhaps an hour or two. Shots that were possible with one were not with the next, shots that were great with one were lifeless with another. As I walked down the same road from my accommodation seeing the same shots night-after-night and making different framing decisions with each lens (and deciding to take the shot or not to bother as it didn't work) I noticed that I made different decisions to walk one way or another as certain subjects required different FOVs and distances to make them.
I've also spend a lot of time, over several trips, shooting night scenes with 68mm and 71mm FOVs. In some locations I can make some shots and not others, while in other locations I can take different shots. If I'm shooting across a road then the width of that road (combined with my FOV) determines the type of shots I can take. After taking a number of those types of shots I start to adapt to how I'm shooting these locations. The more I shoot the more everything feels different. Level 3 thinking says "just take a step back, what's the difference?" and when shooting in those situations the difference between a 35mm and a 50mm feels like it's a span where there are several complete aesthetics in-between the 35mm end and the 50mm end. Thinking about shooting a 50mm FOV vs an 85mm FOV feels like travelling to a different country where things look similar but feel very different in practice.I know I'm barely scratching the surface of Level 4, and perhaps there are levels beyond this that I'm unaware of, but it's just amazing to me that almost no-one seems to talk about anything beyond Level 2. It's probably controversial to say, but I deliberately avoid almost all stills-only people because the thinking seems so rudimentary in comparison to people who shoot moving images. You can feel the limited thinking and the "well, actually!!!!" responses where they miss the entire point entirely because one lens is sharper or something ridiculous.
Anyway, hopefully this helps. I've not really heard anyone talk about this stuff, which seems a shame as the rabbit hole is very deep and to only talk about ankle-deep water seems silly.
- Emanuel and Aussie Ash
-
1
-
 1
1
-
2 hours ago, Emanuel said:
I think the POV Head Tracker should not be seen merely as a vlogging gimmick or as another accessory for people who want to film themselves walking down the street.
There are many different ways of filming, framing and capturing reality. The most “professional” approach is often understood as the most controlled one: you plan the shoot, you discuss the framing, you block the scene, you decide where the camera goes, you decide what the subject is supposed to give you, and then you execute. That is obviously valid, and it is the basis of a lot of good cinema.
But it is not the only way to make images.
There is also another tradition: a more intuitive, observational, physical and spontaneous way of filming, where the camera is less a machine imposing a pre-decided frame on the world and more an extension of the filmmaker’s presence inside that world.
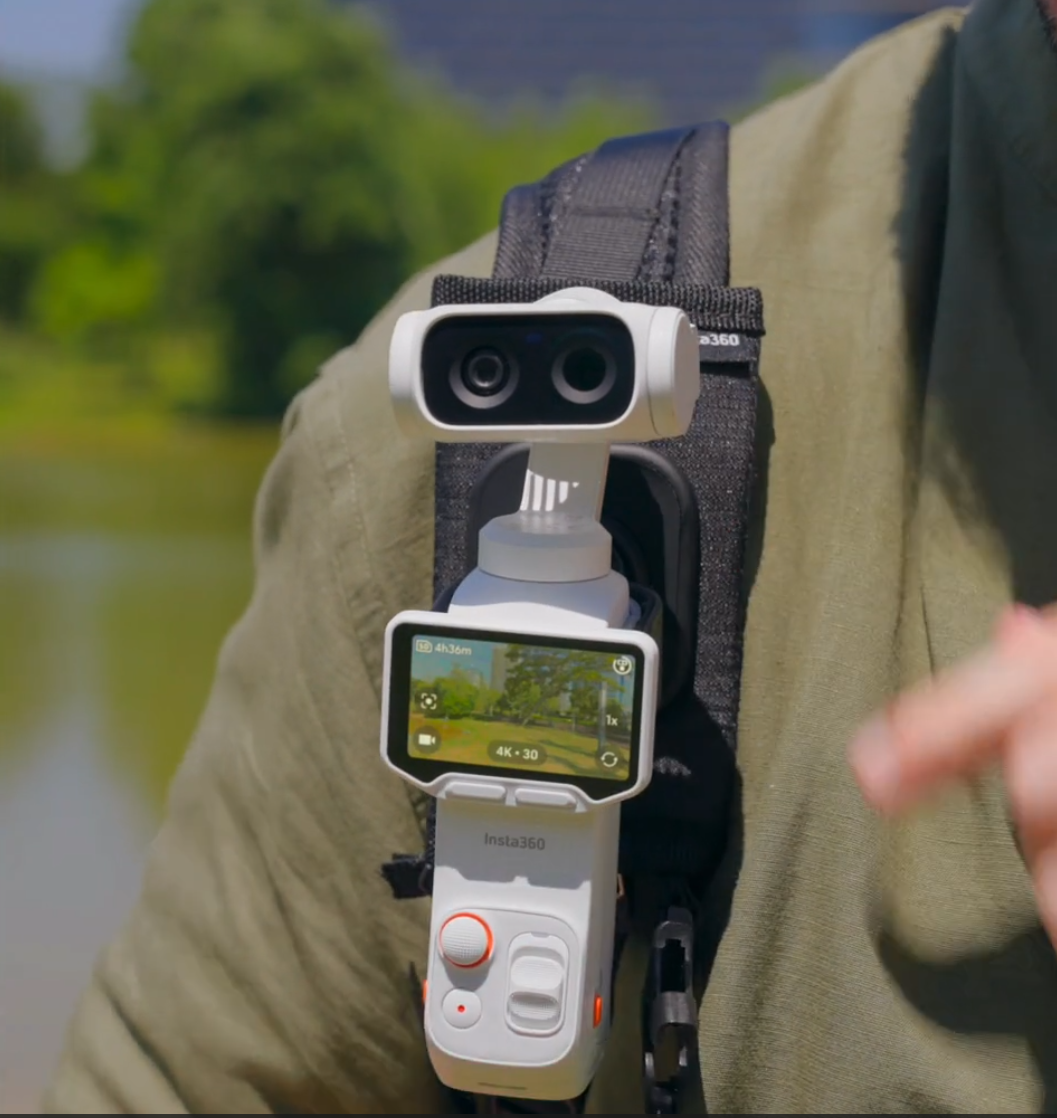
That is where I think something like the Insta360 POV Head Tracker becomes interesting.
The question is not only “what can it do technically?” The question is: what kind of relationship with reality does it allow?
When you are operating a camera in the conventional way, you are always doing several things at once. You are looking, framing, correcting, adjusting, deciding, reacting, and at the same time you are also visibly present as “the person filming”. That presence changes the situation. It changes the people in front of you. It changes the rhythm of what happens. It can intimidate, formalise, freeze or theatricalise reality.
In documentary, this is especially important. The more you plan, the more you risk fixing the subject before you have really encountered it. You may think you are observing reality, but you are already working on a construction of reality. You are no longer only receiving what is in front of you. You are fabricating a gaze, and the subject starts to exist inside that fabrication.
Of course, complete objectivity does not exist. Every image is already a point of view. But there is still a big difference between a camera that constantly announces itself as an intervention and a camera system that allows the filmmaker to remain more physically and psychologically inside the situation.
This is why the POV Head Tracker interests me. It may allow the filmmaker to film without constantly “operating” in the traditional sense. The camera can follow the natural direction of the filmmaker’s attention. The image can become closer to a lived point of view rather than a pre-composed shot. Not perfect objectivity, obviously, but perhaps a more immediate form of subjectivity.
That distinction matters.
A head-tracked gimbal camera could be useful not because it replaces deliberate cinematography, but because it opens another mode of acquisition: a more instinctive, embodied, less intimidating mode. It lets you be present with the subject while still filming. It can reduce the gap between seeing and recording.
In that sense, I see a possible historical parallel with what happened when smaller 16mm cameras became available. Those cameras did not simply make cinema smaller. They changed the grammar of cinema. They allowed filmmakers to move differently, to follow people differently, to enter rooms differently, to film streets, faces, accidents, gestures, private moments and unstable situations in ways that would have been much harder with heavier, more industrial tools.
You can connect that to cinéma vérité, direct cinema, the Nouvelle Vague, the New American Cinema, Jonas Mekas in New York, underground and independent filmmaking, and later the influence of that freer, more mobile language on figures like Cassavetes, Scorsese, and the whole post-studio generation. Even mainstream cinema eventually absorbed some of that looseness, that handheld energy, that search for immediacy.
Jonas Mekas is not just an abstract reference for me. I had the privilege of knowing him personally in the mid-1990s, at the Figueira da Foz International Film Festival, which he used to attend. In that same context, I was also fortunate enough to receive an award as best daily press film critic. More importantly, a project I am still developing today was born precisely from that contact with Mekas. So when I refer to him here, I am not only invoking a name from film history. I am also referring to a very concrete personal encounter with a way of understanding cinema as diary, presence, immediacy, memory and life.
The technology did not create those artistic revolutions by itself. But it made certain gestures possible.
And when a tool makes a new gesture possible, it can also make a new kind of cinema possible.
That is how I would look at the POV Head Tracker. Not as “AI tracking for creators”, but as a small step toward a different relation between body, gaze and camera.
From the end of last month and carrying into this June, I worked on the making-of for A NOITE, Leonel Vieira’s film adaptation of José Saramago’s homonymous play. During the shoot, we used the Osmo Pocket 3 alongside other cameras, including a Sony A7S III, an FX30, a Panasonic GX80/GX85 and other small-format tools, Insta360 included. The film itself was being shot on two ARRI cameras, so this kind of low-profile equipment was obviously not what people on a cinema set are most used to seeing. Even Leonel Vieira, the director, looked at the Osmo Pocket 3 and jokingly said it looked like a toy camera. But that was precisely part of the point. I took the initiative to use it without hesitation, accepting the risks of bringing that kind of device into a professional film set, and combining it with different optical tools, including black mist filters to create atmosphere, Sirui anamorphic lenses and other accessories. In that context, I became very aware of how valuable it would be to have a device that lets me film without constantly managing the camera as an object. Not to mention that 10-bit Log recording is now available on the Luna Ultra as well.
In a making-of situation, the best moments often happen before people know they are “performing” for the camera. They happen between takes, in hesitations, glances, silences, rehearsals, small gestures, private exchanges, and moments when the machinery of cinema briefly becomes human again.
But the moment you raise the camera, adjust the frame, move closer, correct the angle, ask for space or visibly operate, you can lose the very thing you were trying to capture.
The reality in front of the lens changes because of you.
And that is fundamental in a making-of context: to be as minimally intrusive as possible, so as not to disturb the set of the main film being shot. The reactions of the professionals involved are, in many ways, the real subject of a making-of, and those reactions should not be manipulated by the visible presence of the image-capturing device itself. In our case, we were working with a very small crew: two to three people at most. In fact, it was necessary to convince Leonel Vieira to accept a maximum of three people, because ideally he preferred two, and sometimes only one person could be present. In those situations, when only one person was shooting and I still needed two possible angles, a camera A and a camera B, the only viable option was to have a B camera as autonomous and unobtrusive as possible, which is exactly how the Osmo Pocket 3 was used. With a device such as the Luna Ultra and its POV Head Tracker, that kind of work would become much easier, not only during the shoot itself but also later, when reaching the post-production suite and needing more options in the edit.
So a device that lets the camera follow your attention, while your hands and your body remain less occupied by the act of filming, could be extremely useful. It could allow the operator to be less intrusive, less theatrical, less visibly extractive. It could make the camera feel less like a weapon pointed at reality and more like a witness moving through it.
That does not mean this is for every situation. It is not a substitute for composed cinematography, lighting, blocking, lenses, or intentional mise-en-scène. But it could be very valuable for documentary, making-of work, rehearsal footage, street filming, travel, observational cinema, and any situation where spontaneity matters more than perfect formal control.
The professional instinct is often to control everything.
But sometimes cinema gains power when we control less.
Sometimes the most authentic image is not the one we planned best, but the one we were able to receive before reality became aware of our plan.
That, to me, is where the POV Head Tracker could become genuinely interesting.
Interesting points and I definitely see the challenge and how this potentially provides new potential solutions to some aspects.
@eatstoomuchjam mentions having something mounted on the brim of a hat, and this does in some way create an alternative option.
Perhaps the added feature of the head tracker is that you can track the direction of the head without having the camera on the head, which makes me question where would you have it? The further from the head you put it the more parallax error, and unless it could have some sort of offset (which is probably possible) then the framing might be off.
Maybe it's better as a more walk-around camera rather than if you're stationary and what you're filming is mostly stationary. I do see "those shots" in docos from time to time where the footage you're seeing wasn't shot well but is pivotal to the story and therefore included in the edit. For example when crossing a border into a war zone the audio is of the border guards talking with the producer and the visual is the camera seeing the back of a car seat, or everyone is running while chaos ensues, etc.
I can definitely see that it's an alternative to a chest-mounted action camera where the ultra-wide is capturing far too wide a FOV, and where the head-mount would capture the action with a much tighter FOV.
I can also see someone doing BTS rigging one up with an NPF battery and mini desktop tripod and body clamp and just wandering around with it constantly turned on but not always recording, and the fact that it's always on and always moving would mean it would become invisible after a while, making the footage it captures much less influenced by its presence.
Interesting stuff. I guess it's probably a thing where the right uses for it are almost invisible. Like how shoulder-mounted ENG / doco cameras can be used to create footage that doesn't call attention to itself, but in certain drastic situations such cameras do really call attention to themselves, this would be able to capture footage that doesn't call attention to itself in situations where no other camera setup could.
Great discussion!
-
12 hours ago, Chrille said:
Left handed girl form 2025 comes to mind. They shot on an iphone.
I was reminded of this one too.
-
On 6/25/2026 at 3:16 PM, Emanuel said:
No idea about you guys, but I am in love with this tool accessory... pretty useful in those much different configurations:
Head tracker, finger tracker/tracking, etc.* ; )
*shoulder mode:
More comparisons here and there or yet this one too from same Chinese tester BTW.
And here, more for the new Osmo Pocket 4P/Pro with the sample(s) of the new add-ons introduced (whereas Luna Ultra reaches 4K120fps across 20-60mm, DJI's Osmo Pocket 4P/Pro goes up to 4K200fps at the telephoto end).
Haven't you bought a gimbal-pocket-cam yet?
This is for those who will buy one then : D
;- )
What will you use this kind of thing for?
You seem very excited, but I don't really know what I'd use this for.
-
1 hour ago, QuickHitRecord said:
I think that this quote sums up some of the decision-making that I am facing. I could totally go in there and “wing it”, just figuring out my shot as I went. But I want to rely on natural light, which means timing certain shots for certain times of day, and then that raises the question of how much planning I want to put into each scene, and ultimately how the visuals will compliment the story. I’d rather not lean too far into the documentary aesthetic.
I'm once again reminded of Noam Kroll, who has gone a long way into this rabbit hole.
My recollection of his method was a balanced approach, where you make a plan and then improvise and adapt within a limited range. My impression was that he would storyboard things as a way of mentally rehearsing the shoot, and would end up with a clear idea of the logistics of the shoot, the equipment required, etc. Location scouting and anticipating the light etc as you normally would.
I believe he also gained a clear idea of which shots were required, and which had some flexibility. Then when he was shooting he could make sure that he got enough for a functional edit, but was also clear enough in his thinking that he could adapt the plan to compensate for any challenges that arose and also to take advantage of any serendipity or inspiration that occurred.I suspect that this is a very deep skill, to plan and then improvise a shoot with an understanding of how the choices being made will go together in the edit. I know enough about editing to know that it's a jigsaw puzzle where you can have two small sequences that work well but don't cut together directly, so unless you can find a way to get from one sequence to the other then you have to change one of them so they're compatible. To do this for a whole scene, or whole film, in your head while you're still shooting it is beyond what I could even imagine, but I'm sure that the talented cinematographers are easily up to the challenge.
Noam actually went further, describing a process where he worked with two actors and where he 'designed' what would be shot ahead of time, with the major plot points and story beats, but didn't fully script it. On each day of shooting the three would have breakfast and discuss the motives of the characters and how the scenes should go. Then they'd shoot while improvise the scenes, filming as they went and exploring ideas. It was freedom within a planned structure.
I believe he was shooting one or two days a week, and so after shooting he'd review the footage and do rough edits, seeing what worked and what didn't. Then he'd 'design' the next shoot day accordingly, sometimes keeping on with his overall plan for the story but other times seeing something in the footage that made him adapt the narrative.I suspect that the skill is in knowing how much you can stray from the plan and knowing in which ways to adapt to make the end result better than if you just shot it as planned without any adapting to the situation.
Certainly if you make a plan and then prioritise which shots are the most to least important then you'll have a good chance of coming back with a functional edit. My impression of great travel content is that most shots are good-but-not-great, and the art is in the edit and how they're combined.
1 hour ago, QuickHitRecord said:After shooting my last five shorts with my C70s, I’m actually thinking about shooting this film on a hacked EOS-M with c-mount lenses. I’ve been collecting them for a while and have three sets of primes, plus some great zooms. I’d personally put the aesthetic available with this (windowed) sensor and these lenses up against anything, I like it that much. I think the reason that no one really wants to do this is because it’s one of the most difficult digital cameras to work with, AND on top of that, the most difficult lenses to work with. But I’ve been tackling the challenges presented by these one by one, and I think I have them pretty well sorted. We shall see!
EOS-M and primes and a Fujinon-TV 14-70 f/2 will do a lot of the heavy lifting in making it look like cinema instead of video. In my mind you'll need to pay attention to how to keep the camera stable and then look at your references and study their coverage so you can design yours.
By shooting on less than pristine equipment, you'll have to get things right in-camera as you won't be able to mess with it in post as much. Specifically, being able to zoom in a little in post can be useful if a random passer-by is staring. If you were shooting this with a modern mirrorless and sharp/neutral lens then I'd suggest using the highest resolution possible just so you have that flexibility.
Your concern for getting stared at is legitimate, but the focus is to not get people staring while they're in the frame. As such I'd suggest getting more coverage using tighter framing and shallower DOFs, and for shots that are wider, simply getting more footage so you can edit around people staring. AI can potentially help if there are random people staring in shots you really want to use, but if you can edit around these moments (or prevent them from being in shot in the first place) then all the better.
It's also worth considering that there are a number of things you can do that will lessen the changes of people noticing you and the camera, or lessen the people who are currently in frame noticing it.Another strategy is to investigate how much b-roll can be used in the edit without it taking away from the story. You may be able to get away with putting b-roll on top of a good audio edit, essentially having an L-cut followed by a J-cut where the audio goes from one character to the another but the visuals go via a b-roll shot from the location. I'm sure there's a deep art to doing this, but it's worth grabbing as much b-roll as you can while on location (especially if shooting has to wait for any reason but you're able to shoot). You can even return at a later time to get more footage, or better yet, take your kit and go shoot the location ahead of time so you can do a dry-run with the actual rig and also get a sense of what the location is like to shoot by actually shooting in it.
- QuickHitRecord and Emanuel
-
2
-
7 hours ago, QuickHitRecord said:
Can you think of any narrative films that were shot with natural lighting minimal crews in busy areas/cities? I’m doing some research for an upcoming zero-budget project, trying to figure out a solid approach to the aesthetics. I really want to get out of a locked set for this one.
Further to the above, and further to what Mercer wrote..
- The smaller the camera package the more amateur and less pro you look, which impacts how the authorities treat you
- Often locations care if you have a tripod or not, especially in crowded situations where a tripod takes up a lot of space and is a tripping hazard. Alternatives to a tripod are obviously hand-held and also shoulder-rig, but the often overlooked options are a monopod, and Mercers trick of having a monopod where the foot is resting in a pocket of a belt, so the camera effectively gains the stability of the operators waist
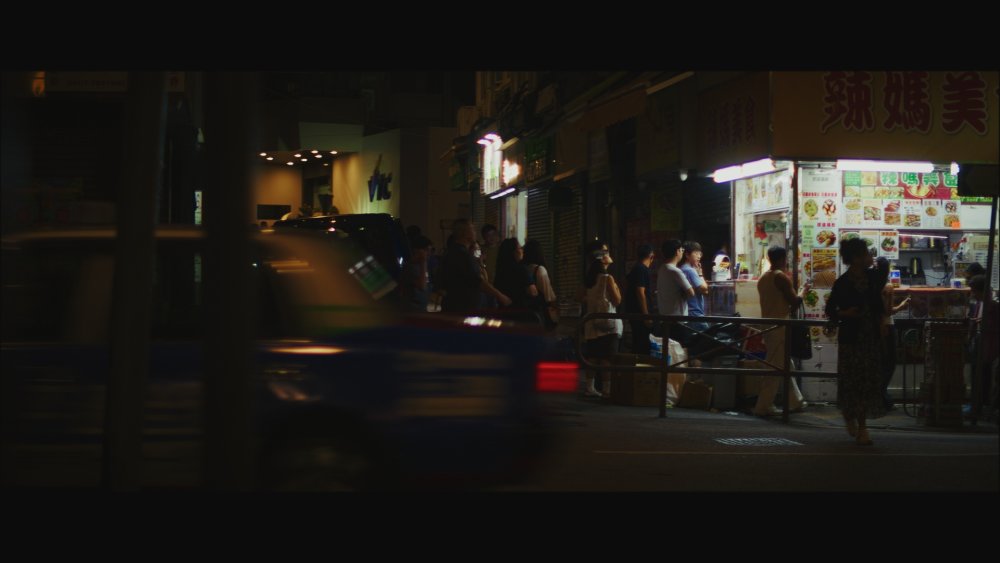
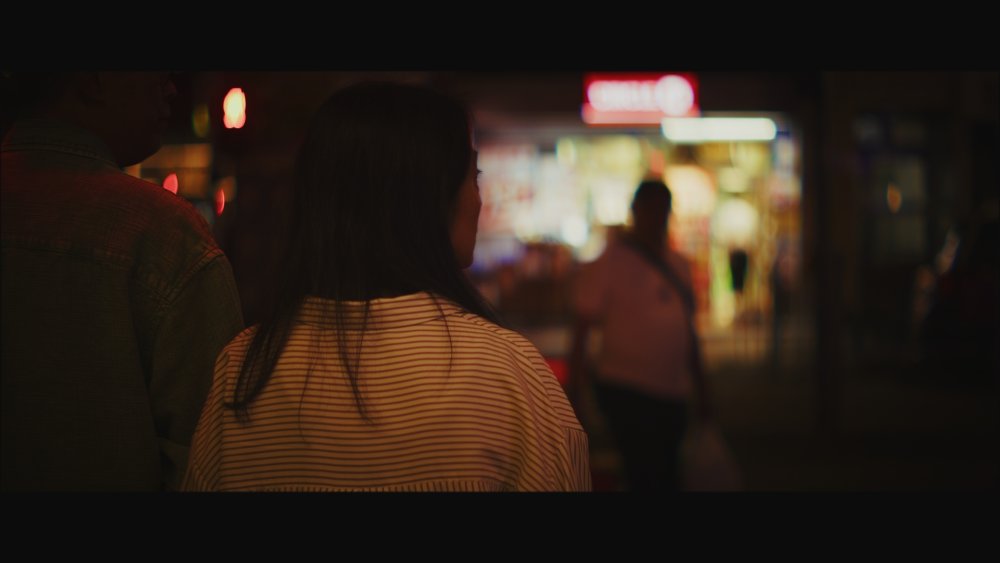
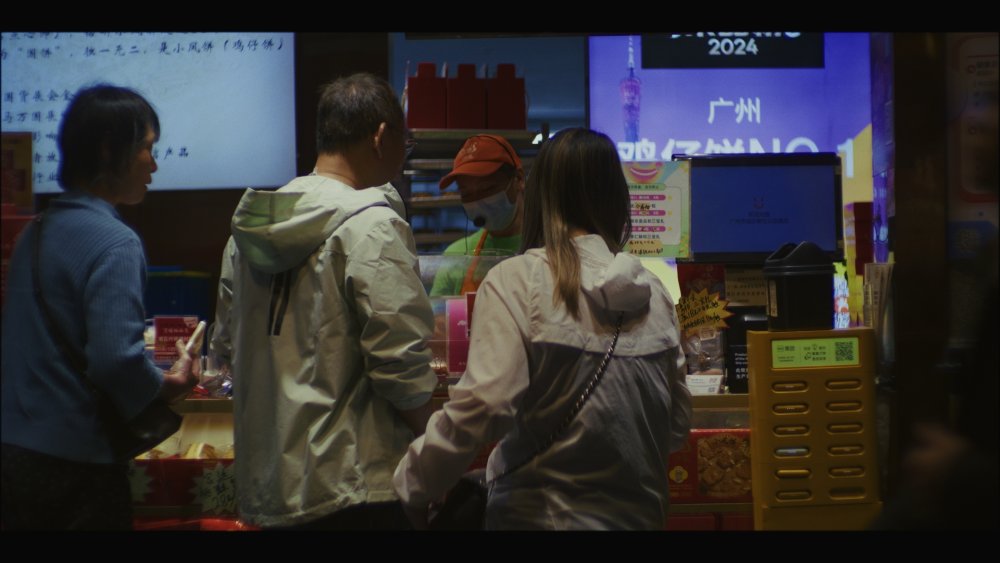
- Depending on the focal length and type of shot (medium, close-up, etc) the primary consideration in crowded places is if people will walk in between the camera and subject. My travel shooting with my family was done mostly on a 35mm F1.9 equivalent and this enabled medium-close-ups and closer in very crowded places without anyone getting in-between and wider than that with people or obstacles in-between. If you want to get more distance than that and not get wider then you'd need to go to a 50 or tighter depending on the distances involved. I personally find this hugely situationally dependent as it depends on how crowded things are, how noticeable the operator is, how willing to walk in front of a camera people are (or how much/little they care about you) etc.
- Combined with the distance / density / shot-size / focal length interactions are the DOF considerations, specifically how much do you want to separate your subject and at what distances. Normally this also blends into low-light requirements but I think these days if you use a dual-ISO camera then that consideration drops away and you can get by with F2.8 or even F4 at night in well-lit areas.
- The main reason that aperture isn't an obvious choice (just go F1.4!) is that if you can choose a slower lens then you can consider a zoom, which changes the shooting equation drastically. Depending on how you're planning and scheduling the shoot, the ability to move fast without changing lenses might be considerable. The French New Wave approach of getting minimal coverage and preferring longer takes is something to consider. There's a huge difference in logistics between storyboarding the whole thing within an inch of its life (and having many setups and doing hair/makeup/wardrobe touchups between takes etc) and running the whole scene a couple of times with a wider master then going a bit tighter and grabbing the more interesting shots as colour for the edit. Noam Kroll has shot short films on film and only had ratios of 2:1 or similar, and for certain sections only shot one take because he wanted to spend more film on making the important parts more interesting.
- For aesthetics it's also worth considering what you'll do in prod vs post. The traditional prod approach is to use filtration and select a lens / aperture combination that gives the rendering you want, and then you'd shape the light and control your lighting amount and ratios etc to suit your ISO/aperture/filtration. This makes prod very cumbersome and if you don't control the location perhaps impossible. The alternative approach is that you choose much more neutral equipment and push a bit of a look in post. There are obviously limits to this, but for example by picking a lens that's sharper across its range you can vary the aperture to control DOF and exposure in prod and then degrade it in post (soften it globally and in the corners, add distortion, add diffusion, add vignetting, etc) and you'll have a consistent look despite using the lens at different apertures, etc.
- Think about DR. The more DR the camera has the less of the scene you will clip and the more flexibility you'll have to adjust exposure and ratios etc in post without making the clipped areas visible. The less DR you have the more carefully you'll have to expose, and the less flexibility you'll have with moving shots that go between dark/light areas. The more DR you have the less you need to vary the aperture on the lens to compensate, or the less you'll need any lighting etc to compensate.
- Think about the contrast of the final film. The more contrast you apply, the more leeway you will have with the cameras DR, so the previous point gets easier. Film was great in this sense as the negative was so wide and flexible and gave a lot of leeway in post.
- Monitor as well as you can. Use a large monitor and a viewing LUT. The more you can visualise the end result while shooting the better. I find that shooting in uncontrolled situations means there are always things in the frame that I'm reacting to. This is in alignment with the situation and performance too - shooting in crowded public places will have the cast reacting to their surroundings, so you should be reacting to their performance and to your surroundings too, so the more clearly you can see the shot the more coherently you can react to it.
- Embrace the chaos. Separate the ideas of controlled coverage and creative experimentation as much as you can. The idea of getting a master in the can and then experimenting is great because you can ensure you've got an edit that can work and then you can grab risky but potentially great shots after that. Much better to have the final edit cut between neutral shots and really great shots that embrace spontaneity and add to the film than struggling in the edit by having to cut between shots that are neither safe nor creative nor sensitive to the surroundings.
Some example 35mm F1.9 shots I've taken (please ignore the grading - these were from a long time ago!!!):
More recent shots with 68mm F1.5 equivalent:
and more recent with 70mm F2.0 equivalent:
If you really wanted a minimal set of focal lengths, I'd suggest a 28mm for wides and ultra-packed situations, a 'normal' lens in the 35-50mm range, and a longer one in the 70-100mm range for shots where you are at some distance and don't want a wide.
Your aesthetic should really begin with the emotional arc of the characters in the film, filtered into scenes, then the equipment chosen to express the intended aesthetic while shooting in the specific circumstances of the location and logistical assets and challenges.
-
Lost in Translation was famously shot in Tokyo without official permission. They shot in public with a very minimal crew and moved fast to try and keep ahead of the authorities. They chose this approach primarily because it was almost impossible to get permission to film there at the time.
I saw a great doco about the making of it but it's been removed from YT now so can't share it.
I don't know what sort of info you want to know to prep for your film, but there are snippets of BTS online if you dig. This video shows a bit of BTS from on location (linked to timestamp):
From what I can remember / piece together:
- shotonwhat says it was shot on Kodak 320T and 500T using Aaton 35-III Camera and a Moviecam Compact Camera with Angenieux and Zeiss Super Speed Lenses
- they moved fast to stay ahead of the authorities
- the cast and crew when out shooting in public was only a few people (camera, sound, director, and talent and I think that's it?) and were all non-Japanese people, and if anyone official came to tell them off the they would just be apologetic but use the language gap to effectively prevent any communication. They had a Japanese fixer who stayed a distance apart from the group (so they wouldn't be noticed by the authorities) but that was helping with logistics etc and could step in if the situation required it
- they had challenges with locations (link to timestamp)
- another snippet of them on location - tripod but not clear if they're using any lights
What information are you looking for specifically?
-
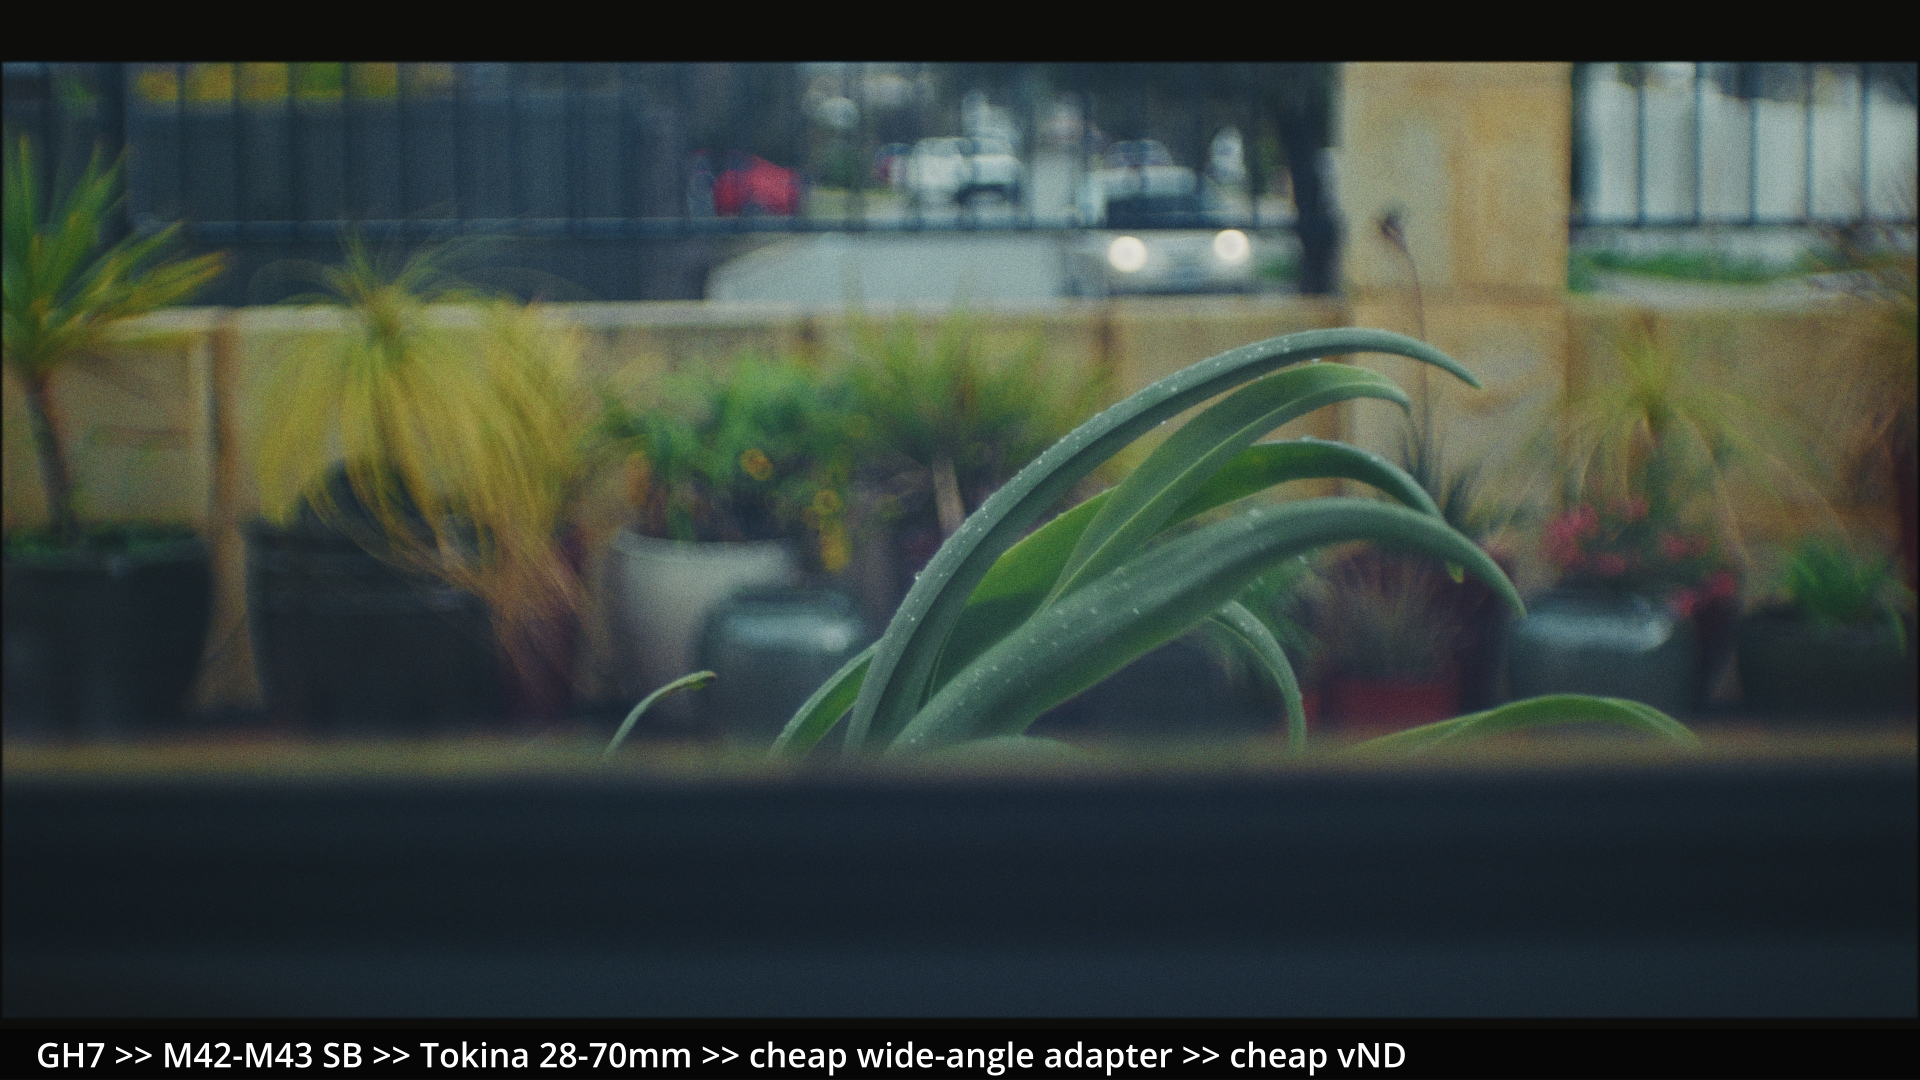
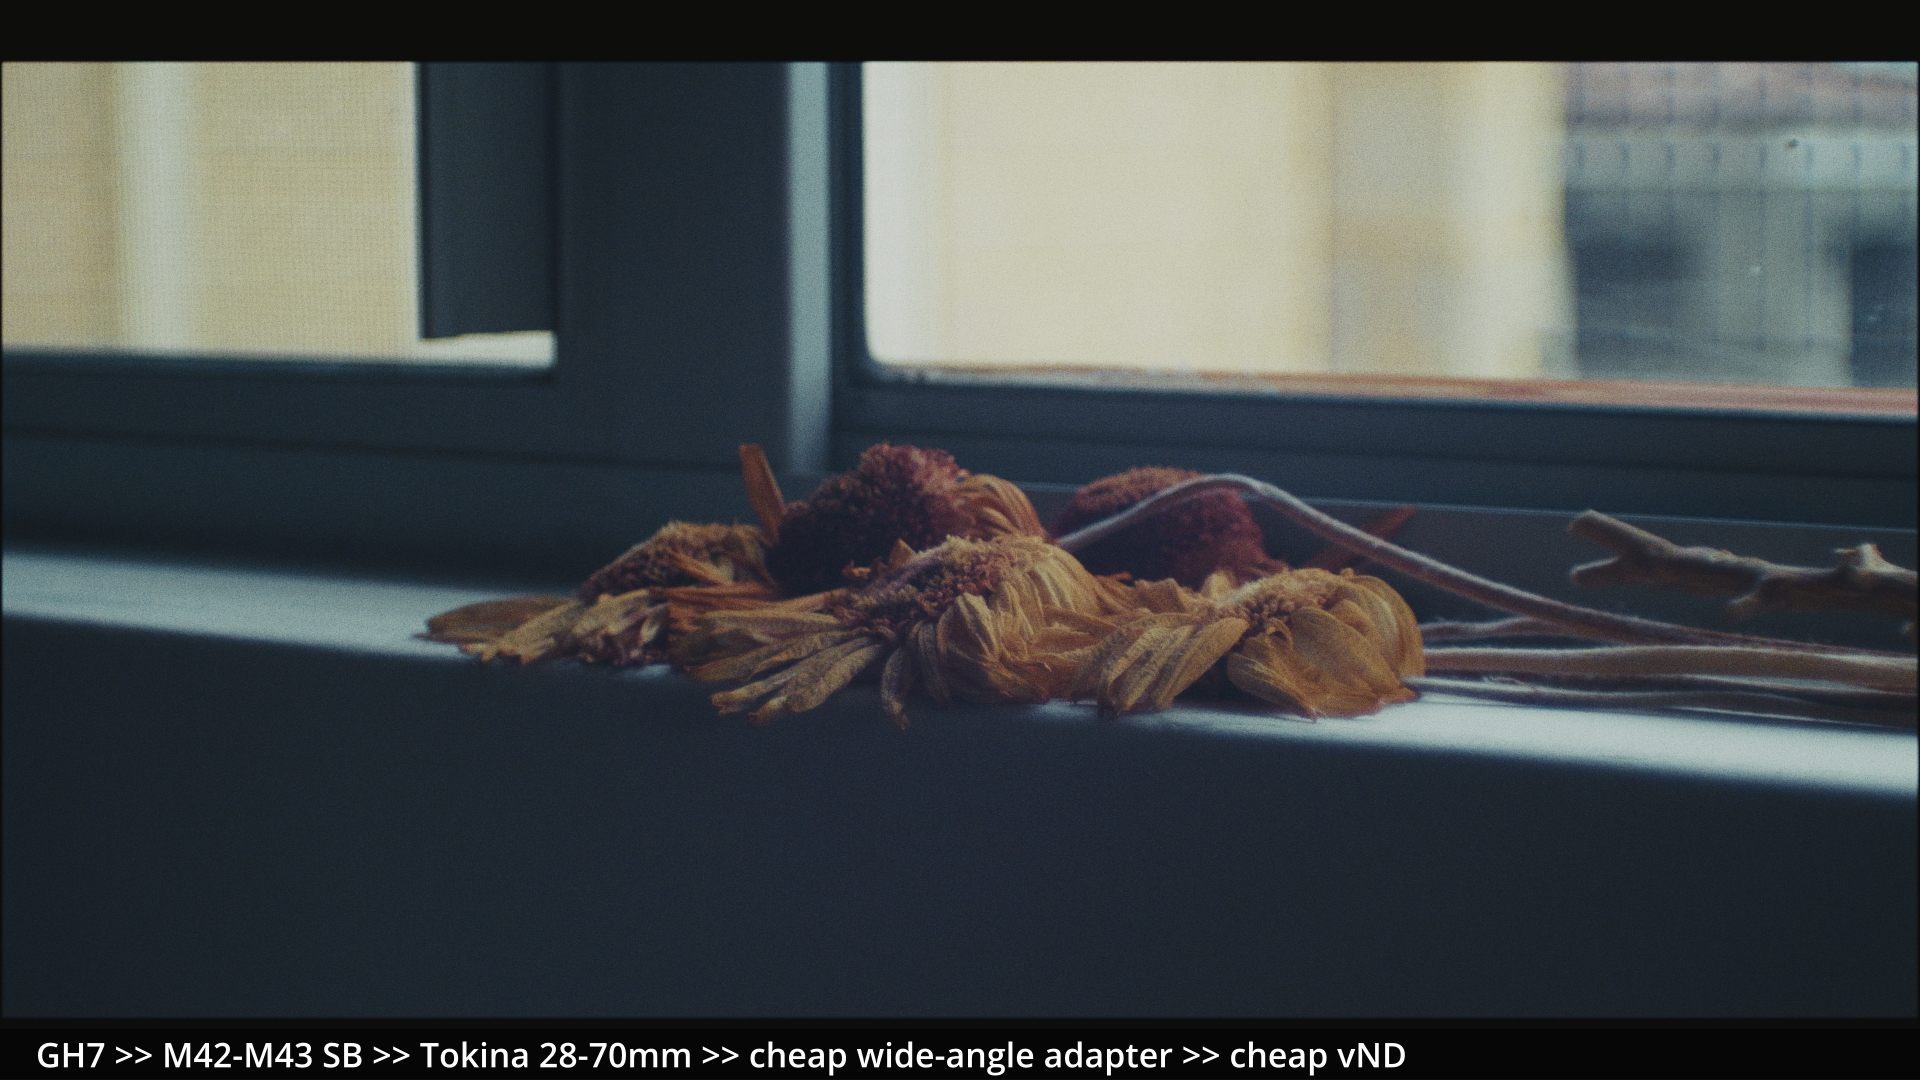
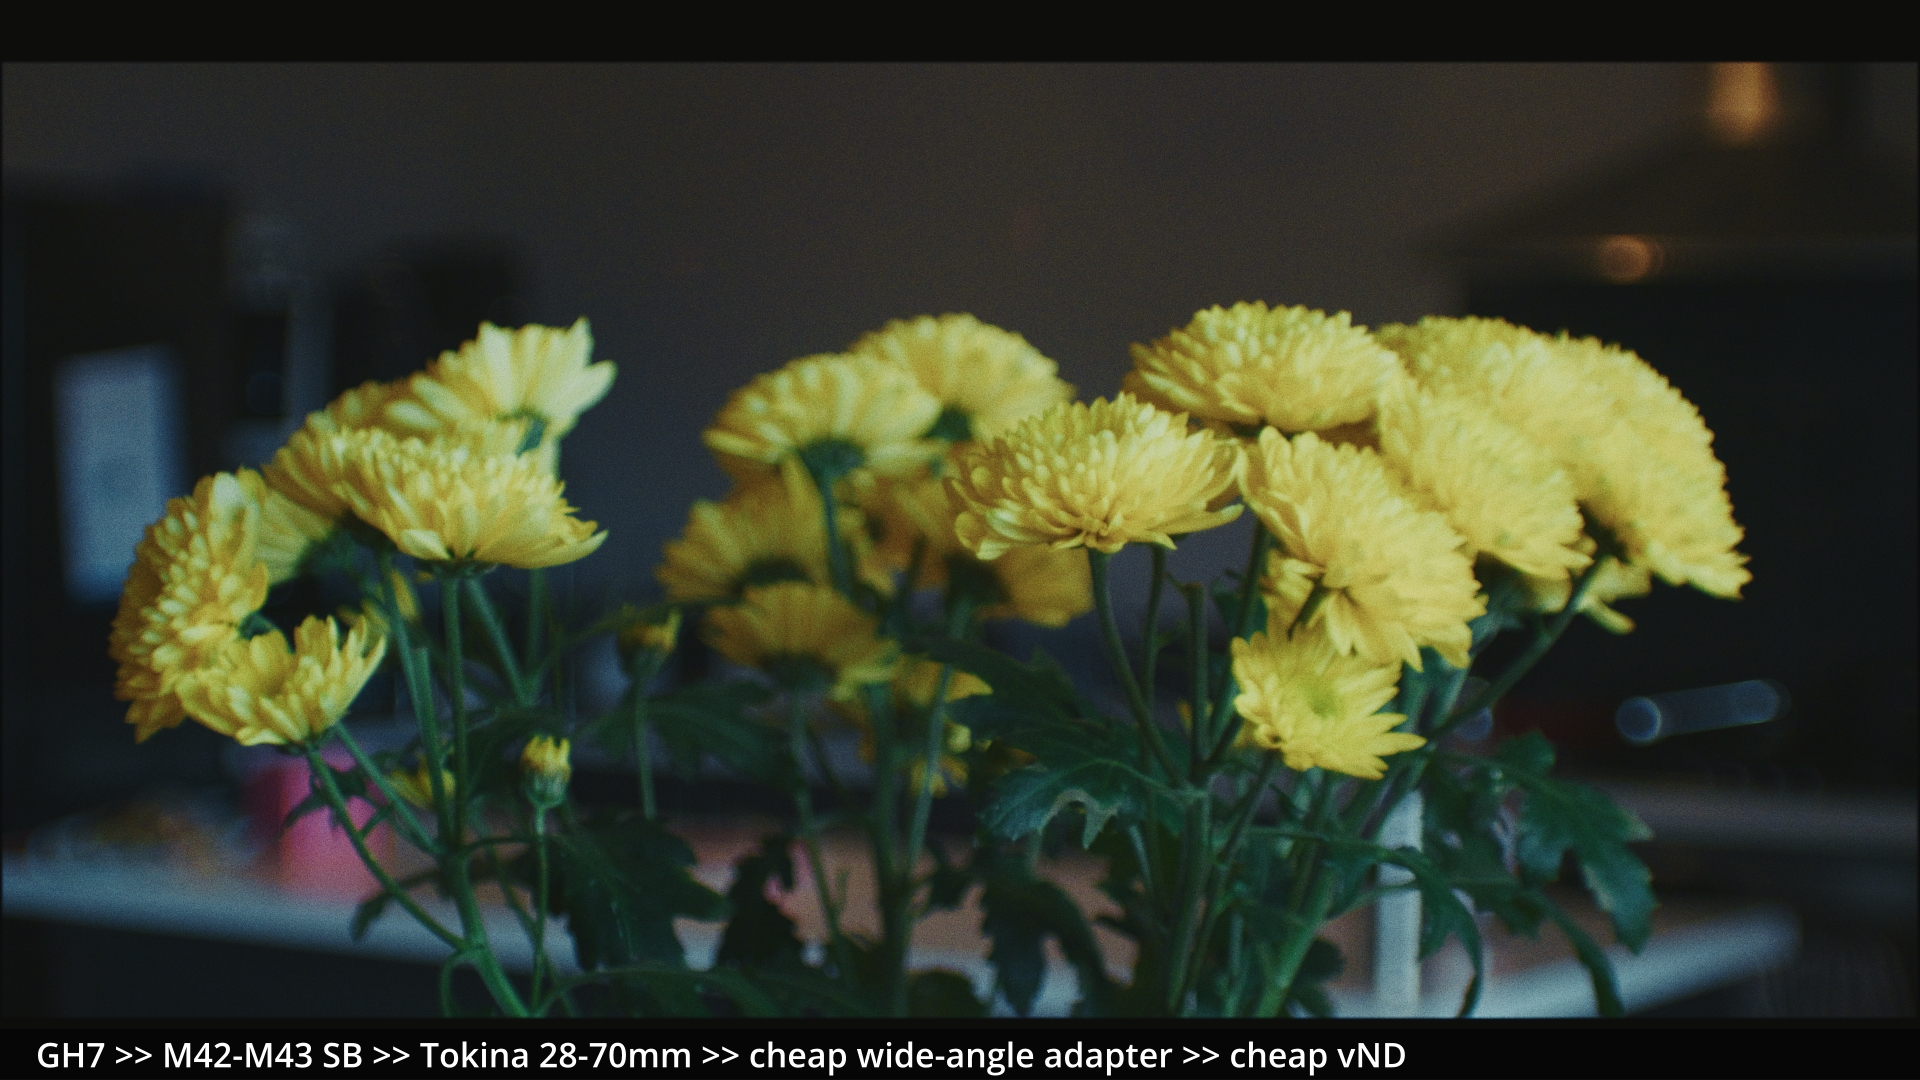
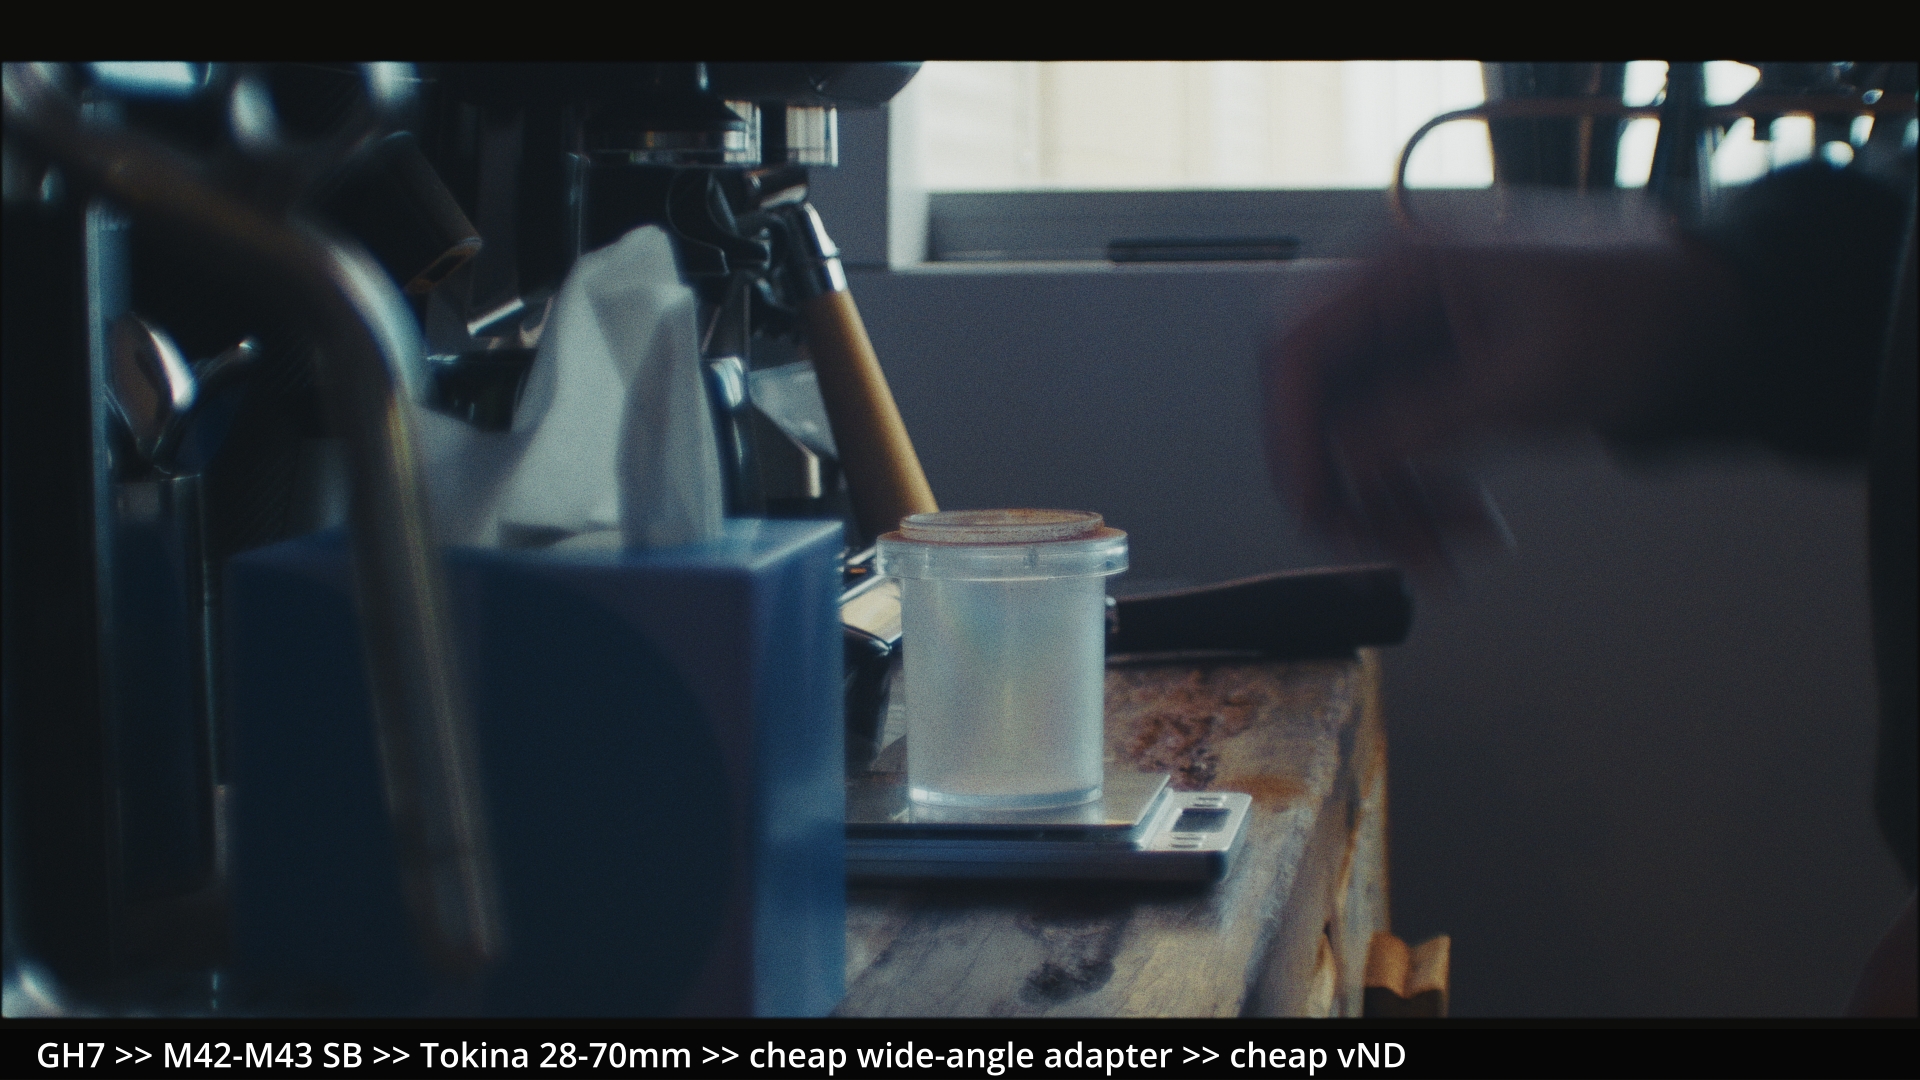
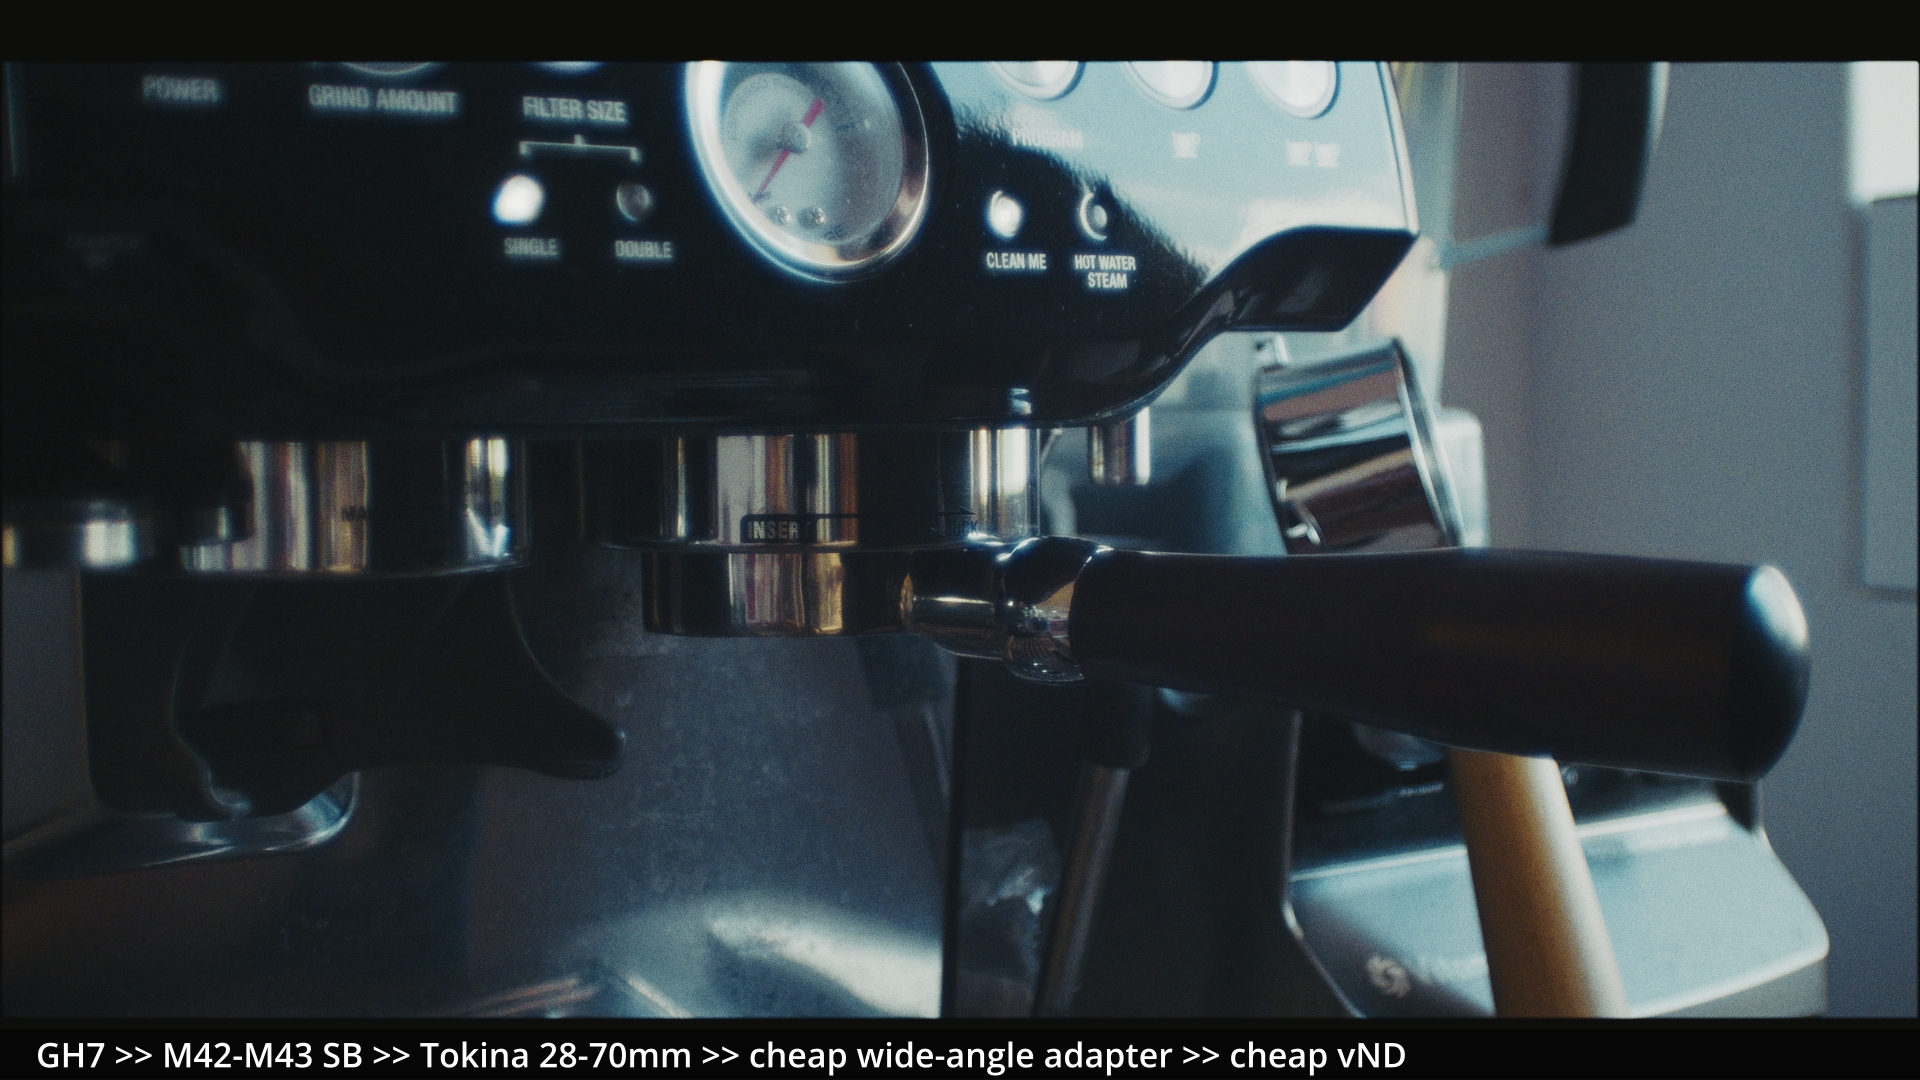
Further lens contemplation reminded me of my Tokina RMC 28-70mm F3.5-4.5 for m42 mount, which is deliciously imperfect, and when combined with an ultra-cheap wide-angle adapter gets even tastier..
I've struggled with this lens because the main issue with it is that it's a dumb lens and so there's no way for the cameras IBIS to know what focal length it's at. This is fine for tripod work, but that's not really how I shoot, and if it was tripod work is slow enough that I could just use primes.
Then I realised that as I now own an EF speed booster I can get an EF zoom lens and it should report the current focal length to the camera and the IBIS challenge goes away.
As such, I started looking for the absolute worst, most imperfect, least sharp, EF zoom lens I could find. Luckily, if you search ebay in ascending price it makes these gems obvious and you can peruse at your leisure.
So I have now snapped up a lovely Tokina zoom that according to the Pentax forums has decidedly poor optical performance. Hooray!! Pics when it arrives, but I'm excited.
I was also made aware of the existence of the Tokina AT-X PRO F2.8 zooms, which are interesting, but a long way from the top of the (price ascending) ebay search results. I also found a couple of the F2.6 Angie designs too, those were $3-4K.. wow!! Being famous on the internet sure makes things more expensive!
-
48 minutes ago, BTM_Pix said:
The head tracker is very smart and for people doing instructional videos it is excellent - even if it does look like you are carrying ET in a papoose when you are out and about.
The head tracker seems like it'll be an absolute game-changer for a small number of niche uses and a curio to everyone else.
I'm wondering if it'll be a way to get natural looking gimbal footage, rather than the not-robotic-but-not-organic-either panning / tilting that we seem to get at the moment. Maybe akin to the difference between a shoulder-rig and a tripod?
The next evolution of it might be to use it to control the camera on a drone - the current state of that art is very robotic.Still, neither of these is of much use to me, so I'll just be reminded of that Renault model that pointed the headlights left and right along with the steering so you could see where you were going while cornering as well as when going straight.
-
15 hours ago, BTM_Pix said:
I think a lot of people feel the world was a brighter and more optimistic place in the 90s and 2000s so it’s a way of putting their current selves back into that time.
Easy to write that off simply as nostalgia but I think at this present time it’s actually a deeper thing as a coping mechanism.
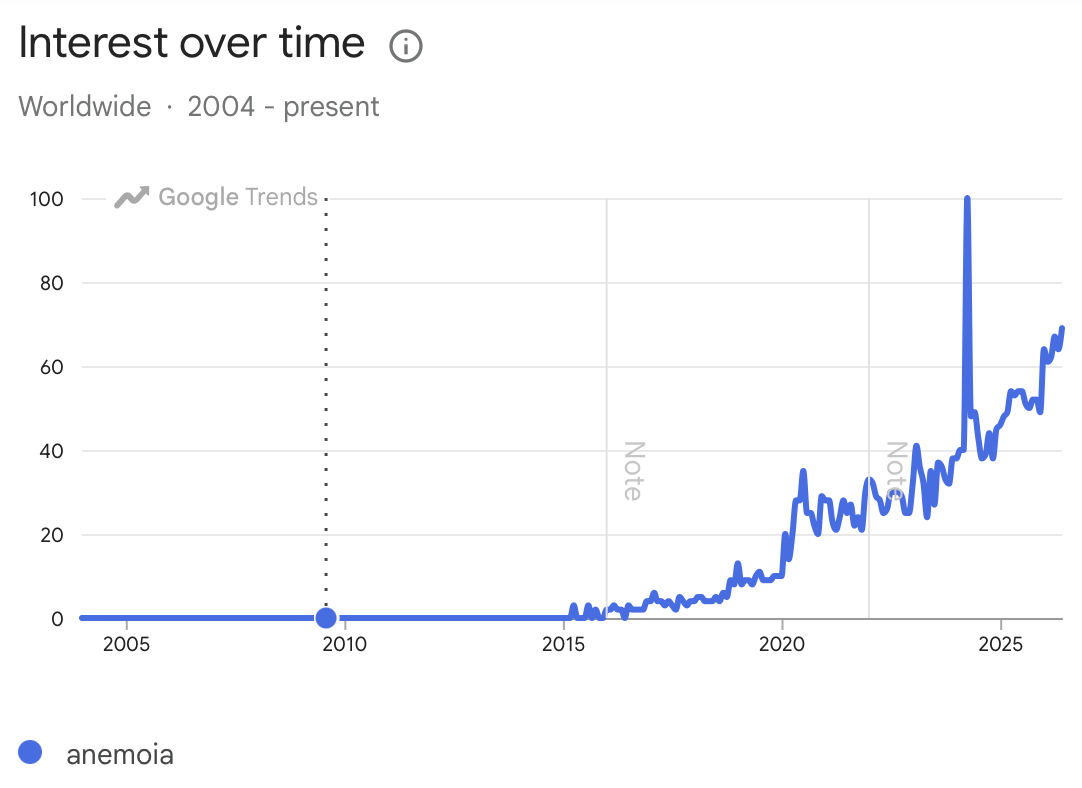
Agreed.. You've likely heard of the term "anemoia" which is from The Dictionary of Obscure Sorrows which aims to come up with new words for emotions that currently lack words, and it means "Nostalgia for a time or a place one has never known".
It's gaining popularity too, with that blip being April 2024...
-
15 hours ago, Clark Nikolai said:
I do think nostalgia, even for a time someone wasn't alive for, is a big factor. Another is authenticity, the title is telling on the comparison video. Which is "more authentic?". I think with so much fake stuff out there, or over polished, commercial media, that there's naturally a desire for something real.
I know a young woman, in early 20s, who last year shot in miniDV for the nostalgia and poor quality. That surprised me because I remember when miniDV was considered high quality (compared to what low budget video makers had access to previously). Things move on.
There's also trends, as the saying goes, when hemlines are down they can only go up. Now that people can do 8K pristine video easily and cheaply, then low quality and dirty is a refreshing change. About 12 years ago I was searching for, and found, a pocket camera that saved in raw. It was great and I loved how I was able to edit in post nicely, etc. This year it died and so I pulled out the old jpeg-only camera from the drawer and I've been shooting with it. Now, instead of cringing when I see the jpeg artifacts, I accept it as a normal look for a cheap snapshot and kind of a style that's now "approved" by others (at least on YouTube.) The ergonomics are great too. I can have it in my side pocket and while cycling, reach down with one hand, put my hand in the wrist strap, turn it on and take pictures without stopping. You can't do that with a phone. I sometimes wish that the amazing image stabilization and other features that iPhones have was available in a little pocket camera.
Anyway, I can dig all sorts of things. It's just another brush to choose.
All good points and it's like everything in that when two people make the same choice it's probably a mixture of everything but in different proportions for each person.
Nowadays I think the "poor" image quality of these older cameras is just viewed as "a look" that you would make from a position of having creative options rather than being something you didn't want to choose but had no better options.
Speaking of pulling a camera out of your pocket with one hand, does the camera button on the new iPhones help? IIRC you can double-click it to open the photo app of your choice (default or otherwise) and also use that button to take a photo or start/stop recording. I have a grippy case for mine and holding it with one hand is a very secure experience, with the only wrinkle being that it's so grippy it can be difficult to get it in and out of a pocket unless you've gotten the angle right and the fabric isn't in tension etc.
-
5 hours ago, Ilkka Nissila said:
Perhaps it is the algorithms giving me content I am likely to be interested in, but none of my social media feeds give me posts where old camcorders or old digital cameras are seen as desirable from the point of view of achieving a particular look. I have heard about it, but I suspect it could be mainly in particular algorithm-created bubbles. People who are interested in serious photography and video work with good image quality tend to be given that kind of posts and so on. 🙂 There are certainly people who are fascinated by old things. I like steam engines myself, and sometimes photograph steam trains because of the visual and auditory aesthetics, although I recognize that the steam engine did gross harm to the environment, air quality, caused fires, lots of CO2 emissions etc. Despite these I really like the sound and feel of it. 🙂
Indeed, algorithms do tend to isolate us from the huge diversity out there, that's for sure.
One thing I like to keep in mind is that even if something is so rare that it's only one in a million people, that means there are 8 million of them!
I have a Korean friend who is incredibly into film-making and film itself. He is currently studying film and TV in the US, and owns his own complete RED Dragon 6K setup (one of the older DSMC2 models). He has been shooting film for many years and still regularly shoots projects on it, mostly 16mm and is a massive film nerd who frequently dives into the detail and can name specific models of film scanners etc off the top of his head. He is a huge fan of K-pop and loves retro camcorders and early digital stuff. I'm in a private Discord server with him and bunch of other film-maker types and there are a lot of them that are into a wide range of looks, including ultra-high-quality digital, film, cinema, TV, music videos, advertising, sports and live action coverage, and aesthetics of all imagination.
They don't just talk about cameras, or film, or lenses (but they do talk about all of those), they talk about bags and equipment trolleys and lights and all things grip, they talk about sound and editing and colour grading, they talk about directing and scheduling and pre-production, they talk about YouTube and sponsorships, they talk about clients and client management and business, as well as cars and other non-video stuff.The YouTube bubble seems to only talk about cameras, lenses, and colour grading, and that image quality has to be the highest possible unless you're emulating film. My experience is that there a ton of people who are interested in much more than these things, but they're made to feel unwelcome because there's no place for these things in the camera-industrial complex that camera bro YouTube is a part of.
The world is much bigger and stranger than any of us know 😄
-
8 hours ago, PannySVHS said:
That would make it perfect for my 10mm Cmount, not so perfect in regards of noise in 4K, compared to the GX85. The GX85 hack from @BTM_Pix allowed a forum member to get 200mbps HD running on the GX9. The stock HD is supposed to be very good in regards to resolution looking at the dpreview comparison tool. I am tempted to check this camera out sometime. I still love and use my GX85 btw. The 8bit 4K is indeed amazingly good for what it is and grades better than it should allowed to do in regards of spec sheet numbers. Nice results you are achieving with yours. @kye
I had ruled out the GX9 for some reason, thinking it didn't have IBIS, and then I randomly heard that it did have IBIS and so I got confused about why I had written it off, so hearing about the crop made me wonder if that was potentially the reason.
200Mbps is a great bitrate, especially for HD! I don't recall hearing about this.
56 minutes ago, Anaconda_ said:have you guys seen Spektrafilm? It now has an OFX plugin, and possibly an ios app on the way too, and it's free!
Yes - there's even a thread about it that just started!
I haven't looked at it myself yet, but if it's a one-stop solution for film emulation then it seems promising. I've heard it's pretty slow still, but it's still early days and perhaps optimisations will change that at some point.
For me, and this GX85 Super-16mm film camera project, it was more about the GX85 and me finding a place for it. I have equipment I like, shooting situations / scenarios I prefer to shoot, and images I like, and the goal is to find combinations that work well.
This project has resulted in me successfully discovering and developing the combination of:
- GX85 plus 14mm F2.5 pancake lens at 1x / 2x / 4x digital zoom
- Shooting street scenes in uncontrolled / available light, hand-held, from waist height
- Passable S16mm film camera emulation for gritty images with a strong vibe
I'm actually really heartened by the GX85 and will be testing how far I can push it in other ways. Emulating a S16 camera is a lot easier than a S35mm camera, for example, so I'll see how I go with that. I'm effectively done with the S16 film camera emulation but not done at all with pushing to get the most from the GX85.
-
11 hours ago, MrSMW said:
OK, I have a black one inbound and should be landing tomorrow or Thursday…
I tried to get the LTD version but has to come from PannyBoy direct and they have zero stock, so black it is.
My S9 is still not fixed and I have missed it on the first 3 jobs of the year and with 5 more imminent, can’t wait any longer.
On the off chance my fixed S9 does turn up prior to these next 5 jobs I am away for, I’ll use both as a bit of a test but regardless, probably have a place more now for the L10 until an S9II comes along.
My experience of not having a mech shutter has not been the greatest and the role either of these units is destined for is more photo, so…
Keen to see footage from it, especially compared to other cameras if possible.. 😄
In the event that Panny don't create an MFT version this might be tempting for me at some later point.
-
4 hours ago, PannySVHS said:
Should be the exact crop of the GH5 in UHD Extele mode, which is pixel to pixel and has about a 1.4 crop factor of the Mft sensor. GH5 and GX9 have the same sensor resolution.
So the GX85 has a 1.1x (2.2x compared to FF) and the GX9 has a significantly larger crop despite being newer and the replacement model? That's disappointing!
-
13 hours ago, Ilkka Nissila said:
I find it difficult to believe that worse quality as such is the motivating factor, but a less polished result, a less artificially processed and perfected result may be desirable when one wishes to appear authentic and I do believe a lot of people are tired of the ultra-processed images from mobile phones and editing apps. They may also be tired of commercial images for partly similar reasons: DYI images may look more real and home-made, and somehow more true to the person in the photos, even if not captured by extended arm holding the camera but someone who truly knows the person in the picture. In some cases, commercially produced portraits which often reflect the photographer's tastes and some product or image style that the photographer has found successful and applies to all their clients. Doing it yourself for an authentic feel doesn't mean the quality of the photo has to be poor. Of course, it's possible that some people specifically want a "different" look such as 8 mm film etc. but I don't think this is common or at the core of the issue, the excessive processing and manufactured "perfection" is much more likely to be what triggers a change in fashion (or perhaps I am just wishing that). You may be correct that the smartphone generation sometimes just wants to use something other than their smartphone, that's perfectly understandable and would be a healthy development.
In my mind "high quality" and "smartphone" are difficult to put in the same sentence with a straight face. High quality for some things, yes, but for a lot of things, not good quality at all.
The below video titled "Retro camcorders are EASY to use in 2026 (full guide)" was posted two years ago and has 241K views.
It opens with these shots:
and his first line is "retro camcorders are freaking awesome".
Maybe you're right that getting worse image quality isn't the primary motivator, but if it wasn't then I don't really know how to explain why anyone would be attracted to these camcorders when new/modern ones have all the same advantages of being a single-use device, have great ergonomics, novelty value, etc, but are also far easier to find, far easier to use (and don't require legacy computer interfaces!), are far more reliable, and have much better image quality.
Maybe the draw is that they're old, and therefore that's the novelty, but I've heard people gush over how they love the JPEG look from cameras that have 2MP cameras and the JPGs are hugely compressed and full of artefacts etc.
Here's another one comparing Hi8 vs MiniDV on the basis of the image alone.. 24K views!
It might also be a nostalgia thing, where the image quality is desirable because it's poor, but in exactly the right way.
-
For example, here's a K-pop video that clearly has enough budget for half-decent cameras, but was shot on cheap looking cameras and definitely looks like it:
...and don't think it's a student film or anything, it was posted 6 weeks ago and has 9M views and lists the A&R person amongst the dozen or more people involved in making it!


Thoughts on the tiny camera market (and Kodak Charmera specifically)
In: Cameras
Posted
Yes, the Go is definitely the nearest competitor, but quite different actually.
The Charmera is:
- half the weight: 20g vs 39g (unsurprising given the processing and battery requirements)
- similar in size: it's slightly longer but also thinner
but probably the most significant thing is the Charmera has a screen and the Go doesn't, unless you add the case, but then it's the size of a GoPro again:
The screen is really a differentiator for use, as the Charmera has a 35mm FOV that you compose by looking at the screen, and the Go is a 16mm FOV that you can't compose unless you use an app or "rig" it up with the case. Unsurprisingly, we're back to the fundamental differences between a normal camera and an action camera, only in this case both cameras are much smaller than a normal action camera!
The size is interesting too, as today I took it out with me and it fit nicely into the tiny coin pocket that sits above/inside the normal front pocket of my jeans. If there was such a thing, this would have to be crowned the King of pocketability!
I've fitted mine with a finger strap (not a wrist strap, that would be far too large!) and now testing that as a "minimalist rig". The people that use a keychain (like the one it comes with) only get video where the audio is the sound of the metal keychain links all reverberating through the camera body, so my finger-strap is made from a thin paracord.
I watched a bunch of his stuff when I was first getting into photography and learning the exposure triangle and all that stuff, but I quickly outgrew his content as he seemed to be a very low-maturity "camera club" photographer, who only ever focused on specs and sharpness and practicalities, and when it came to what you did with the camera he seemed to be all about "the rules" and not about creatively breaking them or moving beyond them.
In photography most people resent how the general public think that their expensive camera is what creates nice pictures, not the photographer, but the irony is that most of them don't create work that is really much beyond taking dull formulaic pictures with expensive kit, and Matt was squarely representative of that mindset.