-
Posts
8,068 -
Joined
-
Last visited
Content Type
Profiles
Forums
Articles
Everything posted by kye
-
Thanks. I'm not sure how brave I'd be with a newer and more expensive action camera.. the fact this would be cheap to replace is what makes me feel ok to take these risks.
-

Help me on an eBay hunt for 4K under $200 - Is it possible?
kye replied to Andrew - EOSHD's topic in Cameras
To that end, here's the explanation about resolution vs bit-depth. You can downscale a higher-resolution image to a lower resolution and get some/all of the benefits associated with an increased bit-depth, but only in certain circumstances. The critical factor is the noise / detail in the image. If there is a decent amount of noise then this technique works, but if there isn't any noise or detail then it won't work. You also need to be aware that this detail or noise has to be present at the point where the downsample happens. For example, if you are downsampling in post, perhaps by putting 4K files on a 1080 timeline, then the detail and noise needs to be present in the files coming out of the camera. Therefore, any noise-reduction that happens in camera will limit or eliminate this effect. Any flattening of areas of the image due to compression will limit or eliminate this effect. This is why banding in skies or banding in out-of-focus areas is not fixed by this process, and needs to be captured in 10-bit or higher in the first place. It matters for each pixel in the image and what the surrounding pixels are doing, so you might get varying levels of this effect in different parts of the same frame, depending on the values of that group of pixels. This is one of the reasons why RAW is so good, it gives a really good bit-depth (which is colour depth!) and it also doesn't eliminate the noise in the image, which can benefit the processing in post even further. Some examples: If you're shooting something with a lot of detail or texture, and it is sharply in-focus, then the variation in colour between adjacent pixels will enable this effect. For example, skin tones sharply in focus can get this benefit. If there is noise in the image above a certain amount then everything that has this level of noise will benefit, such as out-of-focus areas and skies etc. Skies from a camera with a poor bitrate and/or noise reduction will not be saved by this method. Skin-tones from a camera with a poor bitrate and/or noise reduction will not be saved by this method either. Details that are out-of-focu from a camera with a poor bitrate and/or noise reduction will not be saved by this method. This is why I really shake my head when I see all the Sony 4K 8-bit 100Mbps S-Log cameras. 100Mbps is a very low bitrate for 4K (for comparison 4K Prores HQ is 707Mbps and even 1080p Prores HQ is 176Mbps - almost double for quarter the pixels!) and combined with the 8-bit, the very low contrast S-Log curves, and the low-noise of Sony cameras it really means they're susceptible to banding and 8-bit artefacts which will not be saved by this method. What can you do to improve this, if for example you are buying a budget 8-bit camera with 4K so that you can get better 1080p images? Well, beyond making sure you're choosing the highest bit-rate and bit-depth the camera offers, then assuming the camera has manual settings, you can try and use a higher ISO. Seriously. Find something where there is some smooth colour gradients, a blue sky does great, or even inside if you point a light at a wall then the wall will have a gradual falloff away from the light, then shoot the same exposure across all the ISO settings available. You may need to expose using SS for this test, which is fine. If the walls are too busy, set the lens to be as out-of-focus as possible and set to the largest aperture to get the biggest blurs. Blurs are smooth graduations. Then bring the files into post, put them onto the lower resolution timeline and compare the smoothness of the blurs and any colour banding. Maybe your camera will be fine at base ISO, which is great, but maybe you have to raise it up some, but it should at some point get noisy enough to eliminate the banding. If you've eliminated the banding then it will mean that the bit-depth increase will work in all situations as banding is the hardest artefact to eliminate with this method. Be aware that by raising the ISO you're probably also lowering DR and lowering colour performance, so it's definitely a trade-off. Hopefully that's useful, and hopefully it's now obvious why "4K has more colour depth" is a misleading oversimplification. -

Help me on an eBay hunt for 4K under $200 - Is it possible?
kye replied to Andrew - EOSHD's topic in Cameras
I'm sensing things here too, but it's not irony. Ah, now we've changed the game. You're saying that the resulting downscaled image will have the same reduced colour depth as the original image. This is not what you have been saying up until this point. You said that "4K has 4 times the color depth (and 4 times the bit rate) of full HD" which implies that I can film a 4K 8-bit image and get greater colour depth than FHD 8-bit, but now you're saying that the resulting downscale to FHD will have the same limitations to colour depth, which completely disagrees with your original statement. Correct. Which is why "4K has 4 times the color depth (and 4 times the bit rate) of full HD" is a fundamentally incorrect statement. I shoot with 8-bit, I get colour banding. I shoot with 10-bit, I don't get colour banding. Seems like it has everything to do with the colour depth of the resulting image. Please provide links to any articles or definitions (or anything at all) that talks about how colour depth is different to bit depth, because I have looked and I can't find a single reference where someone has made the distinction except you, who it seems suspiciously like you're changing the definition just to avoid being called out for posting BS online. Then explain it simply. I have asked you lots of times to do so. The really sad thing is that there is some basis to this (and thus why Andrew and others have reported on it) and there are some situations where downscaling does in fact have a similar effect to having shot in an increased bit-depth, but you are not explaining how to tell when these situations are and when they are not likely. Making assertions that resolution can increase bit-depth but then saying that banding will still occur is simply disagreeing with yourself. For those having to read this, firstly, I'm sorry that discussions like this happen and that it is so difficult to call someone out on them posting BS misleading generic statements. The reason I do this is because as I've learned more about film-making and the tech behind it, the more I've realised that so many of the things people say on forums like these is just factually incorrect. This would be fine, and I'm not someone who is fact-checking 4chan or anything, but people make decisions and spend their limited funds on the basis of BS like this, so I feel that we should do our best to call it out when we see it, so that people are better off, rather than worse off after reading these things. -

Help me on an eBay hunt for 4K under $200 - Is it possible?
kye replied to Andrew - EOSHD's topic in Cameras
You're really not getting this.... Let's revisit your original statement: So, if 4K has 4 times the colour depth, then downscaled to FHD it should be equivalent to FHD 10-bit. When I shoot a 4K 8-bit image and get banding in it, and downscale it to FHD, why does the banding remain? If I took the same shot in FHD 10-bit, there is no banding, so why doesn't the banding get eliminated like you've claimed in your original statement? -

Sigma EVF-11... Looks like a masterpiece of design to me
kye replied to Andrew - EOSHD's topic in Cameras
I don't think we can tell. The USB port is connected, so it could easily be going through that. It depends on how the camera is designed, but it might have the ability to scale the image within the camera, in which case it could be sending an EVF resolution version through the USB and then a full-resolution through the HDMI. Or the EVF could be taking the feed from the HDMI, downscaling it, and putting the OSD on top of it (talking to the camera about what OSD things to display through the USB) which wouldn't pollute the HDMI image. It really depends on how they've implemented it, but I guess my point was that it's possible they're all independent. -

Help me on an eBay hunt for 4K under $200 - Is it possible?
kye replied to Andrew - EOSHD's topic in Cameras
You're making progress, but haven't gotten there yet. Please explain how, in an 8K image with banding, an area with dozens/hundreds of pixels that are all the same colour, somehow in the downsampling process you will get something other than simply a lower resolution version of that flat band of colour? -
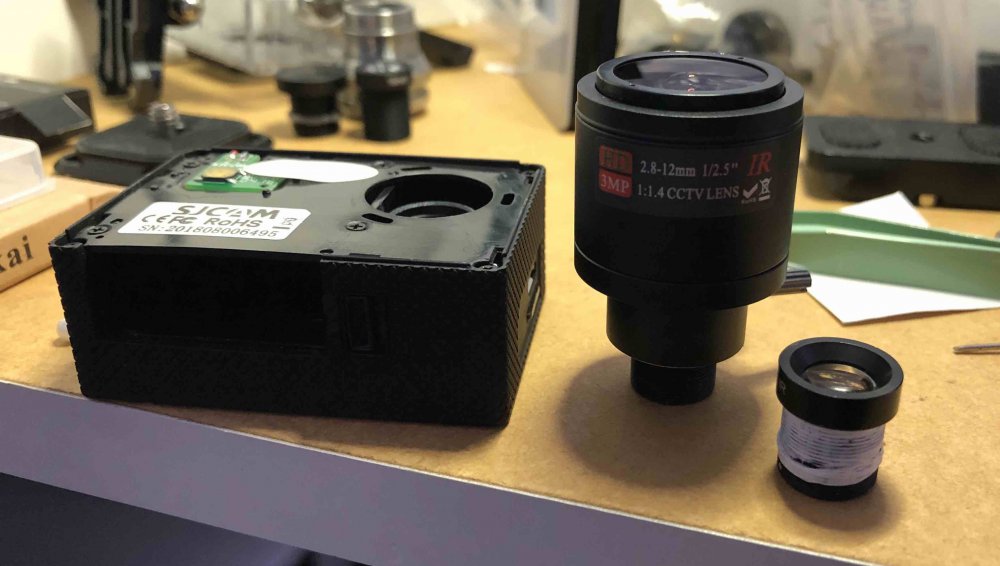
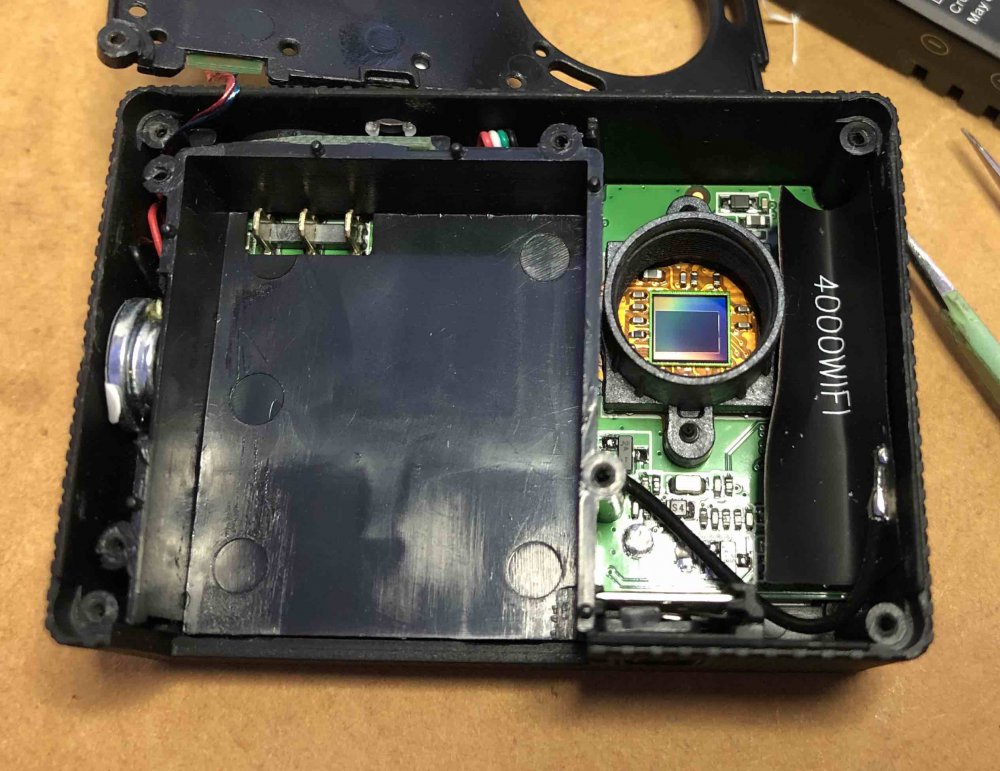
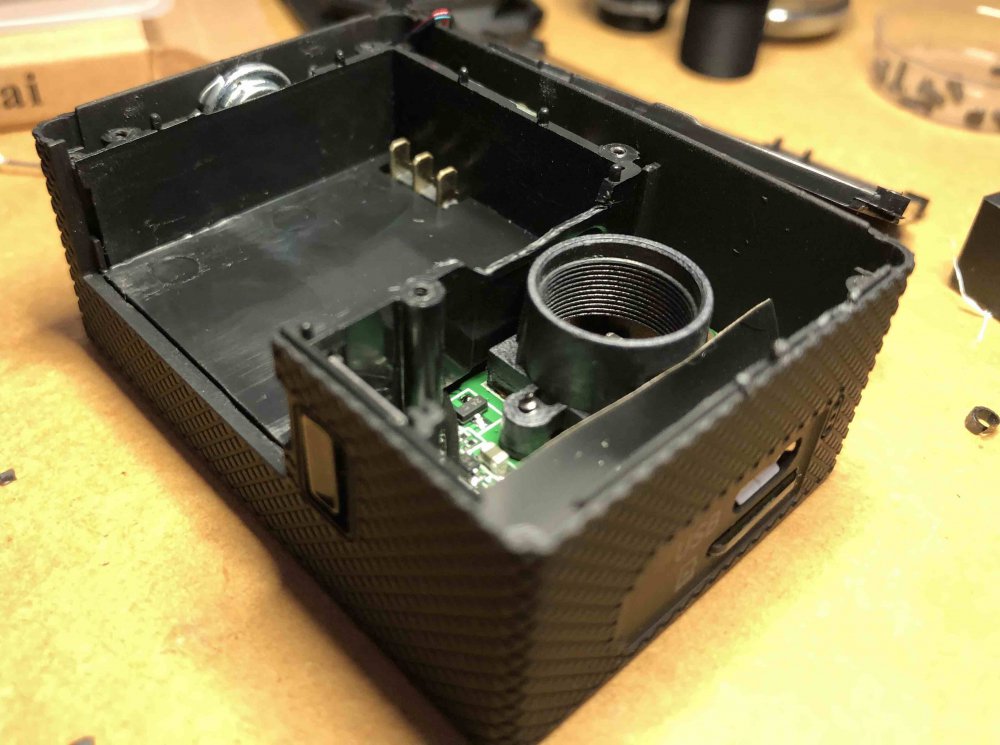
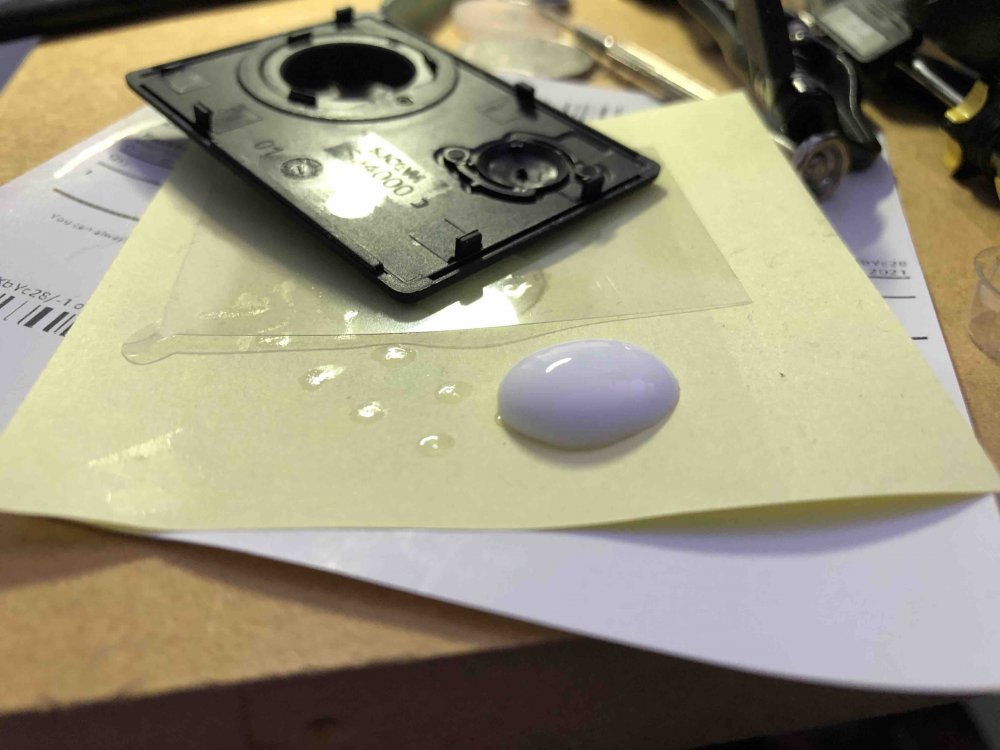
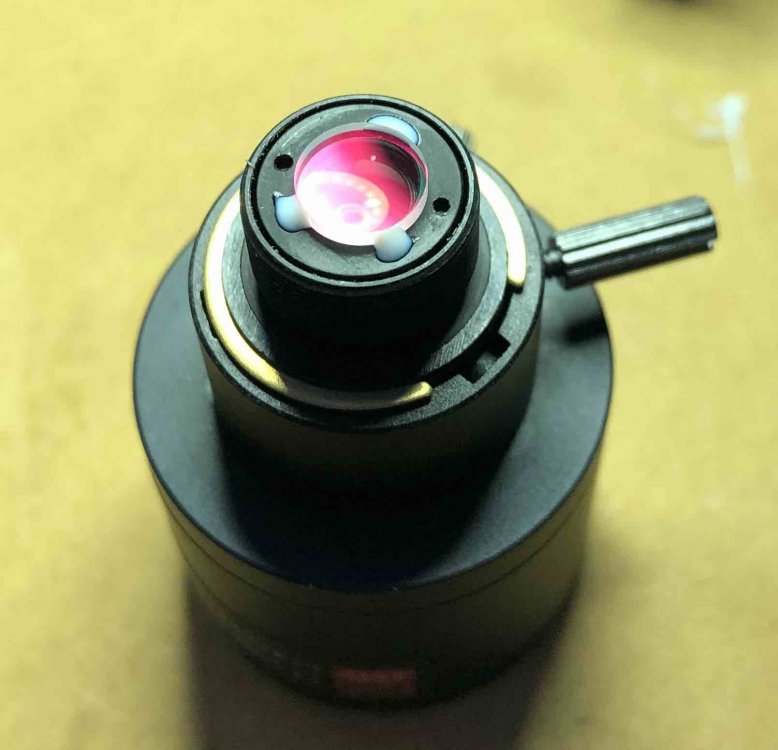
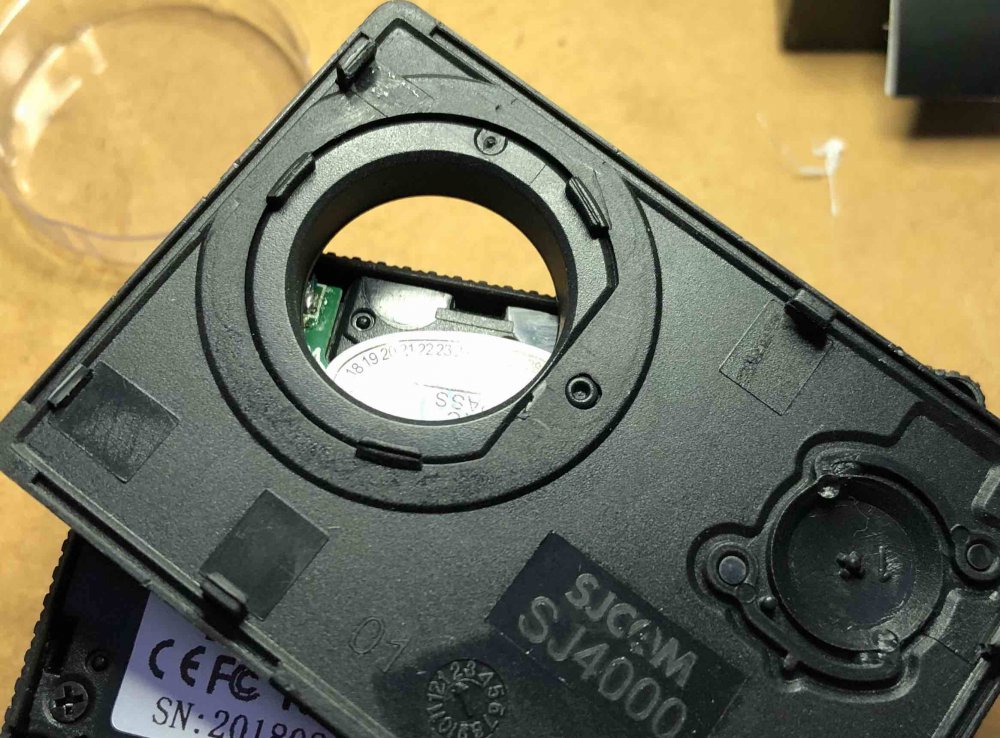
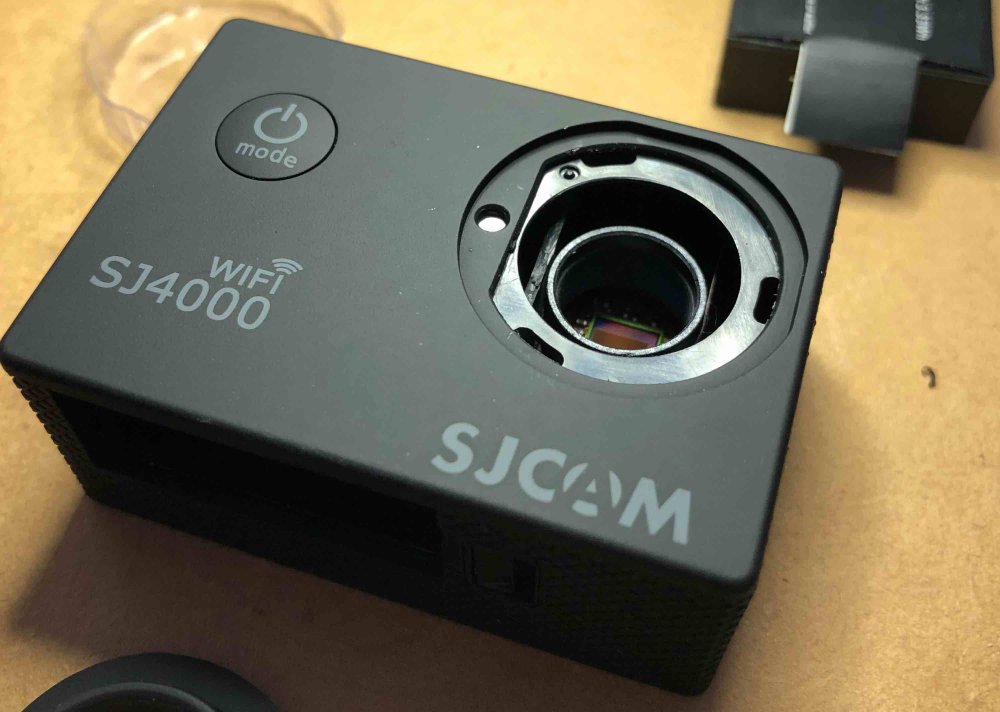
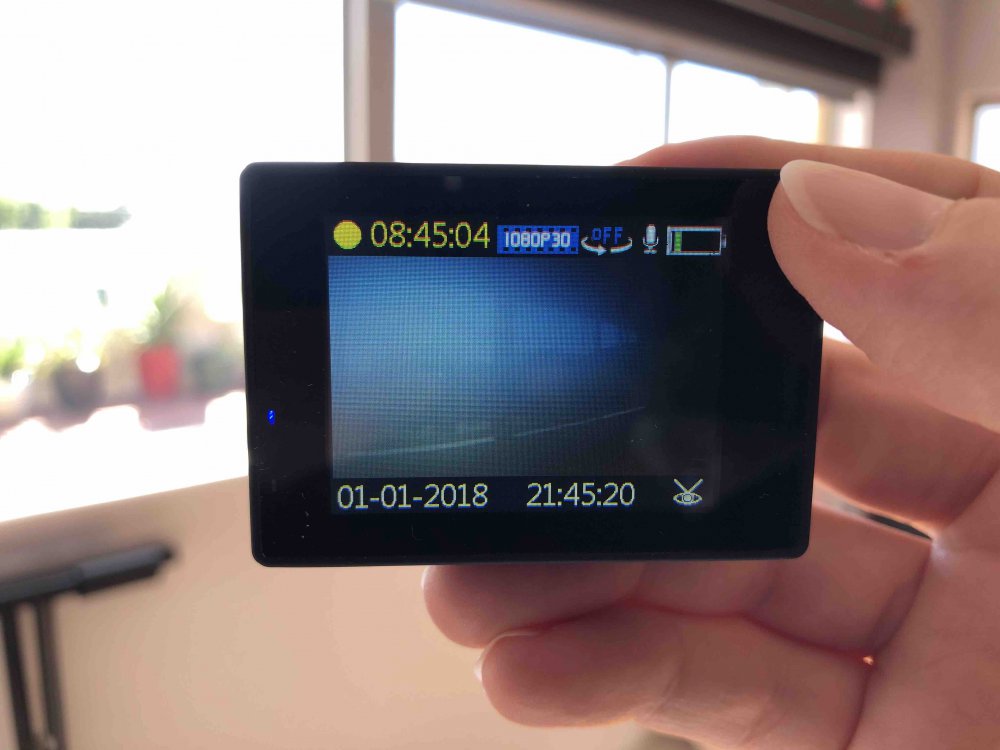
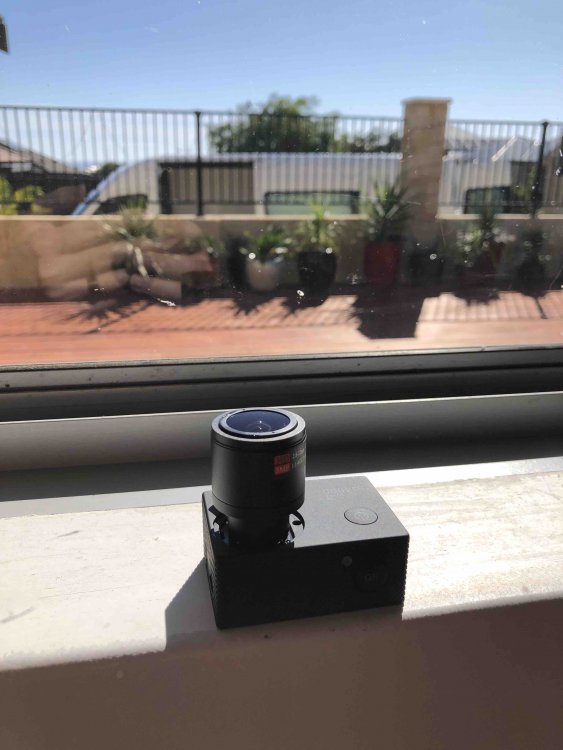
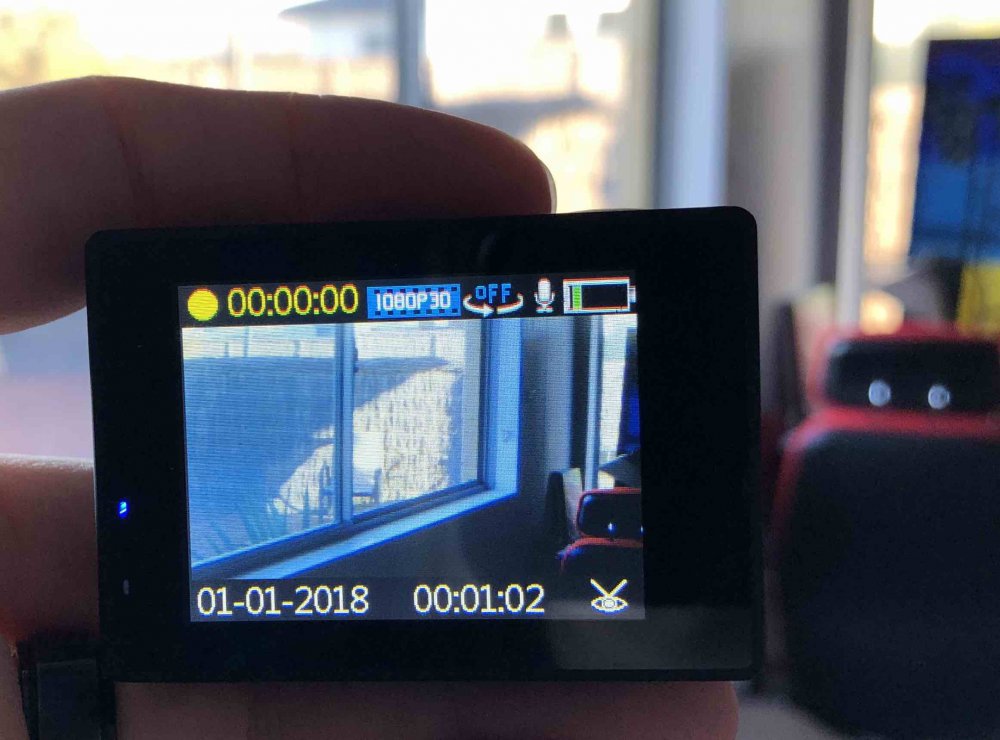
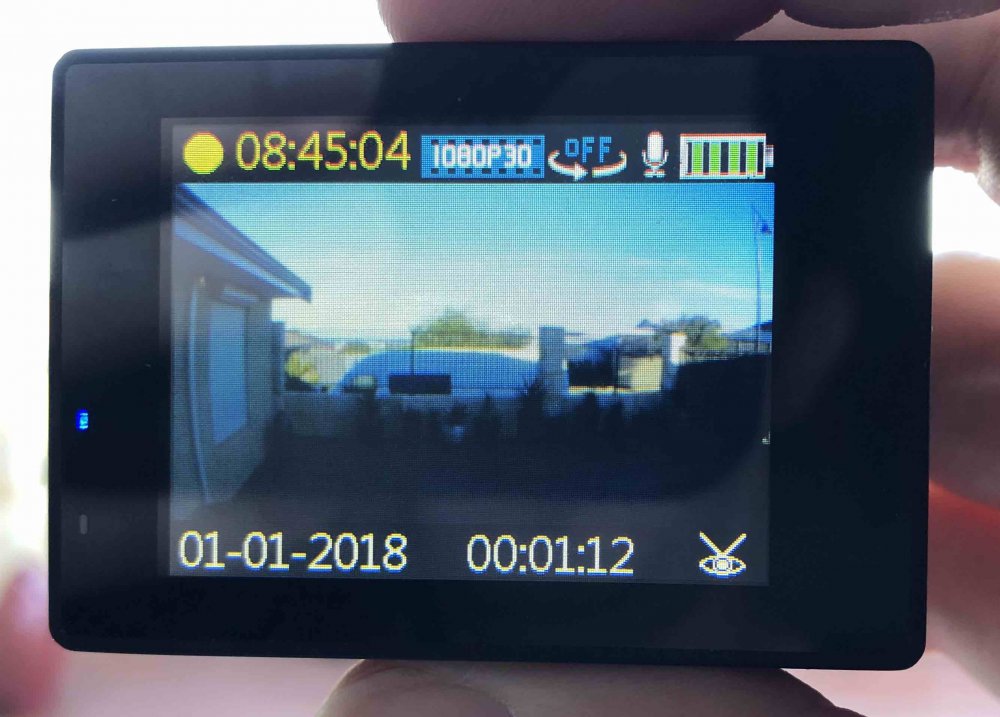
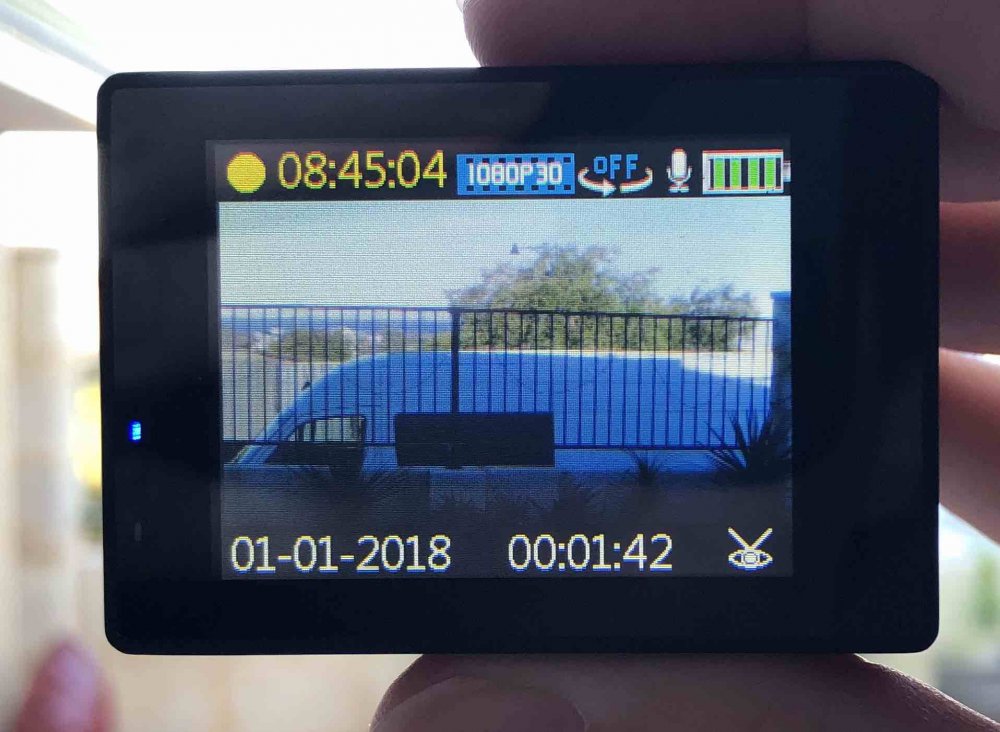
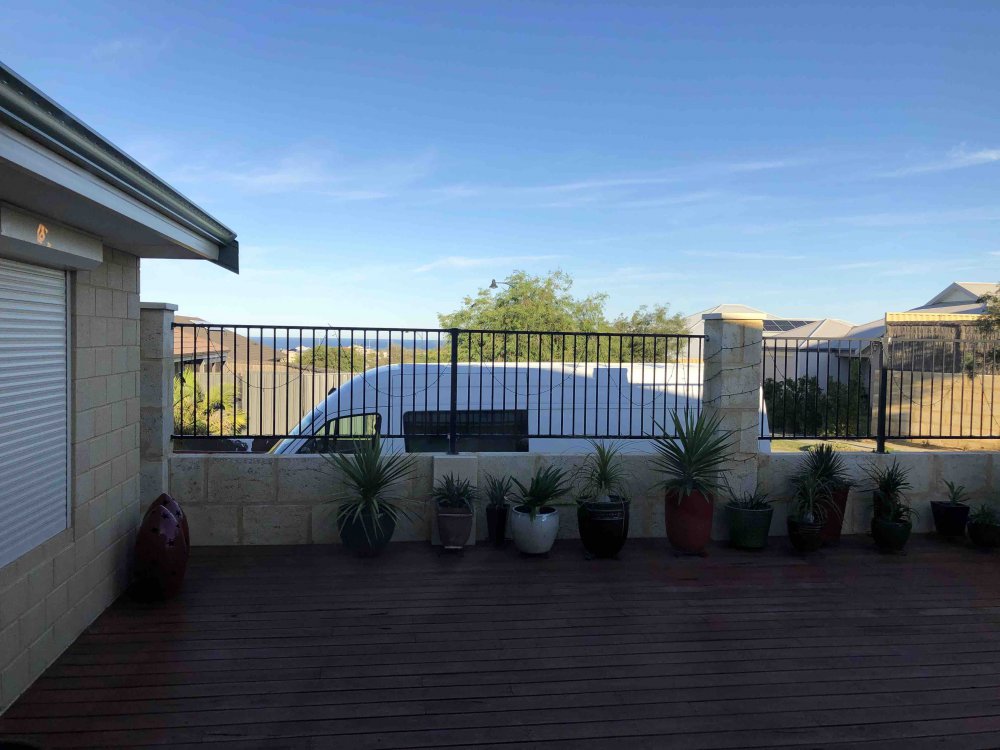
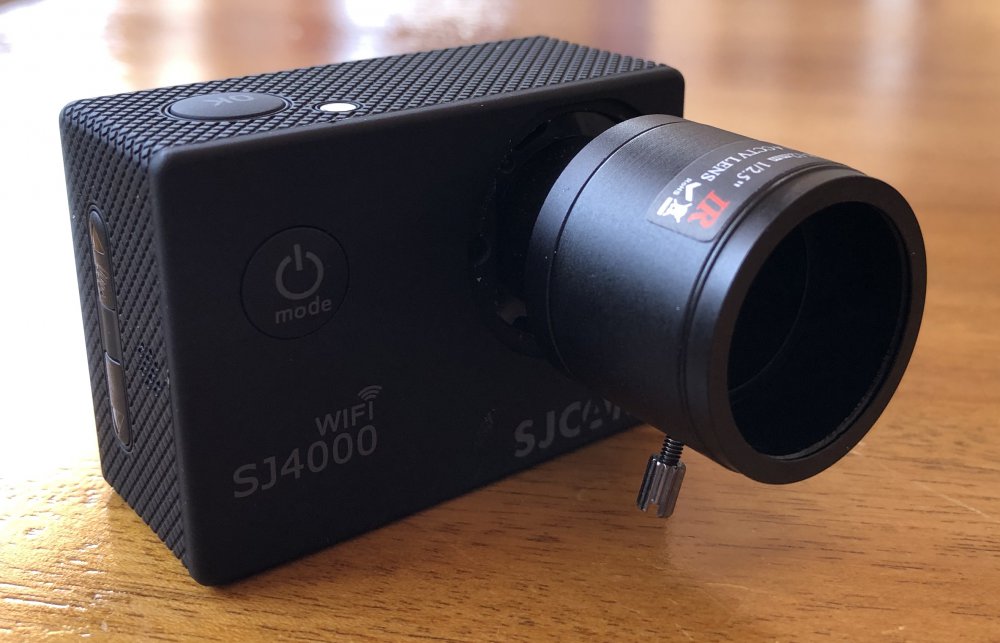
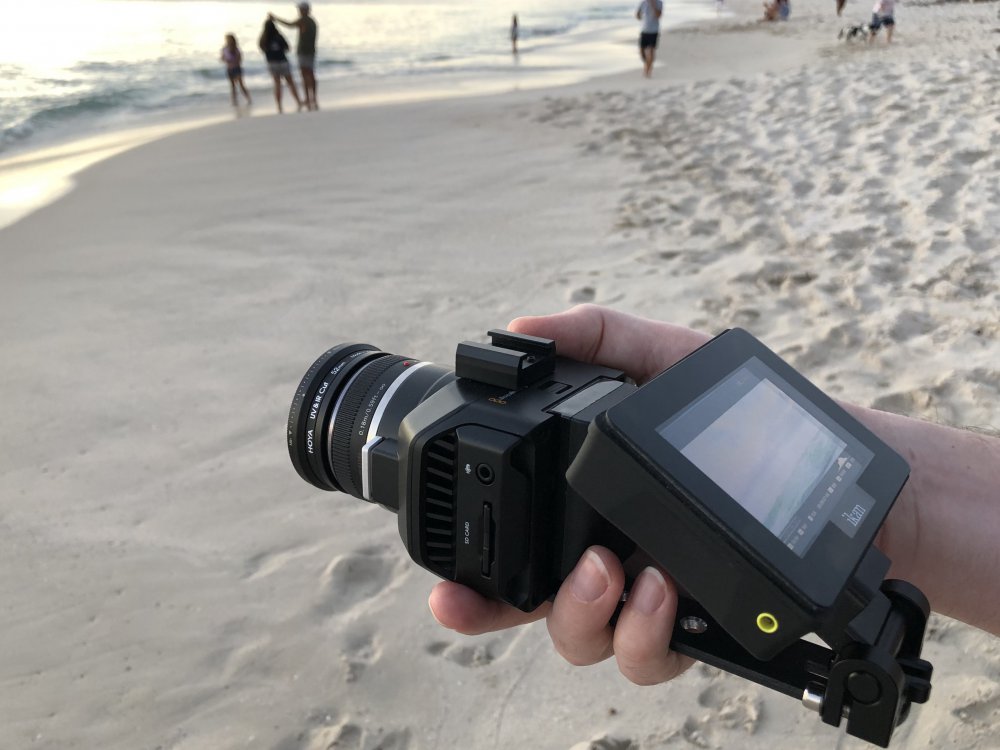
An update... My 2.8-12mm zoom lens arrived and I've completed the mods. It's a nail-biting tale of daring and disaster, but as sure as Hollywood using action cameras with zoom lenses, has a happy ending nonetheless. First impression was that the envelope with the single layer of bubble wrap that was protecting the lens had lost its air long ago, probably while still in mainland China, but concerns of damage were quickly alleviated when I discovered this this is a beast, is heavy, and is made completely of metal. It's also somewhat larger than I anticipated.. here it is next to the camera and existing 8mm lens: I put it onto the camera and couldn't get focus, even if I screwed it all the way in. Naturally, my first impression was to take the camera apart, and modify it to get infinity focus, however it later turned out that this was wrong, and that I had screwed the lens into the camera too far, but back to me going down the wrong path... Camera in pieces: The bit I chopped off thinking it was the only barrier between me and cinematic goodness: It was around this time I realised my error, and that the lens got good focus (across the whole zoom range) with only 2 turns of the lens into the mount. This meant that clearance between the rear element and the sensor wasn't in danger, so I installed the IR Cut filter onto the rear element of the lens. Luckily this lens had a flat rear-element, which made getting the IR filter also flat quite a straight-forward process. I found success with the previous lens by using PVA woodworking glue, which dries clear and holds the IR filter securely (which I accidentally tested by dropping that lens ~1m onto a tiled floor and it stayed on just fine!), so here's the filter: I applied the PVA with a pin and I find that if you give yourself a big lump of glue then you can tell how quickly the glue dries by watching your lump dry, which isn't required in this case but is useful if you glue somewhere that you can't see: Next job was to modify the front plate to allow the lens to sit where it needs to. In this case the front part that clips in needs to be removed: It comes out easily and looks like this when mounted back on the camera: You can see that the mount in the camera is only plastic, which is quite concerning for robustness, but it also presents another problem, which is that the focus and zoom controls on the lens are stiff in parts of their range, and the lens would rather twist in the mount rather than adjust, so my previous trick of putting plumbers tape into the threads did nothing. This is where the story takes a turn - I decided to glue the lens into the mount. I did this for a few reasons. Firstly, this lens give the focal range I need and so I wouldn't need to change it ever again. Secondly, it will help resist turning in the mount, and will also make the whole thing more robust. In terms of risks, I figured that if I needed to remove the lens for some reason I could potentially break the seal on the glue and get it out. If that didn't work then I might break the lens thread in the camera, but maybe not enough to prevent other lenses being used that go deeper into the camera (the previous 8mm lens I had in there went in quite a way). There was never going to be damage to the new lens as it's all metal, including the mounting threads. Worst-case is I kill the SJ4000, which was under $100, and could be replaced. So, I went for broke, and put in quite a lot of glue, both onto the lens and the mount. I made sure to dry it lens-down so that any squeeze-out would drop down the outside of the lens rather than on the inside of the lens mount and potentially onto the sensor. I waited until my lump of glue was completely dry, and then put a battery in and fired up the camera. Disaster. You will note that the windowsill is in focus, so the diffusion is not from poor focus. I suspected some kind of haze from the glue, considering it was fine with the lens installed prior to my glue-up. I have a theory about haze. If something can become a gas and then solidify onto a surface, then it must be able to become a gas again and everything that condensed should evaporate again leaving a clean surface. Assuming that it doesn't perform a chemical reaction or anything. I thought that PVA is water-soluble, so I figured that the haze could simply be condensation, considering that the little chamber between the lens and sensor would have been where a lot of the water would have gone. First attempt to cure it was the late afternoon sun: I pulled the battery and SD card after taking this shot, to remove power and the possibility of them being damaged, and to also let more air in and out via those openings in the case. After sunset I fired it up again and the haze had turned into evenly spaced strange little globs, maybe 10 across the width of the sensor. I didn't get a photo of that, but I thought that movement was good, showing that whatever it is isn't stuck there forever. I left it there overnight and thought I'd contemplate the next strategy the next day. The next morning..... BINGO! Like a phoenix rising from the ashes! I suspect dry air from the air-conditioning gave it the time required to dry out. So, having flirted with disaster but avoiding peril with great skill luck, what do we now have? FOV at wide end: FOV at long end: iPhone 8 FOV: My completely non-scientific analysis suggests that it's about equivalent to an 18-60 lens, and the f1.4 aperture should mean that exposures are good until the light gets low, which is good because the sensor is likely to have poor ISO performance. So, how is it to use? Well, if there was a competition for least par focal lens in the world, this would be my nomination. Each end of the zoom range has its infinity focus setting at each end of the focus range, and if you go from being in focus at one end of the zoom range and take the zoom adjustment to the other end then the bokeh balls are 1/6th the width of the frame (I did measure that) so it's not a subtle effect. I checked if the zoom and focus rings should be locked together but they deviate slightly over their range. The locking pins are useful for controlling the zoom and focus, but if you screw them in completely then they lock the controls, so I'm thinking that I should glue them in place so they're solid. I'll have to be careful not to get glue into the mechanisms but that shouldn't be too hard. So, how the @#&@#$ do you focus using the 2" 960x240 LCD screen? Why, by using the up and down buttons on the side to engage the 4x digital zoom function of course! In terms of natural diffusion and flares, the lens also looks promising, and I've already noticed a round halo if you put a bright light in the centre of frame, so that should be fun to play with. There's probably little chance of this lens ending up in the clinical lens thread! I've matched the colours to the BMMCC via the test chart, so already have a nice post-workflow for it too. I haven't shot anything with it, but will do soon, and considering its size it should be quite easy to film in public without drawing too much attention. So, is it a pocket cinematic beast? Only time will tell.
-

Help me on an eBay hunt for 4K under $200 - Is it possible?
kye replied to Andrew - EOSHD's topic in Cameras
No. Colour depth is bit-depth. The wikipedia entry begins with: Source: https://en.wikipedia.org/wiki/Color_depth -

Help me on an eBay hunt for 4K under $200 - Is it possible?
kye replied to Andrew - EOSHD's topic in Cameras
Actually, no. You've managed to build half of an understanding of how these things work. Answer me this - if I take a camera and shoot it in 8-bit 800x600 and I shoot the sky and get banding, then I set the same camera to 8K 8-bit and shoot the same sky, why do I still get banding? Your newspaper example is technically correct, but completely irrelevant to digital sensors as the method of rendering shades of colour is completely different. -
They may actually be correct. If we were able to analyse the focal length of every second of video watched by everyone in the world ("person viewing seconds" as it were) and look at what the most popular focal length was, it would likely be around 24, just because of the amount of content that is shot on phones (and kit zoom lenses also add to that but probably don't tip the balance). Selfie culture has really made a huge impact on how people see themselves too. A huge percentage of my female family and friends don't like me shooting video or photos of them because of what the "longer lens" does to them - ie, the wide-angle distortion from taking a selfie at arms-length that they use to make themselves look thinner / cuter is absent, but because they've gotten used to the distortion they think my lenses "do" something to them rather than understanding that their selfie camera "does" something that my lenses do not do.
-

Help me on an eBay hunt for 4K under $200 - Is it possible?
kye replied to Andrew - EOSHD's topic in Cameras
Actually, the entire point of my post is that there are complexities to the equation that your statement does not acknowledge. Sure, you added a "all other variables" disclaimer, but the point is that those "other variables" are actually the ones that matter and the resolution makes almost no difference at all, so much so that I'd say it's sufficient to render your statement so overly simplified that it is basically wrong, but regardless, it's misleading and distinctly unhelpful. Unless you're just trolling? -

Sigma EVF-11... Looks like a masterpiece of design to me
kye replied to Andrew - EOSHD's topic in Cameras
Great looking EVF, and I'm very curious about the FP-L and FP (maybe it will get improvements via firmware?)... It would work the way that any camera works. The basic logic must be that the image is taken from the sensor and processed, then for each display (eg, the screen or EVF or video-out) it must be processed separately considering that each one will be a different resolution and have different needs for the OSD etc. If you only had one processor that resized the image and added the OSD then it would only be able to show the image on the output OR the screen, or can't show it on the EVF and the screen simultaneously, etc. -
I guess this is really my question. I am in a strange place where I know that most of YT film-making 'knowledge' is actually BS and that the techniques the pros use for things like exposure and post-production is really the way to go, and also that I am interested in learning more about shooting, specifically when I find myself out shooting how to look at a situation, where to put the camera, how to move it, and in editing which shots to use and in what sequence. However, I shoot in a more observational style where I shoot real events, I (almost) never direct, I shoot in only available light, and am often given very limited options as I have to participate in what is happening ("you must remain seated when the bus is moving!"). So I have no use for discussions about how to direct, or how to build a set, or how to choose lights, or what the historical context is in the 14th century Ottoman Empire, or how some actor stood on their head for 20 hours a day to prepare for their role as a lamp-post, but I am very interested in everything to do with the camera, camera equipment, and how to use it both technically and creatively, as that's the part I do have control and options. I'm also not particularly interested in hearing about what people do just because they're famous. Once I found that I was stuck on the STORE.ascmag.com website and went to the normal one must more things made sense! I was thinking "man, this website really sucks" lol
-
Lots of them seem to be around on Ebay.. they're not cheap though.
-
I'm tempted, but not really sure what their style and content is.. are there sample issues or articles around that best showcase what you're buying?
-
Anyone watching the P2K sales on Ebay will realise these things are going up in value like a Banksy going through a shredder...
-

Help me on an eBay hunt for 4K under $200 - Is it possible?
kye replied to Andrew - EOSHD's topic in Cameras
I've previously celebrated the benefits of FHD shooting, but a very large caveat to that is that the codecs really have to support those modes, and unfortunately on newer cameras this often doesn't seem to be the case. It doesn't matter how many pixels there are, if you're projecting / viewing the total image on a screen the same size regardless of the resolution, then having a FHD mode with dramatically less bitrate than a 4K mode will just look inferior. For example, comparing a 100Mbps 4K codec with a 35Mbps FHD technically has more bits per pixel in the FHD mode, but it actually just has a third the bits over the whole screen, plus any artefacting on the 4K one at the pixel level will also be smaller. If anyone is considering trying to get the best results from cheaper cameras that can shoot 4K then the strategy is probably better to shoot in 4K, even if you're putting that footage onto a 2K / FHD timeline. Plus, with the computers and storage we have in recent years, most cameras that only shoot FHD probably have such a low bitrate that a more recent 4K image downscaled would be a better bet anyway. Of course, unless you're looking at a camera that really stood out and optimised it's FHD modes. -
The purpose of any lens used for film-making (as opposed to scientific or measurement purposes) is to look good, so I would suggest that a lens that looks bad is bad.
-
The thing I was very surprised by, when I watched a video showing techniques like this, was how little elevation it takes to get a drone feel. They had a follow shot and the person went from a standard eye-height shot to holding it up above their head and the shot instantly transformed into a drone shot. It was a very odd experience, having just watched the shot start at eye-height and rise up in one take and while watching a synchronised BTS angle in the corner, to have some part of my brain spontaneously decide that the camera had changed. I took a note of that at the time to do more overhead shots with wide lenses (which for me is my action camera) while I'm on my trips. It really was a very cool effect. A 30-foot pole would be able to create some spectacular angles!
-

Sony Semiconductor Readies a Wave of New Stacked Sensors
kye replied to androidlad's topic in Cameras
Couldn't agree more. I asked the question in another thread and the response was overwhelmingly that the sensors don't matter, and yet, I'm sitting here after grading another test from the Micro and wondering what everyone else is smoking. I think unless you've graded ML, P2K/Micro footage, or Alexa footage, you probably just don't know what difference it really makes. I've felt like I was fighting with the footage from my various ill-suited cameras, then I got the GH5 and felt like I wasn't fighting with it anymore. The thing is that there's a big difference between not fighting, and the feeling where the footage just comes alive as you adjust things in post, but where instead of there being a sweet spot where things look right, everything looks right but different and the sweet spot just looks spectacular. Panasonic could be the people to finally make the successor to the OG BMPCC... -
Yeah, sounds like that might be it. When I first got my GH5 I tested the time-lapse mode, then couldn't for the life of me work out how to turn it off. I googled and watched videos but no-one was talking about it. Eventually I found something that reminded me there was a third dial on top of the camera and one twist and I was all good again. Something as powerful as the GH5 with all the deep menu settings takes a while to work out all the modes and various combinations and limitations!
-
It's a thing, but you have to remember the sensor isn't the camera. For example, the Canon XC10 has a 1" sensor, but has a 24-240mm equivalent fixed lens, shoots up to 305Mbps 4K 8-bit footage with C-Log internally, and has a very long battery life. The ergonomics are spectacular, and is has a fan to keep it cool, which it needs because it has the image processor chip that Canon don't put into their DSLR/MILC cameras. Another example is the Sony RX10ii which has a 24-200mm f2.8 lens. These cameras had their weak points, the most notable being that the lenses were fixed and didn't offer much shallow DoF due to the crop factor, but I very much doubt that anyone anywhere was thinking they'd be replaced by something with no zoom, terrible ergonomics, no articulating / flippy screen, and a battery that can barely run the screen for a few hours on a (non-replaceable) battery charge, without even processing video.... Would a smartphone with a 1" sensor replace a device with a tiny battery, non-articulating screen and single tiny prime lens? Maybe, but their days were numbered anyway. Of course, it might take longer than you'd think - the wide camera on the iPhone doesn't remotely compare to a GoPro, despite using broadly the same sensor size.
-
Firstly, I don't think there is clinical in a bad way. Clinical is the absence of aberations. Aberrations can be bad, like excessive CA (I suspect this might have the least fans of the aberrations?) but barrel distortion is favoured and sought after. You also have to be careful conflating depth with other things. The Takumars are lovely lenses, have beautiful rendering, lovely diffusion from their coatings, but are notably flat and not 3D looking. In that sense, a more neutral lens might have more depth... I've never been a fan of swirly bokeh before either, however I think there's an interesting element to it. Firstly, the aberrations of anamorphic, which some associate with classic cinema or being "cinematic", includes things being compressed horizontally at the left and right edges of frame. Also, the bokeh is taller than it is wide. When you take a lens with swirly bokeh, the bokeh on the very left and right of frame has that taller-than-it-is-wide shape, so can be associated with the anamorphic look. Of course, it could also be associated with that "I've eaten something very poisonous and I'm about to pass out" look, that personally, I don't find all that appealing and aren't looking to include in my videos. Secondly, the lenses that swirl are almost always vintage lenses. Vintage lenses are known for having more diffusion from their less-modern coatings, as well as other pleasing aberrations, so much so that I suspect the love of the swirly bokeh look can't really be isolated from the love of a more vintage look in general. I've just received my Tiffen Black Pro Mist 1/8 filter and did a quick and very unscientific test comparing my Helios+SB combination on MFT (so getting some but not all of the image circle) with my Voigtlander 42.5mm f0.95 lens, both with and without the BPM filter. I tested at f0.95, f2 and closed apertures with a very bright point-source light in frame (my phone in torch mode). First impressions are that the Helios has a stronger diffusion than BPM 1/8, at least towards the edges of frame, the Helios doesn't gain contrast as you stop down but the Voigt does (it has a lot of diffusion wide open and very little by f2). Overall the BPM filter goes a long way to mimicking the diffusion qualities of the Helios. Of course, the bokeh, flares, and sun-stars, etc are all completely different.
-
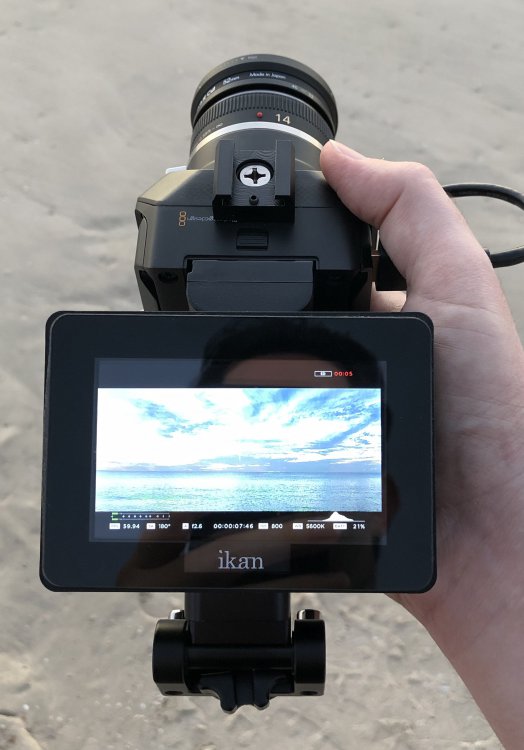
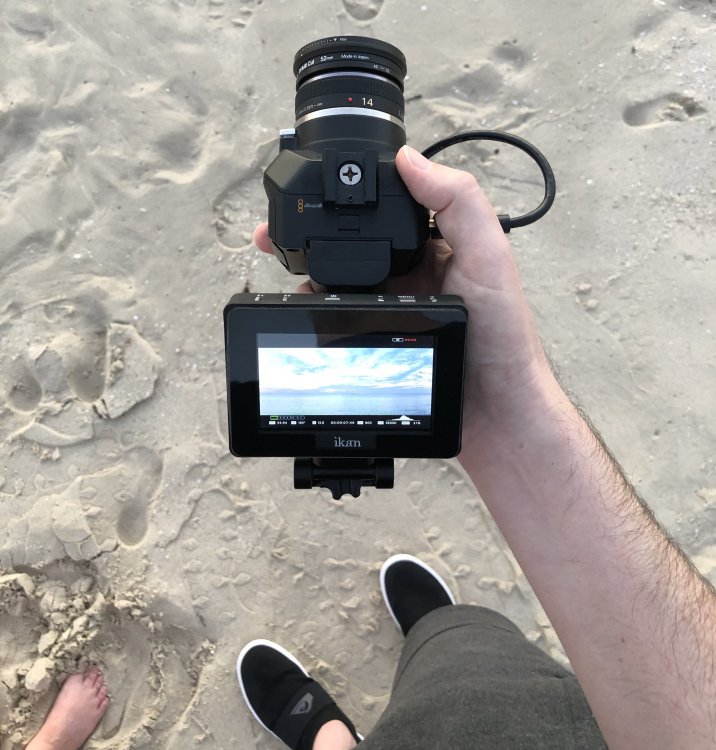
I've used this rig lately and I'm really liking it. It makes the Micro feel a lot smaller while still having a monitor.


