Anaconda_
-
Posts
1,527 -
Joined
-
Last visited
Content Type
Profiles
Forums
Articles
Everything posted by Anaconda_
-
Sure, if that's what you shoot, it's the wrong tool. But if you're filming live music and use this to send the signal from the recorder/mixing desk, which don't move at all, to your camera for better audio on the source clip, it's an almost perfect tool. Or if you just want to clip the built in mic onto a family member during a vacation. Or clip it on the seatbelt while someone is driving. Slip it in the Groom's top pocket at a wedding. This doesn't fill any holes in the market, and may well introduce issues in some types of productions, but for many others it's great for a low budget entry into wireless audio. I've been using it for a week or so, and while I did plug a lav into it sometimes, it's just very easy to give someone the builtin mic and clip it in a way that it's hidden from view. For my uses, this is much more versatile than many other systems.
-
Wow! It looks cool and could be useful, but it's only really for mega-high end cinematographers. I feel like it's overkill for anyone who doesn't use a jetpack on set.
-
I heard the Osmo Pocket is supposed to shoot h265 in the future. But I’m not sure how much to trust it. Personally I don’t believe it.
-
Well sure, but things like mic selection and placement aren’t dependent on the recorder you use. Levels are highly dependent on the recorder, it’s preamps, built in limiter etc etc. all of which you can forget about with this... it seems .
-
There is already a bracket to mount it under a camera, but I'm not sure if it's included or an optional extra. It is definitely possible though. Great for panel discussions and multi-person interviews. Slight side-step, and not really related, but what I've started doing while recording live music though, is have all the instruments go into my recorder, then plug the Rode Wireless Go into the output and send the signal to my camera. It really makes it great for syncing after I've mixed the recordings, but also helps when playing back for the artist, so they can hear their performance better than they could with the in-cam mics. Mounting the recorder under the camera would provide the same end result, but will also limit your movements (should you want to move of course).
-
My understanding is, you don't need to be with this. Plug everything in, press record and then get your levels right in post. (obviously not good working practice - at least try and get them right in the box)
-
The test sample here is pretty amazing, and the explanation of how it works is also very interesting. I also like how it runs on NPF batteries as well as AA. Not sure on the menus though.
-
Another thing the XT30 has over EM10III and GX85 is a mic input. Especially with the Rode Wireless Go fitting right into the pocket rig sizing.
-
I feel like if they included 4k60p it would have sold a hell of a lot more. I for sure would have bought one to replace my walk about camera. I'm still kind of hoping it'll be in a firmware update, in the same way 4K was in an update for the XPro 2. I'm loving mine too, and it's so easy to pass to someone with no prior experience of cameras without overwhelming them even a little bit. The only downfall for me is the price of the audio input jack. I'm refusing to buy one for now, hoping someone will make a 3rd party version that works. Of course, DJI couldn't care less about my protest and the only person it's affecting is myself... So not sure how much longer I'm willing to fight.
-
I don’t wish to derail the topic, but I wouldn’t use the GX80 as an A cam, but for many reasons beyond the IBIS. I would for sure, and people regularly do use a GH5, for example. My point was IBIS isn’t only good for your mom. It’s a tool that can be used to great effect in all kinds of productions, from private videos with your wife that nobody else will ever see, to globally distributed films and anywhere in between. Speaking of tools and your wife - at the end of the day, it’s all about how you use it, and putting it under the blanket of ‘it’s rubbish’ doesn’t help anyone.
-
Despite what I'm going to say below, if I had to choose between the two cameras here I'd go for X-T3 and put it on some kind of mount to lock it onto my body for stabilisation. Blanket statements like that annoy me. It 100% depends on how you make your money. There are people with more money than I will ever have making YouTube videos and they sure as hell love IBIS and AF. I work in TV and the few shots I've used that have been shot with IBIS (GX80 as a C cam) have had a lot of praise from 'Knowledgeable people scrutinising it'. Even when matching it to an FS5/LS300 on sticks. Would I use it as an A-cam? No way, but the IBIS allowed me to get a shot I would have struggled with if I tried to use the other cameras. It's a very valuable tool, just like the microphones, lenses and lights you pack.
-
I'm not sure why this keeps being said. I set BOTH clips (h265 AND ProRes) to FULL LEVELS and they matched in 16b3.
-
Just to clarify, my test was also in Resolve 16b3 with both files set to Full levels, and they matched according to the charts in the colour tab.
-
I didn't transcode anything, this is the OG files directly into Resolve.
-
Those stills look great, but if you turn all the lights off, zoom in to 500%, strain your eyes and sit 2 inches away from the screen, the image really falls apart. Such a shame because the camera was so close to being perfect, but it's really just overpriced.
-
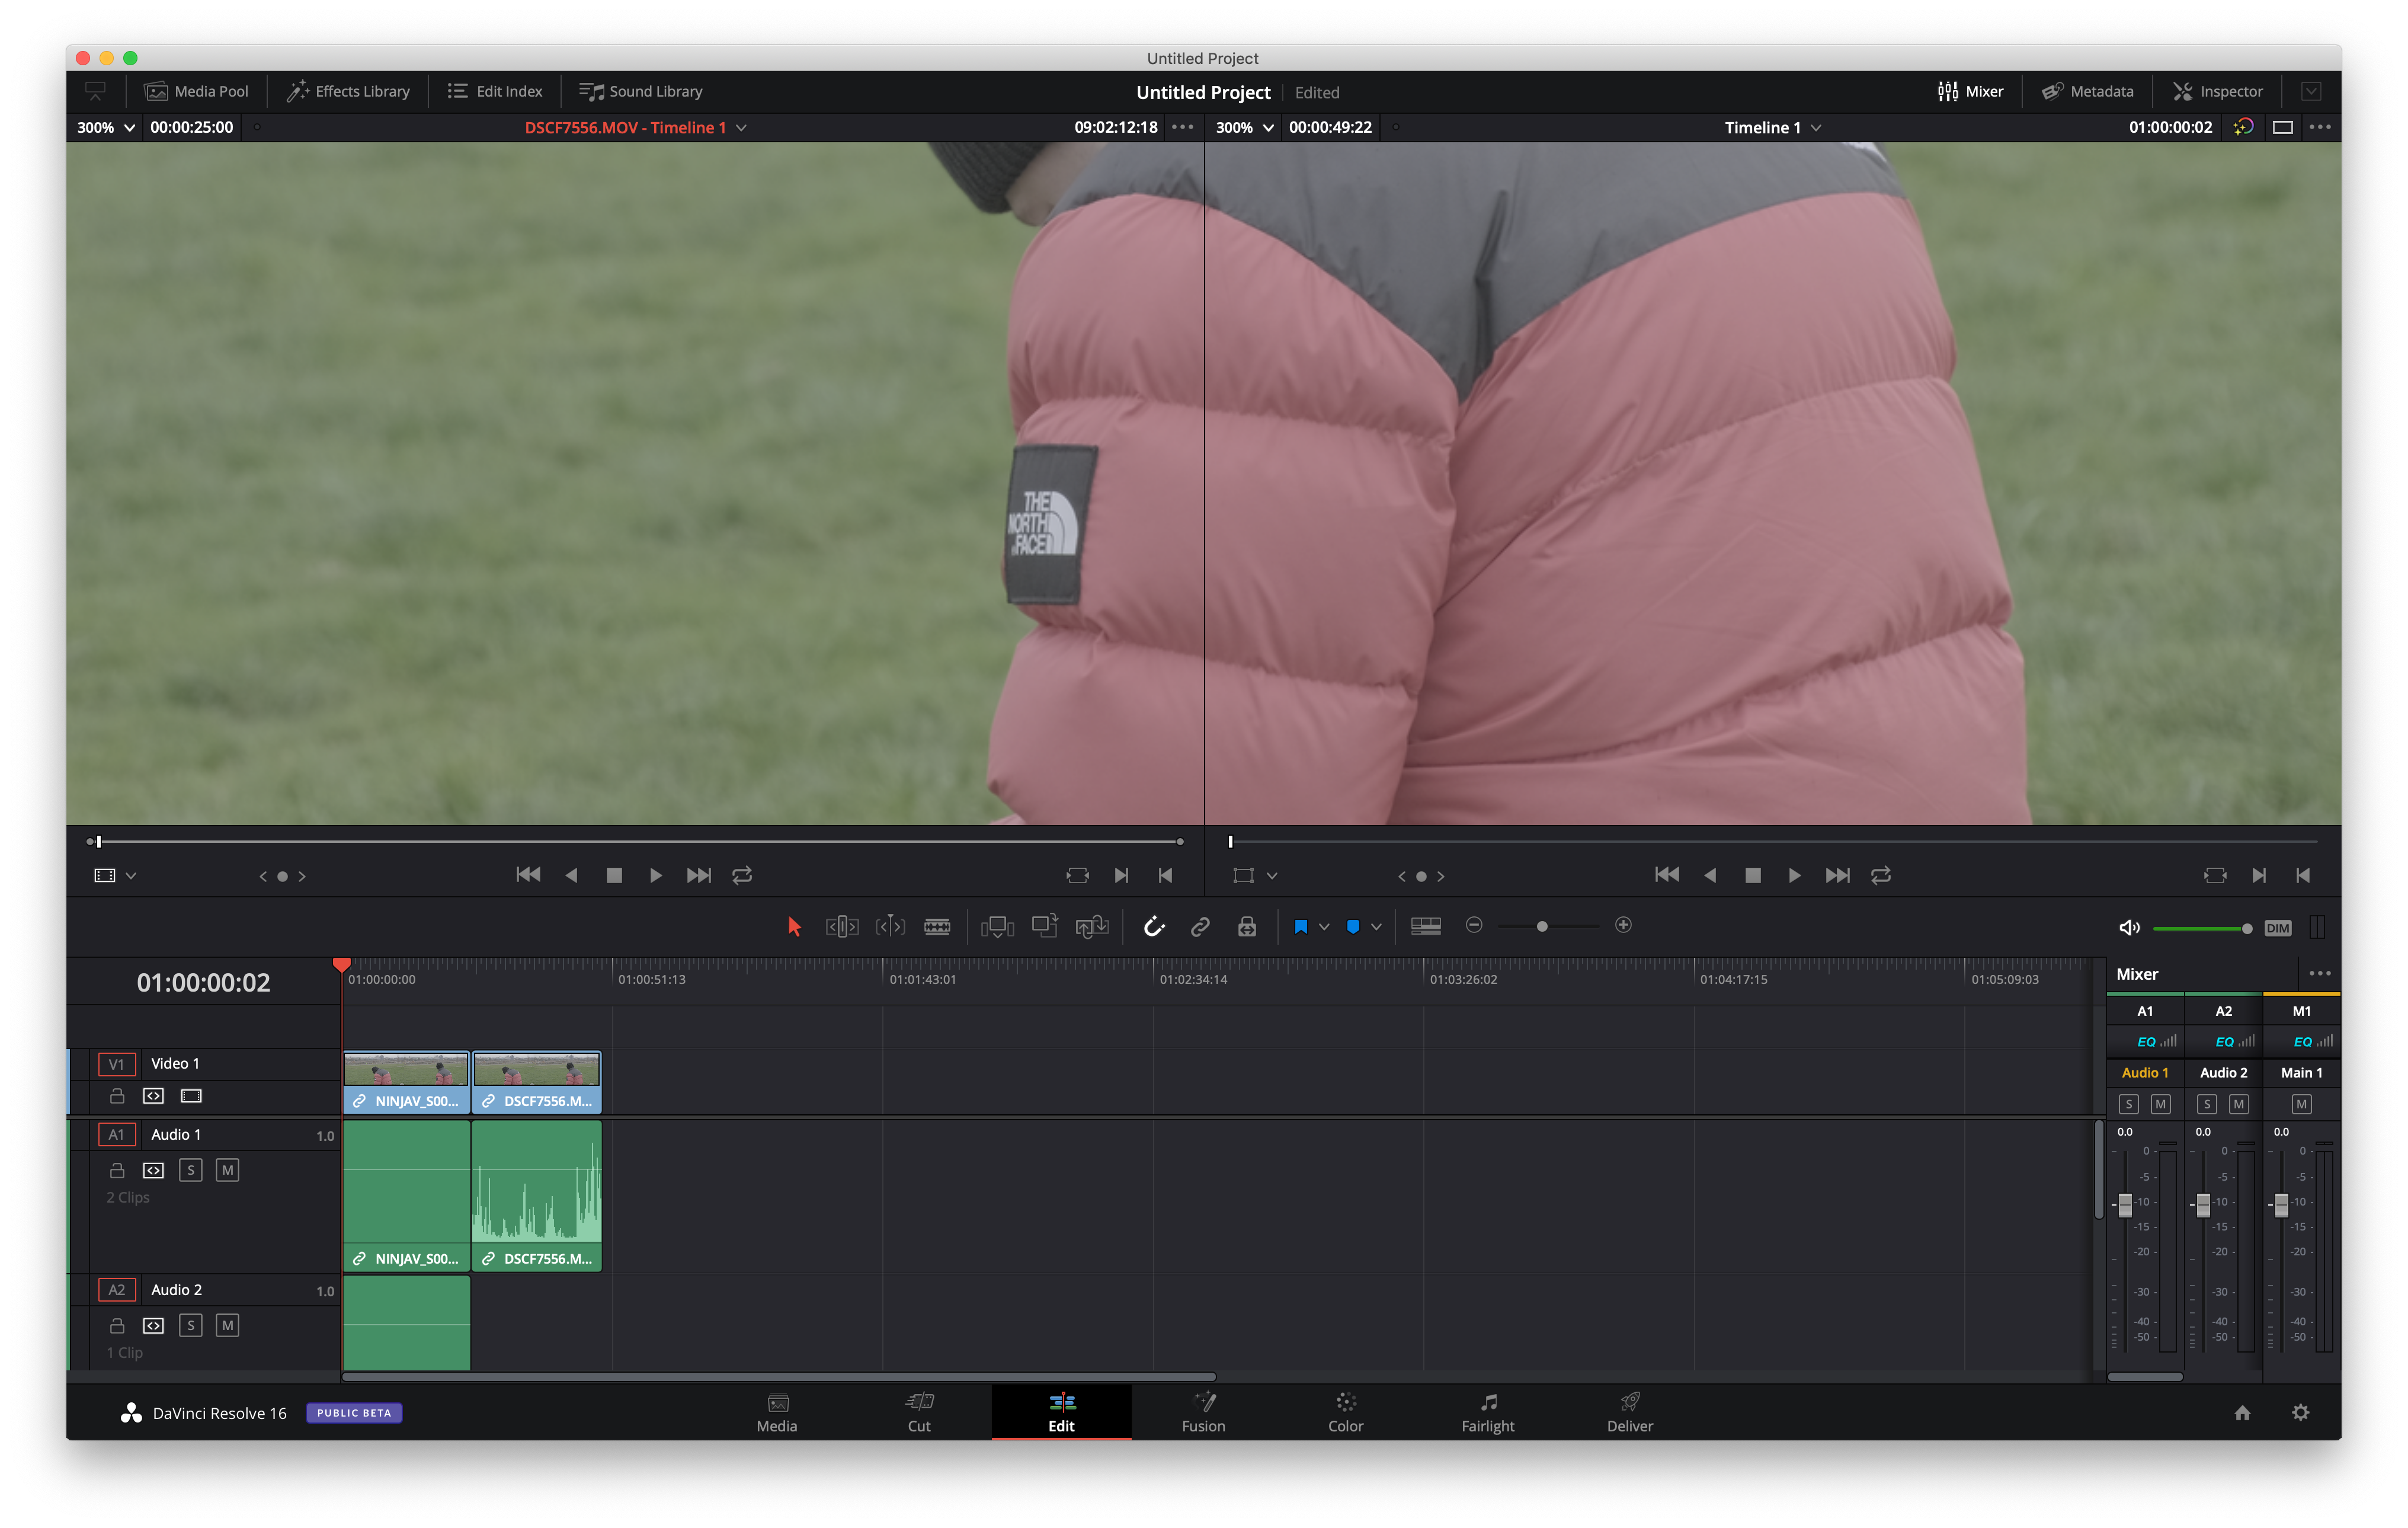
Here's a screen grab of the images in Resolve, the left screen is the XT3 file and the right is from the Ninja. I set them both to 300 and lined them up to form basically one image with a line in the middle. I thought that would be the easiest way to see if there's any difference in the colour. - both are set to Full in Clip Attributes. To my eyes, they're exactly the same, but if there is a difference, I wouldn't even think about it while shooting. One thing I did notice though, is the capture from the Atomos is 2 or 3 frames behind the file straight from the camera, nothing major, and I'm sure it's not camera / recorder specific, but worth noting. Edit: If people want, I could also post screen grabs from the colour page, showing the histogram, vector scope, curves etc. But they don't change at all between the clips. Safe to say they're exactly the same image from that perspective too...

-
I wonder if that's because with Braw, you kind of need Resolve to use it - or be on Windows and buy the Premiere plugin separately. Great news for people who already have one camera with the software though!
-
If someone uploads a clip, I'll happily open it in Resolve and test some stuff out - just let me know what you need to know about it
-
It's a shame the price is so high and it still needs external power. For me, the only benefit this has over using your phone is tactile buttons.
-
Yeah, but even still, I think you'd be better off with one of the smaller sleds that take 1 battery. That way you can just have 3 on rotation and shoot all day long. 1 charging, 1 charged and 1 on the camera. Thanks for the info!
-
Oh that sucks, kind of defeats the purpose of mounting two batteries for me. Do they both discharge at the same time too? For example, if 2 batteries gave you 4 hours, could you run it for 2 hours, change 1 battery and still have 4 hours to go?
-
This is an interesting solution. Vmount to dual npf pries with power meters and dtap. Hot swappable external power that's pretty cheap to run all daylong. https://www.amazon.de/Baxxtar-1837-2-V-Mount-Adapter-Ausgang/dp/B077VQ7PVL
-
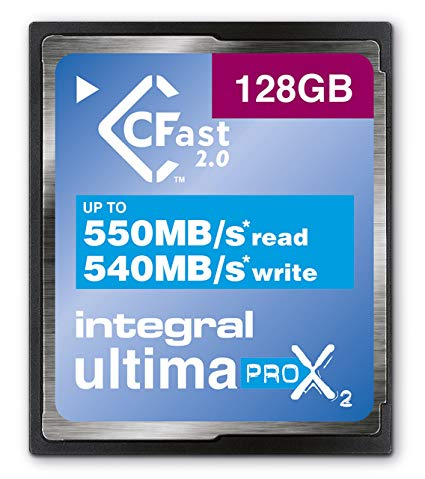
Hmm, that's a bummer, but at least the card works somewhat. Since you're using ExFat, have you tried formatting to OSX in camera? If that works, you might then be able to format again to ExFat from the now blank card. A stupid work around, and probably won't work, but I'd try if you haven't already. I also read that if there's a bit of dirt on the contact points on the card, the camera might have issues, while other card readers won't... could you check that just to be doubly sure. I think the best course of action would be getting a new card and keeping this one as a backup, always initiated on a PC and kept in your back pocket. If it's any help, I use these in our UMP4.6k (not Pro) and so far never had a problem. They're also the cheapest Cfast 2.0 cards I could find.
-
As long as the footage and media is in the same location as your last save, it'll open as normal with everything still connected. If your media is in a different locations, you just need to point resolve to the folder it's been moved to and it'll connect everything in that folder. Cuts, colour, transitions etc. Are all left the same.
-
@thephoenix For a project that size, I would edit and grade in 1080 and then change the timeline resolution to 4K before the export. I've often had much better playback rates working this way on larger timelines. Of course, change to 4K before you do any graphics/titles as well to avoid them being the the wrong part of the frame later on Doing it this way, you might be able to get away with using the slower drive, but not sure. Or once you've got a first draft edit from the slower drive, you could move the media that you're definitely using to the faster one, leaving the clips you don't need behind. As for exporting the project for reopening on another machine, or simply to keep things organised, I open the first menu (the home in the bottom right), right click on the project you want and then select Export Project and save it the .drp file wherever you need it to be. This is just the project file, so it won't copy any of your media along with it. I hope that helps