
richg101
-
Posts
1,828 -
Joined
-
Last visited
Content Type
Profiles
Forums
Articles
Everything posted by richg101
-
if you struggle to grip the initial ring that needs to be unscrewed, wash your hands with soapy water to remove grease and put a little double sided tape on the end of each finger so they grip to the face of the ring. there is nothing to grip on to so you need as much friction between your fingers and the face of the ring as possible. you might need to wash your hands repeatedly so there is as little grease as possible otherwise its very hard to get the ring spinning. also, maybe mask over the front element with a bit of low tack masking tape too. just 'de sticky' the masking tape by sticking it to the inside of your arm, and pull it off and repeat till the sticky is less sticky:)
-
have you done the mod already?
-
Comparison Image:- https://www.wetransfer.com/dl/0Ljy7XxE/07fbd6c56caaee74716729a4ce56db222d9c237dba89b8f0afa4ae5603400f28f5d3711b6e72ae3 Each image was taken by setting the minimum focus on the Iscorama then moving back and fourth until the image was in focus. I then tweeked the focus ring slightly to make sure it was bang on. There has been no cropping to any of the images. this is exactly what the sensor saw. The closer shots are because the camera was physically closer to the cat, there has been no cropping or zooming. fyi, Point of focus was on the cats cheek where his whiskers grow. As you see, the modification now allows me to get as close to the subject as i use to be able to using the tokina. adding the tokina to the isco 36 now it has been modified allows me to go really close. each image was taken by getting as close as i could to the cat before i ran out of focus ability. As you will see, the modification doesnt seem to affect sharpness at all. and allows the isco to go as close as with a tokina, without the tokina. the tokina added to the modification allows really close focus!:)
-
Just uploading a comparison photo. doesnt seem to be any sharpness degradation with the mod.
-
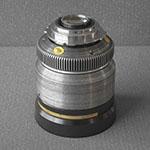
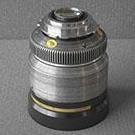
no. due to it being such a worry - (I didnt know what was going to happen when the 4 screws were removed) I wanted to be in full control of the parts and not worry about documenting it. Based on your previous stuff you have done I think you will be fine man. be careful removing the 'iscorama 36 1.5x isco gottingen' ring. then carefully remove the 4x screws - they are very soft metal so make sure you have a precision screw driver the right size. the 4x screws just hold the plastic housing in place - they dont hold anything else in place from what it seemed. Once you are at this stage you will see what needs to be done. just use a dremel multi or similar mini grinder to shave away the stopper on the inside of the plastic focus ring. There are 2 stoppers - one for infinity, and one for minimum focus. it'll be apparent which one does what once you are inside:) then wash the plastic focus ring under a tap and dry properly to remove any sanding dust before re- assembly. when re assembling, set the focus ring and the front element barrel to infinity (you can use the dabs of glue (which was put on in the factory to stop the screws untightening) as a guide so infinity focus matches the infinity point on the focus scale. You might need to tweek it back to exact while on the camera, but using the glue marks as a guide was good enough for me. just remember to not completely unscrew. dont go past the infinity mark on the scale - the focus thread is VERY TIGHT!, and might get damaged if you completely unscrew it and then cross thread it when screwing it back on. I will probably just work out my prefered closest focus based on sharpness/close focus ability and put a short m3 bolt through the ribbed plastic focus ring part so the bolt end stops it turning too far.
-
*Edit* tested at f1.8, it doesnt seem to degrade the sharpness. have a look at the image link I post later on this page. the mod involves removing the ring which has 'iscorama 36 1.5 isco gottingen' printed on it, unscrewing the 4 retaining screws. Then filing away the 'stopper' on the inside face of the ribbed part of the plastic body which you grip onto while focusing. this allows the focus ring to turn approximately double the 'throw' it does as standard. as standard the focus throw is exactly 1/2 a full turn. with the stopper removed you can spin the ring a whole turn before you start to get dangerously close to running out of thread on the main focus element barrel. At the moment, I have yet to add a replacement 'stopper' at a different location on the inside face of the focus ring. this means if I go further than a full turn from infinity, I can completely unscrew the front element. I have noted the maximum safe amount so this isnt a problem for now, but I will add a new stopper when i decide where I want the minimum focus to be.
-
WOW! it works. I can get a shade under 4ft without a diopter now:) shaved off about 2.5ft of the minimum focus distance which is superb. with tokina I can get twice as close as I could before the mod! Who wants to know how to do it?
-
Xume Adapters - An Anamorphic Shooter's Best Friend
richg101 replied to QuickHitRecord's topic in Cameras
amazing find man. cheers -
this seems confused. to save battery the screen would need to completely shut down. the overlays disappearing after a period of time wont do anything to save battery life. There will be a setting somewhere. go deep man. the engineers will have known videographers will want permanent info on view. Maybe look at the 'hdmi settings' - maybe 'clean hdmi' also affects feed to the built in screen and removes the overlayed info text on the screen as well as on the hdmi output?
-
[url="http://vimeo.com/55250926#at=0"]http://vimeo.com/55250926#at=0[/url]
-
95/mbs gold pro's are good to have due to being really fast when scanning through during review of your footage in camera. a lot of slower cards may be happy writing, but when playing back - scanning thought they take time to scroll through. the same for deleting files. most class 10 cards will be fine though id imagine
-
i cant help i'm afraid. it looks like the shutter is set slower than the frame rate (ie. 1/20th sec for a 24p framerate)
-
Very few of the shots are sharp on this. lovely soft image to a hard edged story
-
I suppose I was assuming the thread starter is using aps-c. however, gh2 with smaller sensor will work better with bigger apertures. I'd still question the usibility of the century any wider than f2.8 in close to medium distance - sharpness at infinity is easier it seems. -but in most cases I never managed anything wider than f2.8 personally
-
I thought The Hunt looked lovely too. Amazing colours.
-
I think you might want to rethink your plans. though you wont get any vignette on the 35mm (and very little with the 24mm) f1.4's are a no-no with anything focus through like the century or la7200. just get something like a 35mm f2.8 and that will be fine. you're only lining yourself up for disappointment otherwise. IMO
-
century again, vimeo.com/47971206
-
LA7200 from what I have seen is no better than the century 16:9, yet people pay almost twice the price for them! go with century and have enough to a tokina left over! century + tokina on 28mm f2.8 wide open, aps-c sensor:- vimeo.com/52472870 I have a few more samples of the century on my profile. If you find a la7200 for the same price as the century then go for it, otherwise, it's no better from what I have seen. Both need a smaller sensor to work at their best. Someone for gods sake try one of them on a ikonoskop or a rx100
-
Hey Stu. cheers for the offer. We do need to hook up soon. I bet it is a worry having the 54 hanging off the end of a small lens. the 36 is heavy enough!
-
hey Phil. yep its the rollei lenses. perfect to hold the weight of the isco36 due to all metal, over engineered in germany:) There seems to be a lot of people who disregard sharp affordable lenses for similarly priced glass of less quality - and seem to be under the impression sharpness lacks soul. I think its nice to show just how sharp the isco can go, even at apertures wider than f2.8. i still get amazed how well it copes. I am in love with the nex5n. the flat portrait profile is really good. I'm always hesitant to do too much cc and levels if the image is exposed properly - I just love the flatness, If they ever hack it and give us a few extra mb/s's I can see this being a killer little system. I'm currently looking at m39 Russian glass myself (Jupiter, etc) as a replacement to the zeiss in order to shed a 10-20mm off the total lens length. Using some rangefinder glass will allow me to move the lens a lot closer to the sensor and shorten the total lens length. I'll keep the zeiss for scripted stuff but will use the jupiters for fun stuff.
-
exactly. Subtle use and it seems to add so much weight to the production.
-
ps. thanks for all the other replies.
-
Thanks for this. I'm gonna have to invest in AE. Knew I should have taken advantage of the spare user license for master collection before quitting the job:( This is exactly the type of movement I'm looking for. it's not very noticeable, but adds a massive amount of physicality to the piece. The track is very well put togehter, as is the whole video production. in 1999 this track would have been making them oodles of money! reminds me of my late teenage years.
-
cheers for the replies. i just read up on the digital intermediate process (film scan) - I imagine if there was a little bit of 'gate' play on the scanner then each frame would be slightly offset (by less than 1/100th mm), but blown up to cinema screen size, this play would be multiplied by maybe 1000% or more - meaning each frame on screen would move 10mm up or down, left or right depending on the offset. So i guess you are right, a 1 or 2 pixel offset of each frame would work. If anyone can suggest a step by step process in prem that would be muchos appreciated! Tried a 4k film stock scan overlayed and I love the results, but feel I need a little more added to boost the mechanical element.
-
Hey guys. I did some searching but couldn't find anything relating to this specific effect. I want to apply a slight wobble to each frame to give the imitation of the mechanical film feed you often see on movies shot on film. The wobble is most apparent during title and credits sequence - in particular when titles are static superimposed on a black background. sometimes the title text wobbles up and down on screen. Often the effect is most visible on titles and credits sequences, but also the effect can be seen in shots locked down on a tripod - sometimes the movement of the frames is so large it can make it look almost as if the tripod shot is handheld. Are there any plug ins for adobe premiere which replicate this film mechnical movement? I guess in reality the movement originates in both the camera, and additionally during film scanning. cheers in advance
