bunk
-
Posts
234 -
Joined
-
Last visited
About bunk
Recent Profile Visitors
4,032 profile views


bunk's Achievements
Active member (3/5)
127
Reputation
-
 gethin reacted to a post in a topic:
Panasonic GH5 Review and exclusive first look at Version 2.0 firmware
gethin reacted to a post in a topic:
Panasonic GH5 Review and exclusive first look at Version 2.0 firmware
-
deezid reacted to a post in a topic:
Panasonic GH5 Review and exclusive first look at Version 2.0 firmware
-
Panasonic GH5 Review and exclusive first look at Version 2.0 firmware
bunk replied to Andrew - EOSHD's topic in Cameras
You shouldn't be to hard on yourself. Hard to judge on a non HLG monitor ...but at first glance on a non HLG monitor it seems to have a similar problem as Vlog. It's indeed very hard to do as it doesn't react as you expect. And you end up with dull highlights. Probably easier on a HLG monitor
-
deezid reacted to a post in a topic:
Panasonic GH5 Review and exclusive first look at Version 2.0 firmware
-
Panasonic GH5 Review and exclusive first look at Version 2.0 firmware
bunk replied to Andrew - EOSHD's topic in Cameras
From the article: "Download pre-production V2.0 sample clips Panasonic USA have allowed me to share some original ALL-I files shot with the pre-production firmware V2.0 on my GH5 (4K, 400Mbit/s, 10bit 4:2:2)." -
Panasonic GH5 Review and exclusive first look at Version 2.0 firmware
bunk replied to Andrew - EOSHD's topic in Cameras
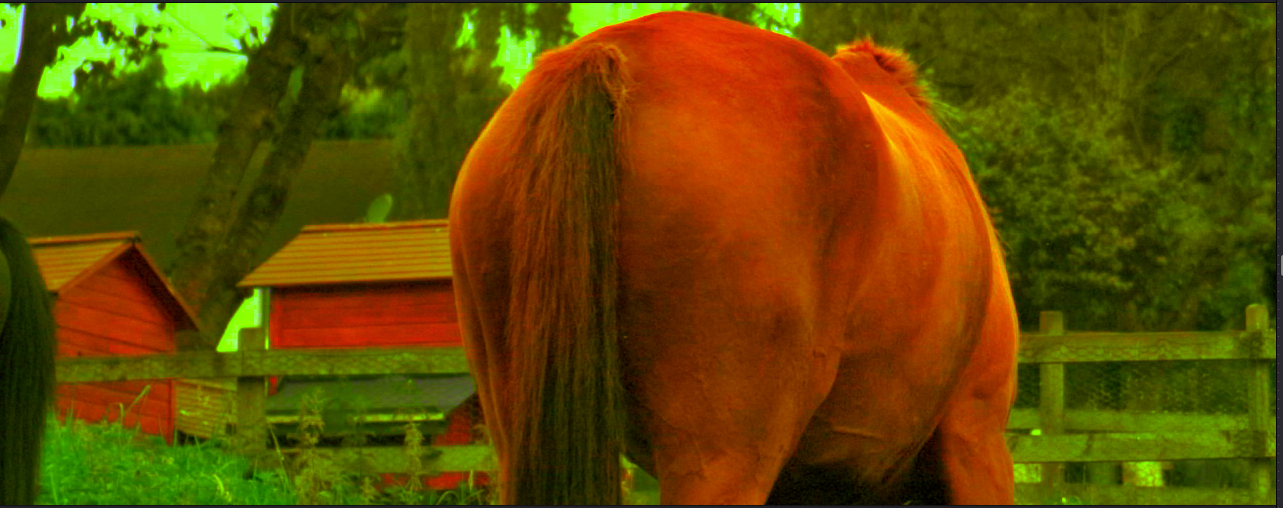
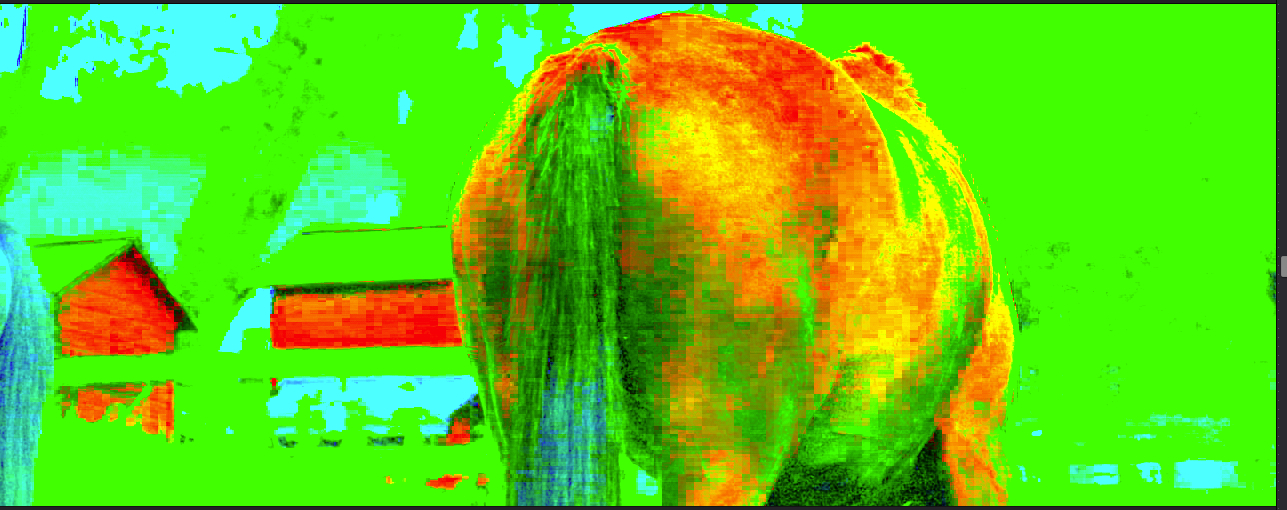
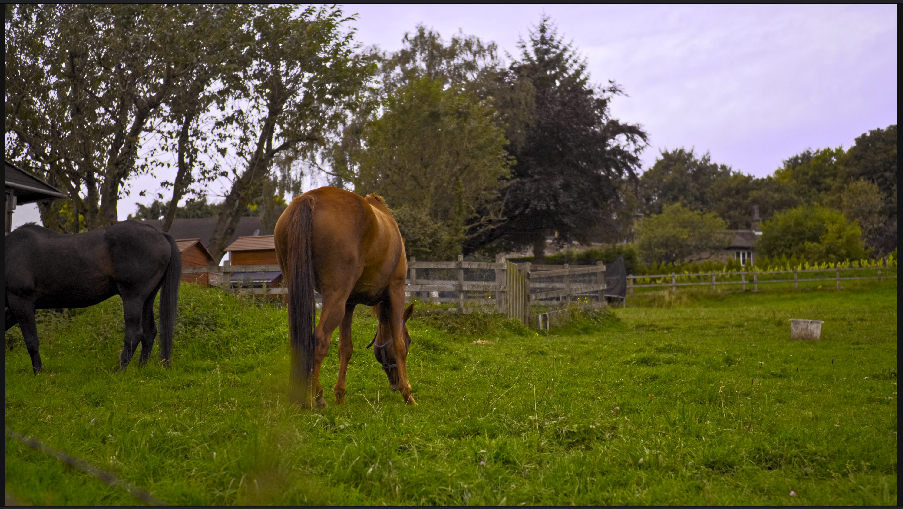
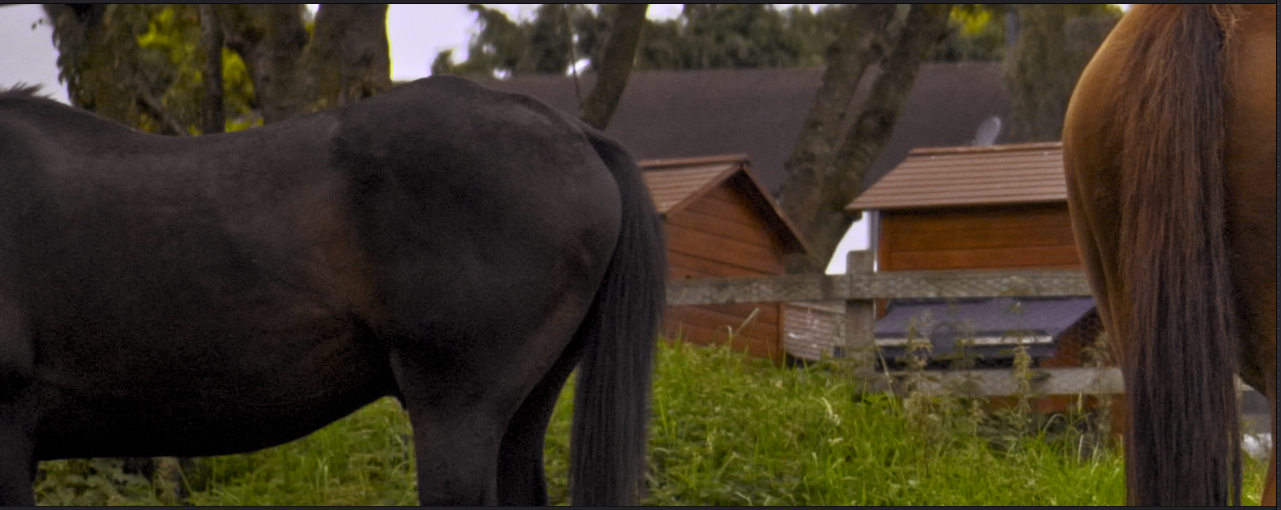
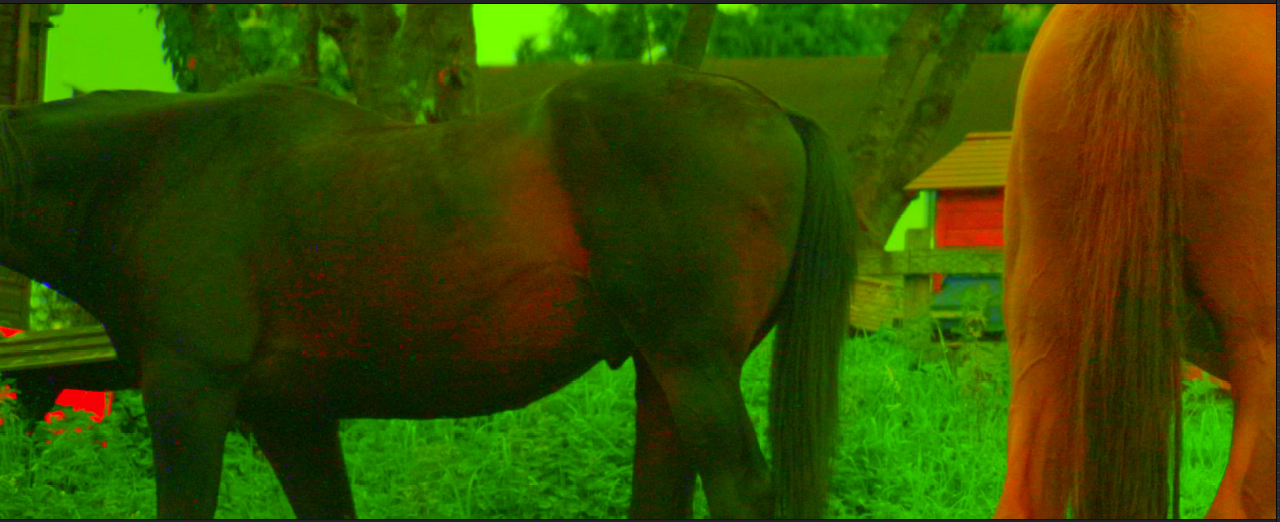
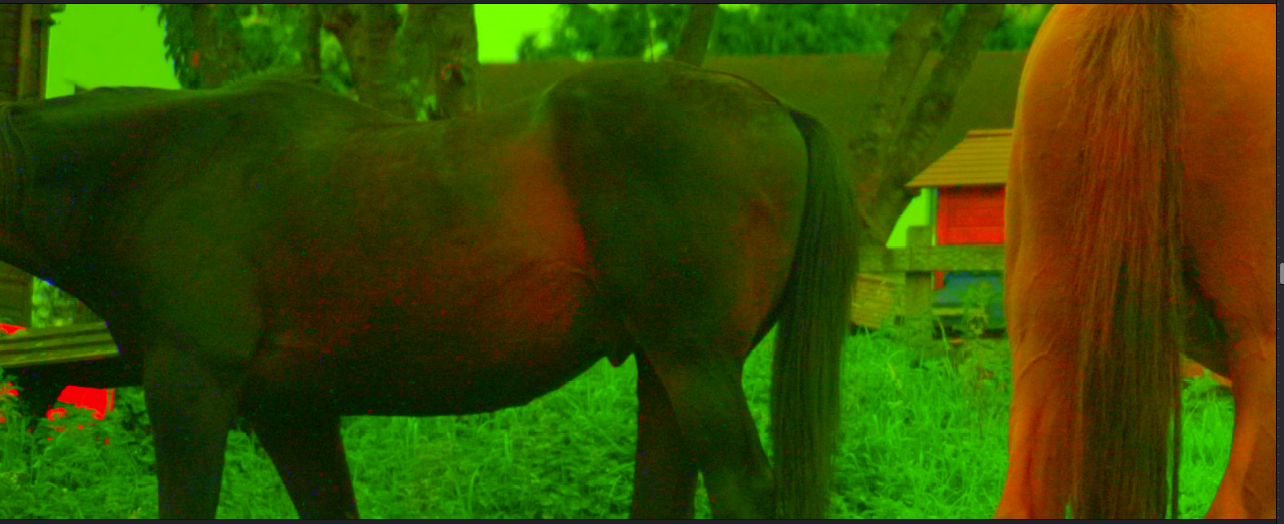
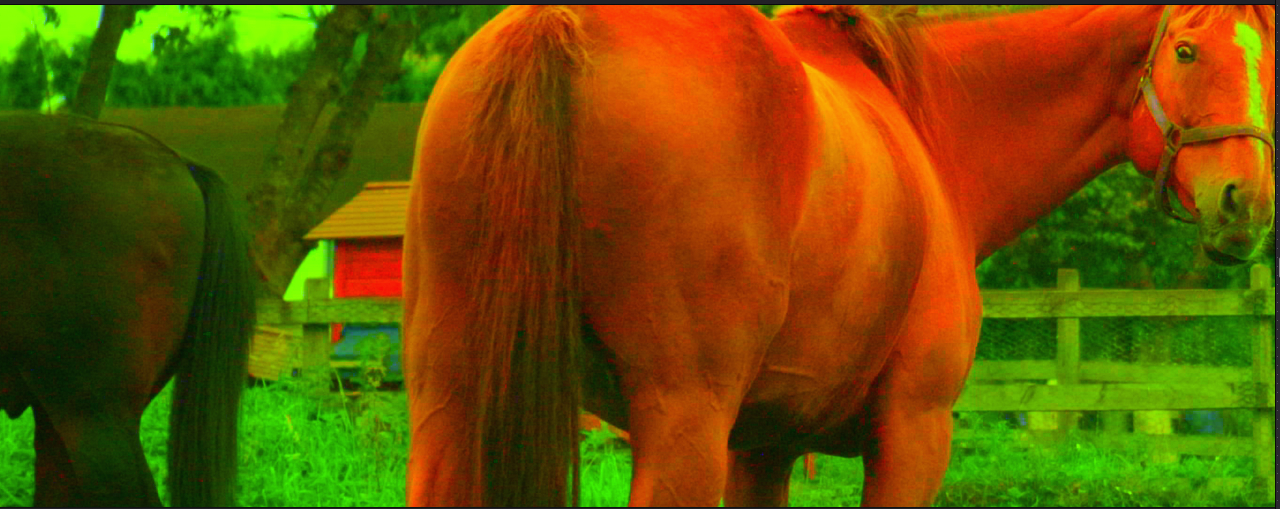
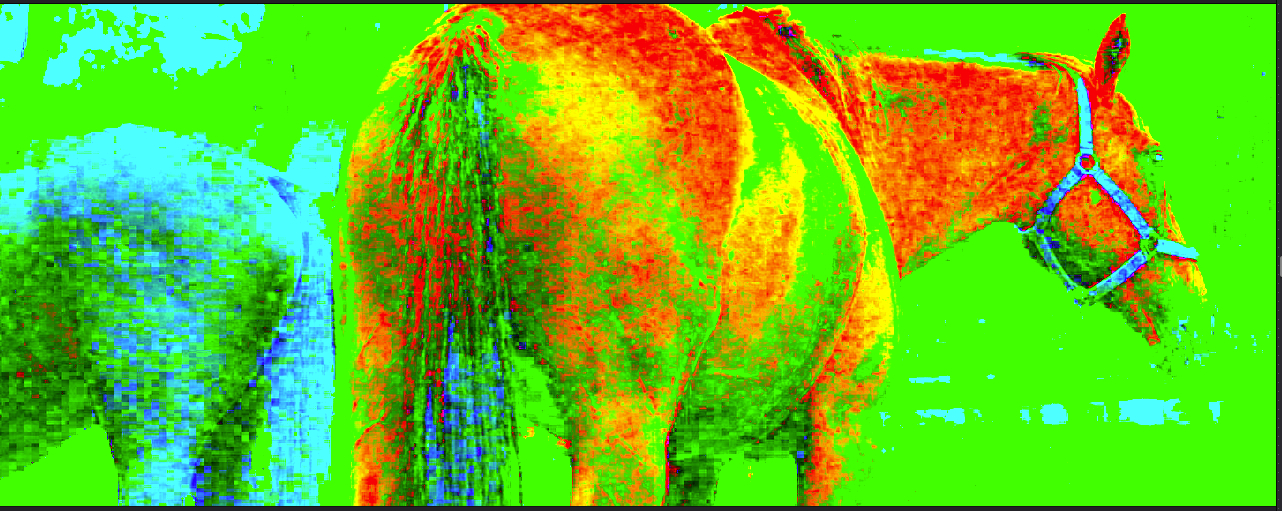
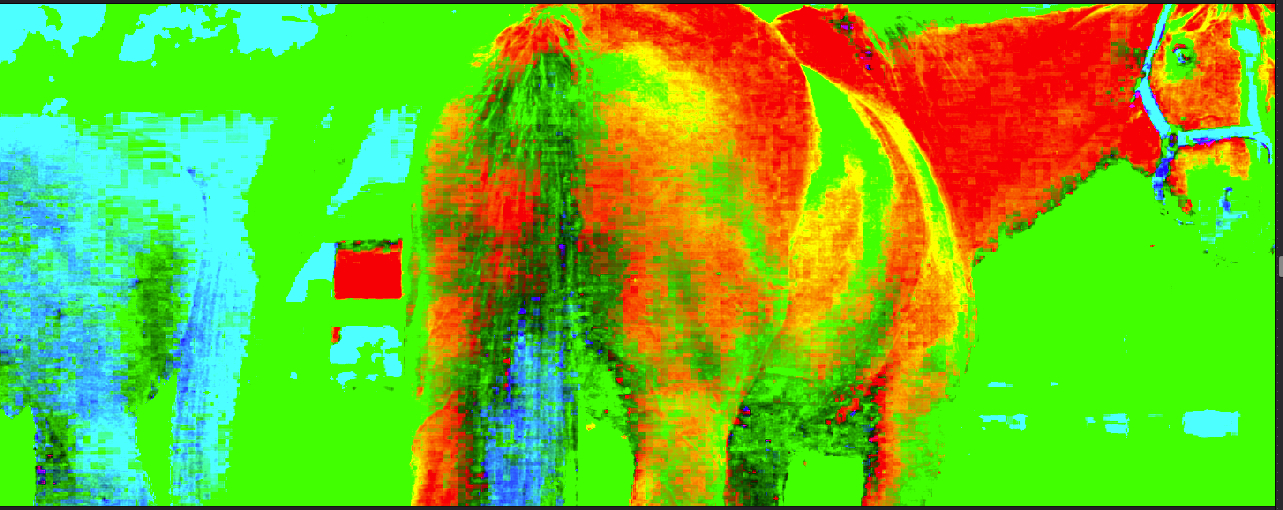
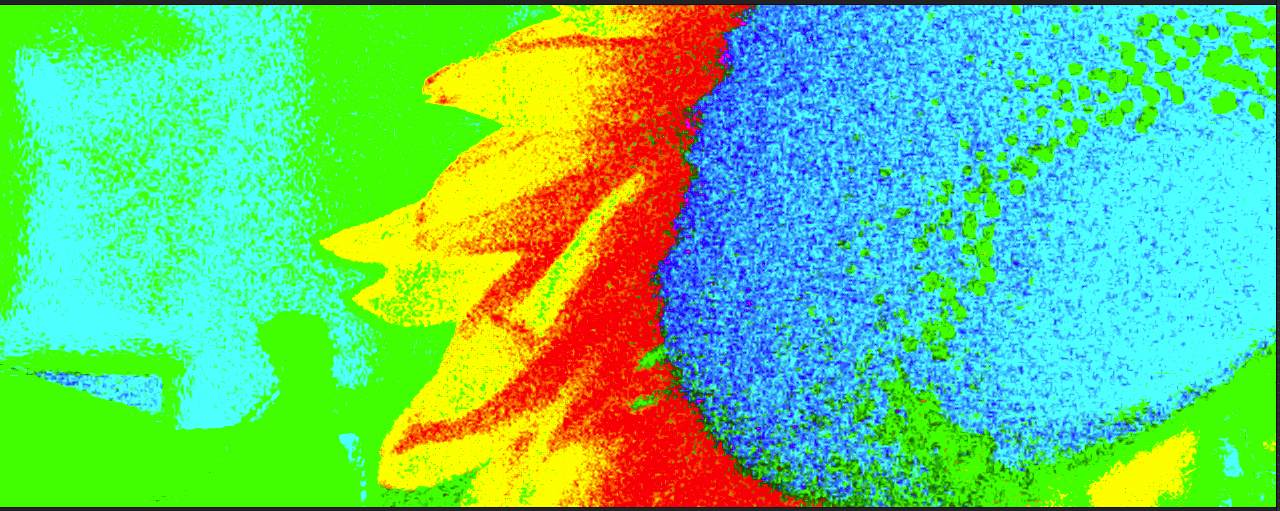
Let me be the party pooper… Vlog ALL-I is massively flawed! At least if I go be the files Andrew made available (@Andrew, thanks for sharing). I noticed dancing spots in the flank of the darker horse. This is usually seen in the darker areas of footage, due to compression algorithms that shouldn’t be there in the first place (My opinion. No change you will ever see this on phenomenon a BM camera. It comes standard with the GH4 …and now GH5)…and we are looking at ALL-I no, with compression methods better than ProRess according to Mat Frazer. The problem with these noise clouds is that they do not respect the boundaries the live in. Intensity and shape changes per frame. See in the pictures below. And then I noticed something different. Horizontal stripes We are not talking about a little bit of compression here we are talking about a massive amount of compression, mimicking some kind of interlace. Then checked a ‘standard color’ example with one extreme node, no “interlace”, just looked fine… Actually pretty good! Back to the standard horses with 2 nodes applied, to make it even more extreme and visible. Notice how the red parts follow the direction of the tail (as it should). And the Vlog version with it’s horizontal stripes. This btw what footage of the BMPCC looks like, under the same treatment. See how you don’t see huge blocks of compression as we can see in the GH5 foortage? In all fairness it's Raw, but ProRess HQ 422 looks just as fine. All screencaps were taken at 100% My advice if you didn’t buy a GH5 yet, but do want one …don’t buy the VLog upgrade. For anyone that already did buy a GH5 and the Vlog upgrade …file a bug report as this has to be a bug. That or some developer code was added by accident instead of the finished product. If it turns out that this is the finished code and you need Vlog like footage …there are plenty of other camera options out there.
-
Let me guess ...he will end up with stuff on digital film? Or are you implying there will ufos?
-
Or you can build them yourself... http://openbuildspartstore.com/
-
In that case I think I can see the difference as well on my 1080 TV and if so it only shows us the piss poor quality of the HD productions. Could be wrong though.
-
jonpais reacted to a post in a topic:
Camera resolution myths debunked
-
Axel reacted to a post in a topic:
Camera resolution myths debunked
-
Of course you can. The content was created to watch on a 1080 screen and the term used 'noticeable difference'. The difference is not noticeable watched at 100%. It's start to get noticeable at 200% and even more noticeable at 400%. ...however at 100% you will not be able to see the differences. On a 4K screen that means using only a quather of your screen. So if you saw a difference you either where looking fullscreen ( and now your screen starts to create 4 new pixels for every one pixel of the content, for allready two different pics) or your screen has pixels that are somehow better then the pixels of a 1080 screen and in that case I for one would really like to see a screen shot of the differences you saw on the pixels of your screen, as I don't think that is even possible.
-
No idea however there is an interesting fragment at 20:35 where this demolition man talks about chrysler building that still holds a record. It took them months of preparation and months to place the explosives. Shouldn't be to difficult to get into contact with people who worked in that building the months before it collapsed and ask if anyone ever asked them to move the desk so a demolition man could place the charges, or if they ever tripped over wires connecting the explosives.
-
Jonesy Jones reacted to a post in a topic:
Swapping the FS5 for a........ GH5?
-
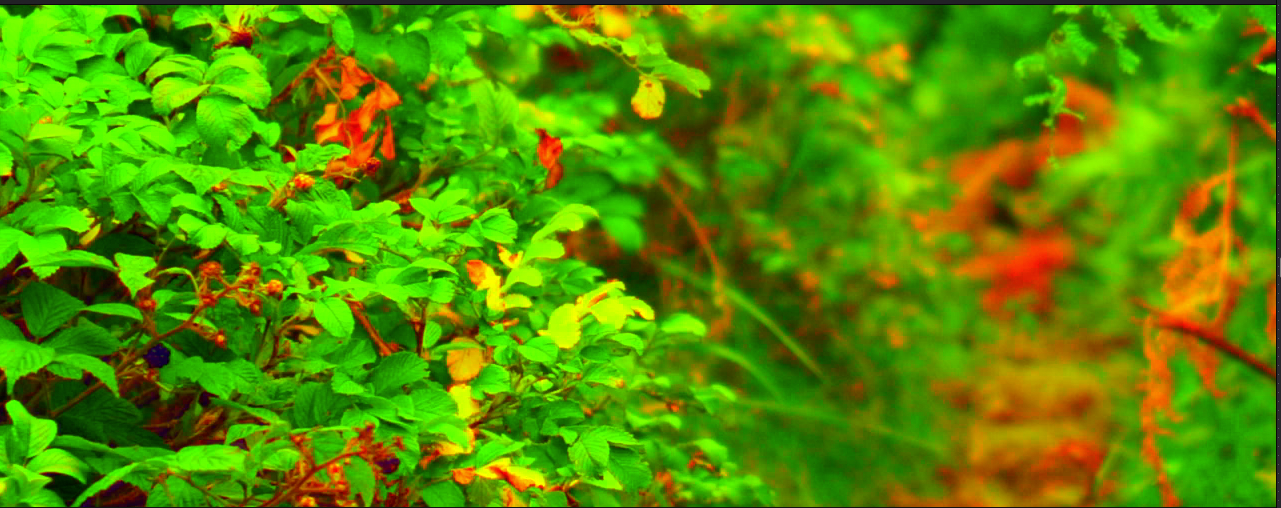
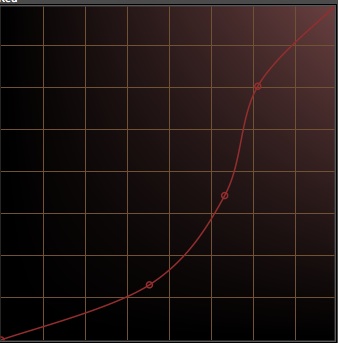
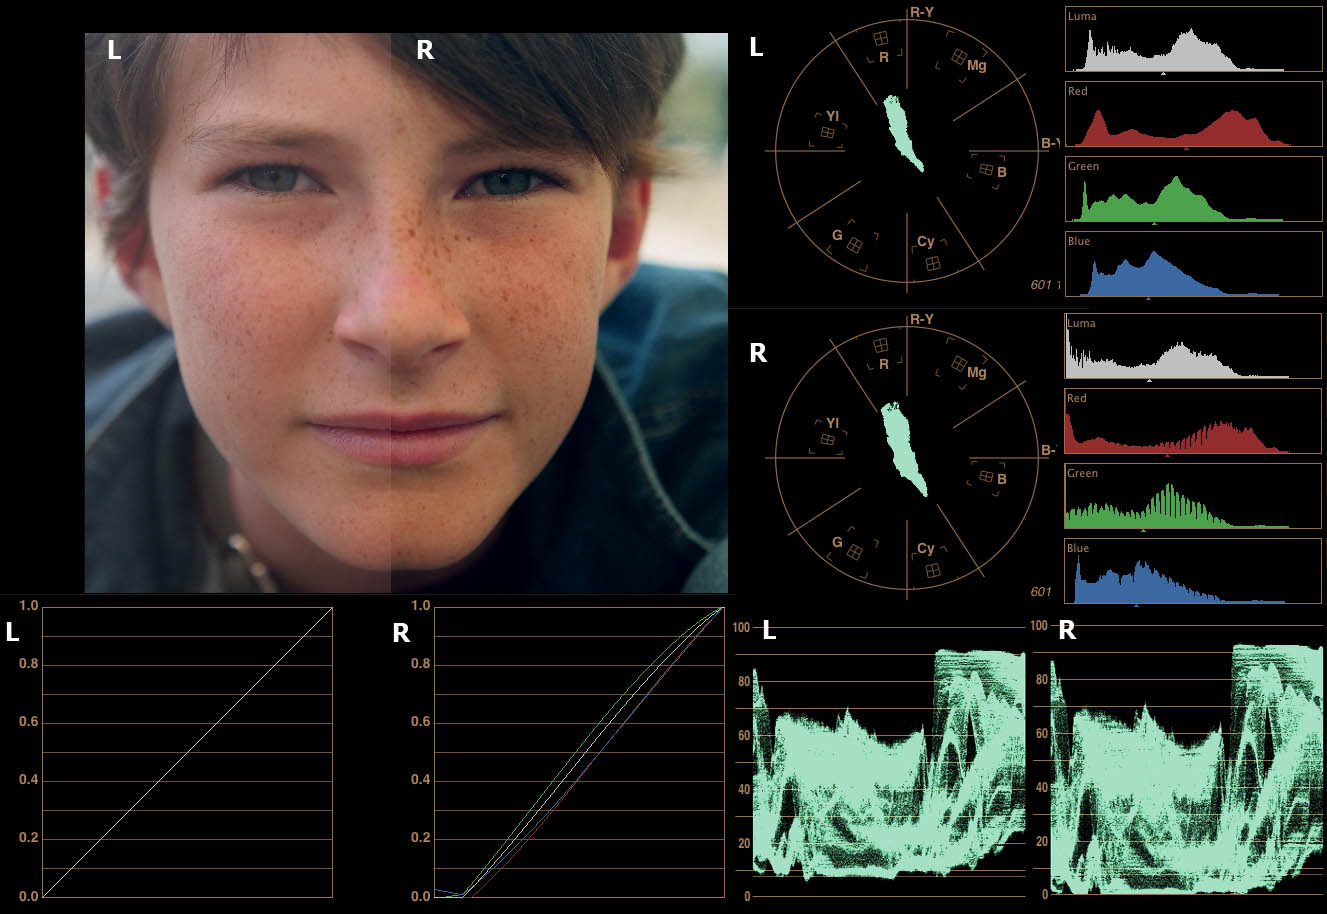
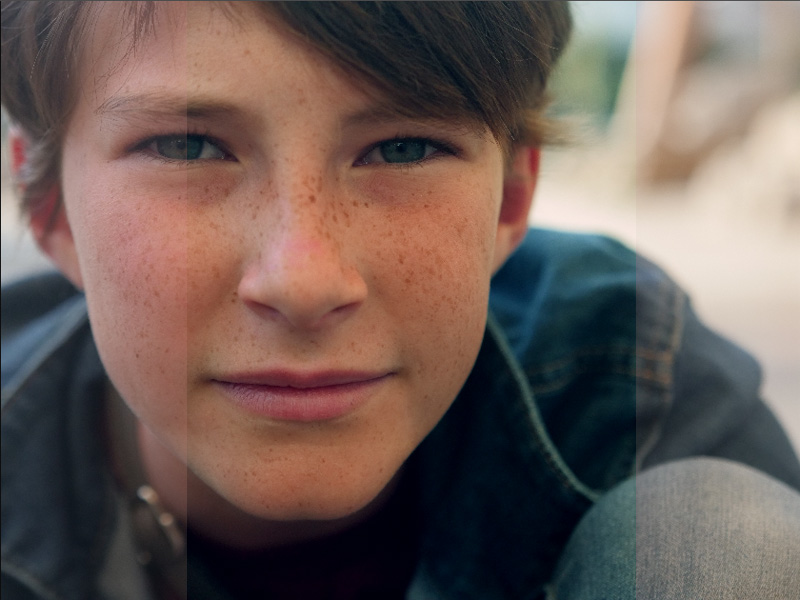
Here is te extreem curve used. Be your own judge. I don't have a real recipe. What I tend to do is set up some extreme curves to explore the picture as a whole. So literally the top point either to left or bottom direction and the bottom point to the right or up direction and that for each curve. That usually leads to a good first impression of the direction I want to go. After that it's just a choice of tools. On my desktop computer I work with Davinci. The picture you shared was graded on my MBP in ColorFinesse a plugin for AE. I use it as it is the only grading plugin that will work on my 2010 MBP ...it is slow but actually quite sophisticated for it's age. ...In the end basically all you need is curves and a way to set saturation. The curves in the picture above tell you what I did with the tools available ColorFinesse. The waveform shows I crushed some of the lower levels and the histogram shows the new cloth of the emperor It would really be cool if the 400mb/s is going to help out but I don't have high hopes.
-
Jonesy Jones reacted to a post in a topic:
Swapping the FS5 for a........ GH5?
-
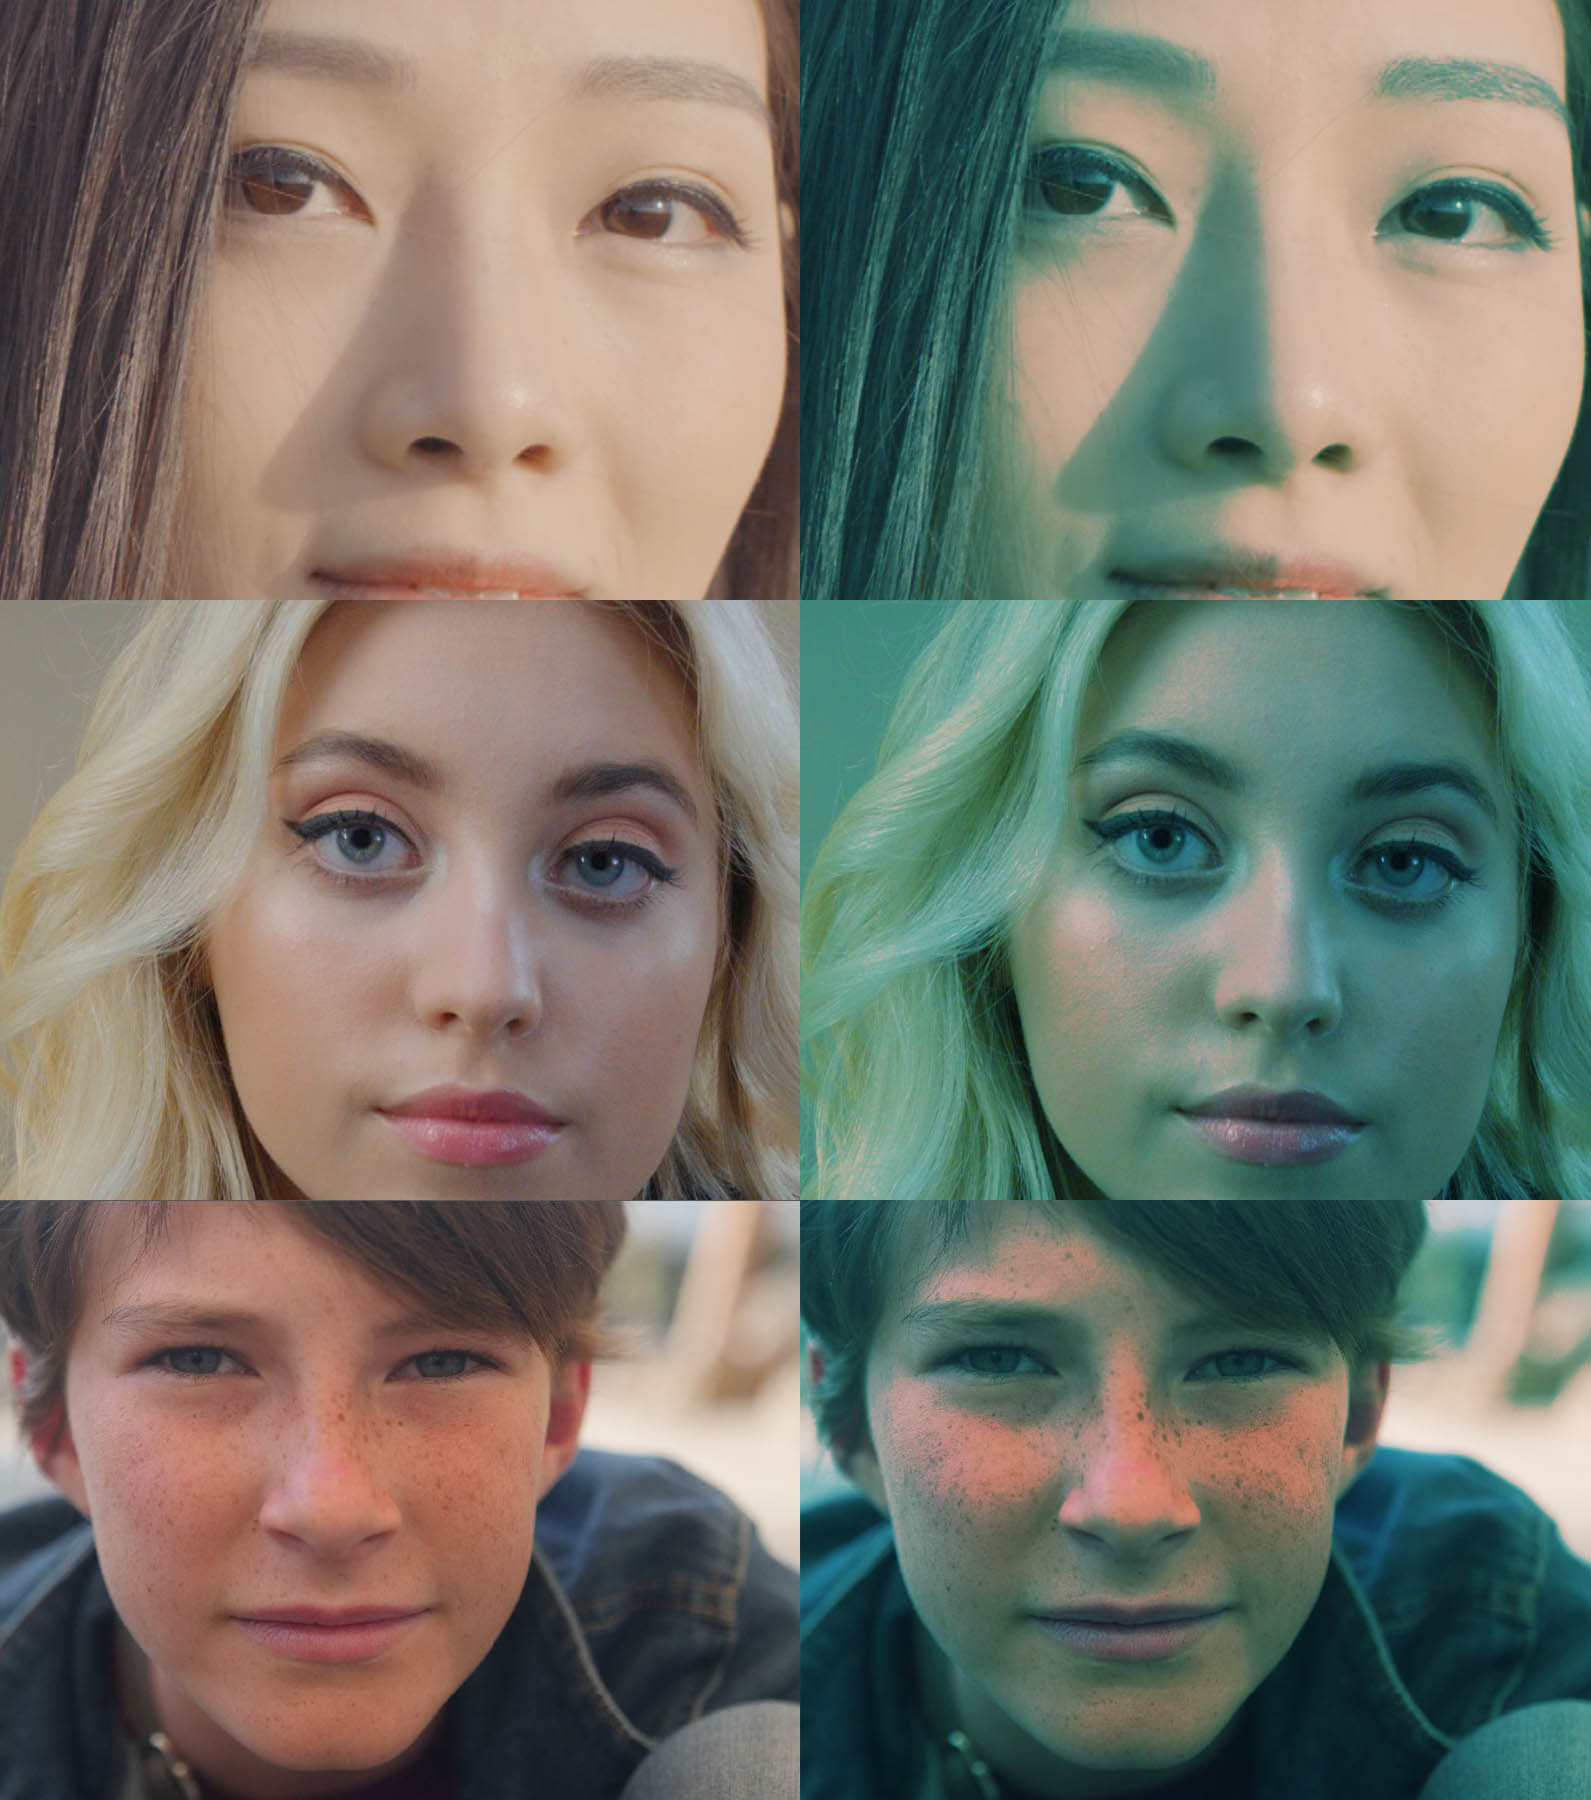
I really enjoyed grading the shot. ...but if I were you I would hold on to the Ursa just a little bit longer. Especially now you want to focus on grading. All three have the same curve (red channel) applied. The Terra holds up, The Ursa holds up and the GH5 falls apart. I think their compression tech is top of the bill ...so much that only after grading you find out that literally every nuance was squeezed out.
-
kaylee reacted to a post in a topic:
Do you guys know anything about 3D scanning/printing?
-
I never understand how people are able to use a mouse with modeling, feels like you're handicapt. If Zbrush clicks with you go for it, you can't go wrong. It never clicked with me so I went the 3DCoat route. ...and then there is Mudbox, if it still excists.
-
kaylee reacted to a post in a topic:
Do you guys know anything about 3D scanning/printing?
-
I How about approaching Ron Mueck ...I think you can skip the scans
-
kaylee reacted to a post in a topic:
Do you guys know anything about 3D scanning/printing?
-
The prints from the photoscanner look like shit and only half descend because the photos used for the scan are also used as a texture. Here is what you can do. Use this photoscanner to create a scan of your dog. Give the file together with the photo's it creates to a 3d sculpt artist, so he/she has a starting point to create a life like sculpt of your dog. The sculpt will look way better than the scan and even descend when printed at a height of 25 centimeters average (without texture). But you want a life size print. There are two problems. Small printers print up to 25cm average. Industrial printers are probably out of reach and I wonder if they have the resolution you are after. Lets say you want to print the dog in pieces and glue them together afterwards. If you use the data of the 25 centimeter dog it will give the same effect as shooting at 2k and scaling it up to 8k. http://3dprintingcenter.net/2016/01/31/how-to-3d-print-a-1-meter-high-sculpture-of-the-hero-of-childrens-animated-movies-part-2/ No detail what so ever was left from an already poorly detailed original. If you subdived the sculpt enough to keep the details for a 1mtr print the computer probably comes to a stand still and the sculpt artist won't be able to cut the sculpts into parts for the print ...and if he/she manages, your print times will go way up (on the one hand robust enough the be glued together on the other hand fur detail). Why not hand over some photos to a sculptor and ask for a real piece of art in bronze? ...at least it will have some artistic value.
-
Judge Dredd?
-
Just mentioning it in case you missed it. A fast double push on the OK button will magnify the view 200%. Unless your delivery format is something like 720 or 810 I don't think the bmpcc would be my first choice for vfx. The more headroom you have the better.