kye
-
Posts
8,224 -
Joined
-
Last visited
Content Type
Profiles
Forums
Articles
Everything posted by kye
-
Yeah, I watched a few videos today and learned a couple of things, but people editing real projects seems to be pretty uncommon, let alone pros who actually know what they're doing and do it day in and day out. I guess for me there's two parts... One is how they've laid it out, both in terms of which functions they mapped to buttons and also in the overall layout itself. The other is how people actually use it. For example, I think there's likely to be a few different schools of thought around workflows and because of that the layout is likely to be designed to cater to each of them, rather than be optimised for just one of those, so the layout alone may not actually be quite so useful. I will persevere though.
-
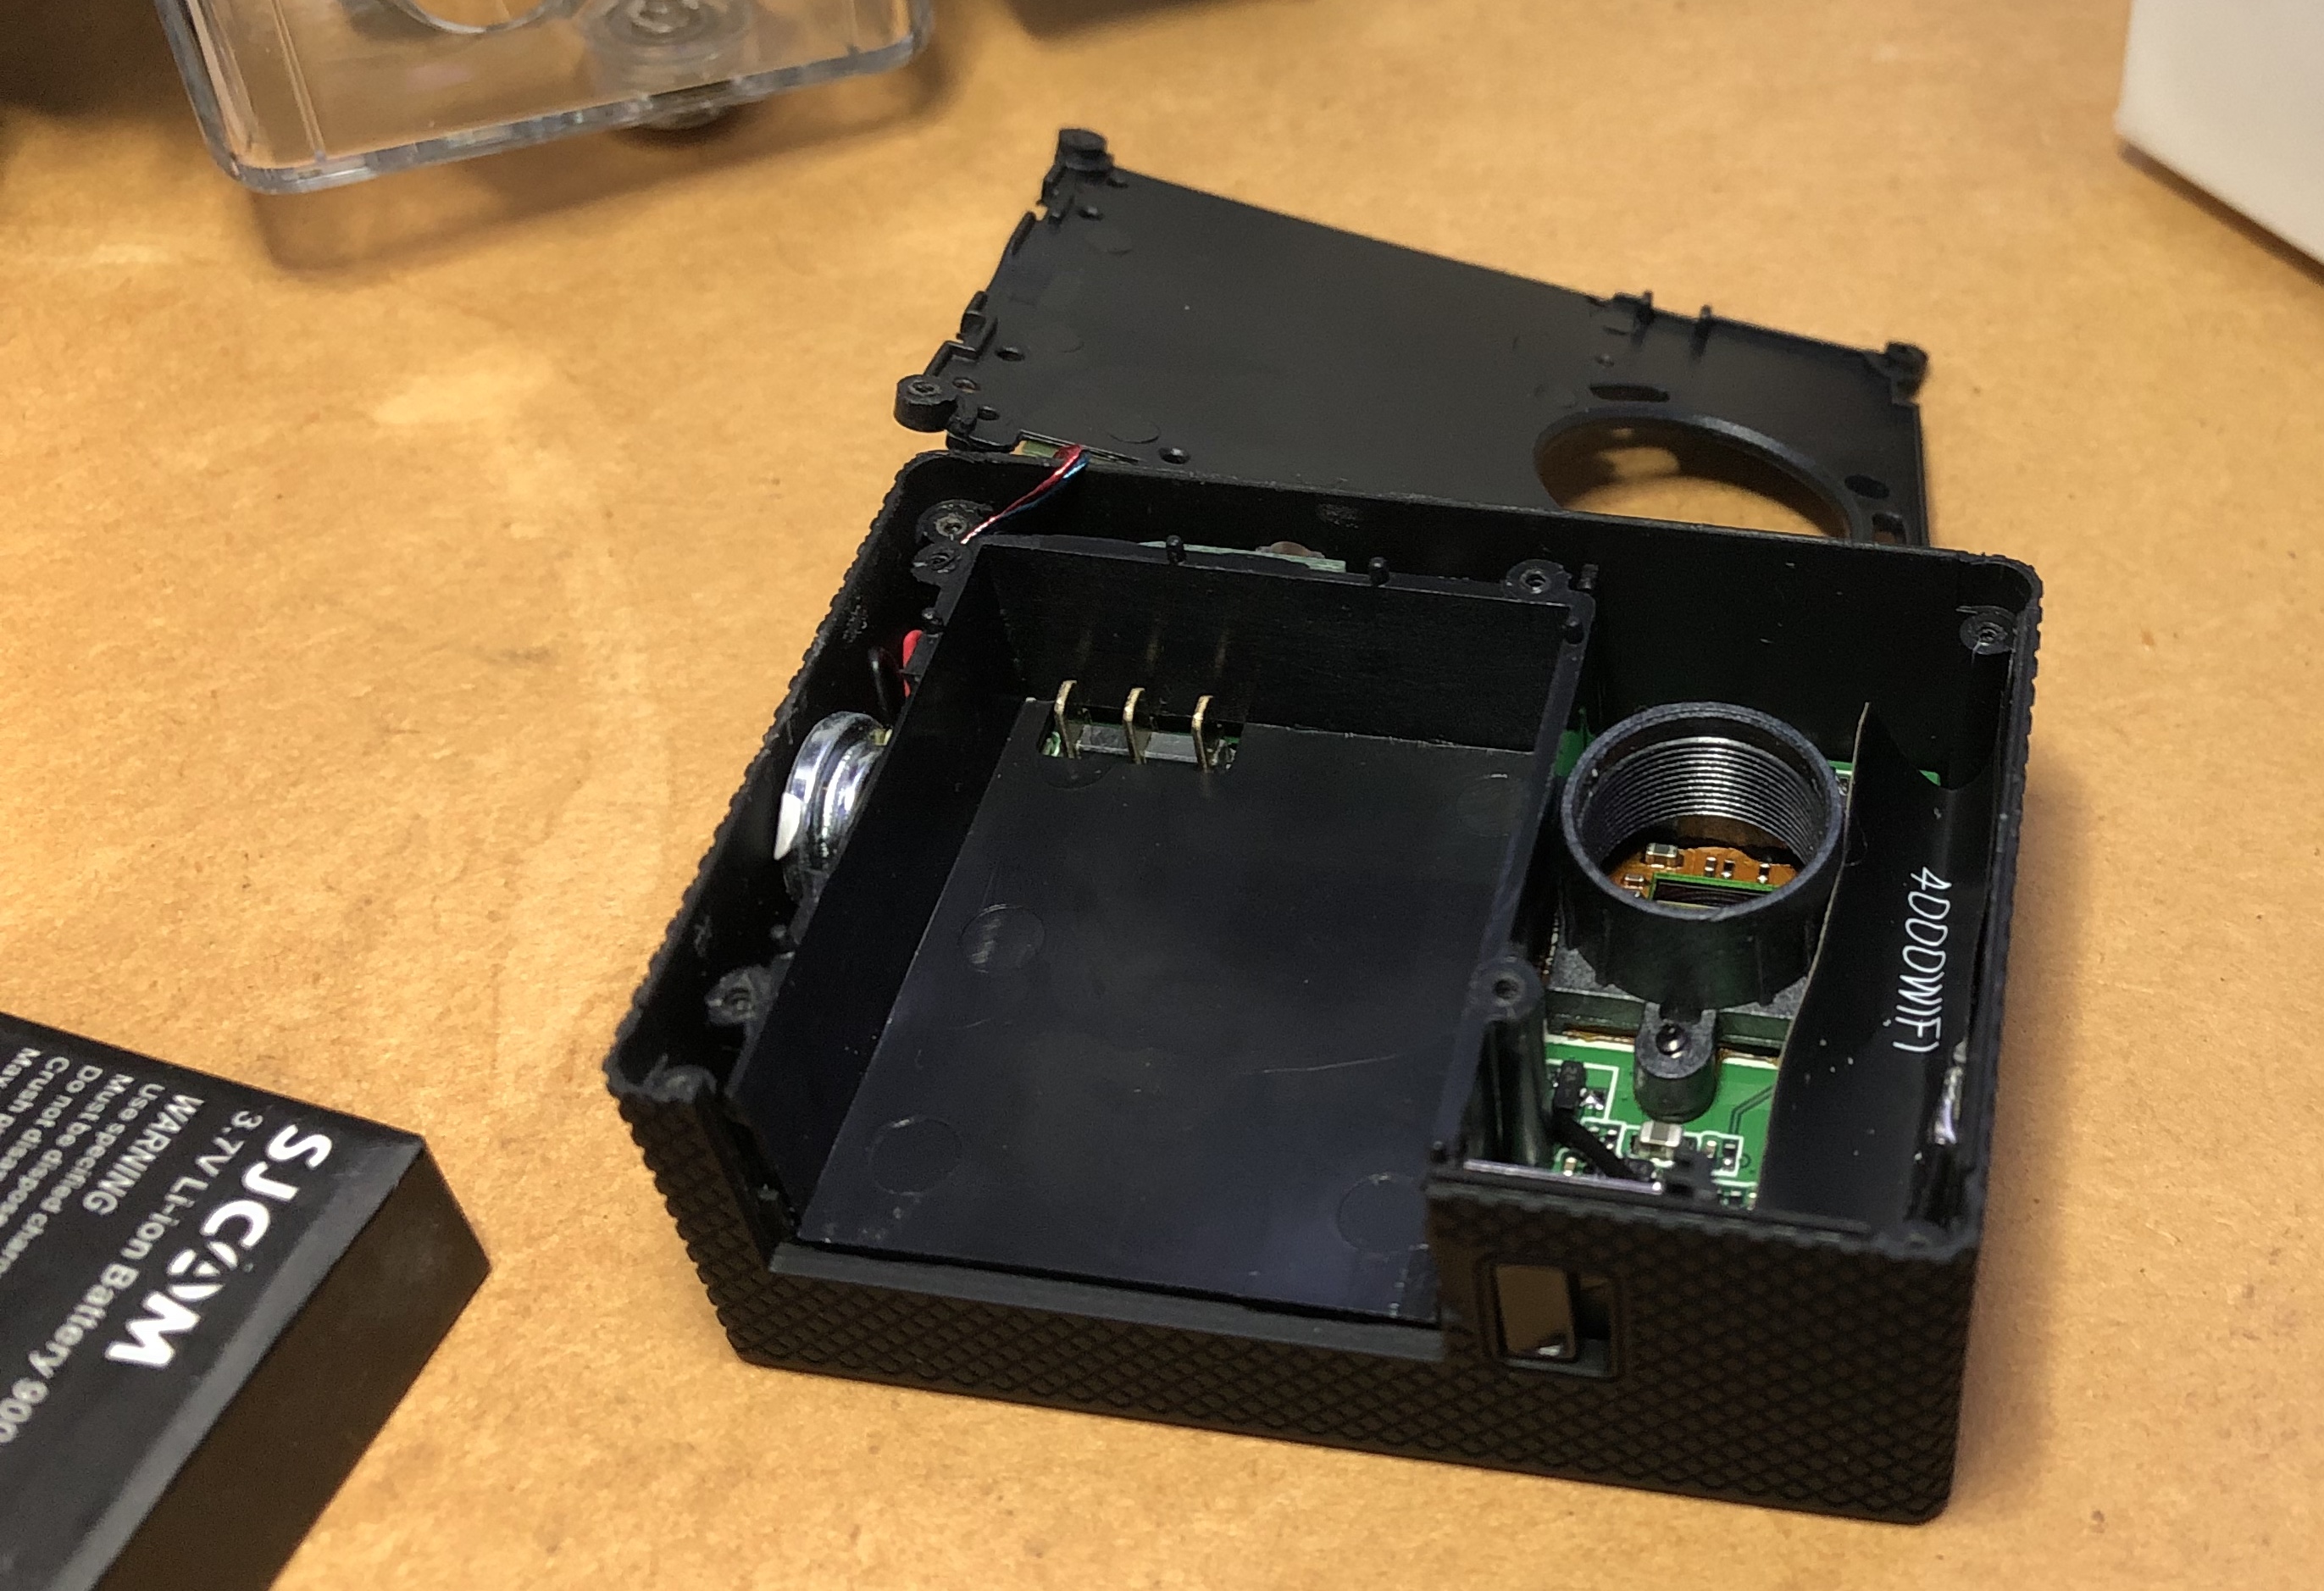
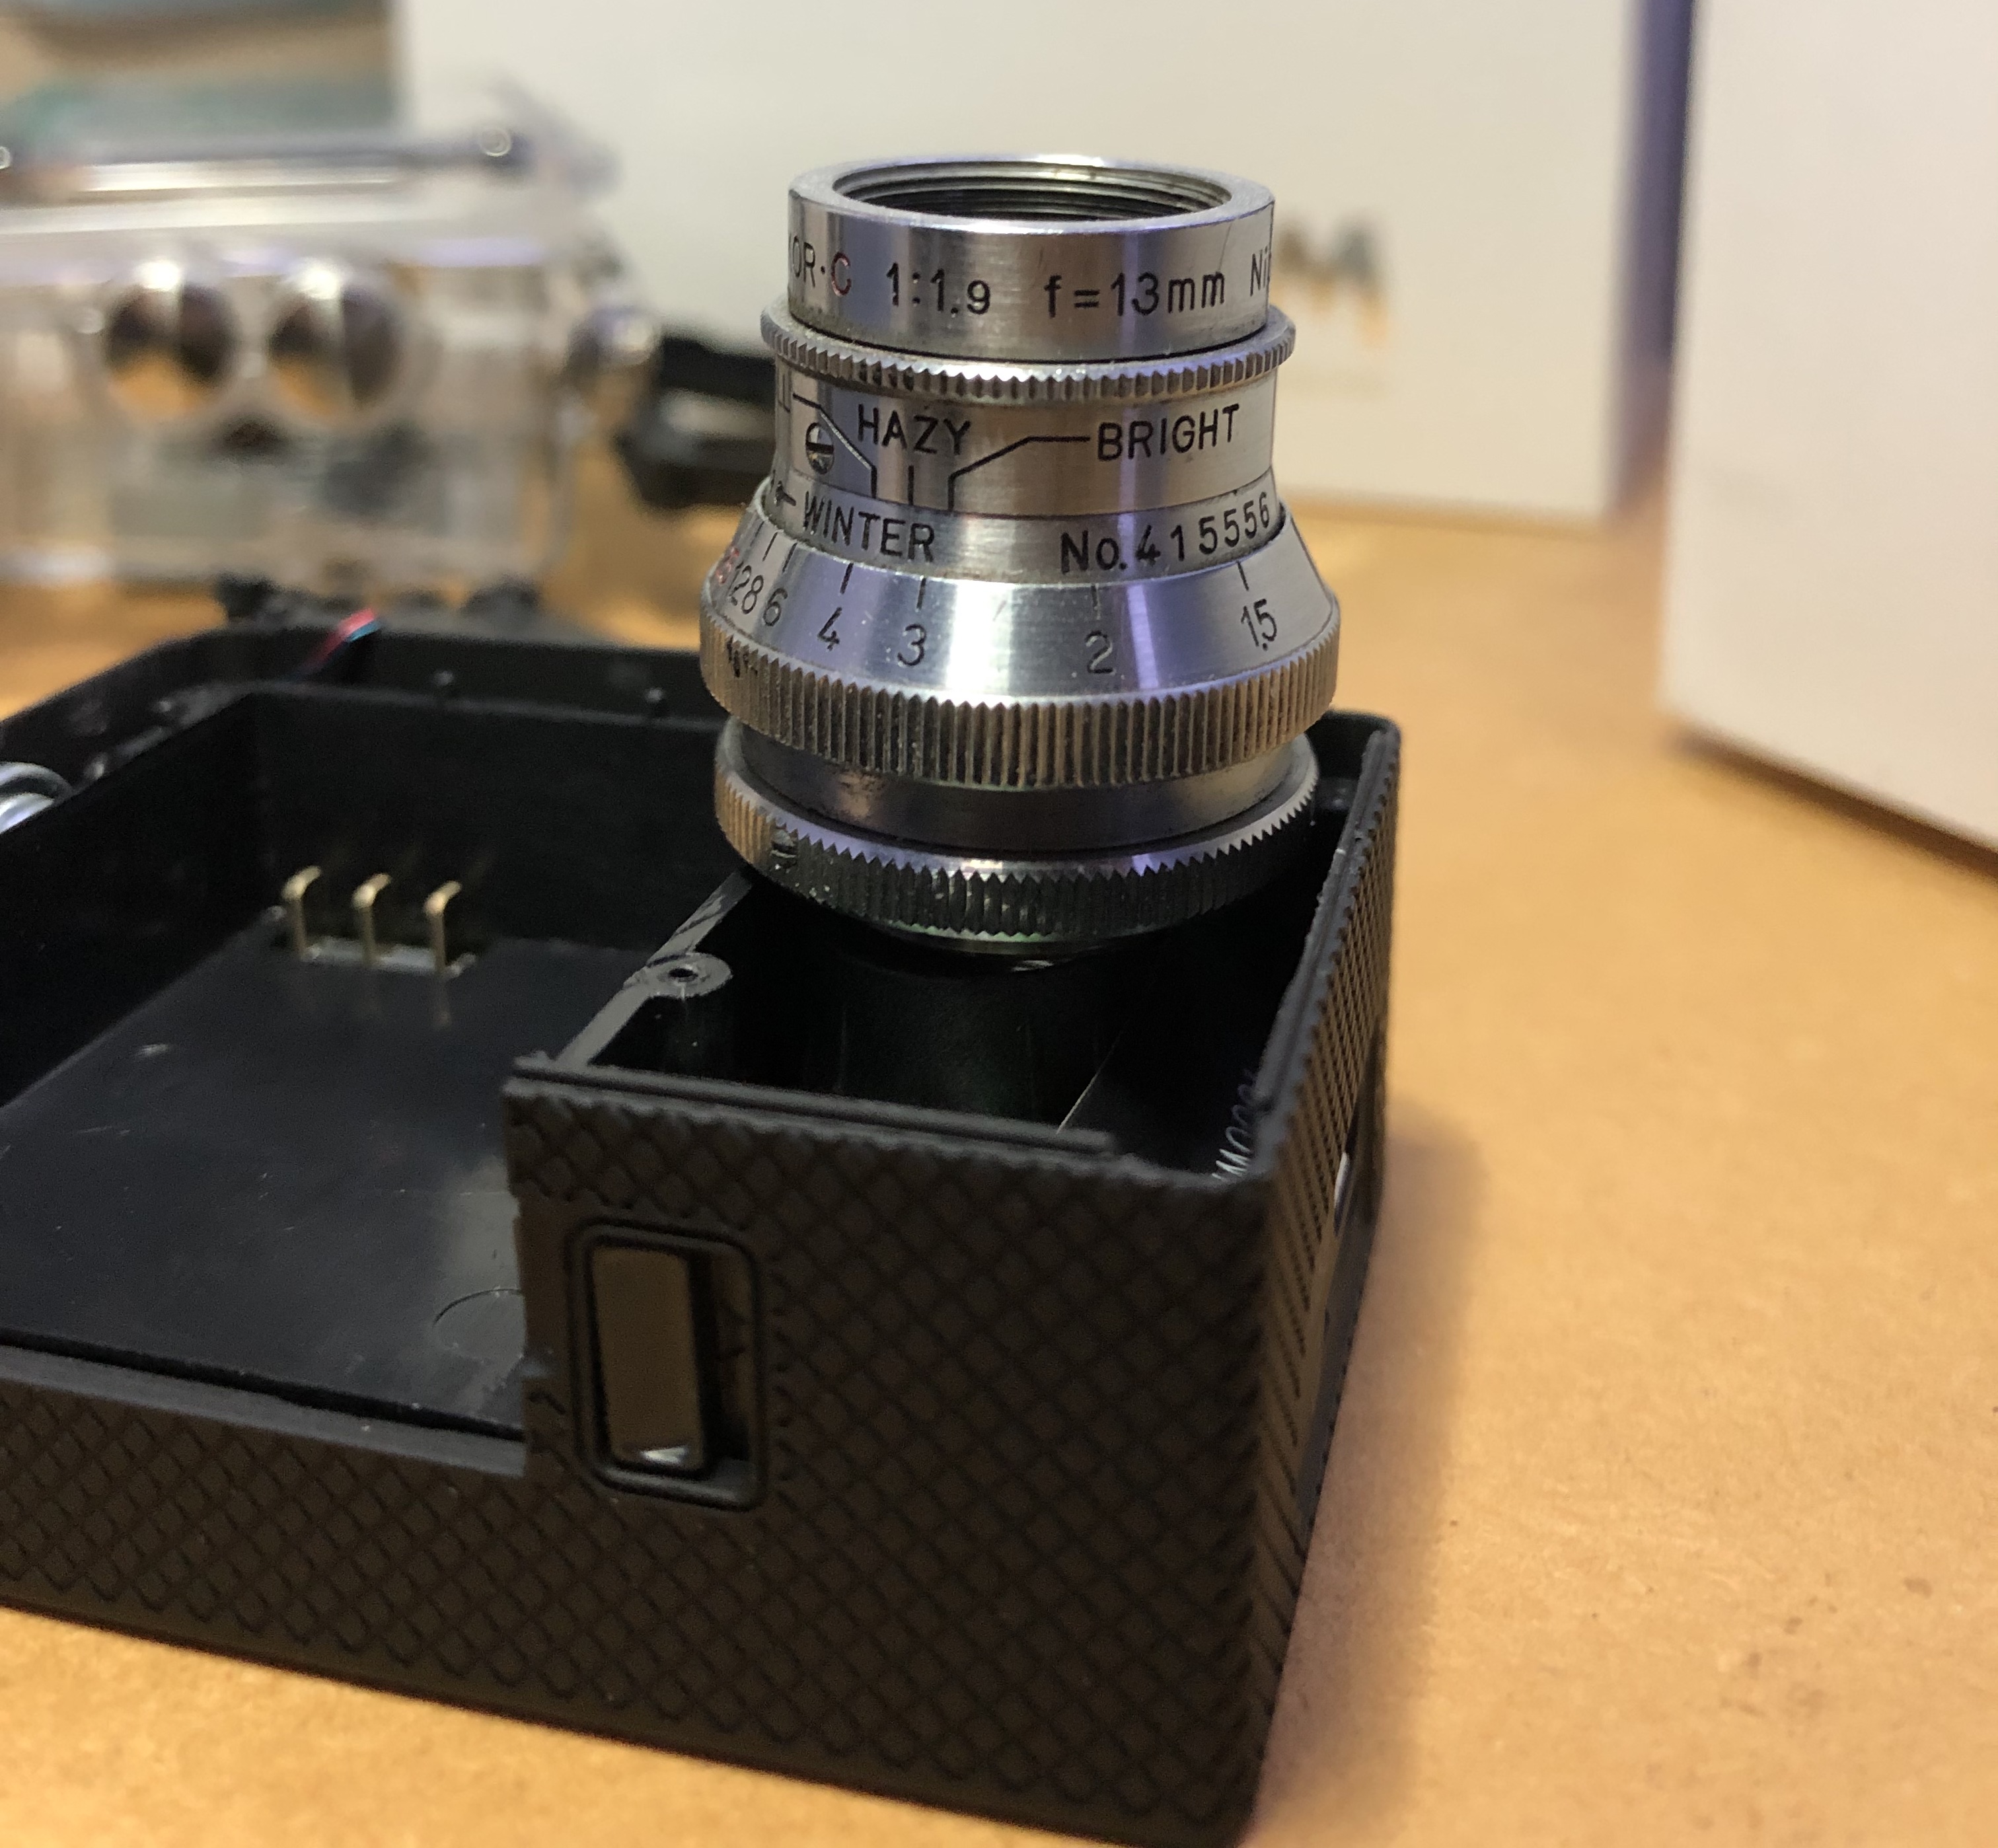
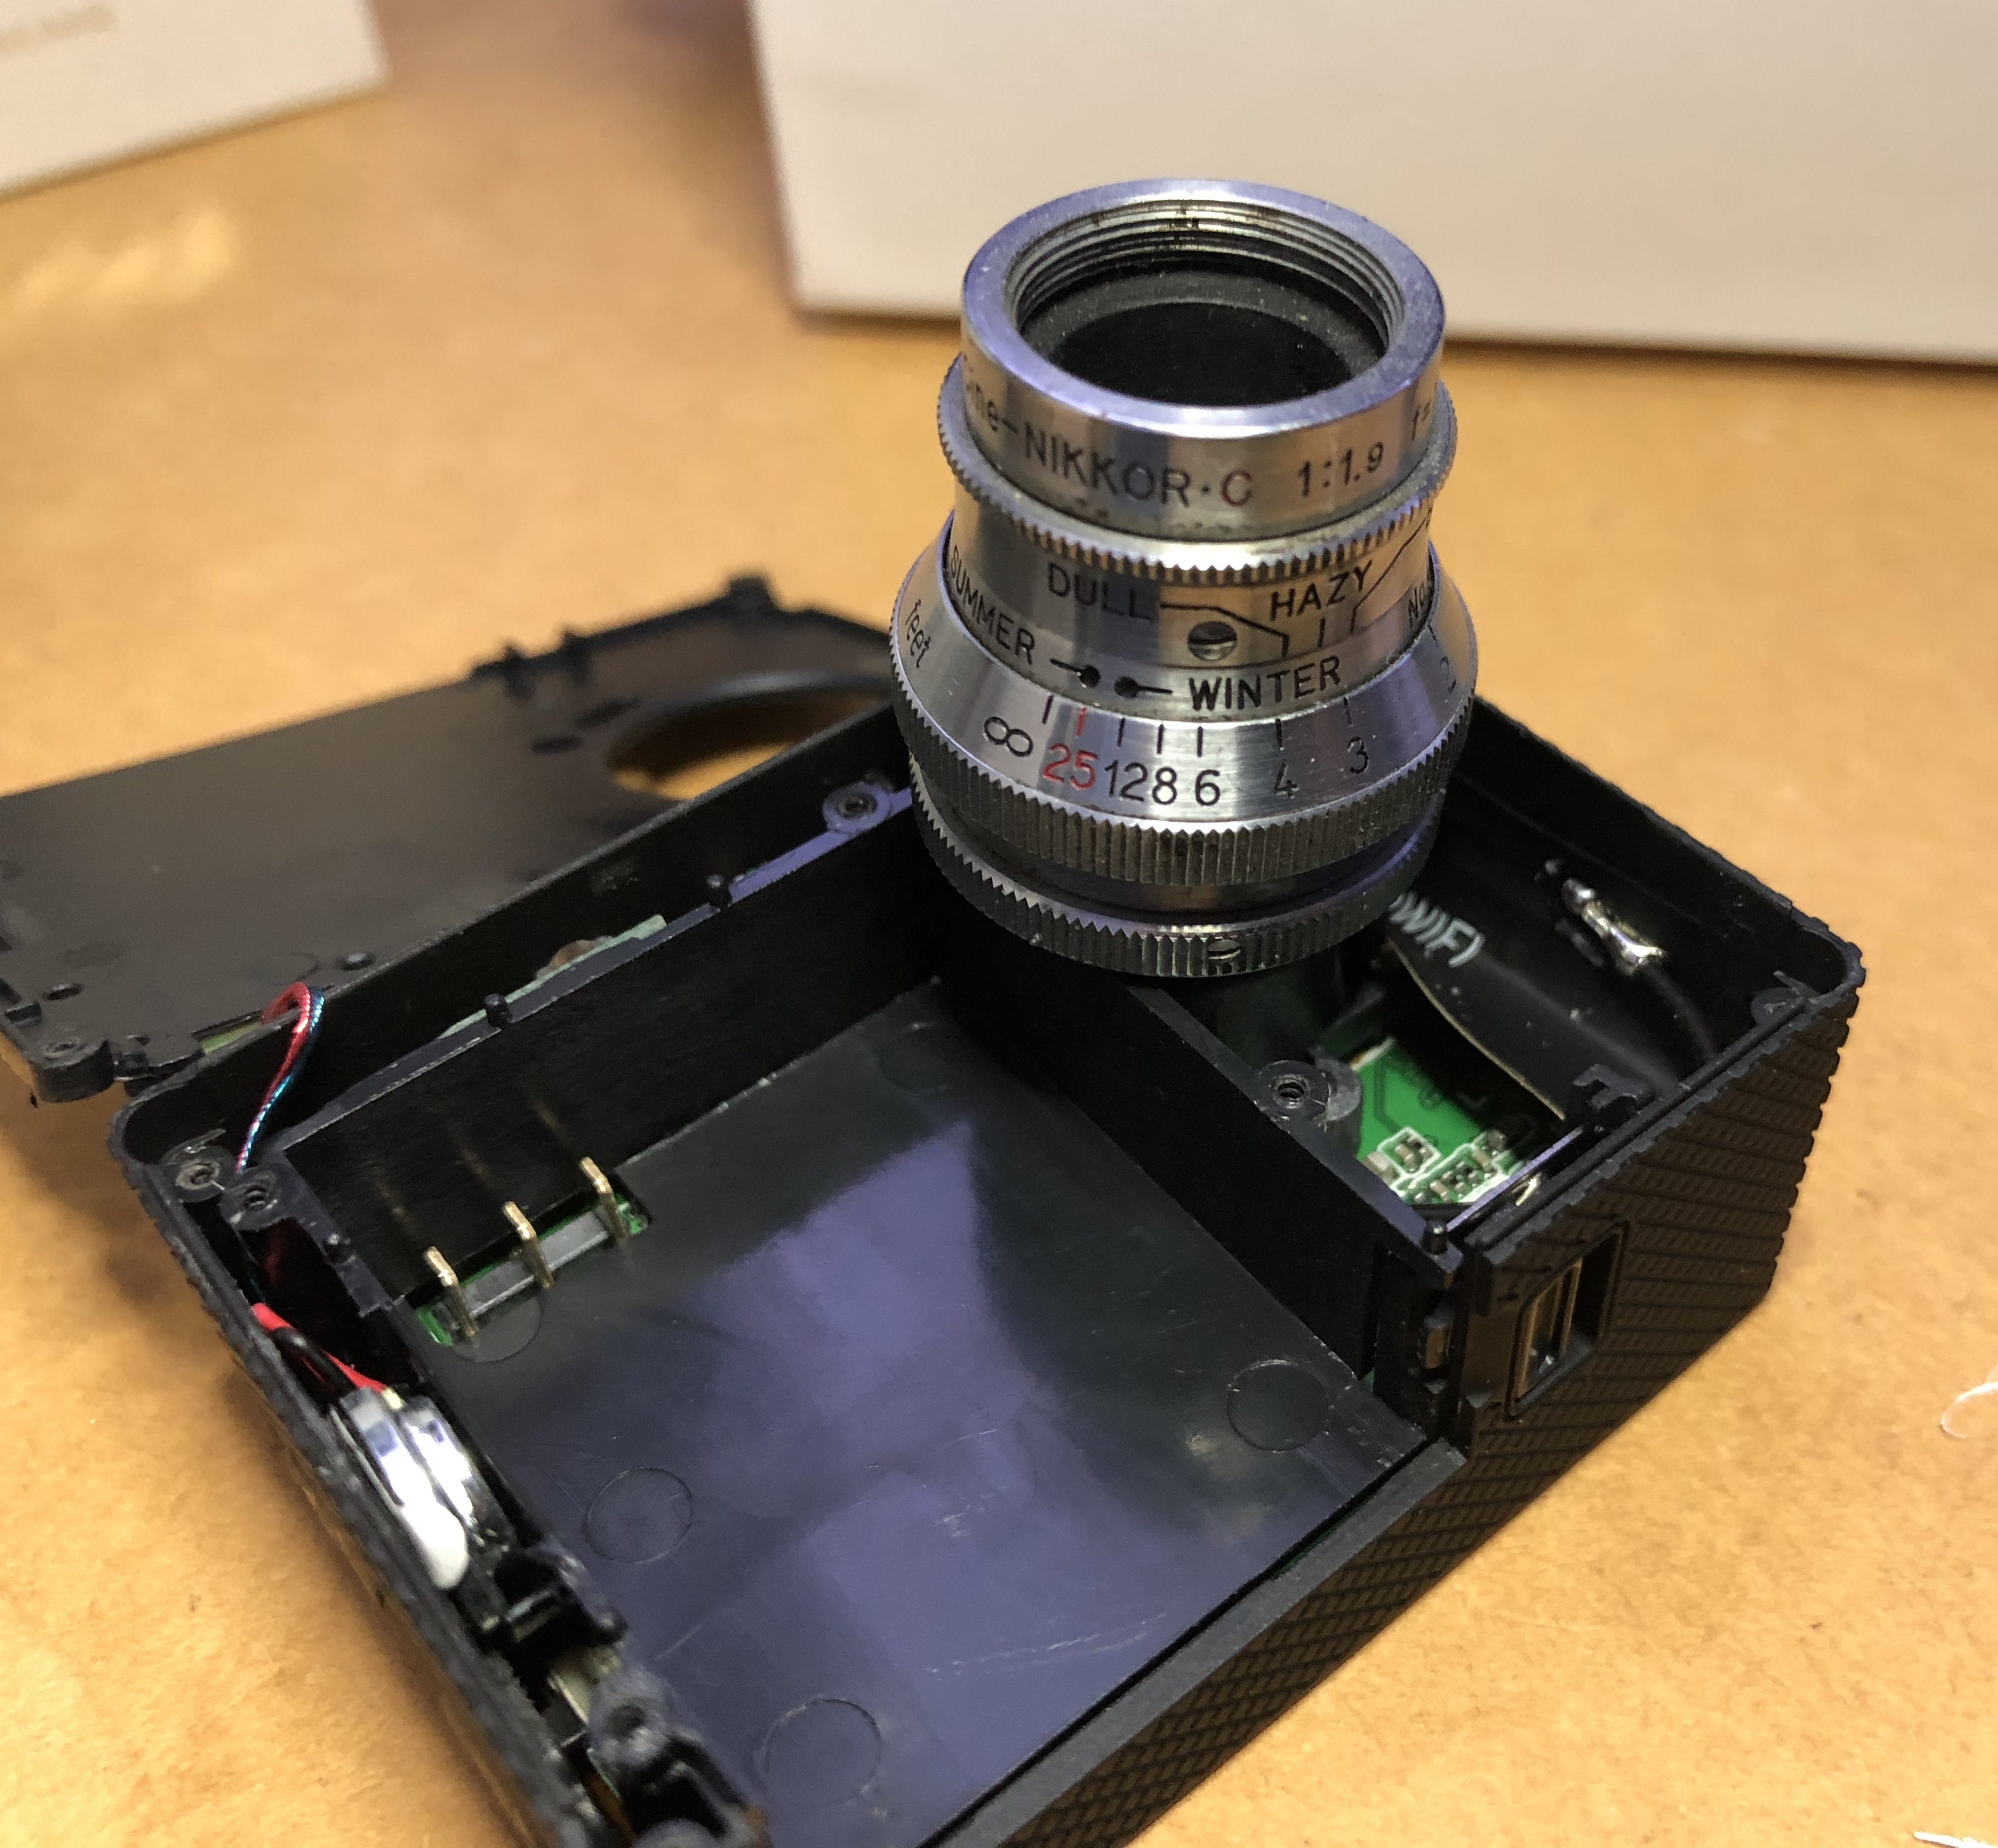
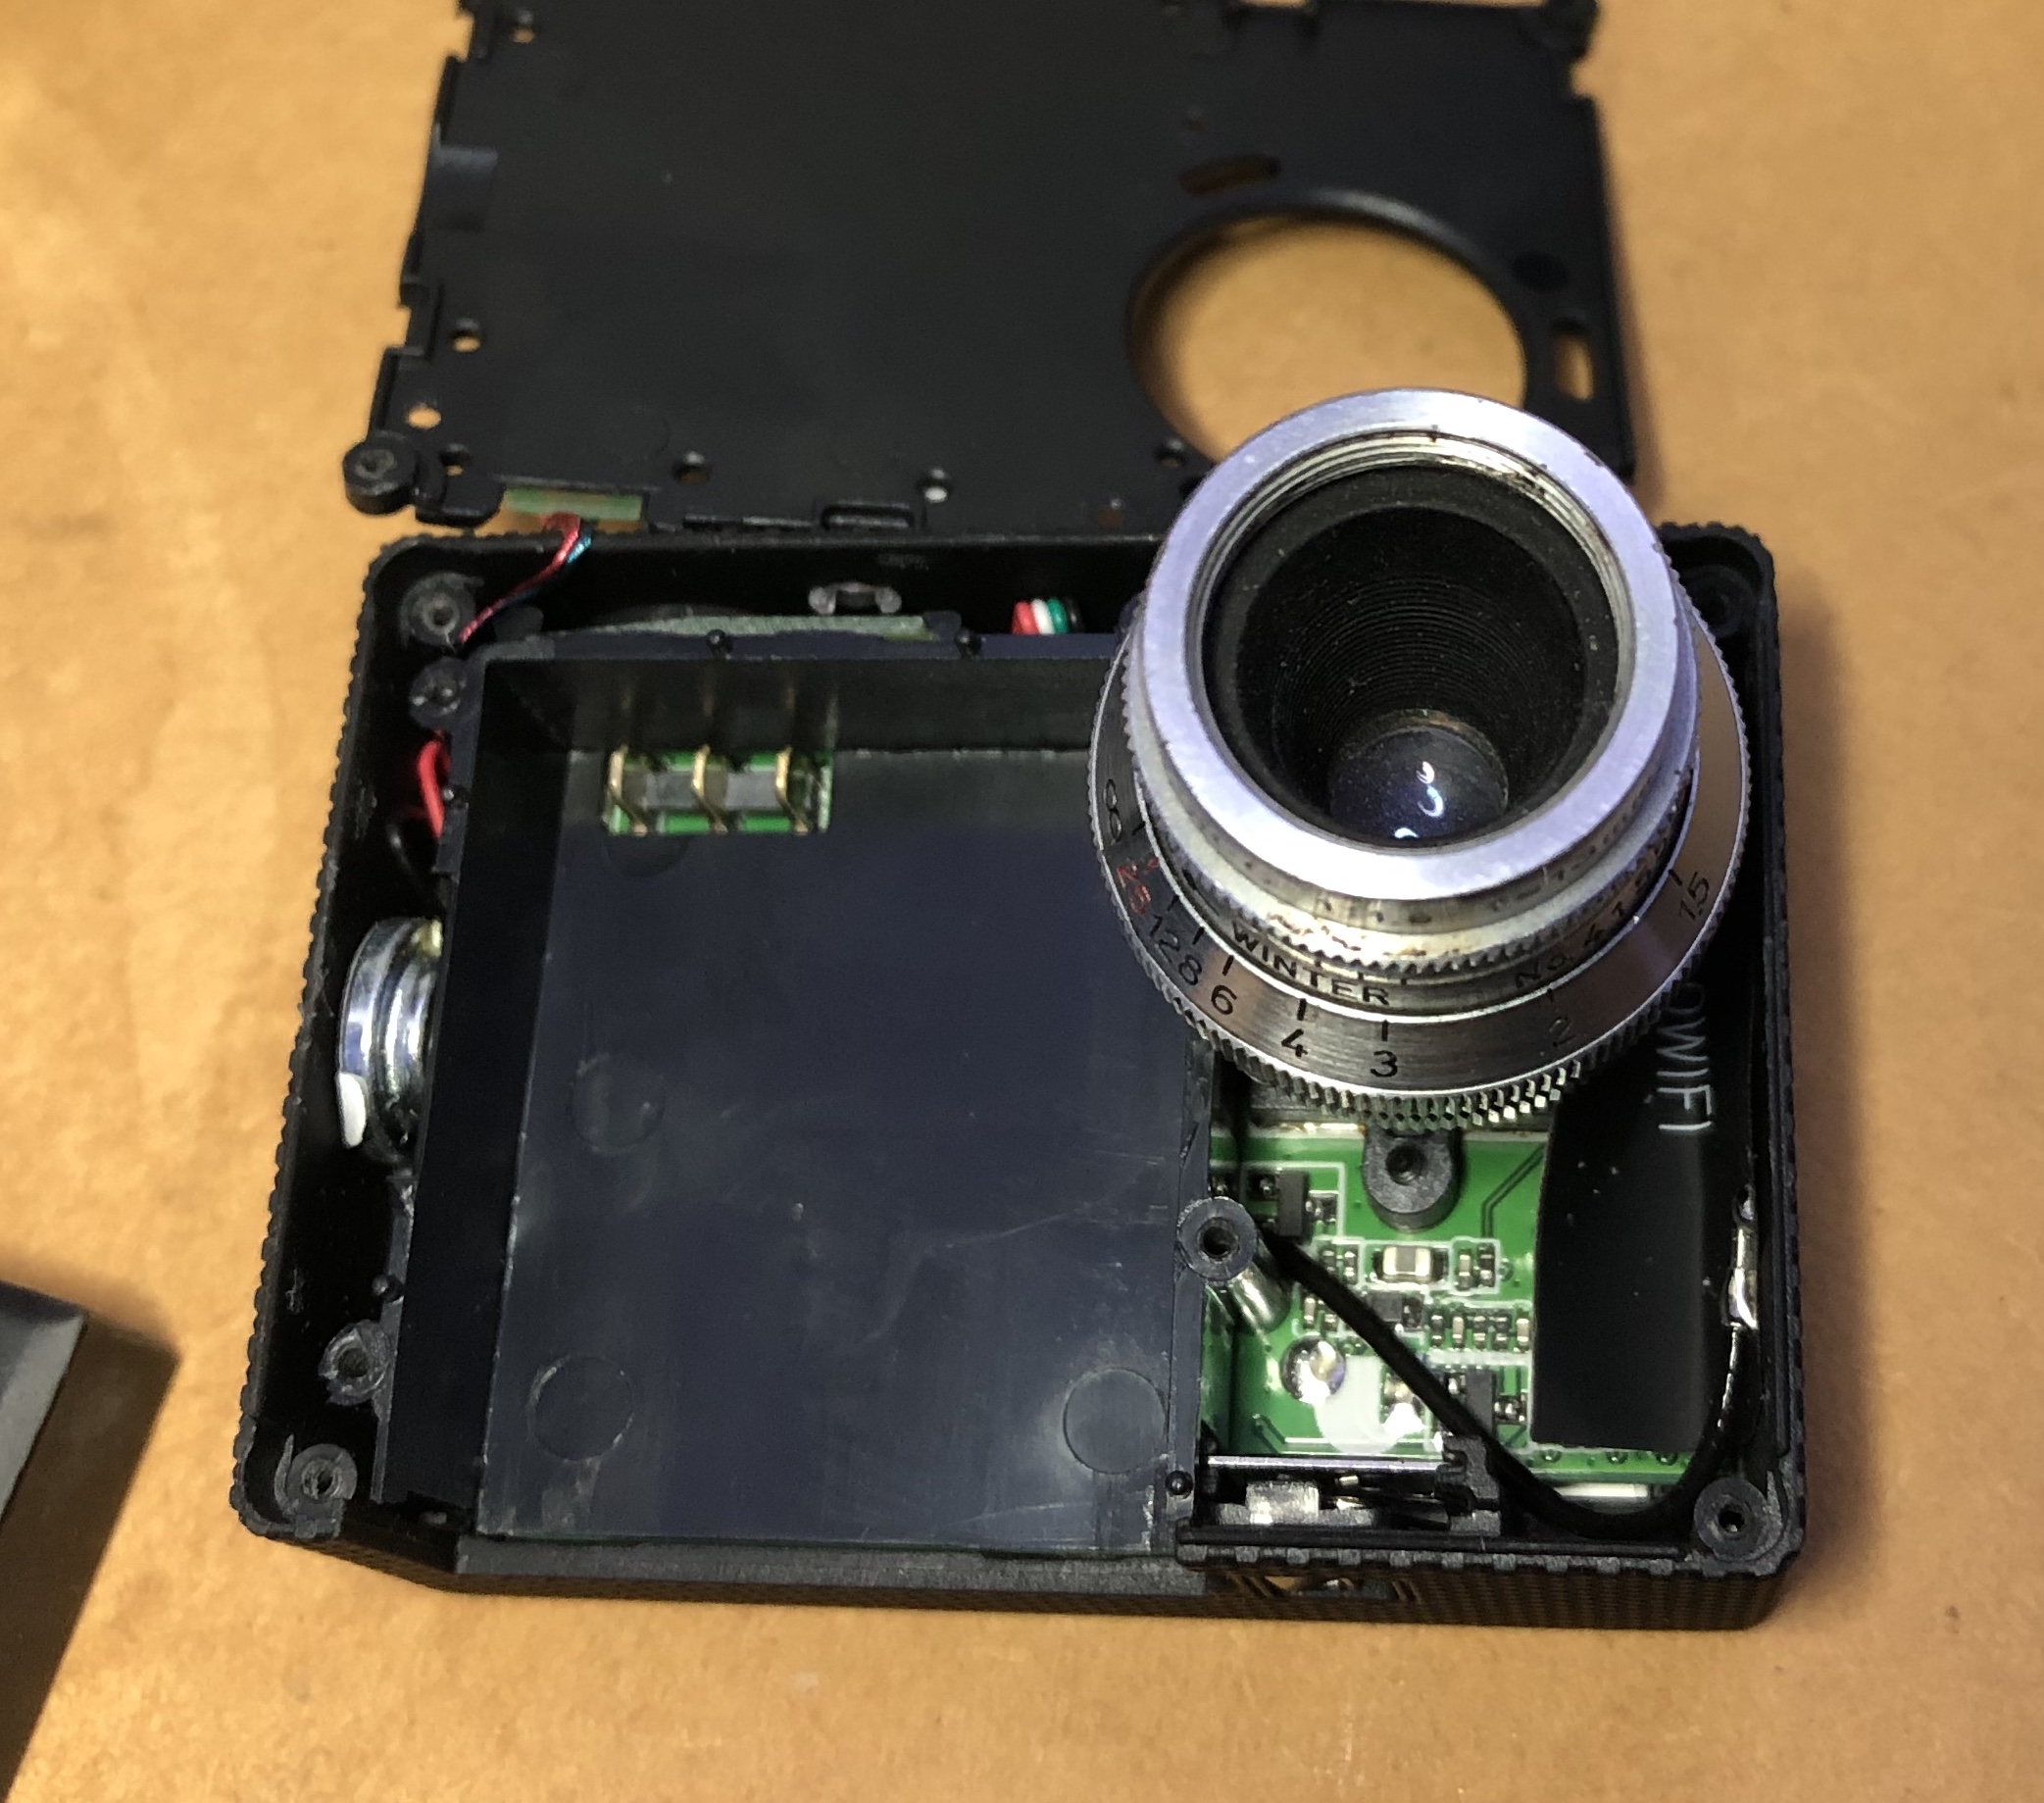
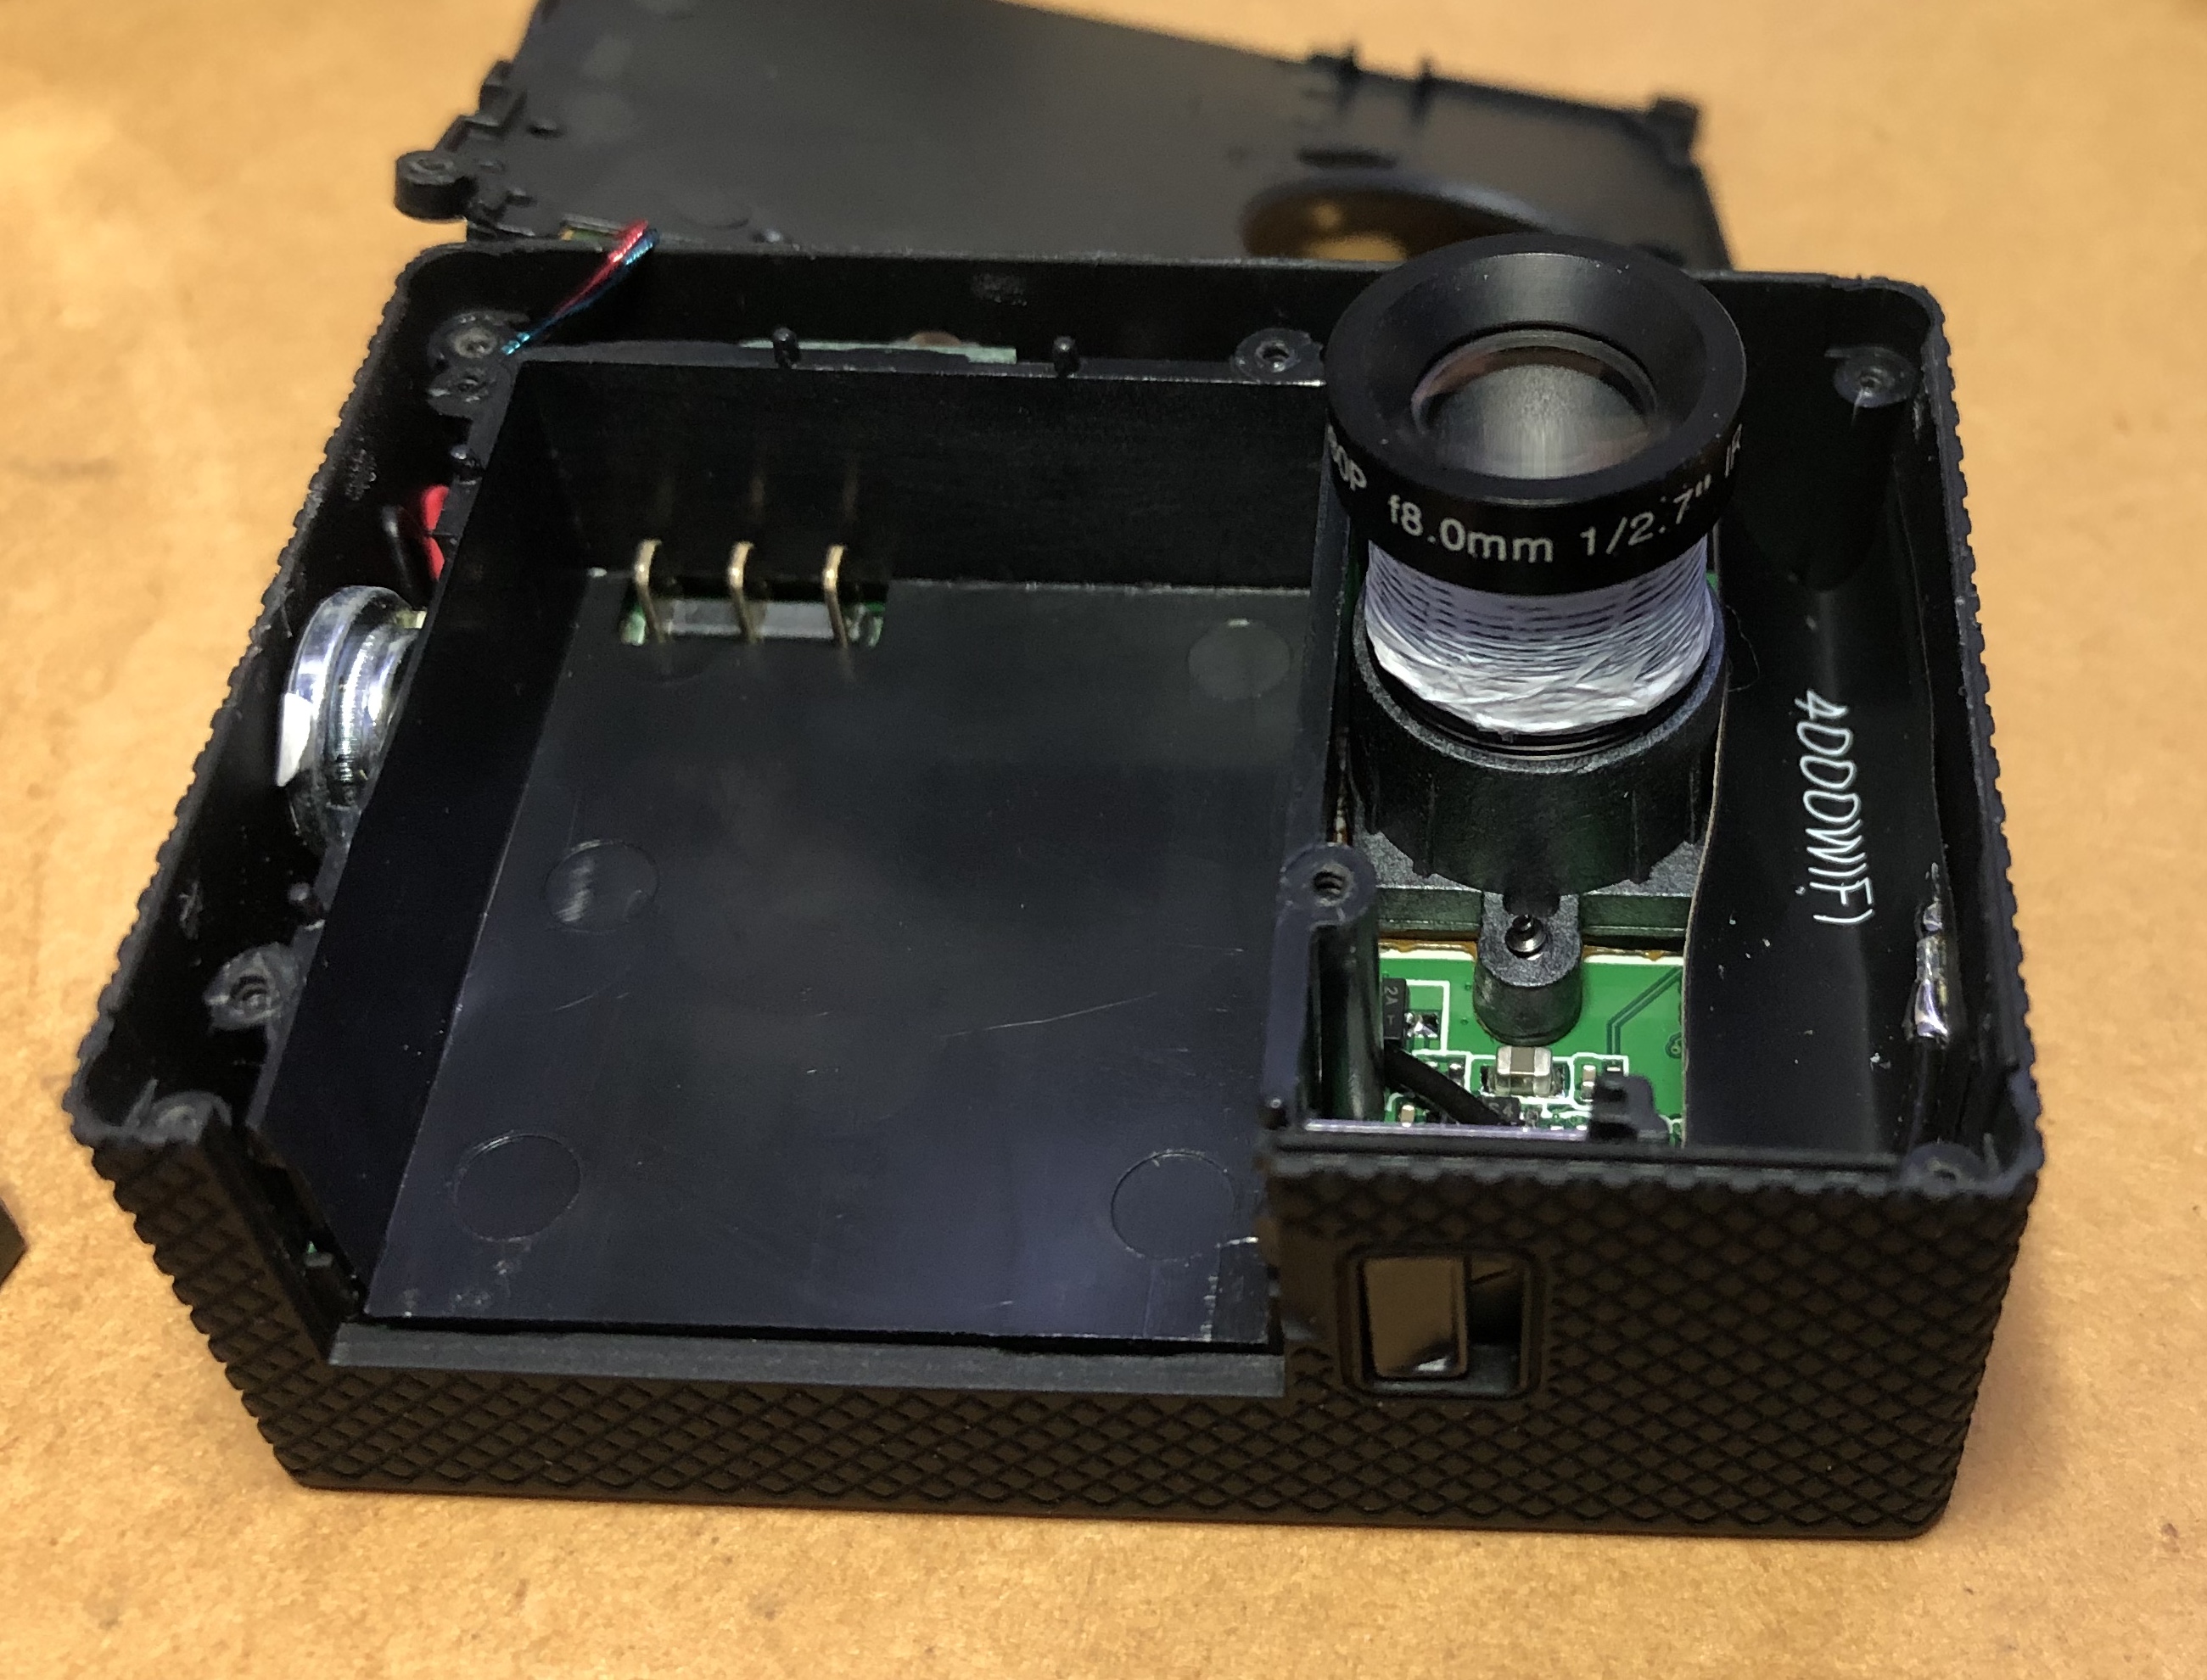
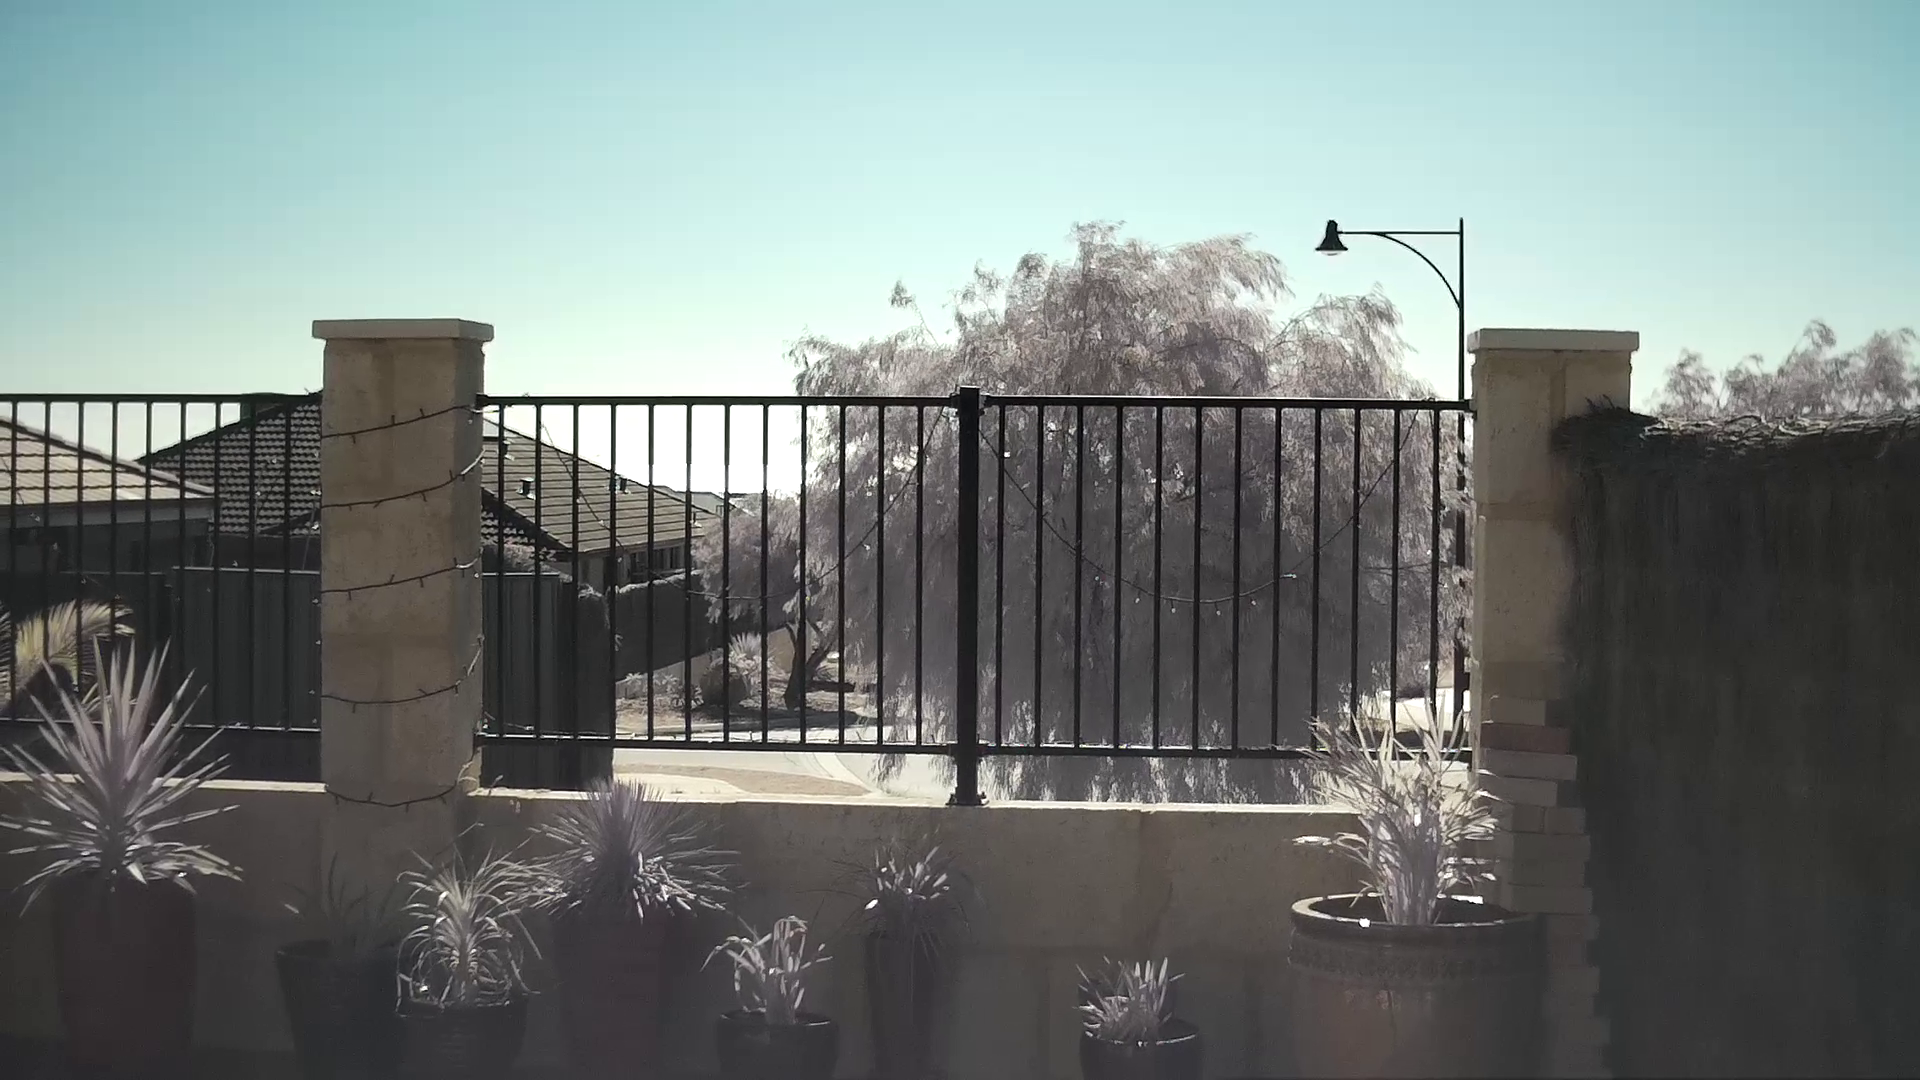
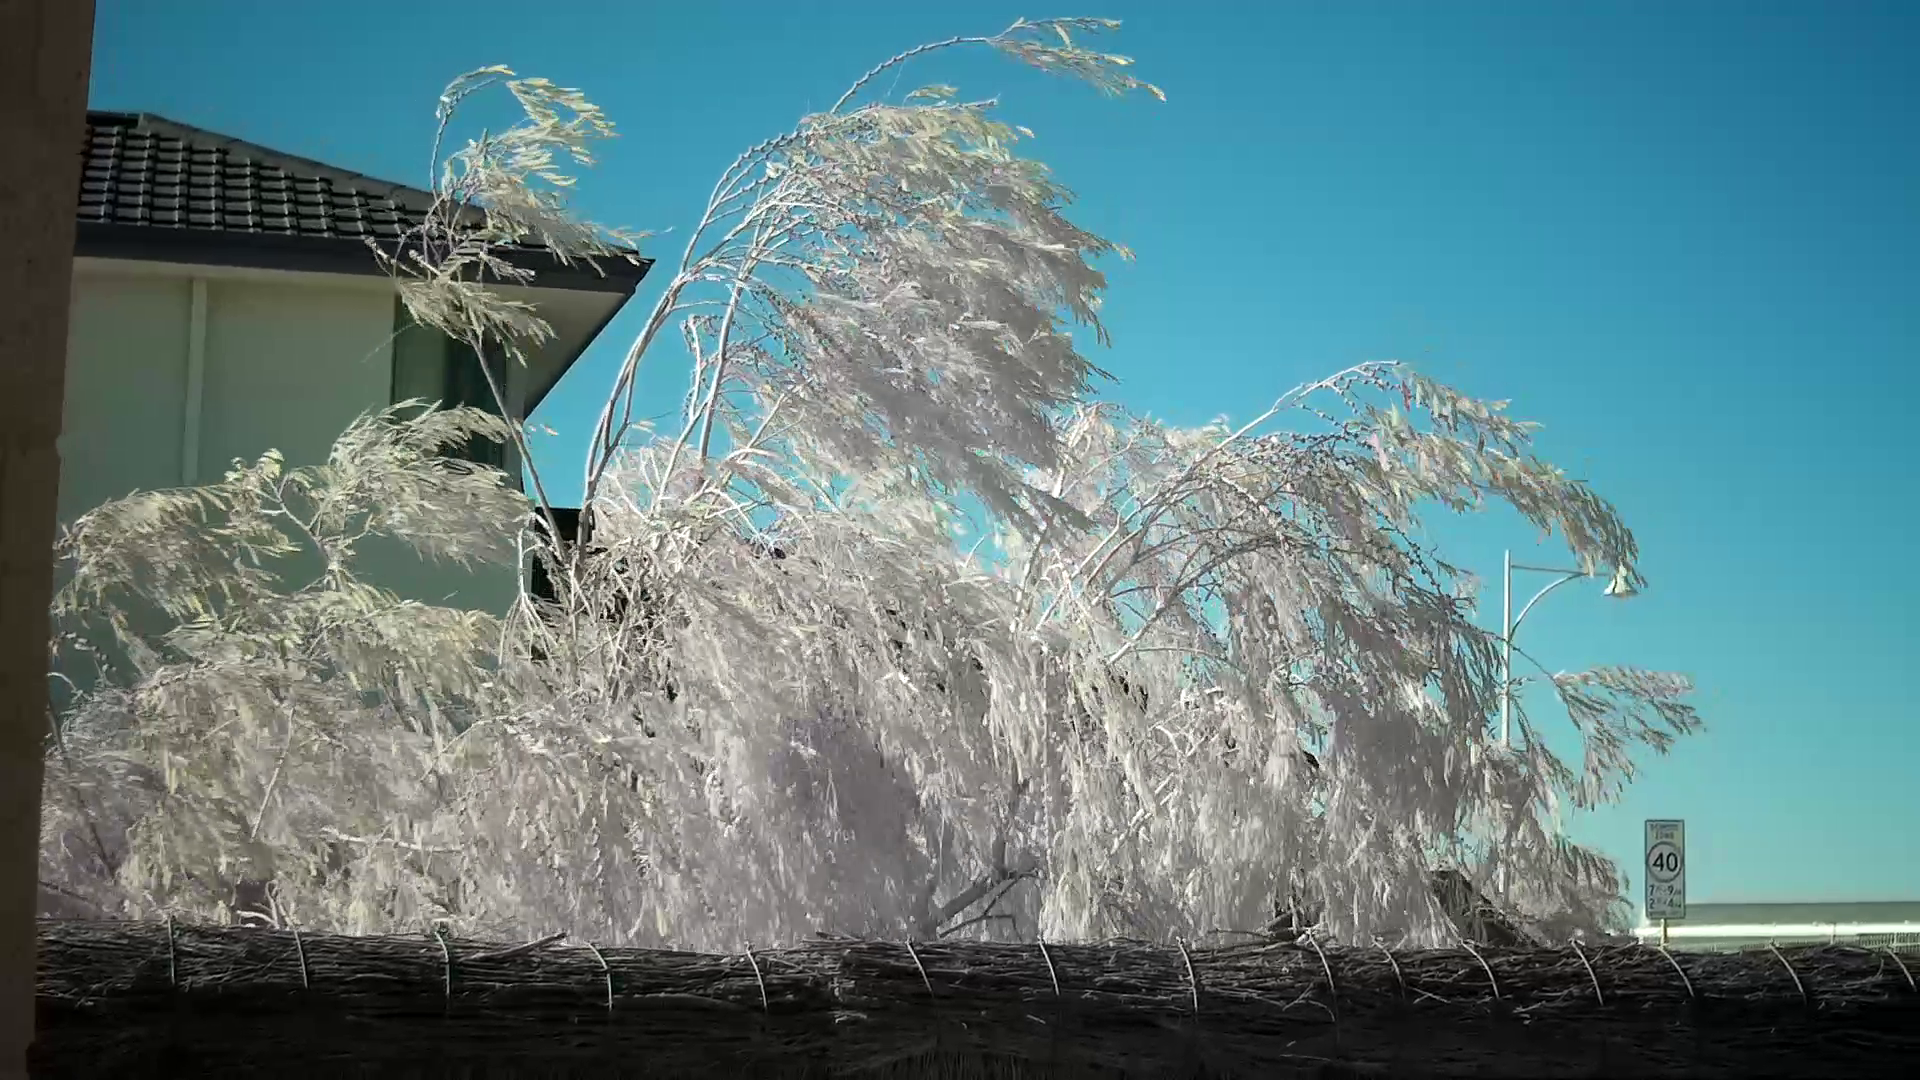
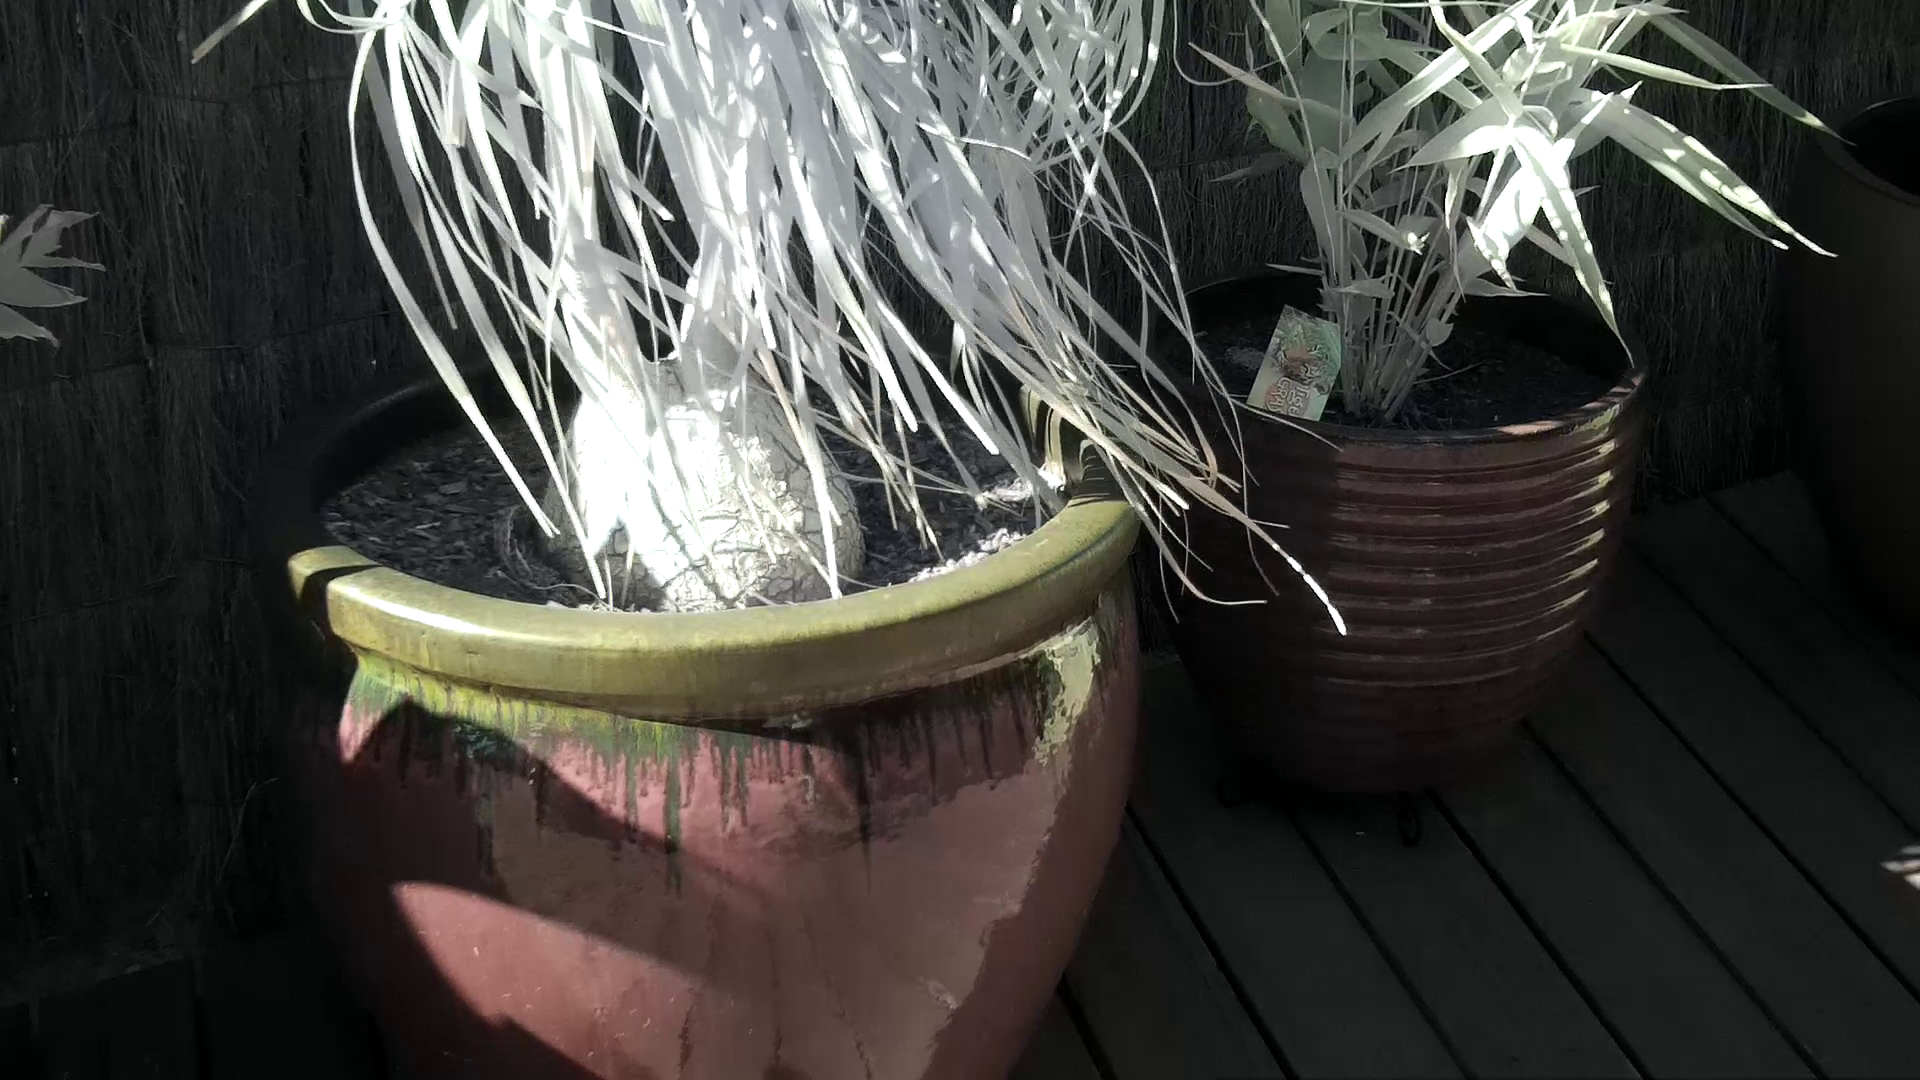
Well, I think that the D-Mount project might be dead, at least for me. Some time ago I ordered a genuine SJ4000 action camera, as they're structured very differently internally and are much more supportive of lens changes. Here it is, front plate and front panel removed (which is very easy to do) and lens removed (just twist with a strong pair of pliers to break the glue and it unscrews easily)... and here it is with the mighty Cine Nikkor just sitting on top: You can probably already see what the problem is - it interferes massively with the battery slot. What you can't see from those pictures is that when the lens is mounted at this distance from the sensor and is set to focus to infinity it can barely focus beyond the hand that is holding the lens. The infinity focus is so bad that focusing close-up on the lens is basically the same. The Nikkor would need to be mounted a significant distance further into the camera, making its intersection with the battery a problem. However, I also bought two other M12 lenses when I bought the camera... Here is the 8mm one, which gives a FOV somewhere around the 40-80mm range (I haven't really tried to estimate it better than that) which is perfectly serviceable and does the job of not being a crazy fisheye lens like the stock one. Here it is mounted in the camera: The other idea of the lens replacement was that it would be less sharp and slightly "vintage" with it's 2MP CCTV "pedigree". So, how does the footage look? Well, it's one of those good/news bad news things. Good news is the lens is great and flares like a monster: The good news / bad news part is that the new lens doesn't appear to have an IR filter on it, and I didn't swap the one from the other lens over yet, so it's an IR camera!! I've always wanted to try IR photography so that's pretty cool. Also, my original plan was to make everything B&W anyway, so that doesn't really matter much, and actually gives more light to work with, which is great for these tiny sensors. This pot is bright red, just like the leaves of that plant are bright green: The bad news is that the compression is pretty crunchy: Of course, I've worked with worse, so that's fine. But, going back to the Cine Nikkor, unless I want to somehow move the battery connectors, which are soldered onto the circuitboard IIRC, then the lens isn't going to be mounted to this camera any time soon. I'm also wondering if the codec is good enough to really warrant putting a nicer lens on it. I also bought a 16mm CCTV lens, but that can't even mount because it has to be so far AWAY from the sensor that it doesn't even touch the M12 mount, I'm free-lensing it at a decent distance in front of the camera. Also, the FOV from the 13mm Cine Nikkor would be prohibitively long, unless shooting with a tripod or a rig that's at least 20 times the size of the camera. One of the benefits of this setup is that it's so small I can film with it without any other rigging. I shot a project the other day with just my phone in 240fps mode, and am having fun editing that (my wife picked a ridiculous song for the edit which really elevates the project lol) and I'm wondering if using my phone is the ultimate camera for street and casual videography. Everyone takes photos these days and if I pull a face while I'm shooting maybe people will just assume I'm taking a selfie and not react in that "I've just been photographed!!!!" kind of way that some people do. So, SJ4000 and 8mm 2MP CCTV lens.. is it a cinematic beast? Probably not, but is it an interesting thing? Sure... It's probably the Super-8 version of an action camera.

-
I also love the look of lenses wider than 28mm. I think that the fact that 24/28 is the standard wide end of a zoom and therefore kind of the default focal length for landscapes etc put me off it. The fact that every smartphone video until two year ago was also that FOV sure didn't help. I settled on 15/35/85 FF equivalent FOVs as how I shoot. I love the 35 for environmental portraits (which is most of the work I do) and the 85 for close-ups or detail shots or far-away things and the 15 for landscapes and buildings and anything that's big and you want a WOW reaction from. When I bought my Laowa 7.5mm f2 (which is equivalent to a 15mm F4 on FF) I was tossing up between that one and the 10.5mm f0.95, but I wasn't sure that the 21mm equivalent FOV would be wide enough, and you can always crop in post but you can't zoom out in post so I didn't get it. Having done a few trips with the 7.5mm (and the 8mm SLR Magic I had before that) I've realised that I don't think I ever need quite the full width of the 15/16 FOV they give, but I'm not sure how much narrower I can go before I'd start missing the width. 18mm might be a good point to look at. I've done shots where I filled the 15mm FOV with the object, not leaving any dead space on the sides of the frame, and found that I had to get closer and the wide-angle-distortion was too much, so I'd have been better off standing further back and having a longer focal length. This is an example where the lens is too wide, unless you're deliberately going for a ridiculous look which I was.... but for this shot it was fine:
-
It's worth mentioning that with the right geometry you don't even need to tighten the clamp at all. This hook, which is designed to sit on top of a door, works because all the force is applied to one side of the door, and because the force from gravity is down, which keeps the hook securely on top of the door: Obviously the clamps we're talking about can easily rotate if kept loose, but I'm just saying that they don't need to be super tight because they're not fighting gravity, they're working with it.
-
Ok, now I am going to call you guys crazy.. Balconies are designed so that drunk people partying will be stopped by the fence/railing when they trip or get shoved towards the railing. People who fall from balconies do so because they fall over the railing, not that the railing fails! I'll take the structural integrity of something designed to hold up 100kg+ falling people over the structural integrity of an aluminium tripod with a rating of 10lb/5kg 🙂 Obviously it's important not to over-tighten the clamps, and also to ensure that the teeth or clamping surfaces aren't sharp in any way, which can easily be done by just putting a towel or t-shirt inside the clamp, but the setup only needs to hold up a GHx and lens combo, so that's not a problem. I can also arrange to put a tether around it to catch the setup if the clamp fails, but the orientation I would set it up in would put the centre of mass on the balcony side of the railing so it would tip into the balcony rather than over it anyway.
-
That makes total sense, and I guess that the lack of them out in the wild (they're radically backordered) will exacerbate current second-hand prices too. I can't justify the purchase now, so waiting until more people have taken delivery of theirs, and inevitably a bunch of people working out that it's not for them, will mean there are more around and the price might go down a bit. The way people were talking was that the editor was almost the same price as the license, so the (faulty) conclusion would be that you can get these things for almost nothing!! Alas. I think longer-term I would likely end up selling it anyway. For me, the more important aspect would be learning what techniques it's designed around and then implementing them in some other way. The only non-keyboard thing that the editor seems to have is the jog wheel, which I already have with my Beatstep Resolve conversion.
-
So, if I bought the Speed Editor and then sold the Resolve license to recoup some of the cost, how much is the difference? Has anyone looked at this? My rationale is that I want the Speed Editor but don't want to pay for it!
-
double post
-
double post
-
Ah ha... now I get it! You use the clamp to attach and then the head to change the orientation 🙂 Considering the cost of these things I'd be more likely to buy one and put both cameras on it rather than buy two. For that I'd probably mount a couple of arca-swiss quick-release clamps to a flash bracket and then the flash bracket to a ball head and then the ball-head to the grip head. So how do I mount a ball-head to the grip head? Is there a pin of some kind that goes in the grip head and ends in a 1/4-20?
-
I'm not convinced - the 24-70/2.8 will be as good a lens that Canon / Nikon / Sony etc can make, but they all managed to extend the zoom range by lowering the aperture by a stop. I cannot believe that the same trade-off isn't possible at a slightly lower focal length.
-
D16 would do it! The GX85 is definitely a small package, but the D16 would fit in much more convincingly on the set of the original Star Trek, and I suggest that perhaps that's the more important criteria 🙂
-
What makes you think he hasn't already got one? ....or more? 😂😂😂
-
I am at that stage of just refining my kit with odds and ends. I think this is a good place to get to because it means that you're actually taking feedback from how you work on real projects, and you're refining your kit to be the most useful to how you work. In terms of new camera GAS, I'm thinking I should build a collection of great looking stills from videos I've shot just so that when I start going "maybe I need a...." I can just go look in that folder and remember how good the camera I already have is. That can then me a kickoff point to thinking about lights and composition and things that may actually improve my images... 🙂
-
or maybe I mount a ballhead to the end of these...
-
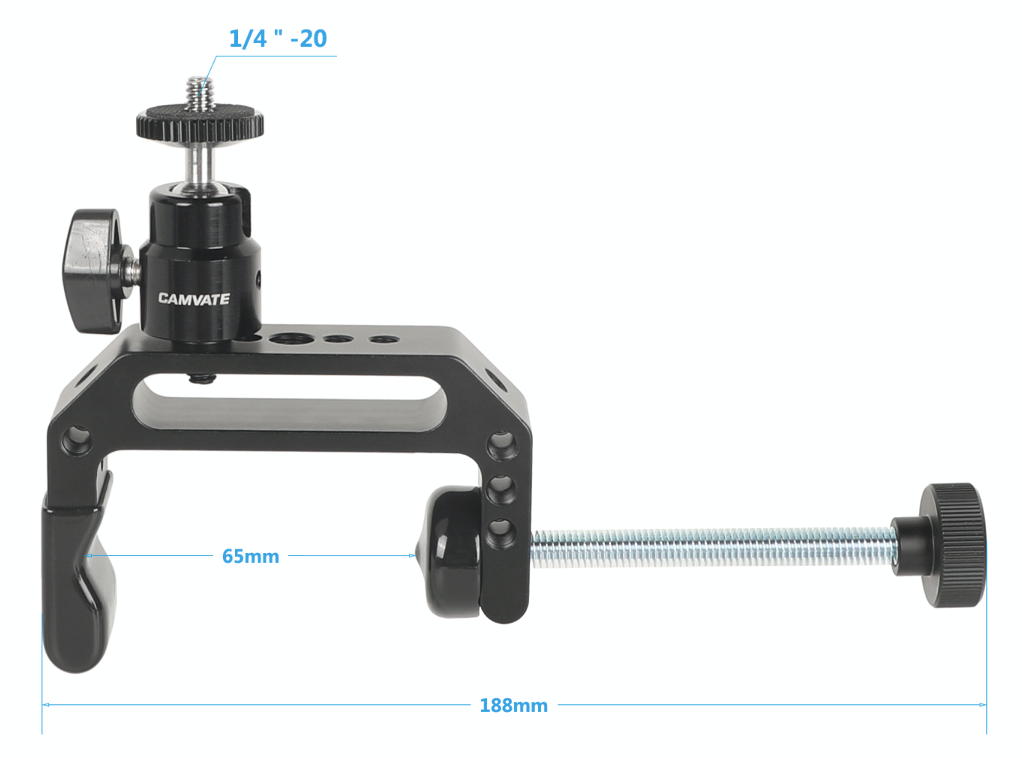
Same with this one, also from Camvate...
-
This one has the right geometry, but doesn't open up far enough...
-
You're paranoid! Not sure why you requested that, but anyway, moving on... 😆😆😆 Ideally I'll have two, one for my action camera and one for my second camera (likely a GH3), so spending $100 each for tripods that weigh ~1kg each doesn't really make sense, especially considering that I wouldn't use them for anything else. I've taken a tripod on long trips and never used it, and taken a large Gorillapod and only used it for time lapses mounted to a balcony rail, so this is literally the only thing I need anything for. Thanks, half the battle is knowing the right terminology. However, it does look like neither is a good fit. The problems with the Mafer style is that they don't seem to open very wide, with the max I could find being 2" which is probably fine for rigging etc but is on the smaller side for handrails, so I'd be running the risk of it just not being large enough if I got a larger handrail. The Cardellini look to solve this issue, and the vise-clamping motion seems to be perfect, but I'm not that sure the geometry quite works. If I oriented it like the below then that would work for free-floating handrails but wouldn't work for handrails capping a glass sheet, which are very common. Ie, I can't attach the clamp upright like this: on balconies that are a rail on top of a sheet of glass like this: In that situation I could clamp it so the threaded rod is horizontal, but then I'd have trouble attaching the tripod mount on the end. This clamp has the right geometry, but it's special order from B&H and the price is getting a little high at USD$54 each. This could really be achieved with a cheap hardware store clamp with an angle bracket welded to it. I think my late father-in-law had a welder gathering dust in the shed, so maybe I should fire it up and with a few dollars of parts and the worst welding job in the world I'd have something suitable. I was just thinking there would be a $7 high-impact plastic clamp on eBay that someone knew about.
-
This looks like a good option as it looks like it can clamp on flat and round things, but it's 1.2kg / 2.7lb !!! https://www.bhphotovideo.com/c/product/840831-REG/Kupo_KG500511_Large_Gaffer_Grip.html/specs
-
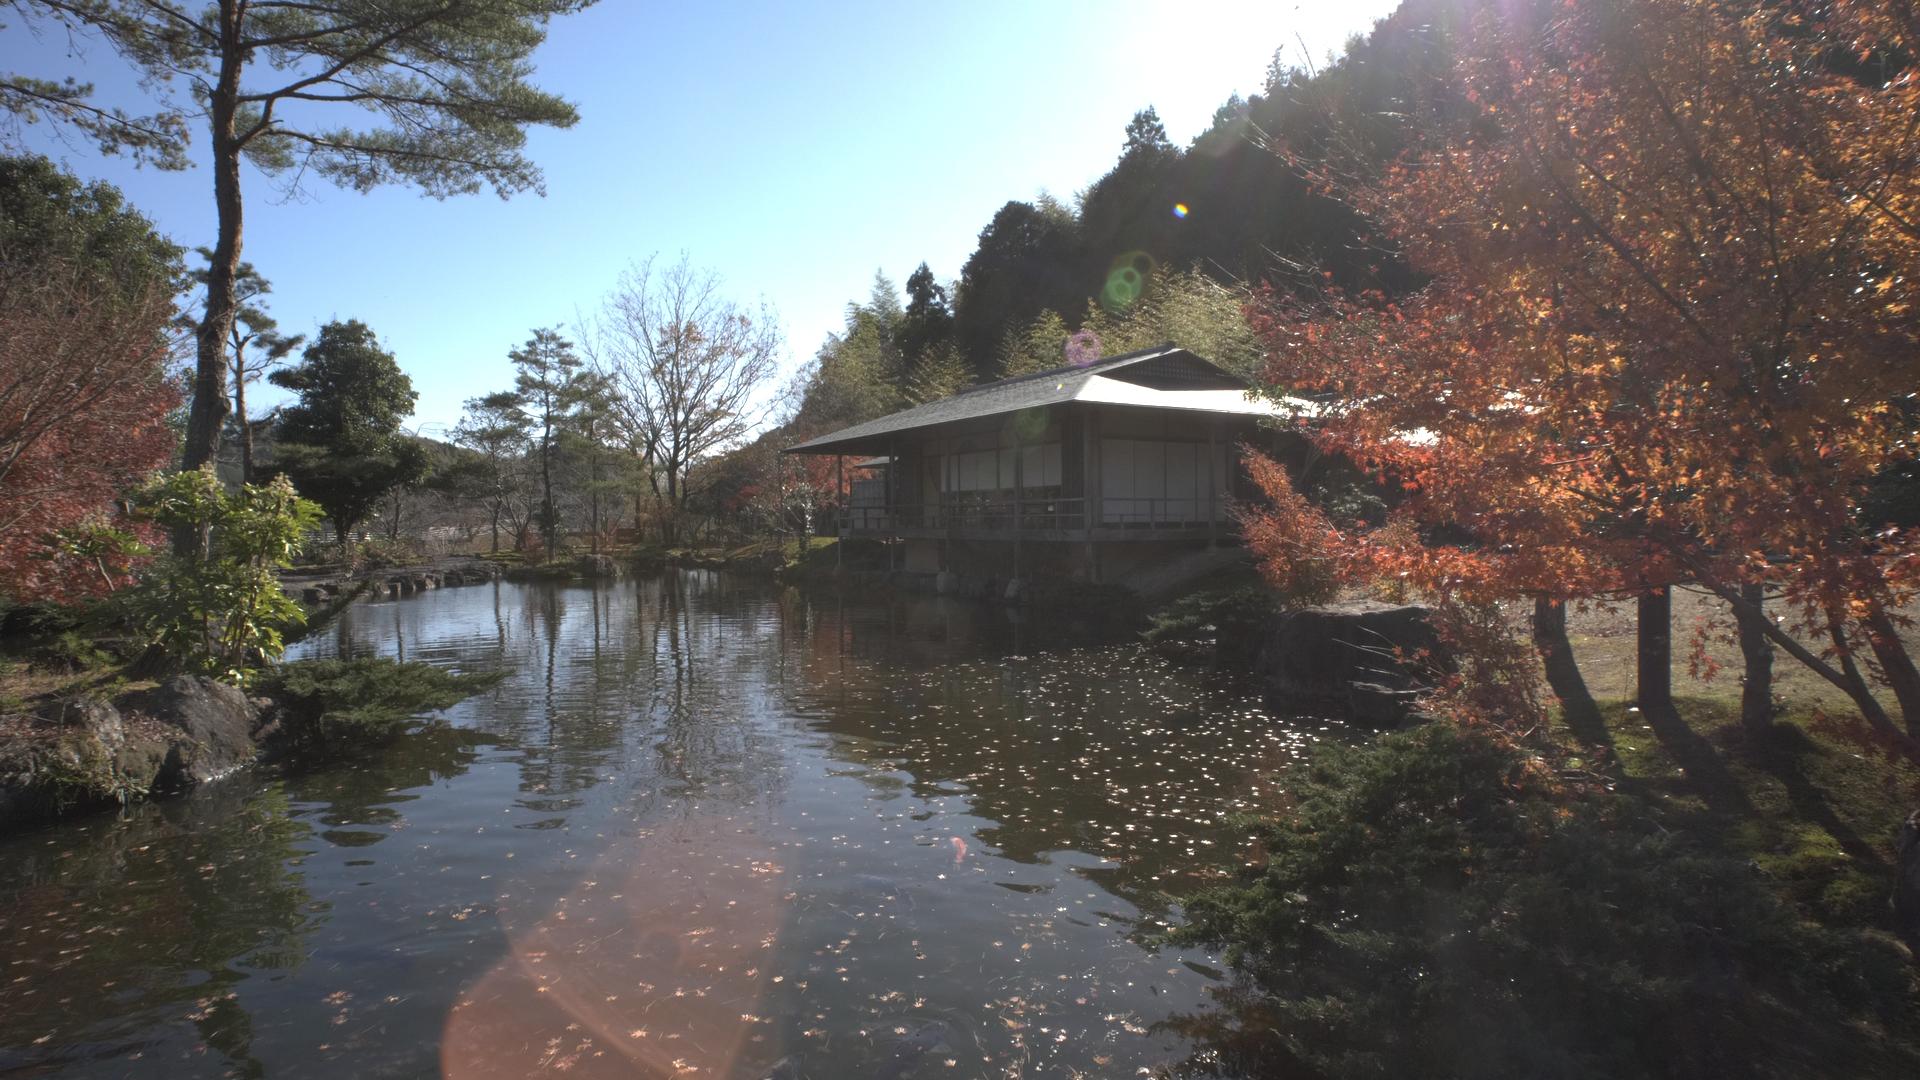
I'm now thinking about travelling again (but not doing it yet!!) and am looking for recommendations for a camera clamp for a balcony handrail. The context is that I often shoot time lapses from balconies and want something that can clamp a full-size camera and lens combo securely to the balcony. Some of them have a handrail, but others are just a piece of toughened glass that isn't capped off with anything. Here's some random shots of various balcony hand-rail setups.. Ideally, I'd like it to: be able to clamp on just glass, or a thicker handrail have the camera mount on one side of the clamp so I can put the camera on the balcony side of the railing so if the clamp fails the camera falls into the balcony and not over the edge be lightweight as I'll be travelling with it, although size isn't as much of a concern so sturdy plastic would be fine I think I've carried gorilla pods before, but I've realised that I don't end up using them except for this, and they're big and heavy and not actually that sturdy for clamping to anything, especially as I'd like to be able to leave them unattended, even in a decent breeze, and not be afraid they're going to fall. Does anyone have any recommendations?
-
Yeah, odd that it was 2019 TV shows vs 2020 movies - not a straight comparison and sample size isn't that large.
-
Sorry - I mean FF. There's heaps of lenses starting at 24mm FF FOV, but if you want to get the 16mm FF FOV then you're stuck with 2X zooms. If you don't care about wider than 24mm FF FOV then you're covered, but the 16mm FF FOV is part of my trinity (16 / 35 / 85mm FF FOVs) and they're super common if you're a vlogger too. Even on MFT there's the 6-11, 7-14, 8-18, and 9-18... all 2X zooms. That Nikkor is so 3D compared to the Taks. I found the Taks pretty flat in their rendering too. My love goes almost exclusively to the MFT Voigtlanders now, but the Helios is a true classic that can be had for almost nothing... I've also re-discovered my Minolta 135/2.8 too, such nice rendering!!
-
Watched this recently, comparing the Alexa 65 to the Alexa Mini. Unlike typical YT hit-and-run equipment reviewers, this is a proper test done with care, rather than just waving the cameras around. To my eye the 65 has extra shallow DoF, the vignetting and barrel distortion from the lens, and greater resolution of course, but the interesting thing is that the colour science just kills the mini! I do wonder how much of the 3D rendering could be emulated by matching DoF and applying the vignetting and barrel distortion in post. ....and to those who think that 4K matters, even to Netflix, please recalibrate yourselves.... Source: https://ymcinema.com/2021/01/20/the-cameras-behind-best-netflix-original-movies-of-2020/
-
So, why are there no 16-50+ F4 lenses? Everyone makes a 16-35/2.8 and a 24-70/2.8, but lots of people slowed the aperture by a stop and made 24-105/4 and there's even a Nikon 24-120/4, but no-one seems to have slowed the aperture of the 16-35 and extended it's zoom range. A 24-120 is 60% longer than 24-70, but even if they could only add 50% more range to the 16-35 that would still make it a 16-52mm lens. Then you could get an extra prime in there. For people who like to shoot wider than 24, this would be a big improvement.
-
One of the philosophies I've adopted is that the things you can do to make bad footage look passable also help to make good footage look great, and great footage look spectacular. Luckily I have an almost endless supply of terribly-shot footage, which I shot because I didn't know what I was doing for a long time, and so I've been in my own self-made crash-course for quite some time now!