
shijan
-
Posts
200 -
Joined
Content Type
Profiles
Forums
Articles
Posts posted by shijan
-
-
On 9/23/2016 at 3:31 PM, Fil said:
Just to mention SmallRig have confirmed they are going to release a wooden side grip soon for their micro cage.
Thats great news. I wait for release of Monitor mount which is so neededed for Micro camera. Also magnetic filter rings looks promising.
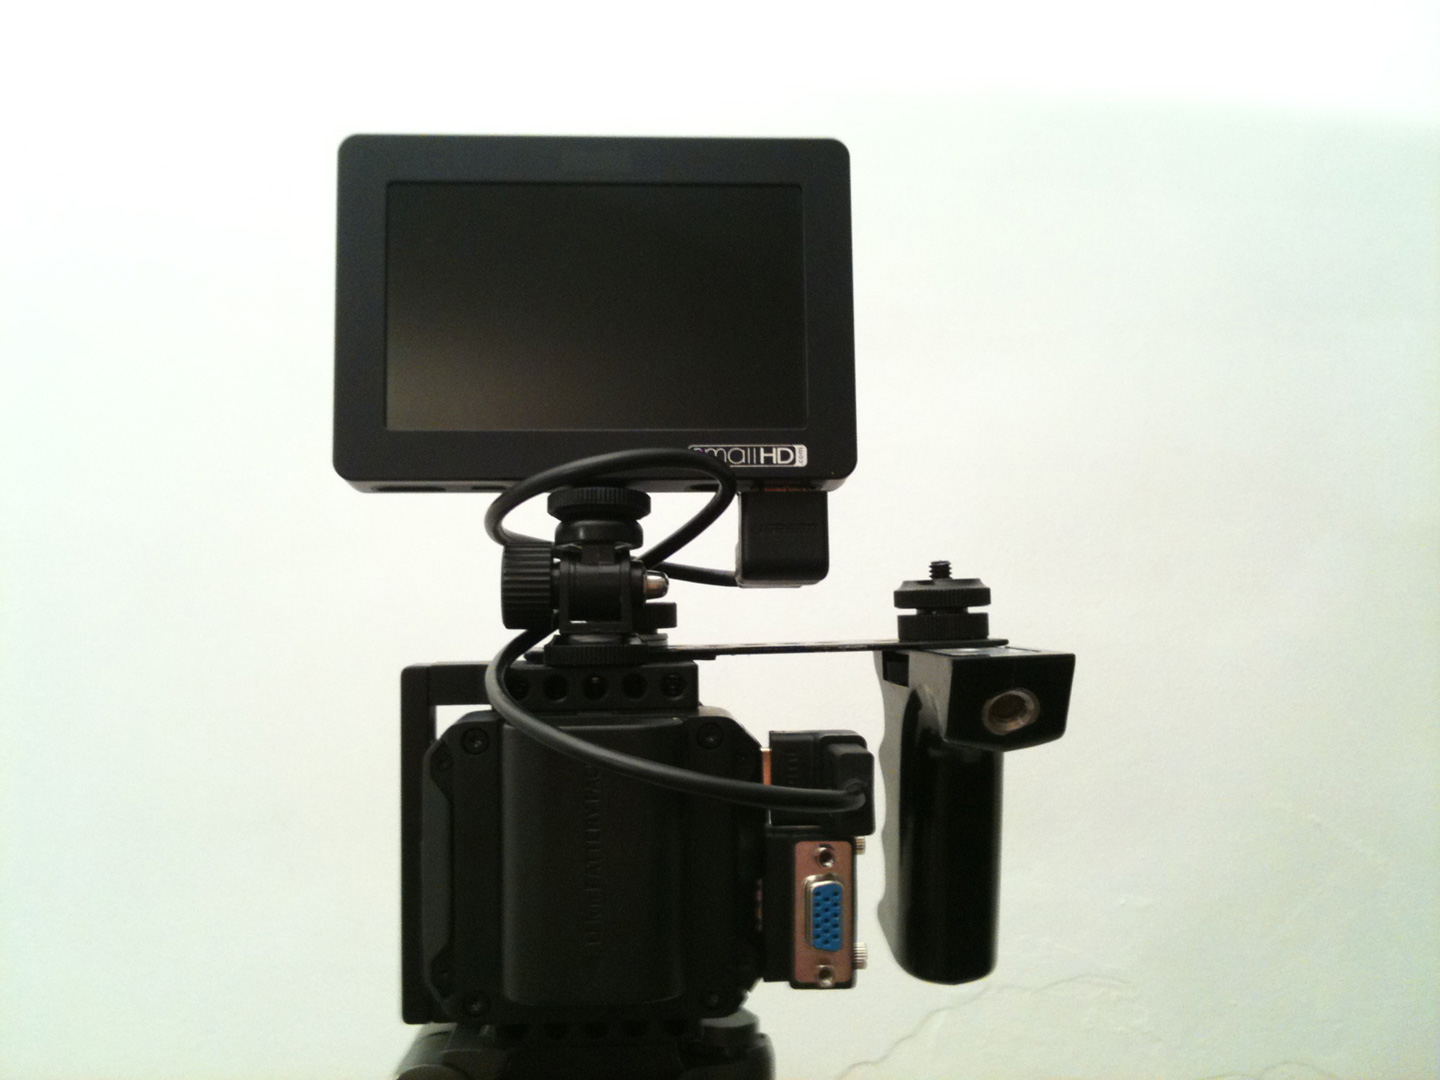
Here is some update. The Andoer Top handle from BMPCC cage fit perfectly to SmallRig co-designed cage. Also added DIY cable clamp.
Problem with earlier setup - Side handle plank blocks REC. button.

-
-
The main problem with ProRes in Vegas was that in timeline it was limited to 8 bit only. Even if you force the project to 32 bit float and got 12 bit 4444 source the Quicktime ProRes always stay 8 bit in timeline and final render. And its because Vegas used native Windows Quicktime decoder which is limited o 8 bit system wide. Also Quicktime files got crazy gamma shift when placed to timeline. Maybe they mean they fixed this ancient bugs and added ProRes export option?
-
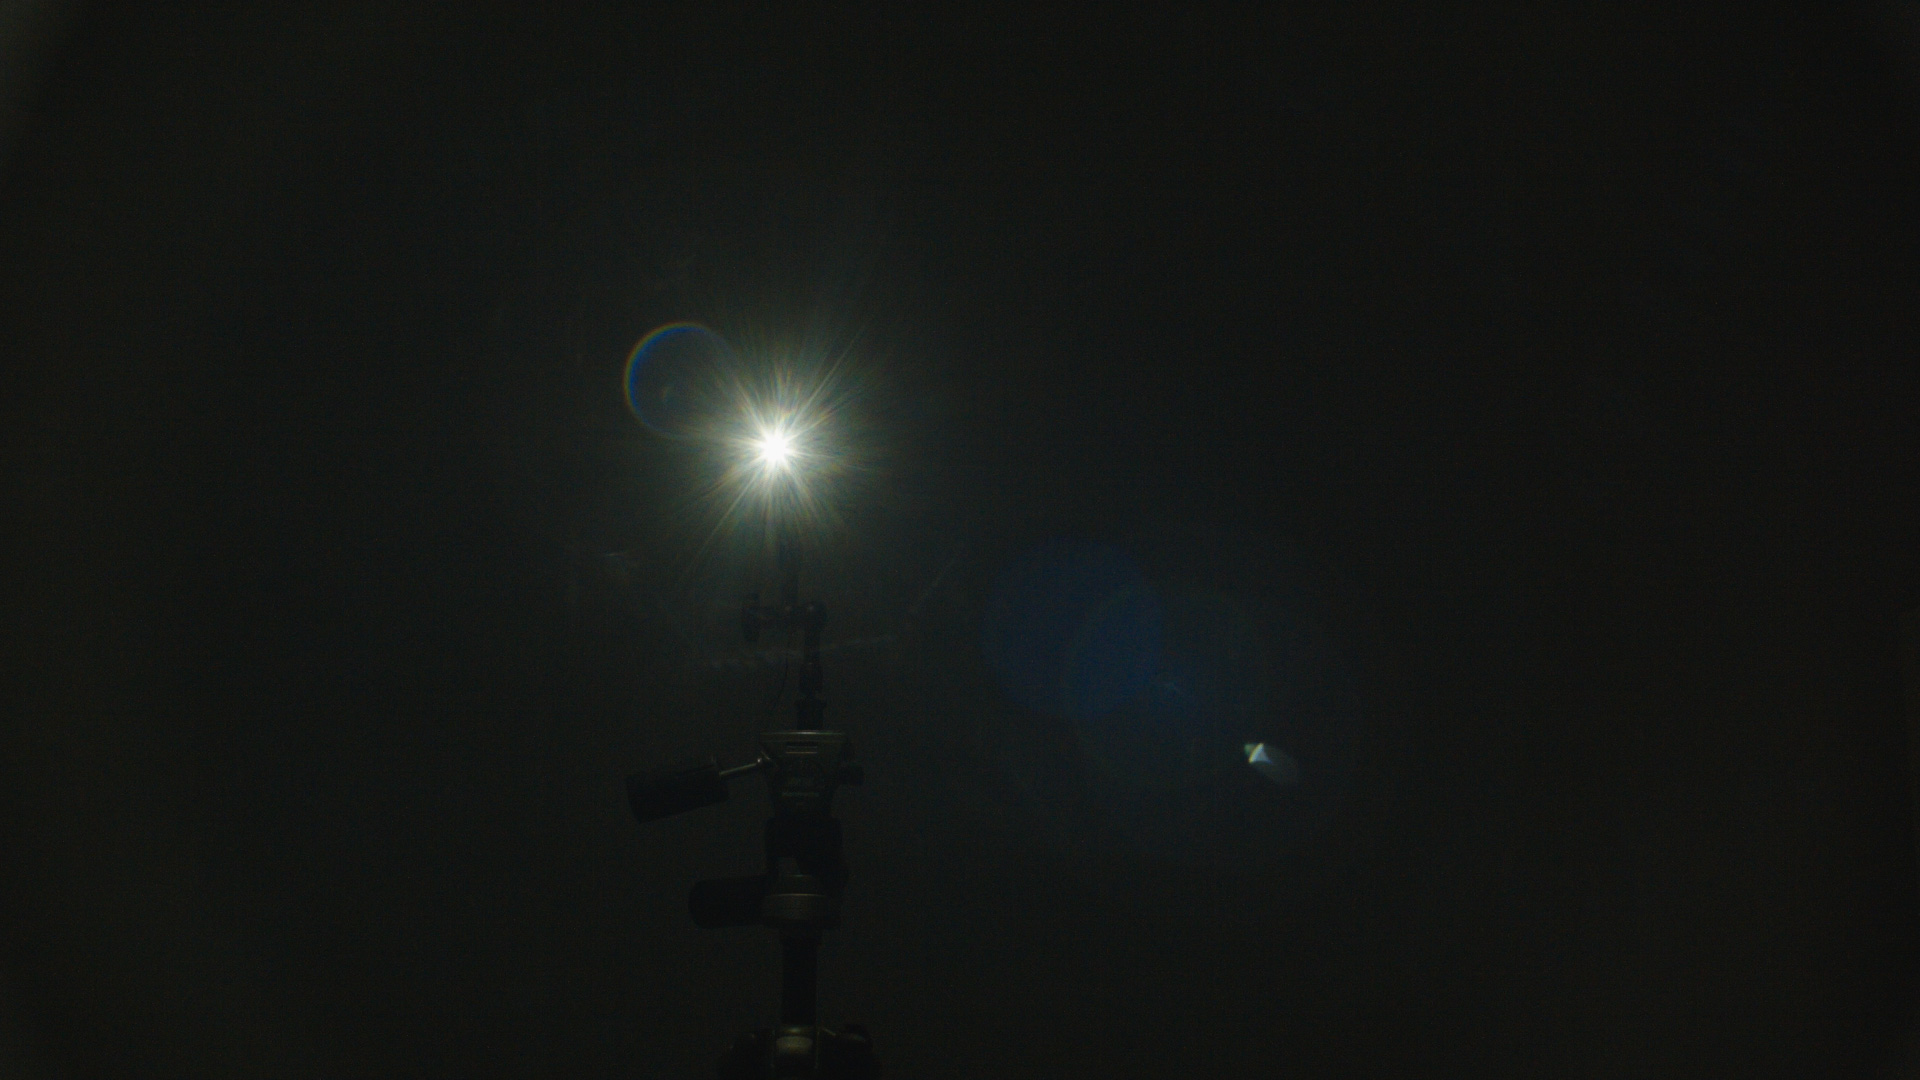
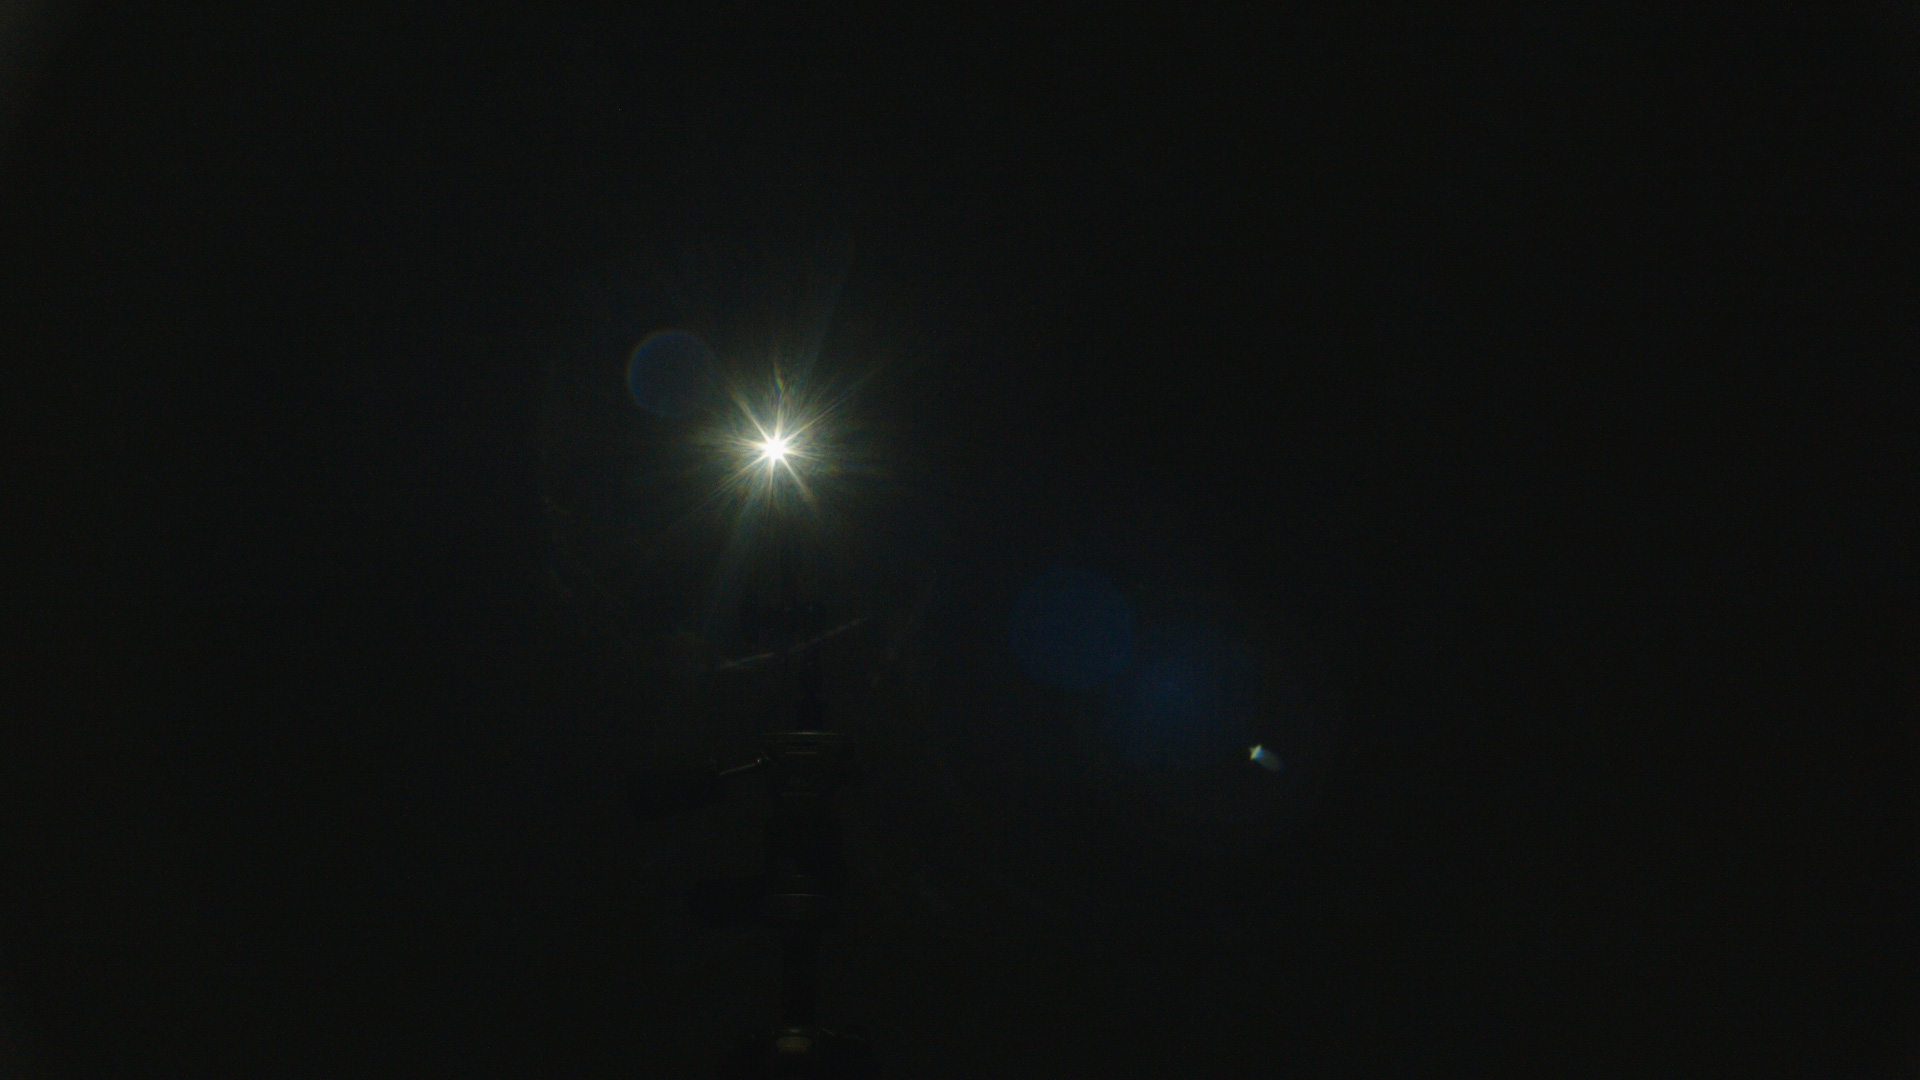
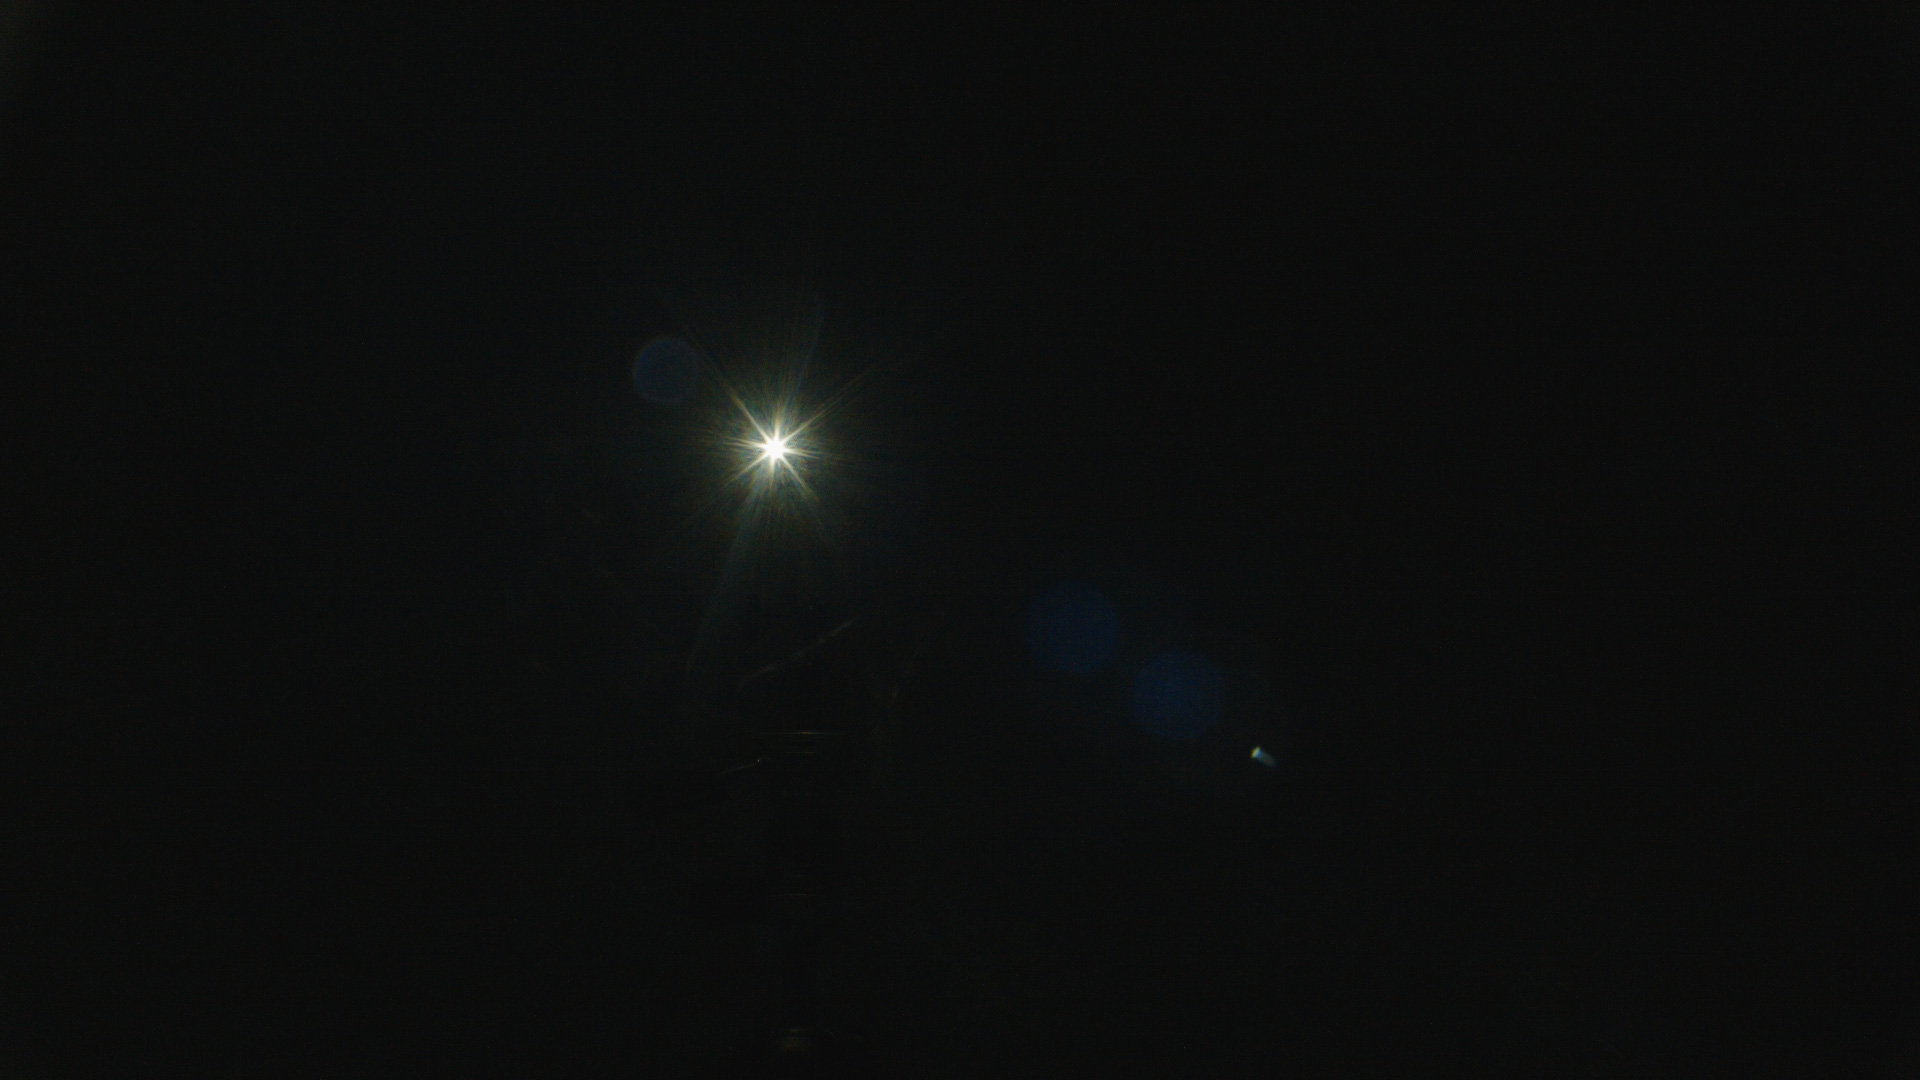
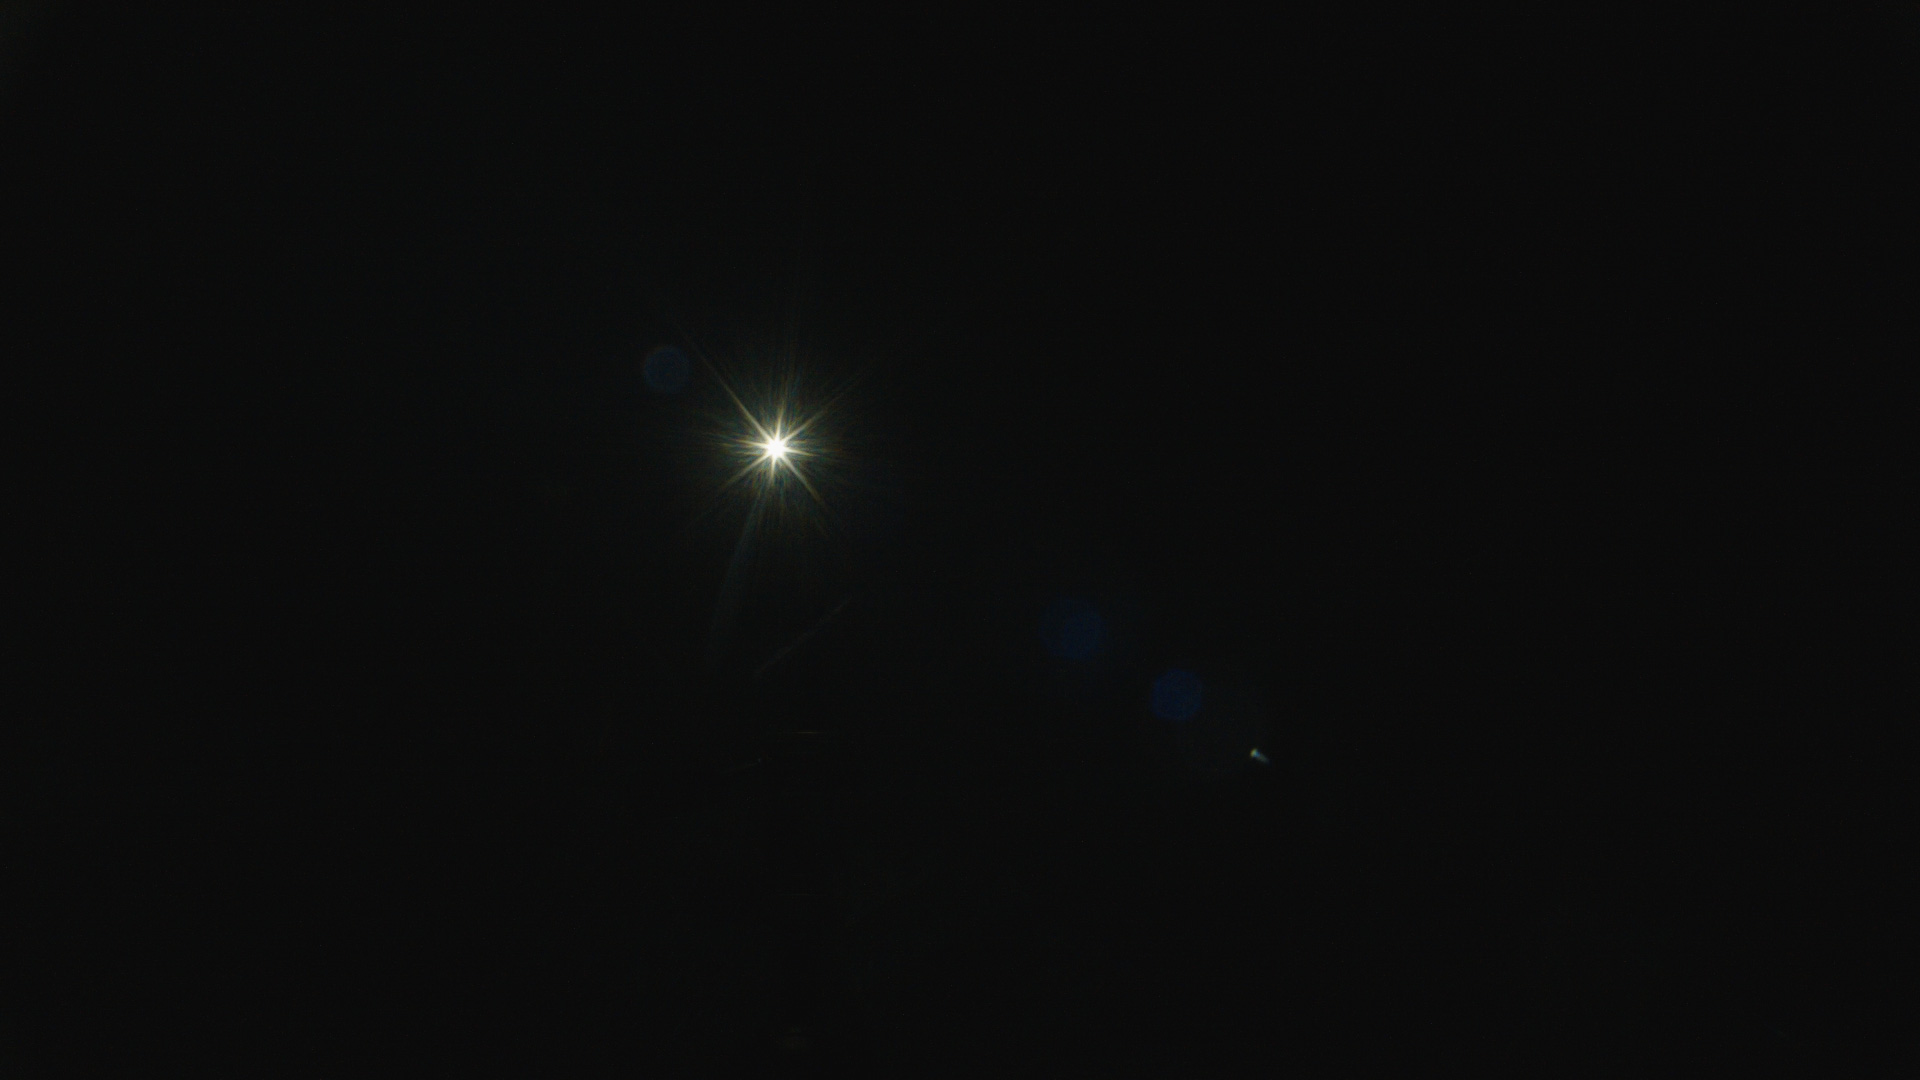
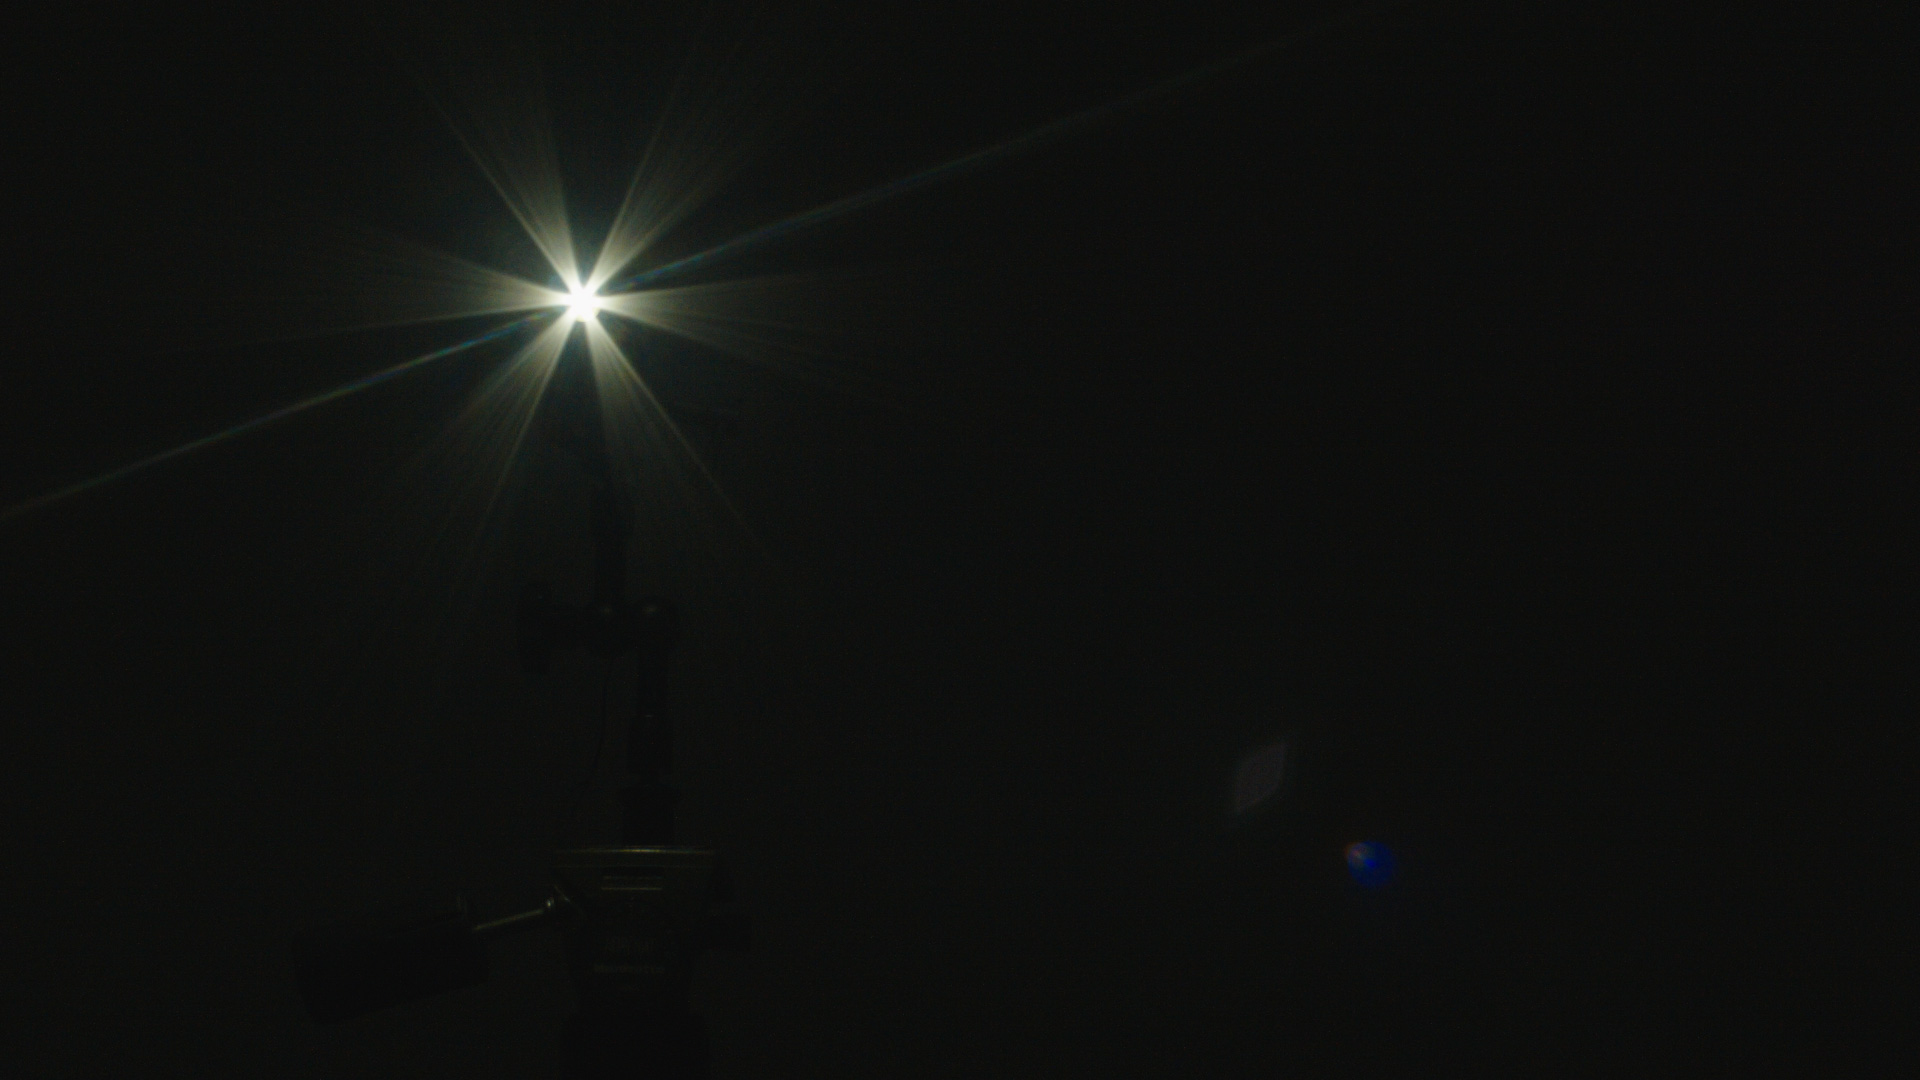
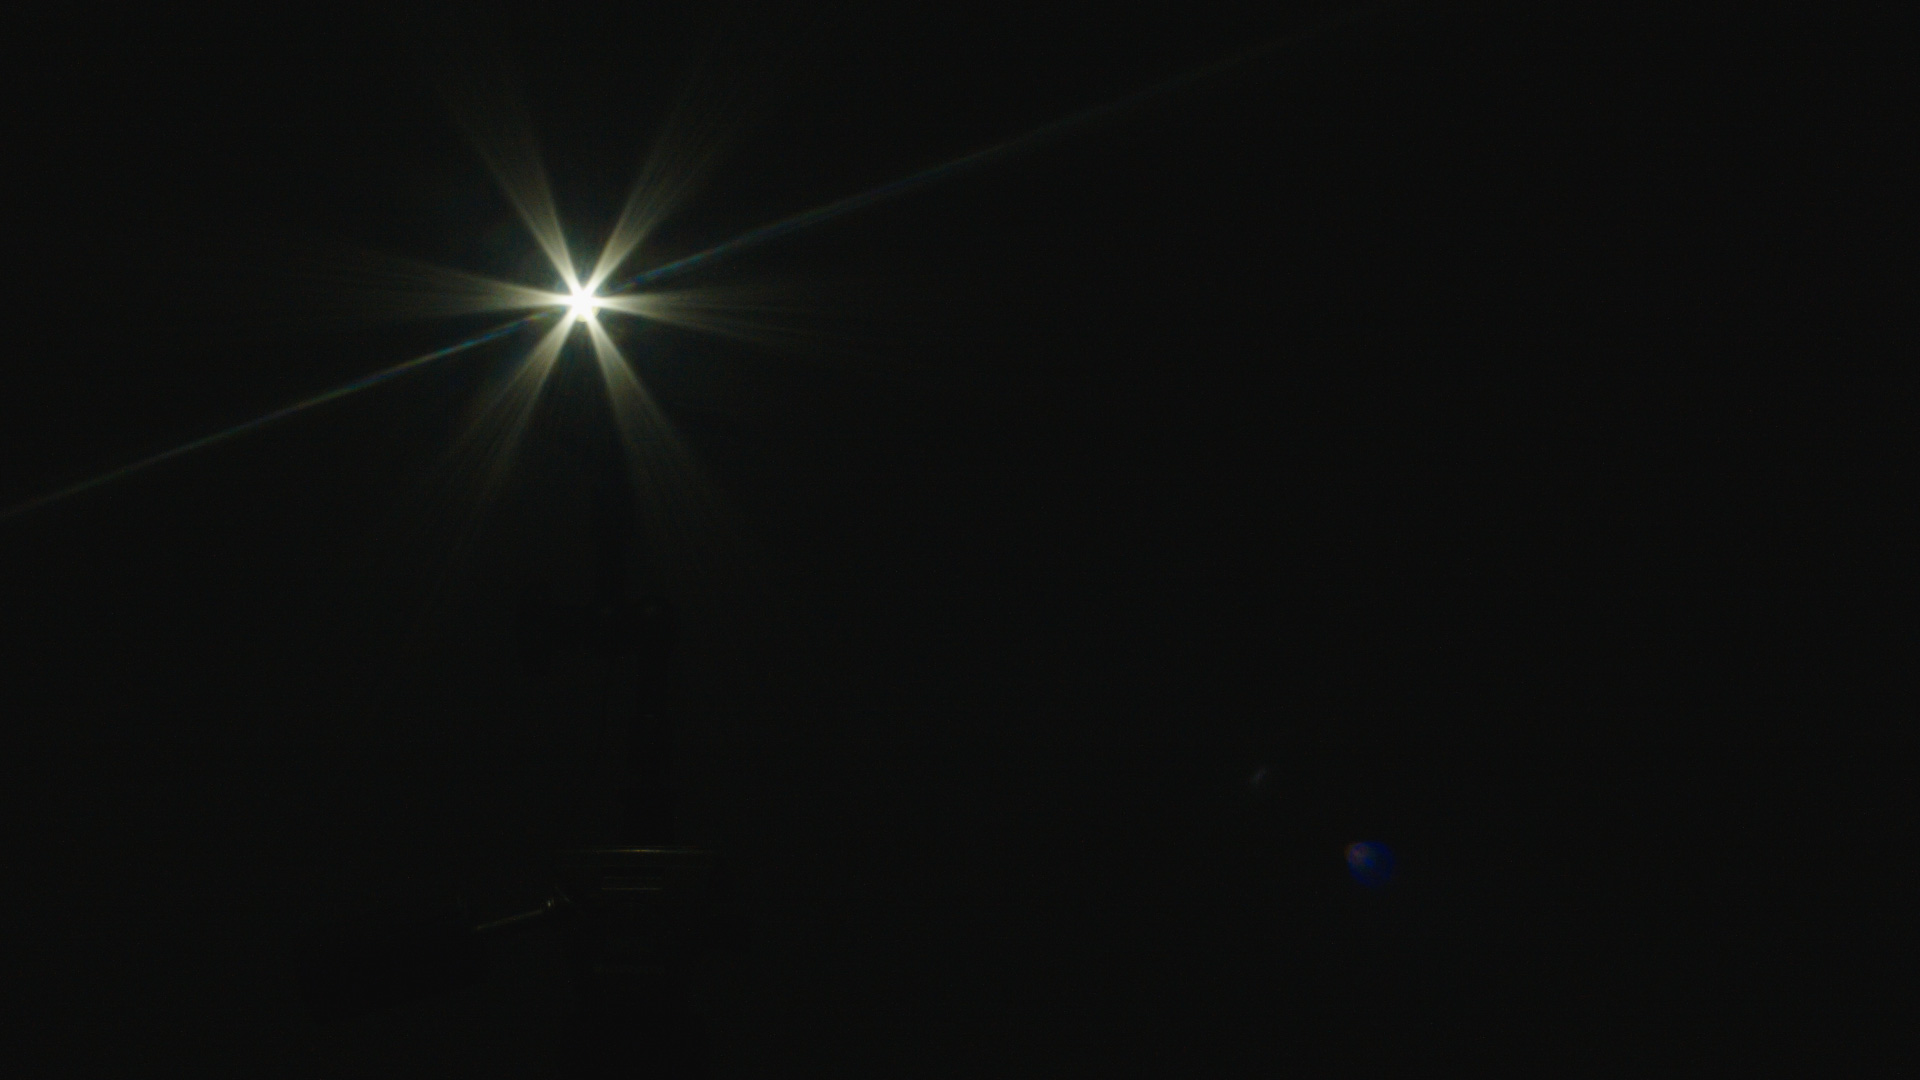
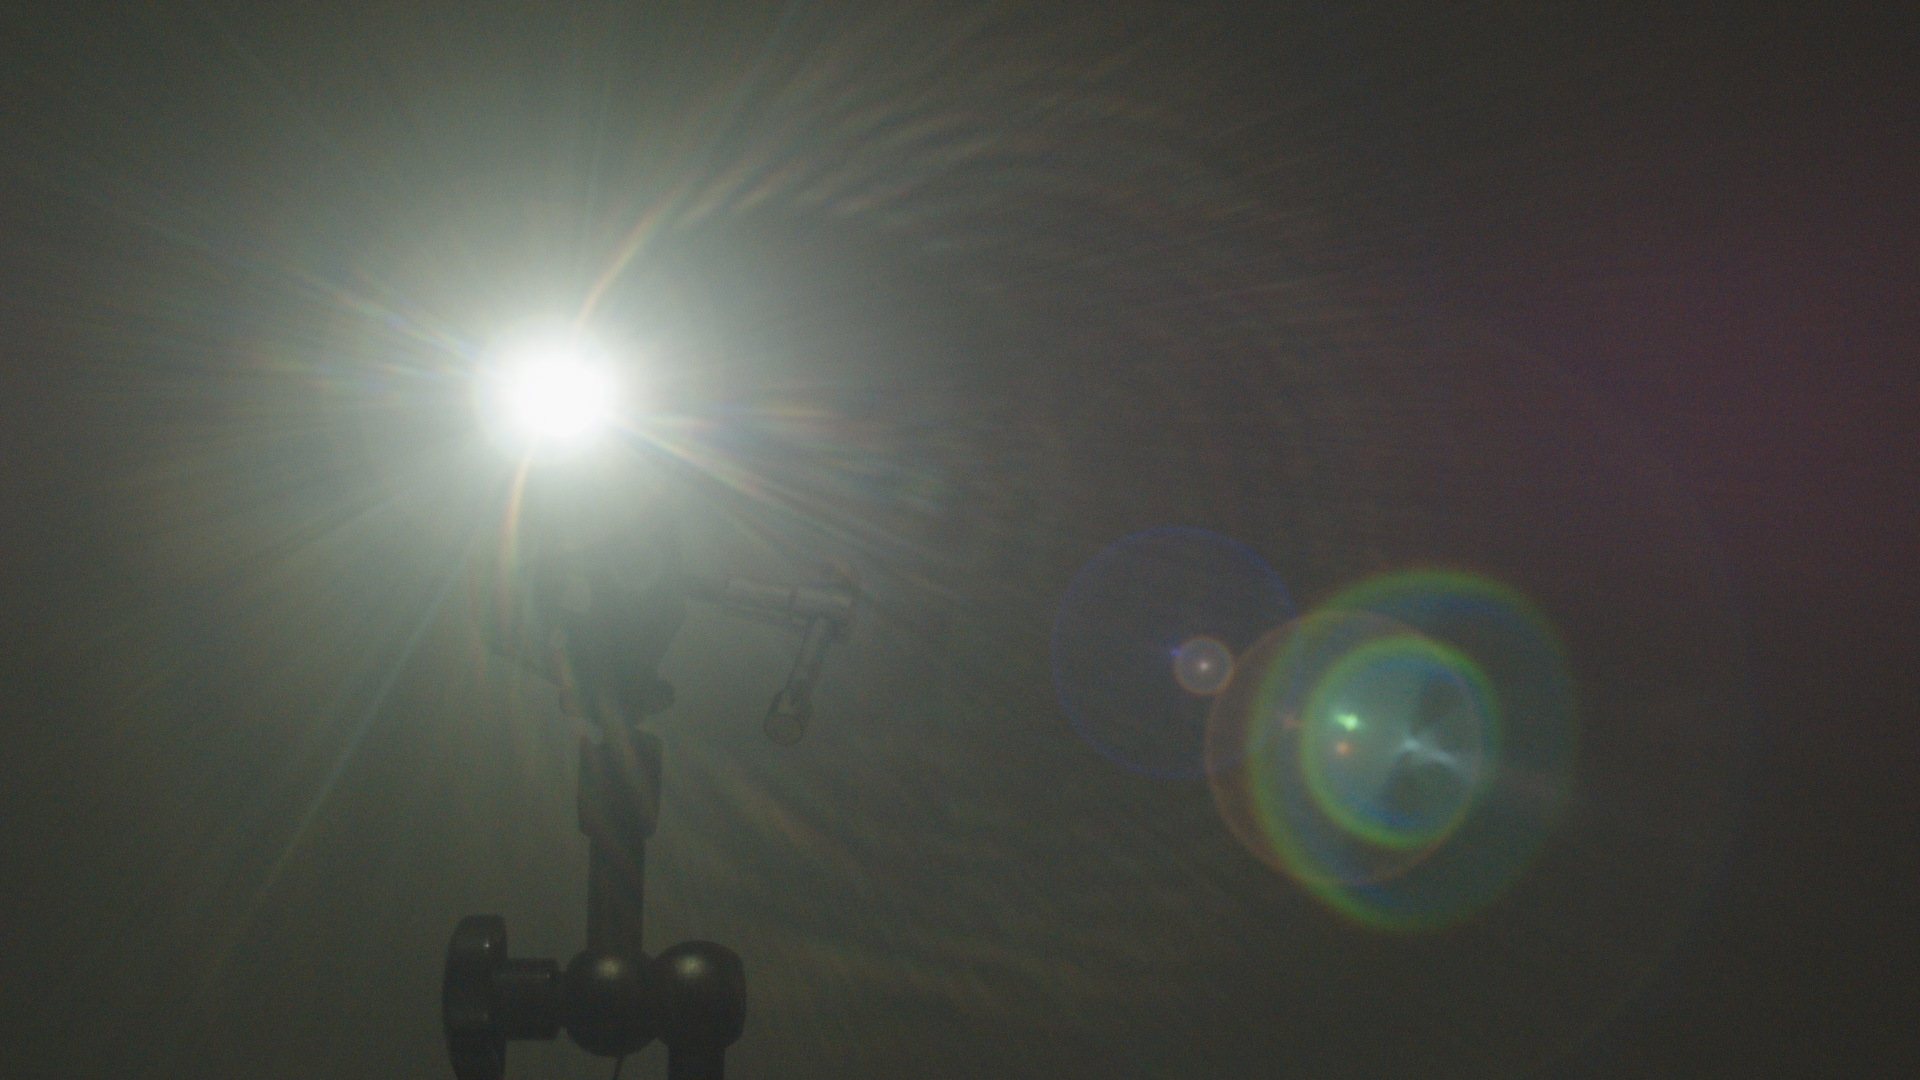
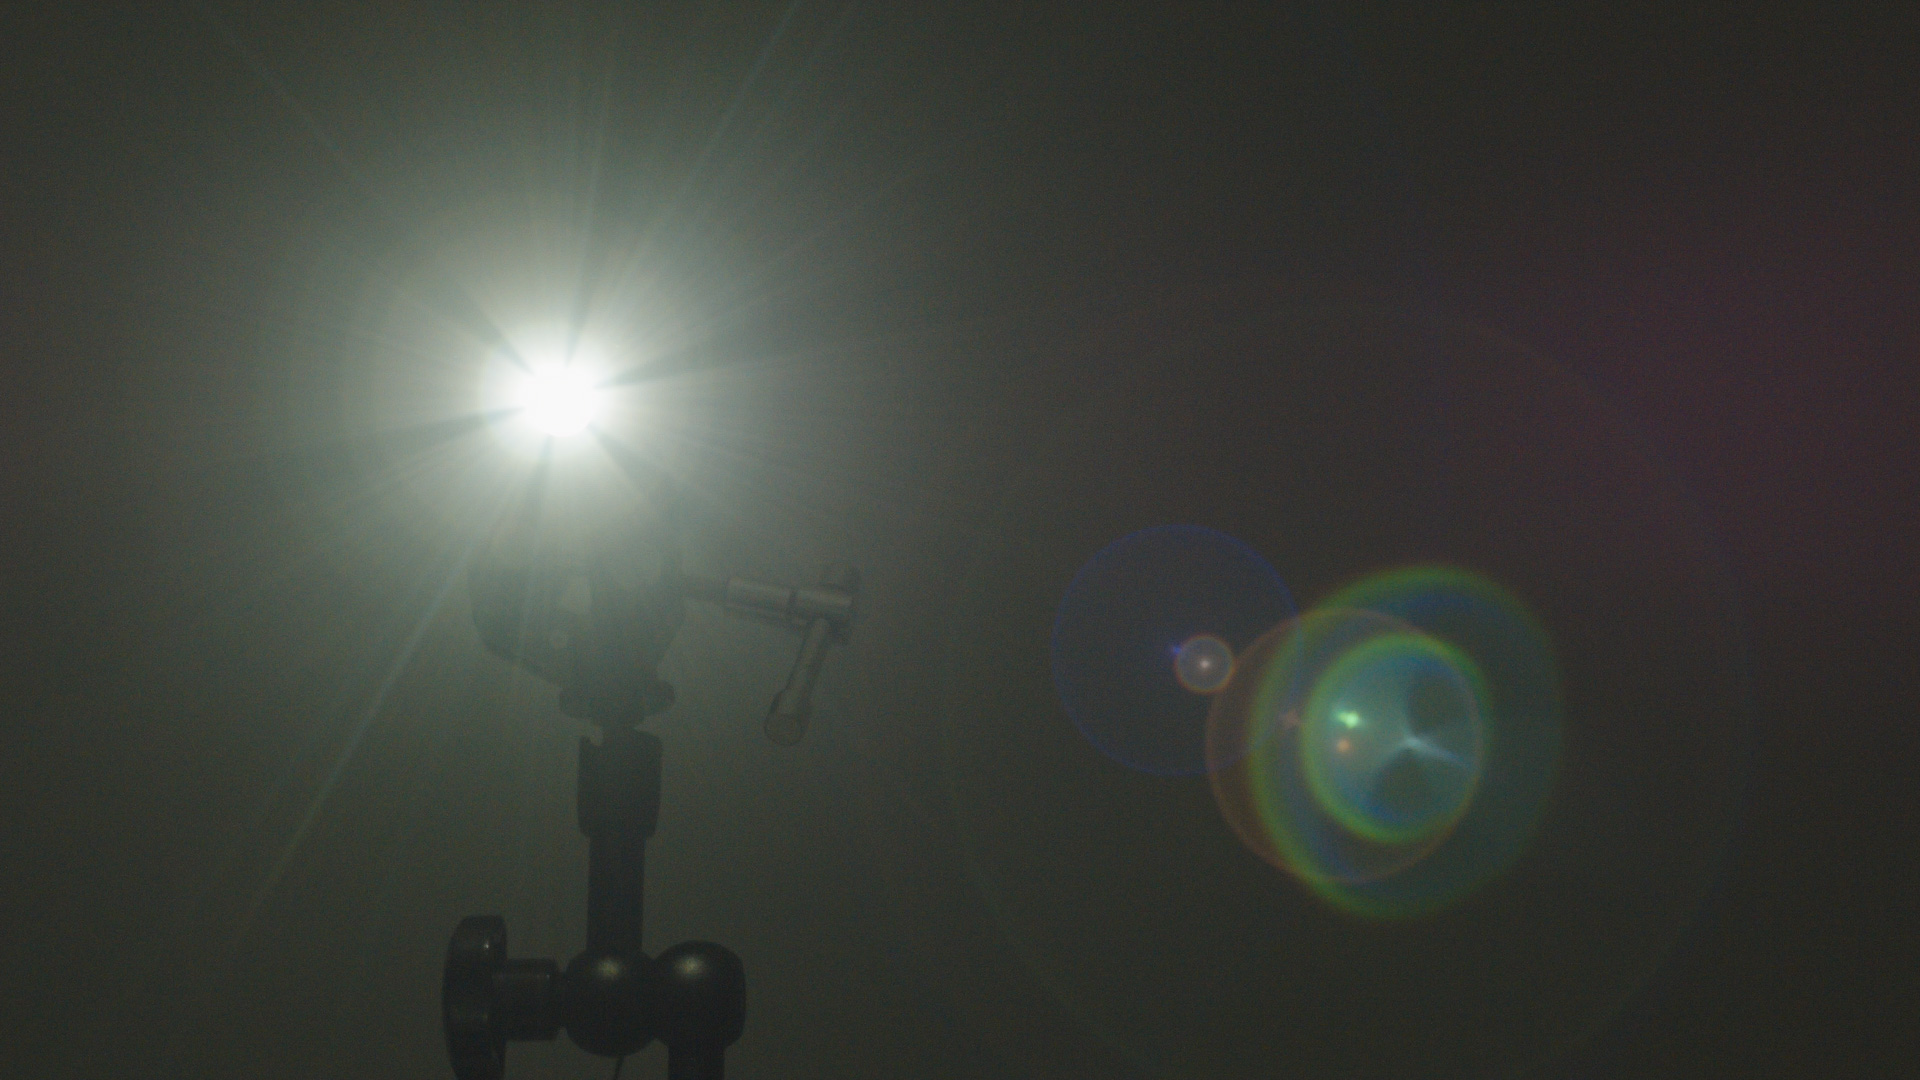
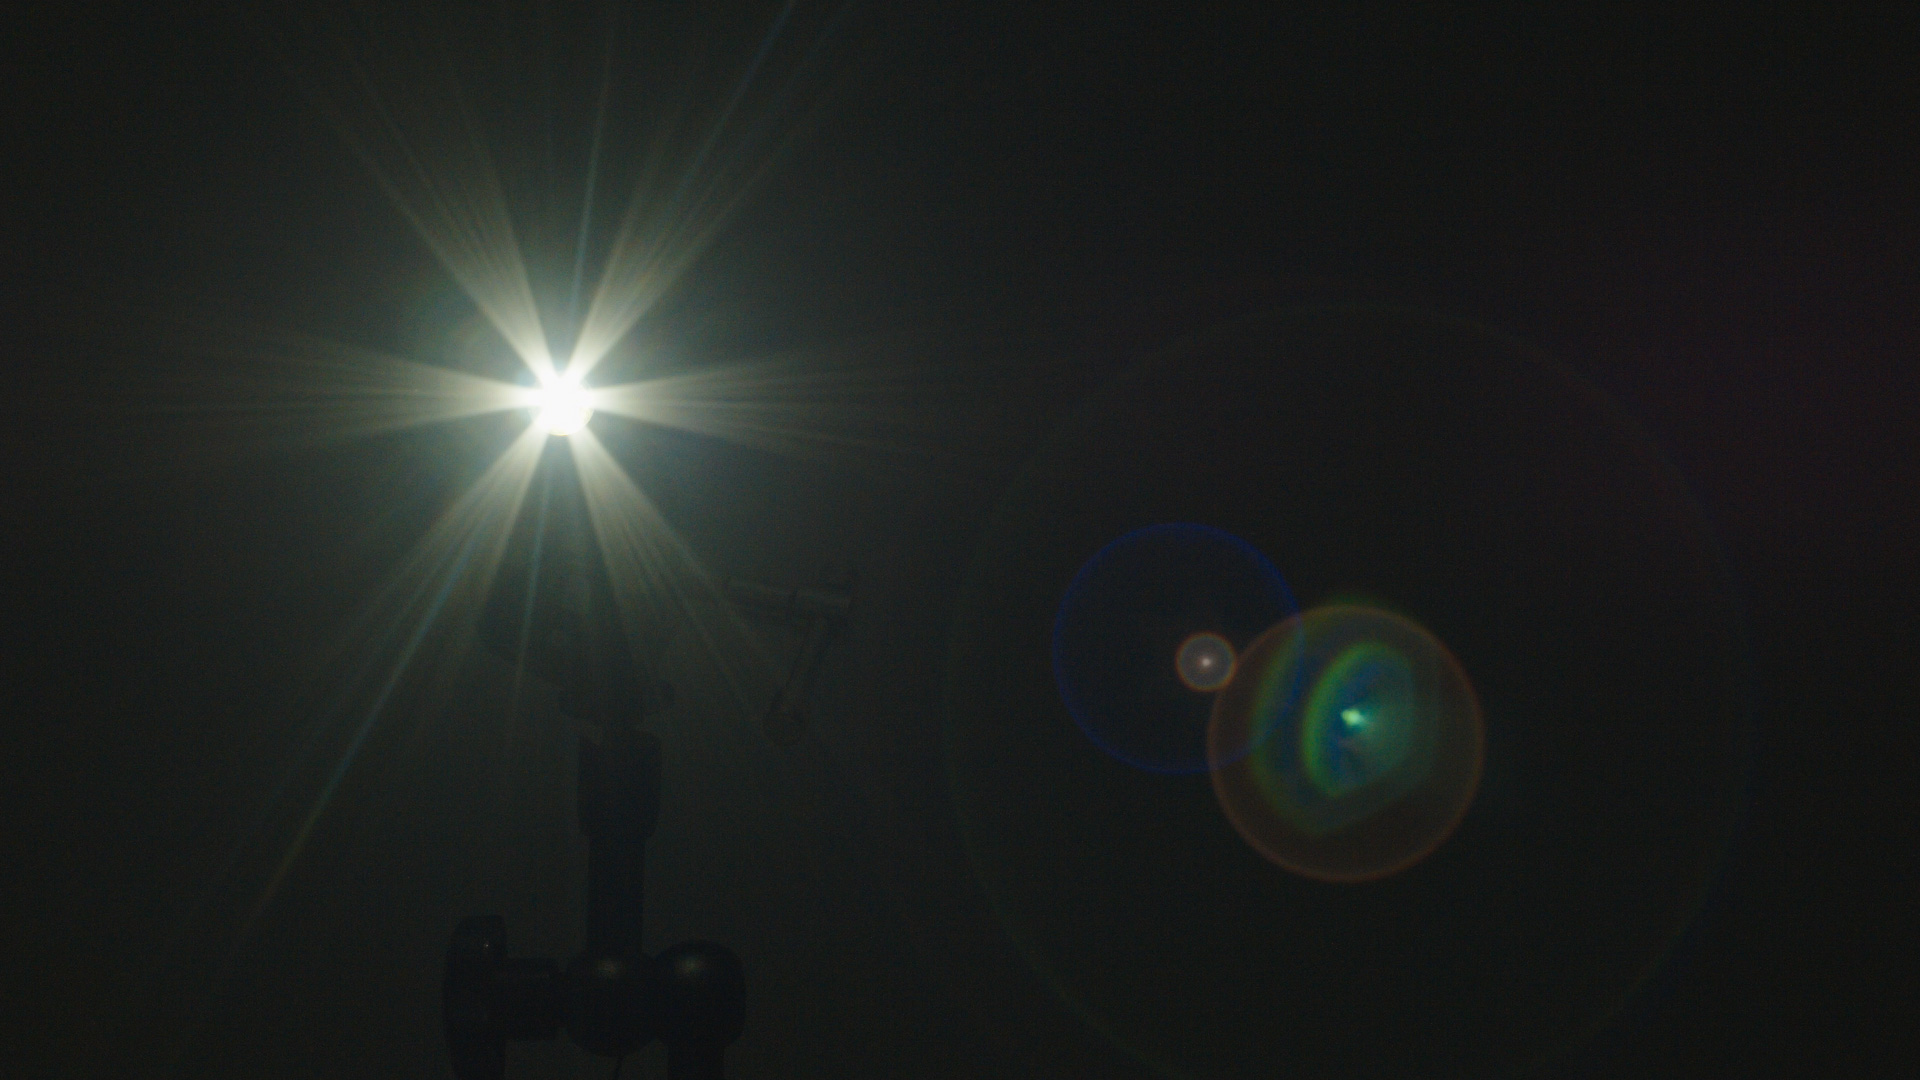
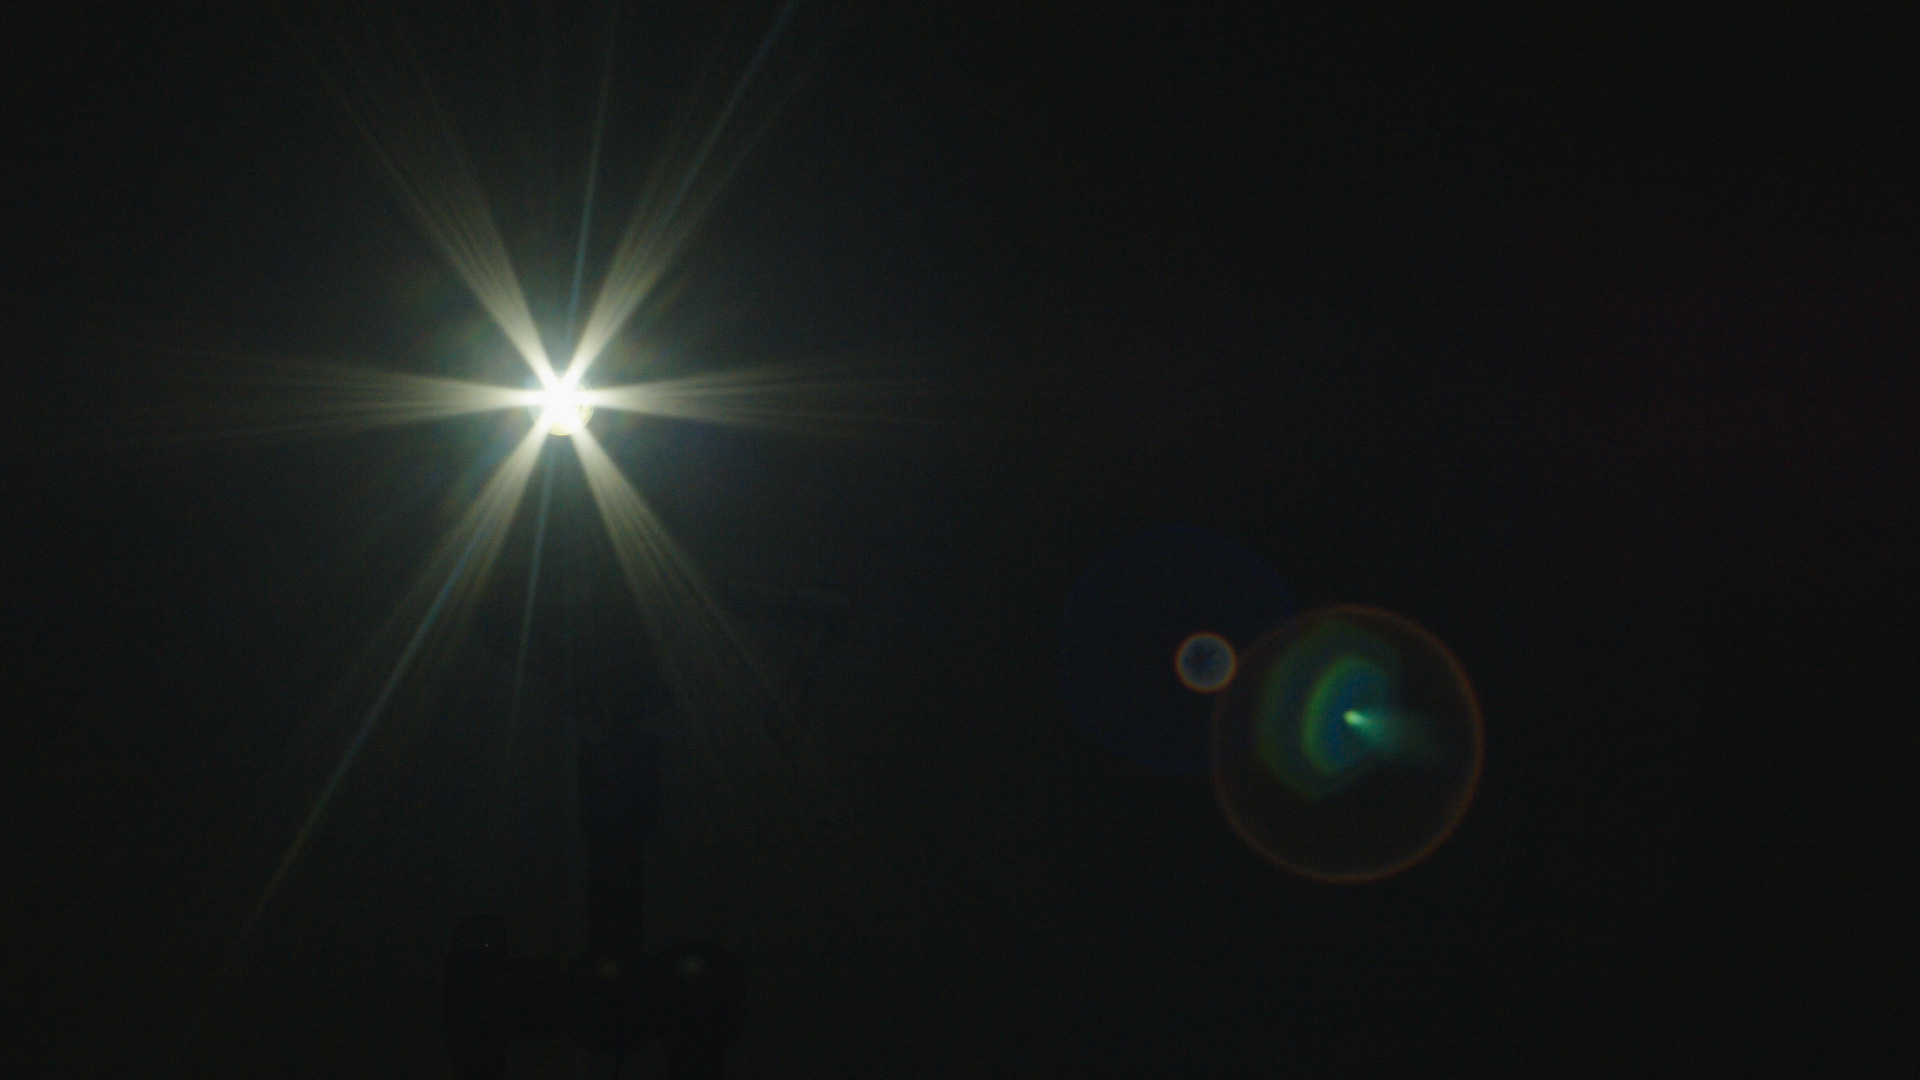
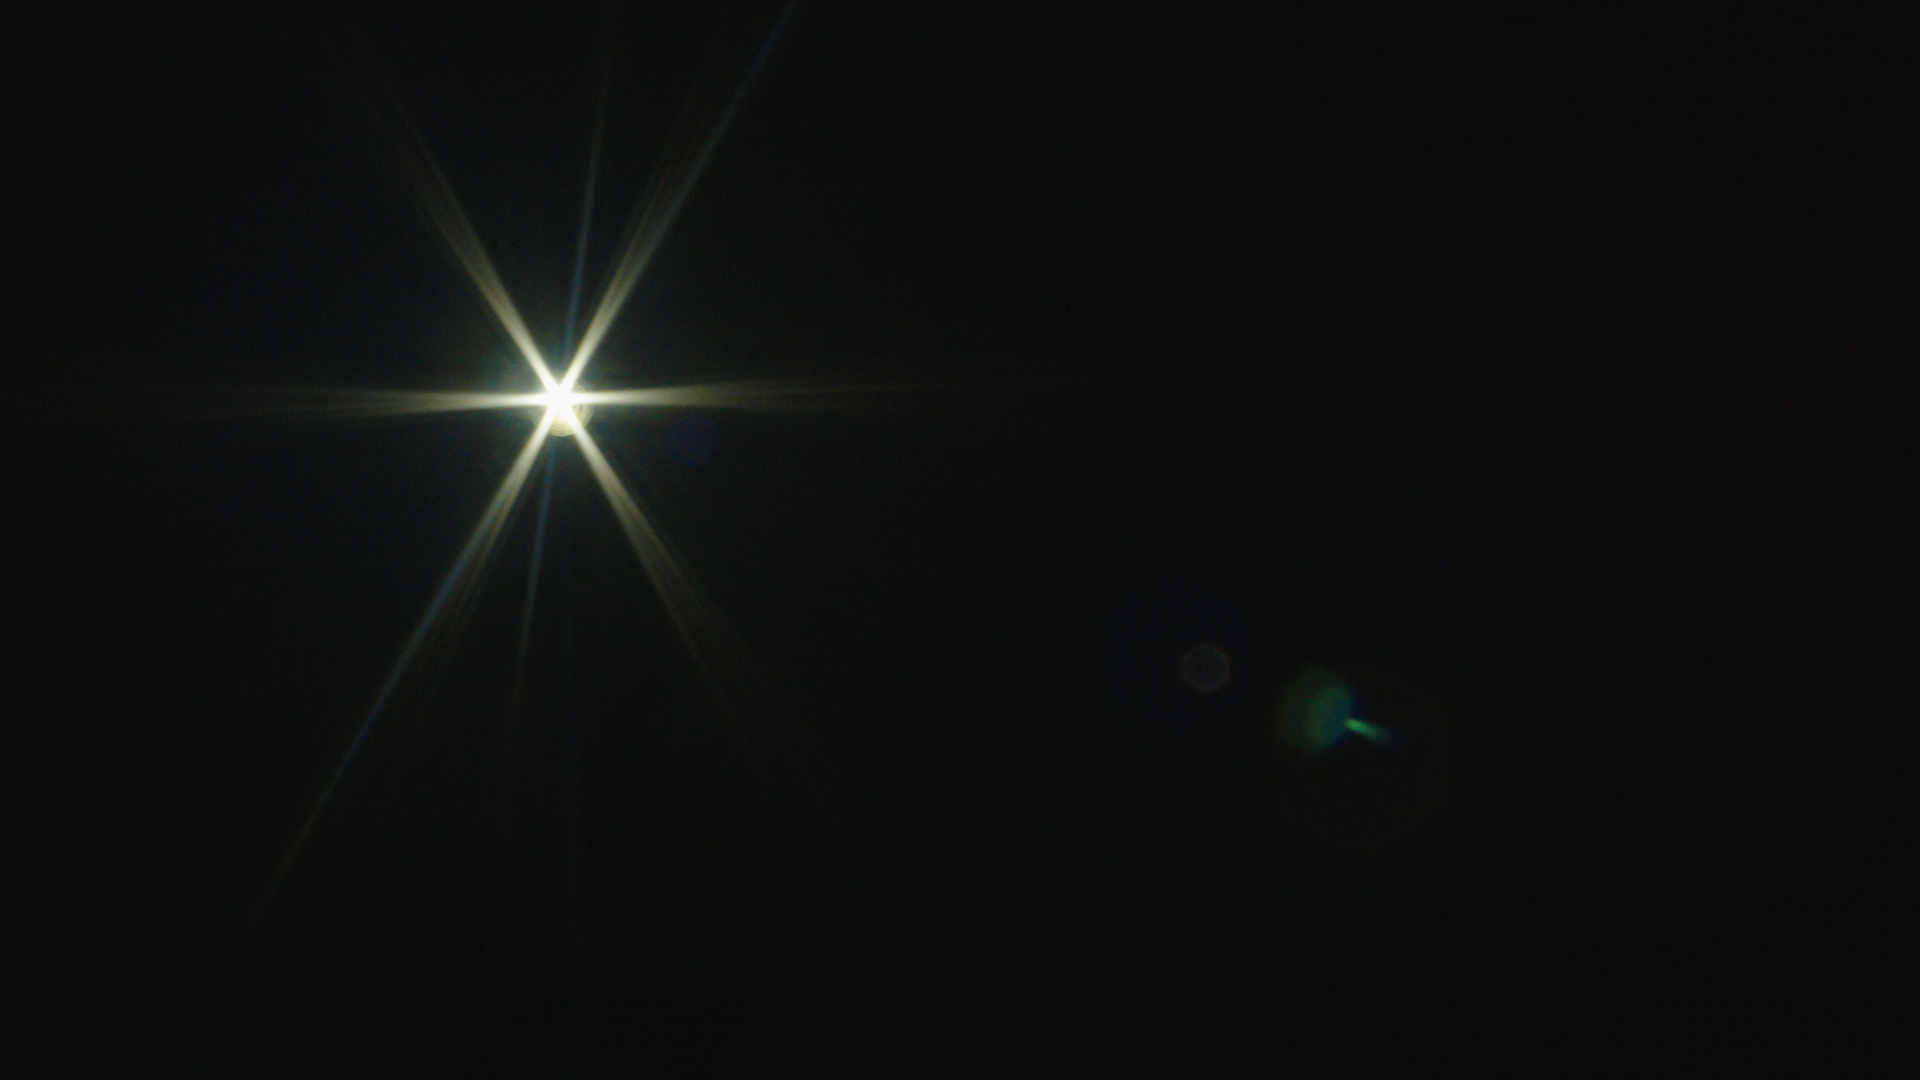
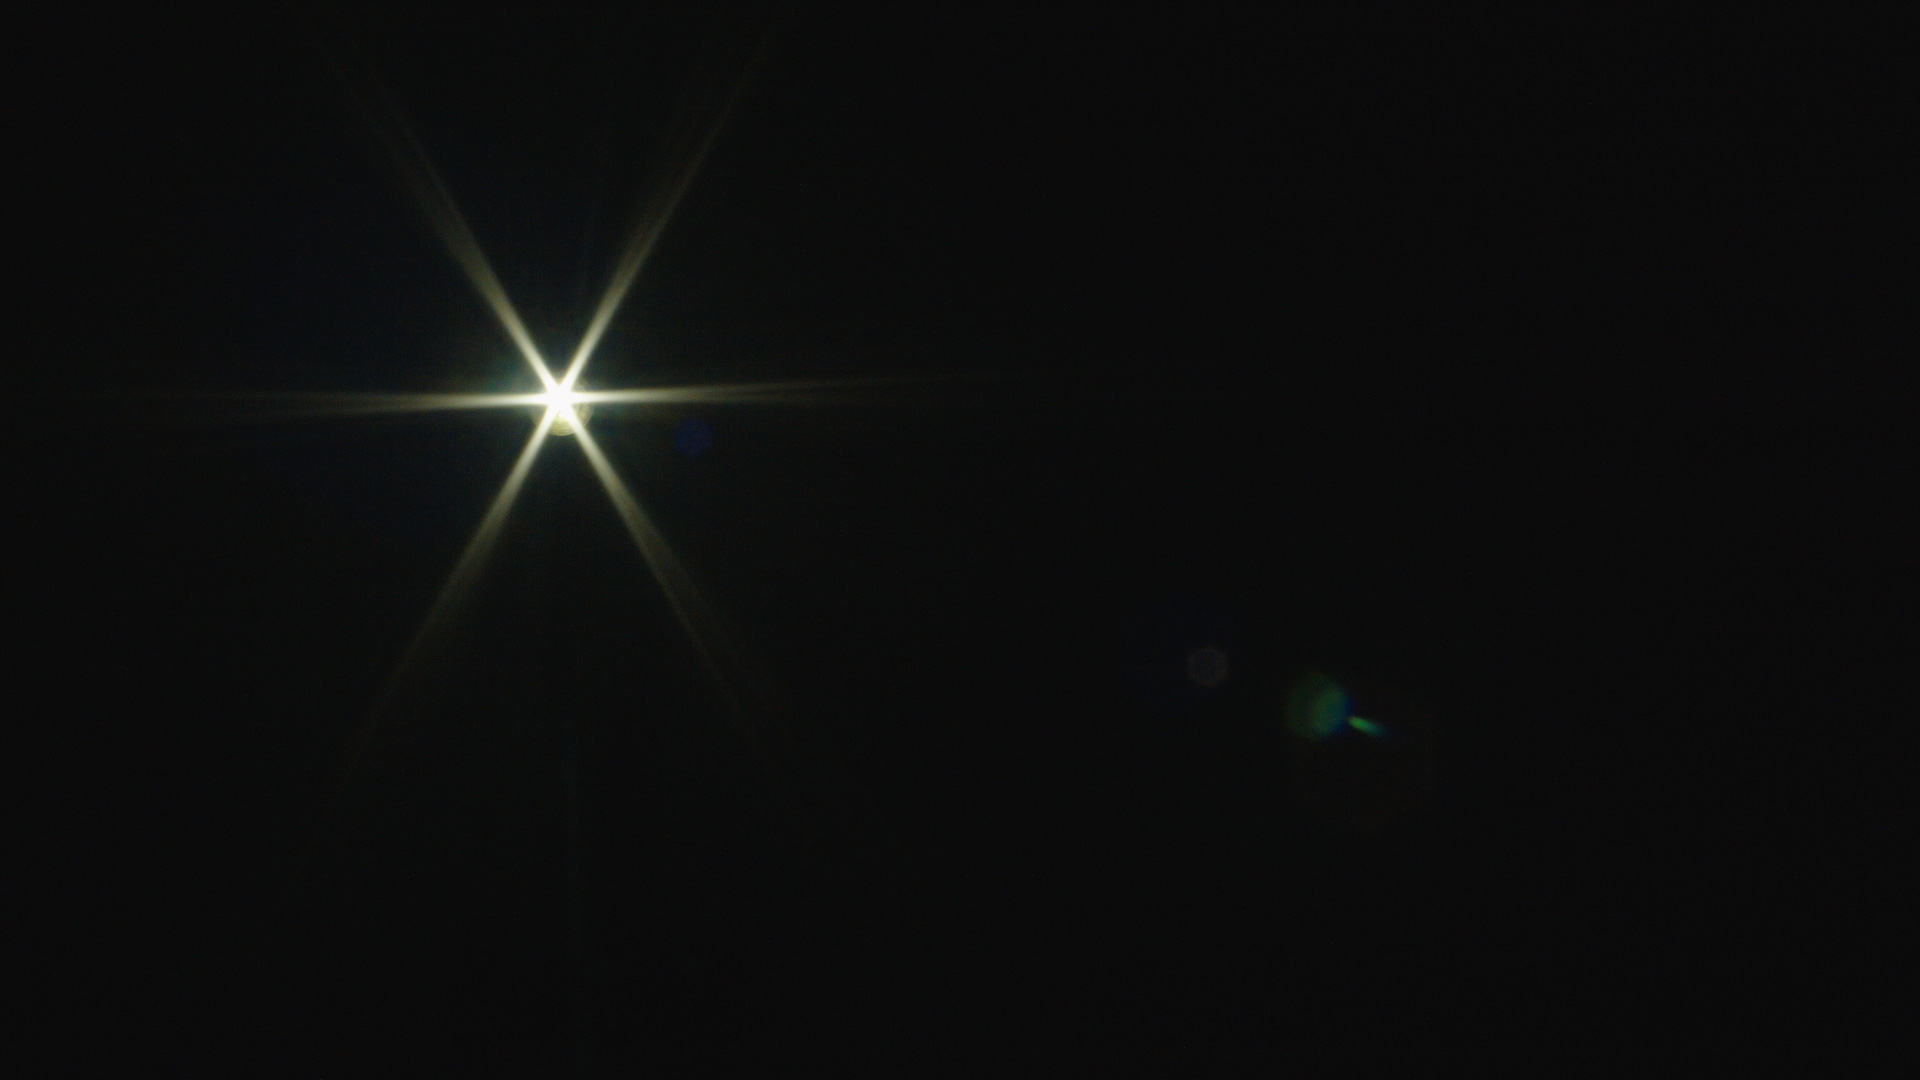
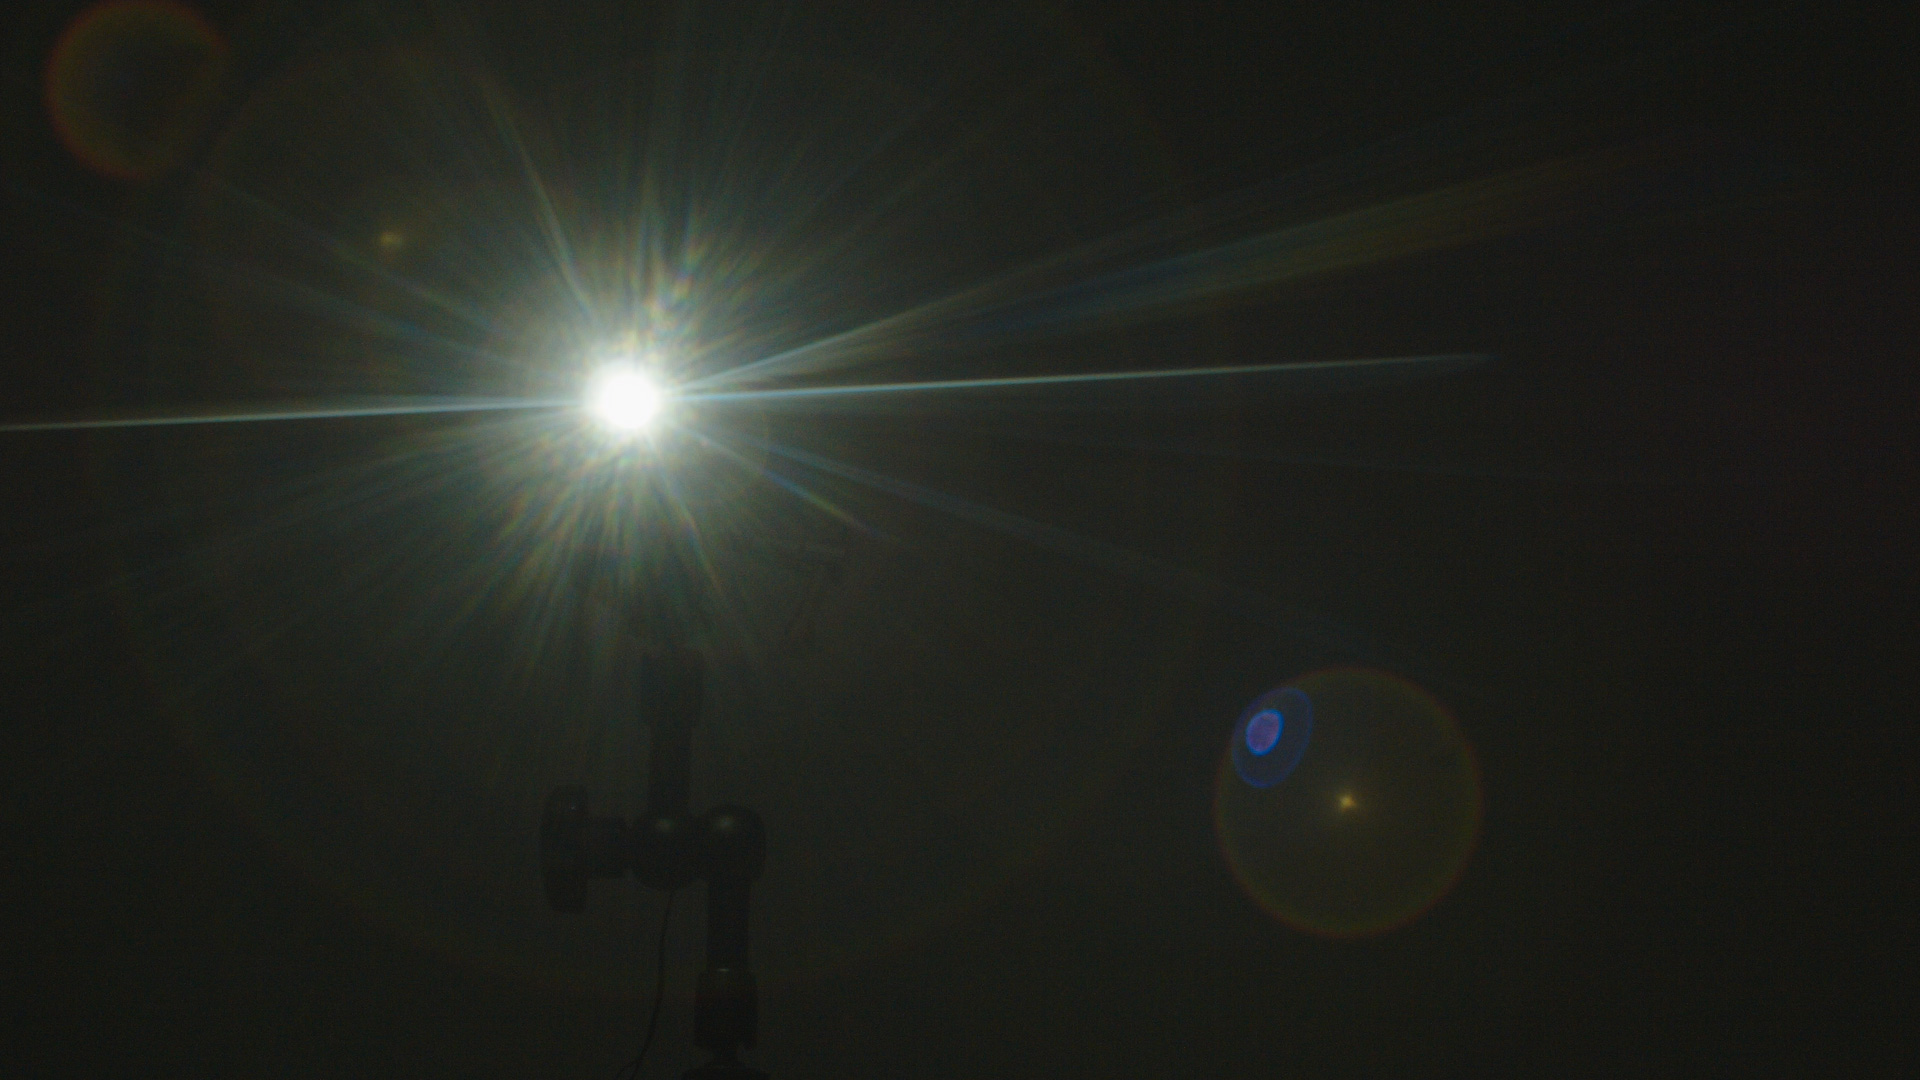
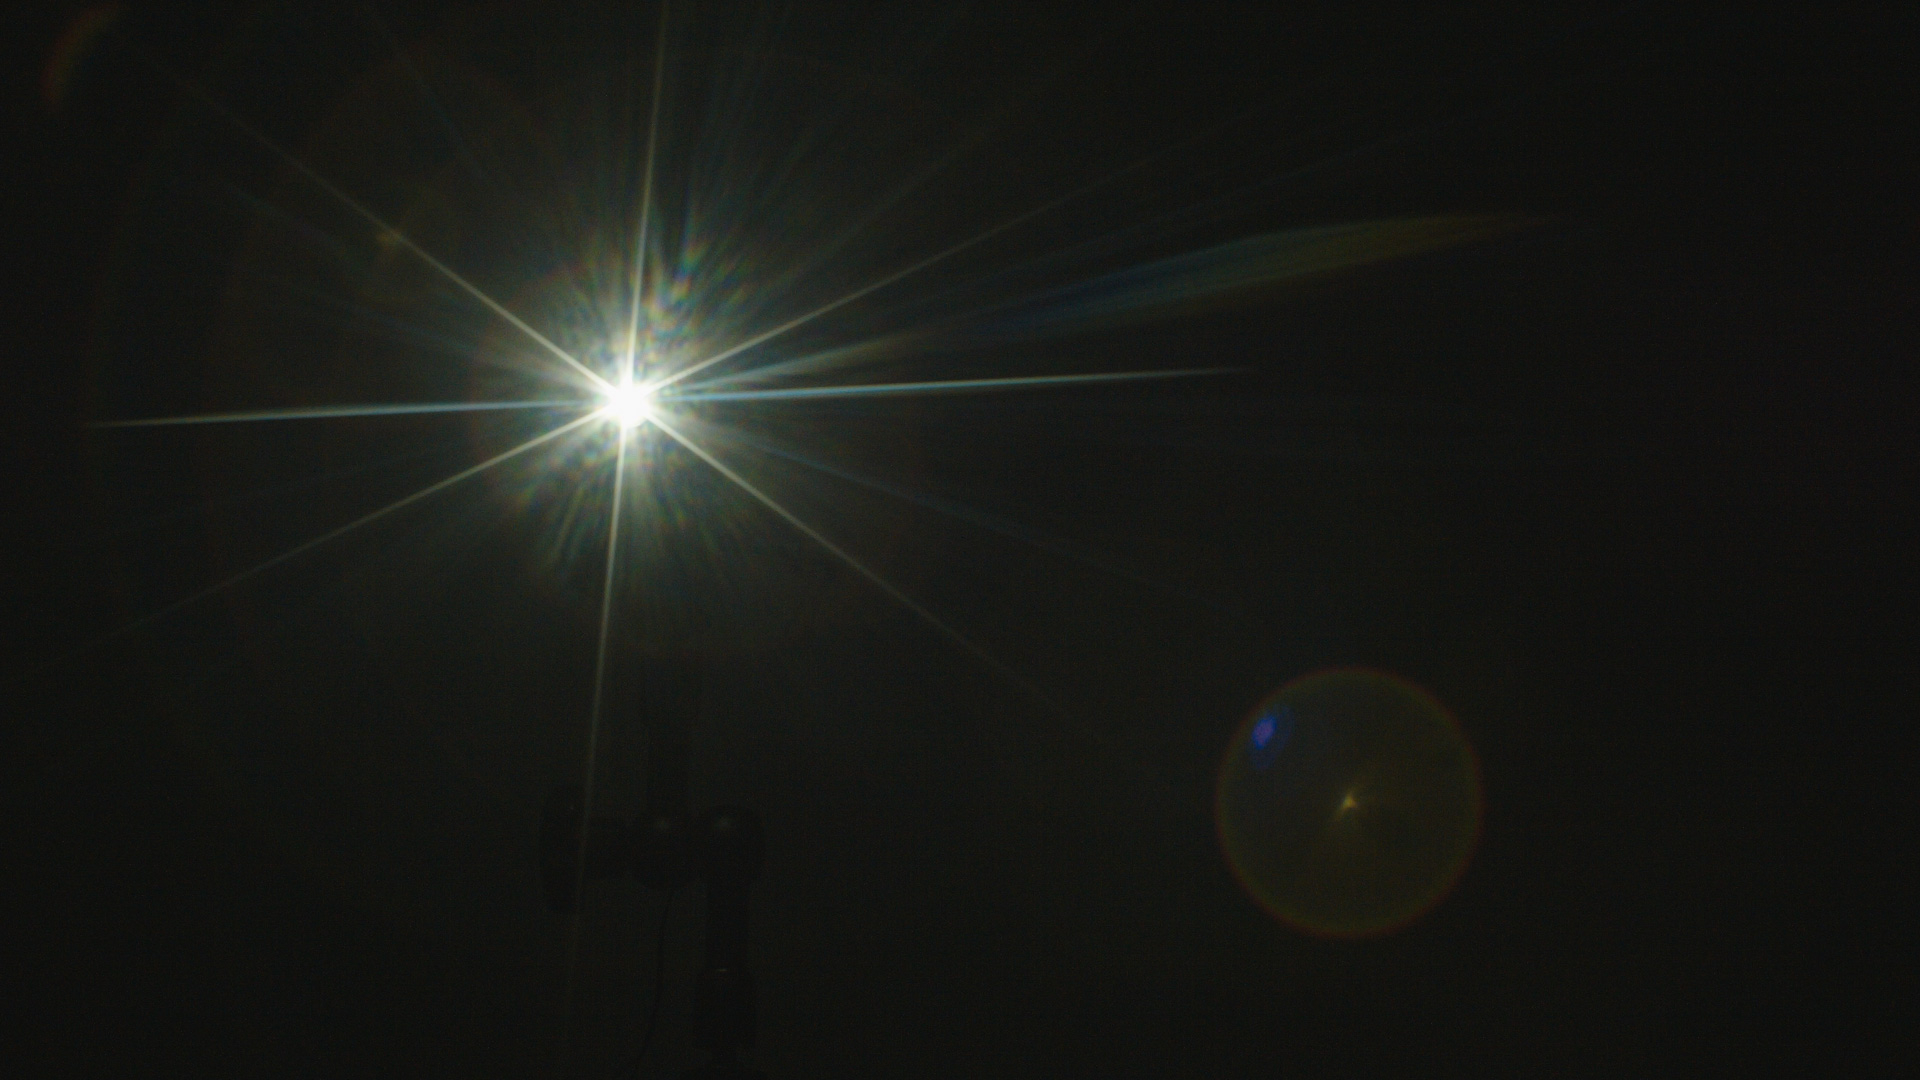
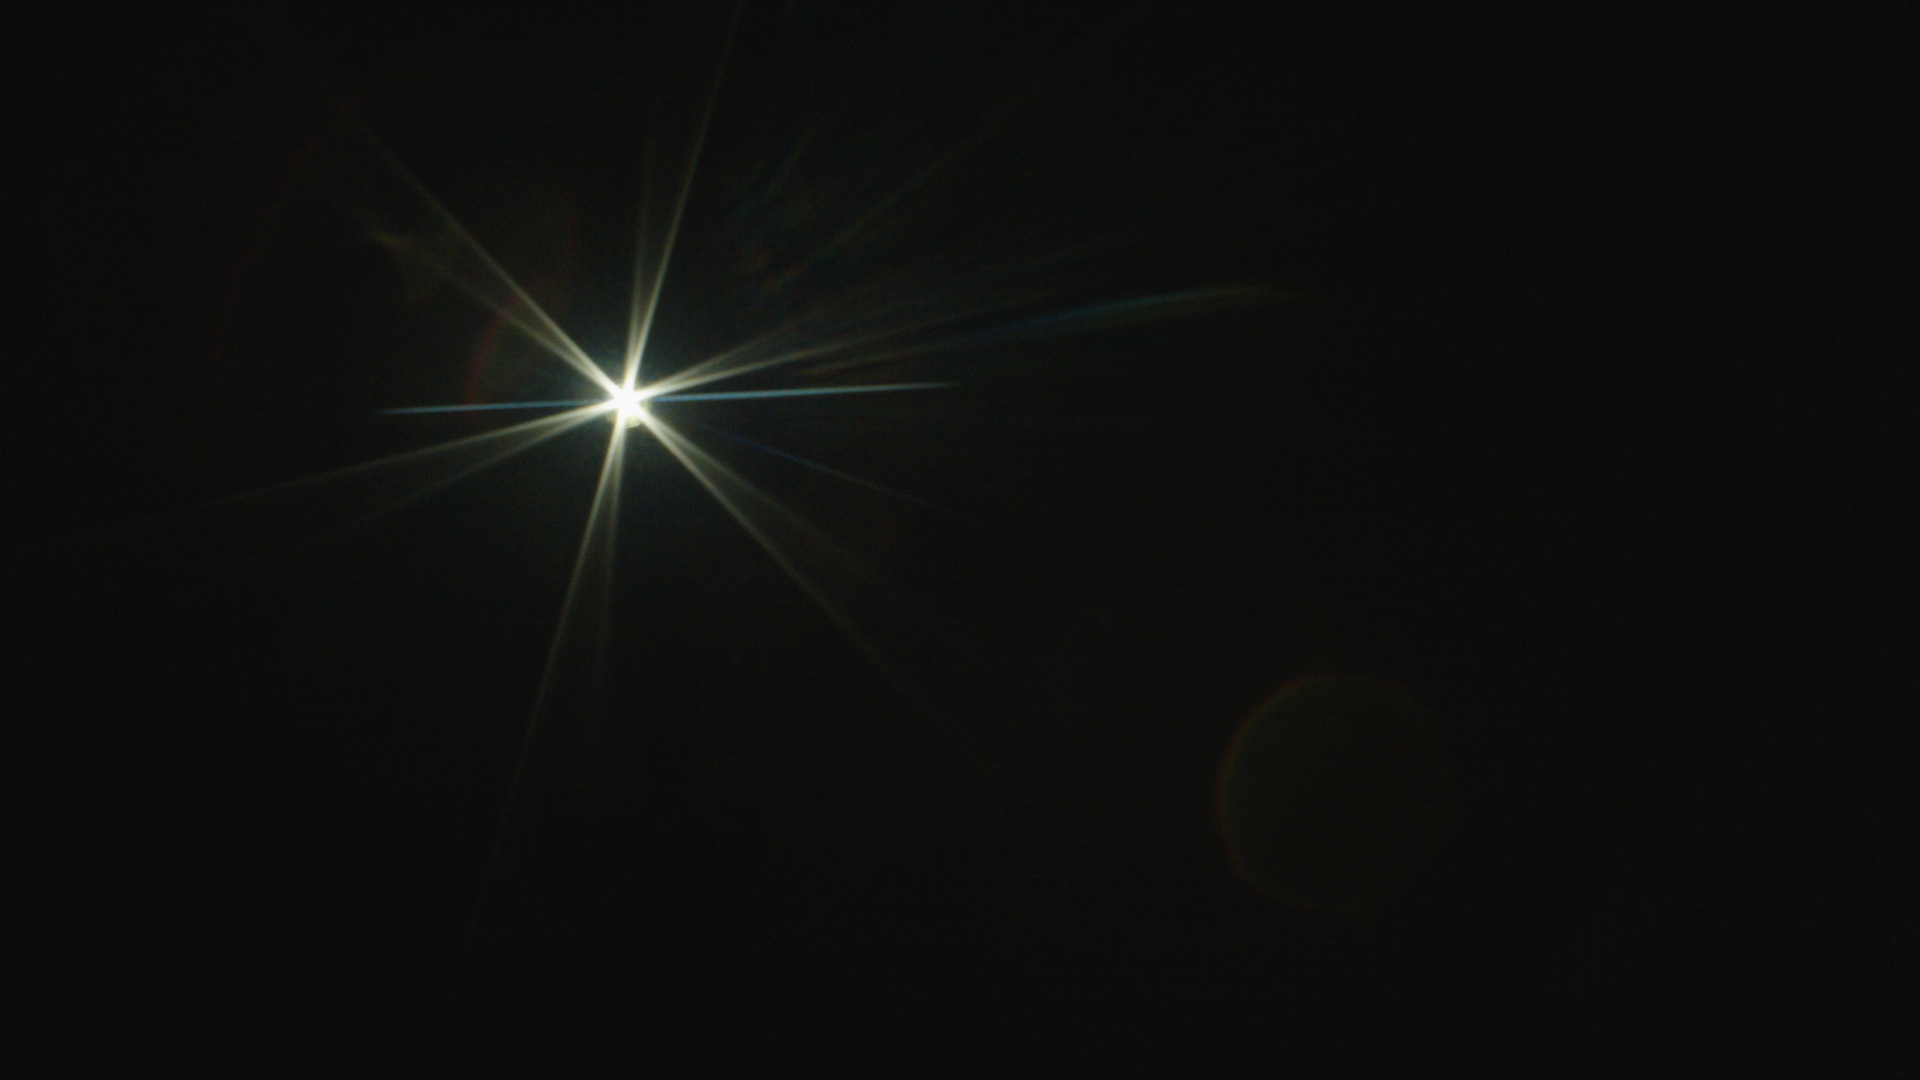
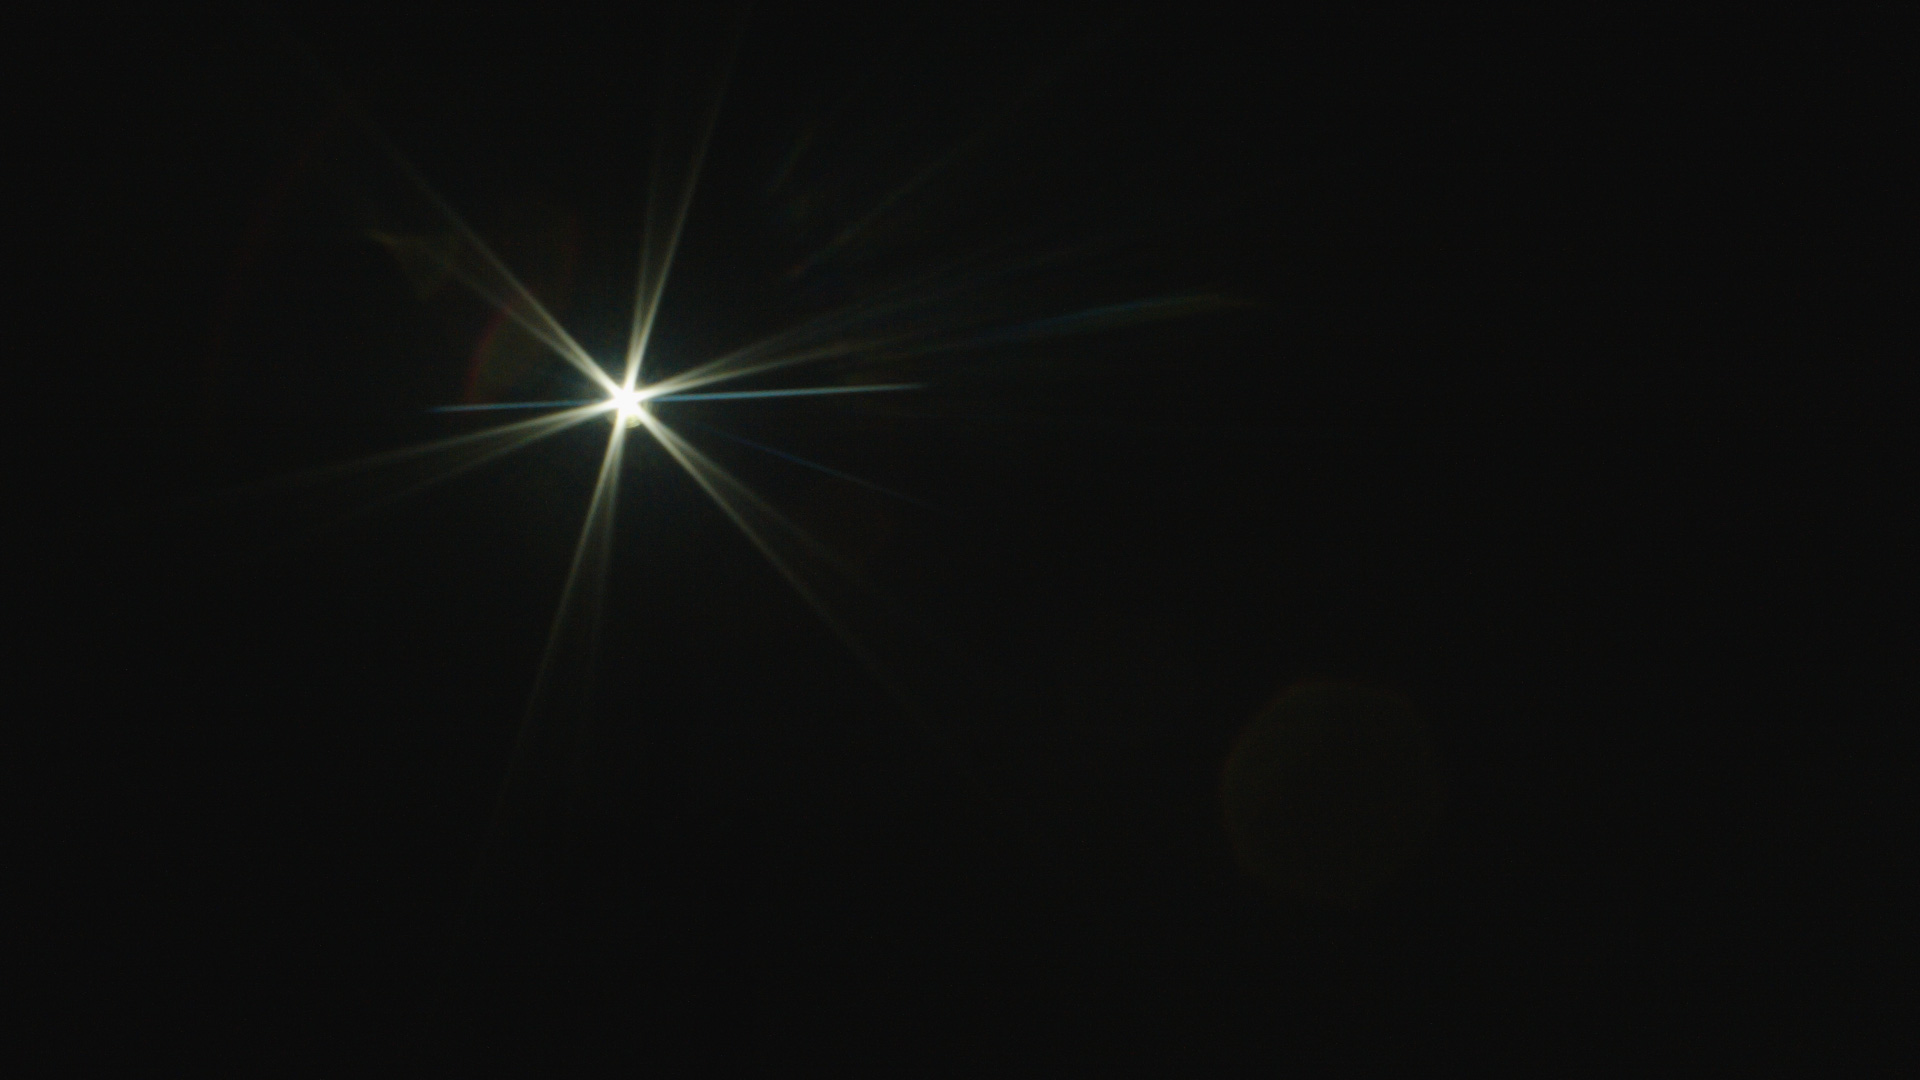
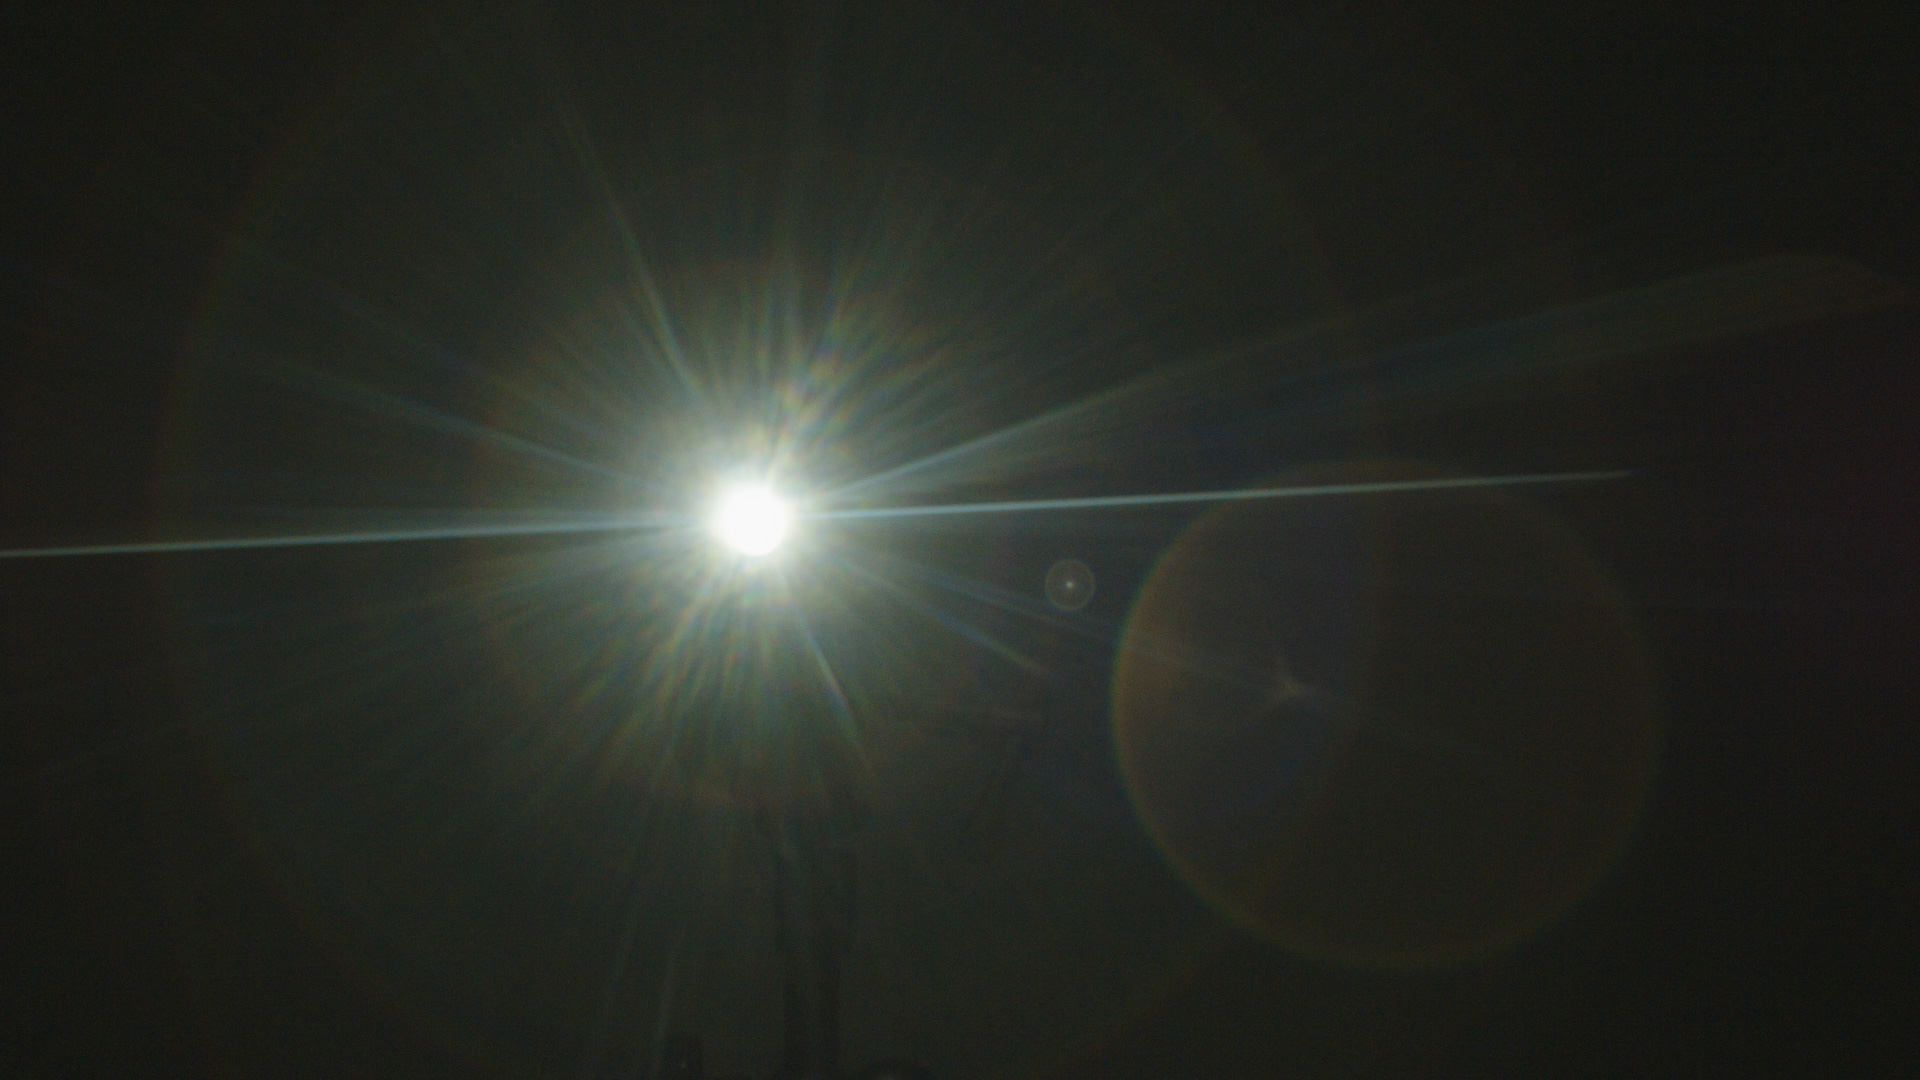
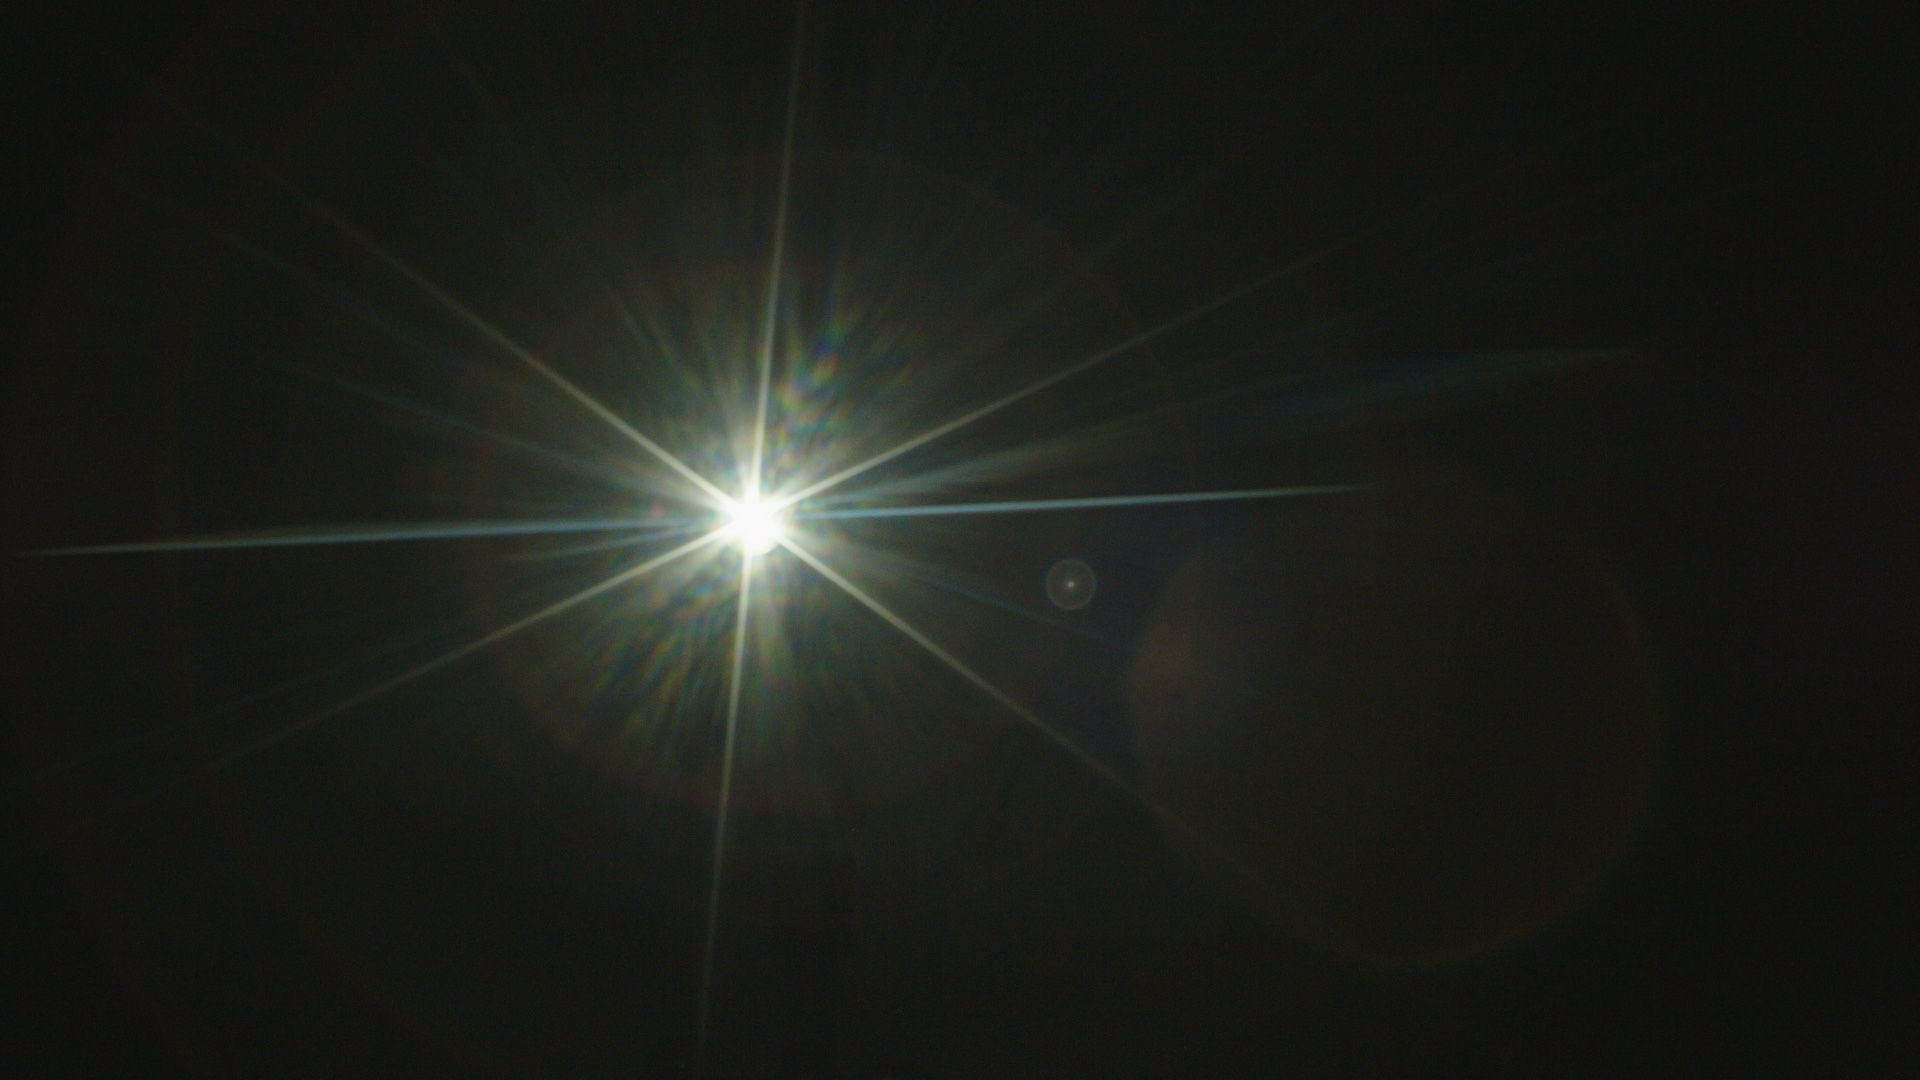
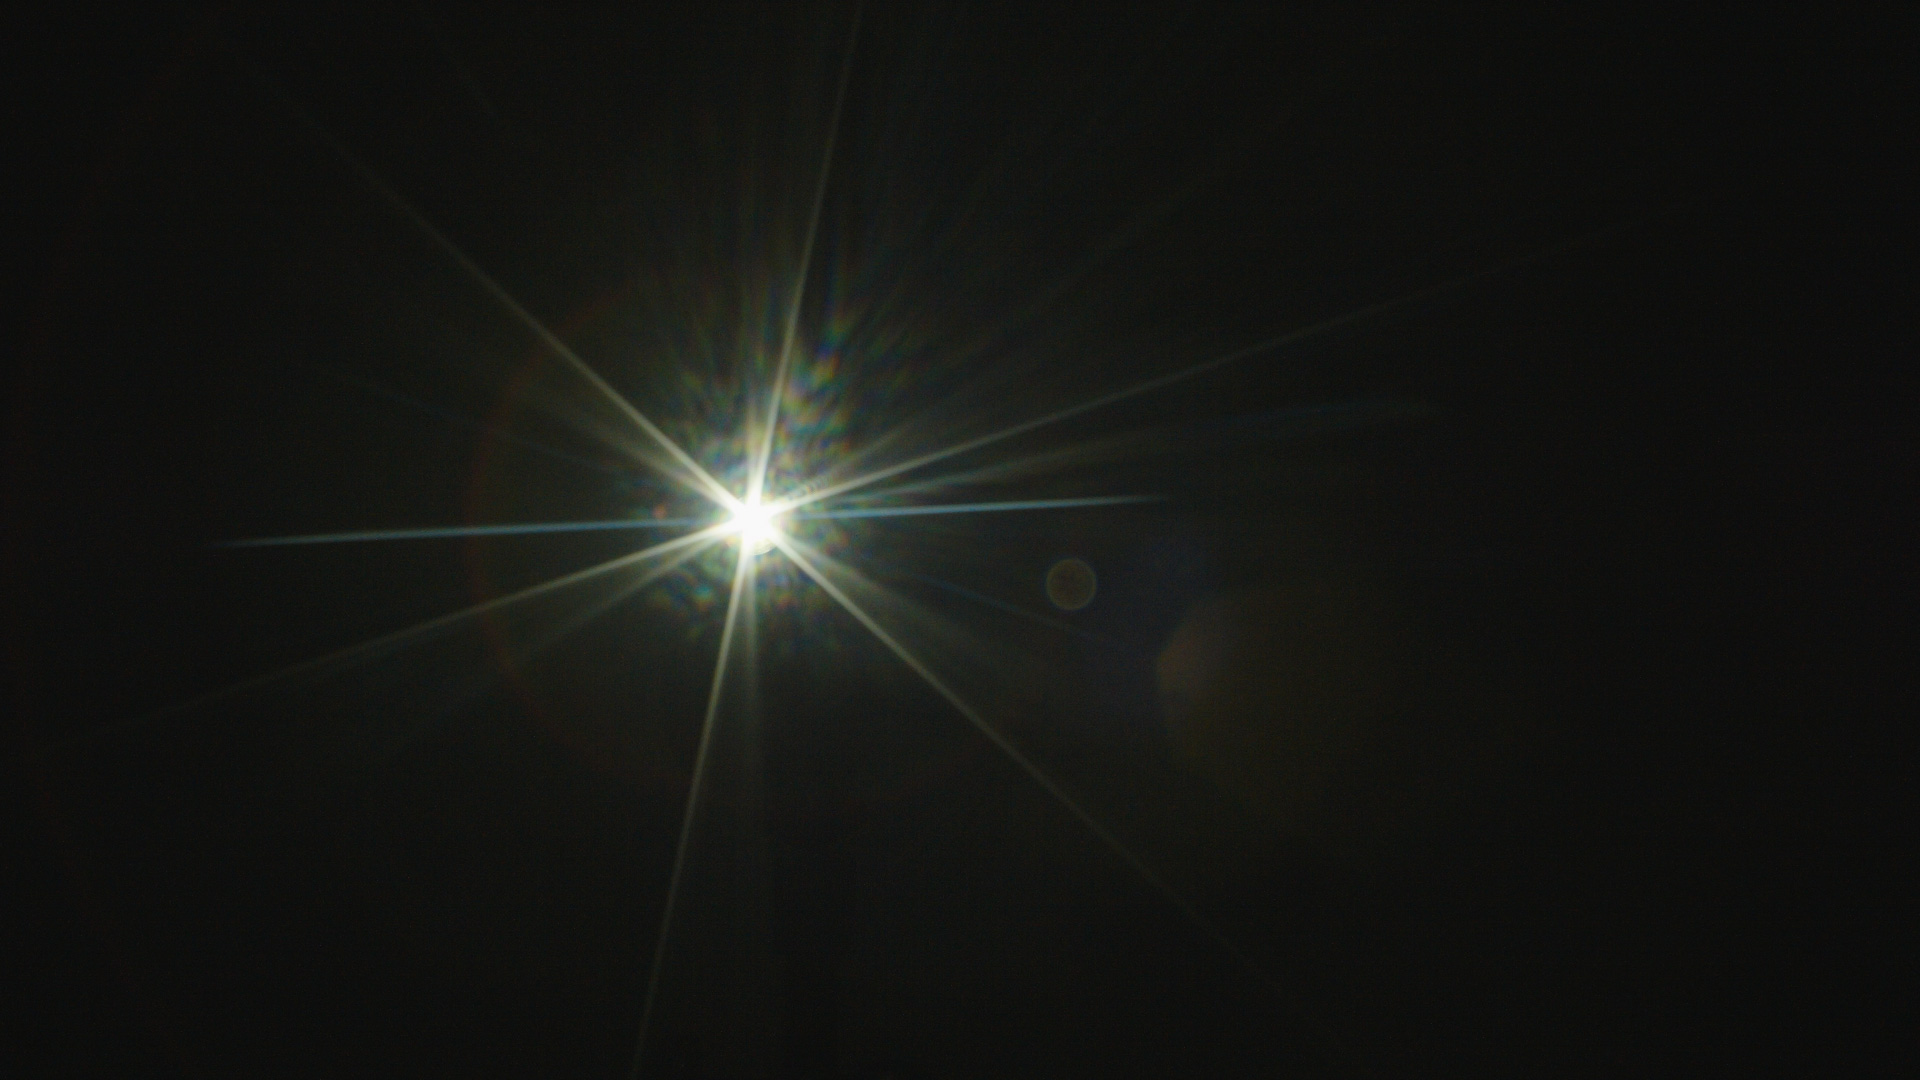
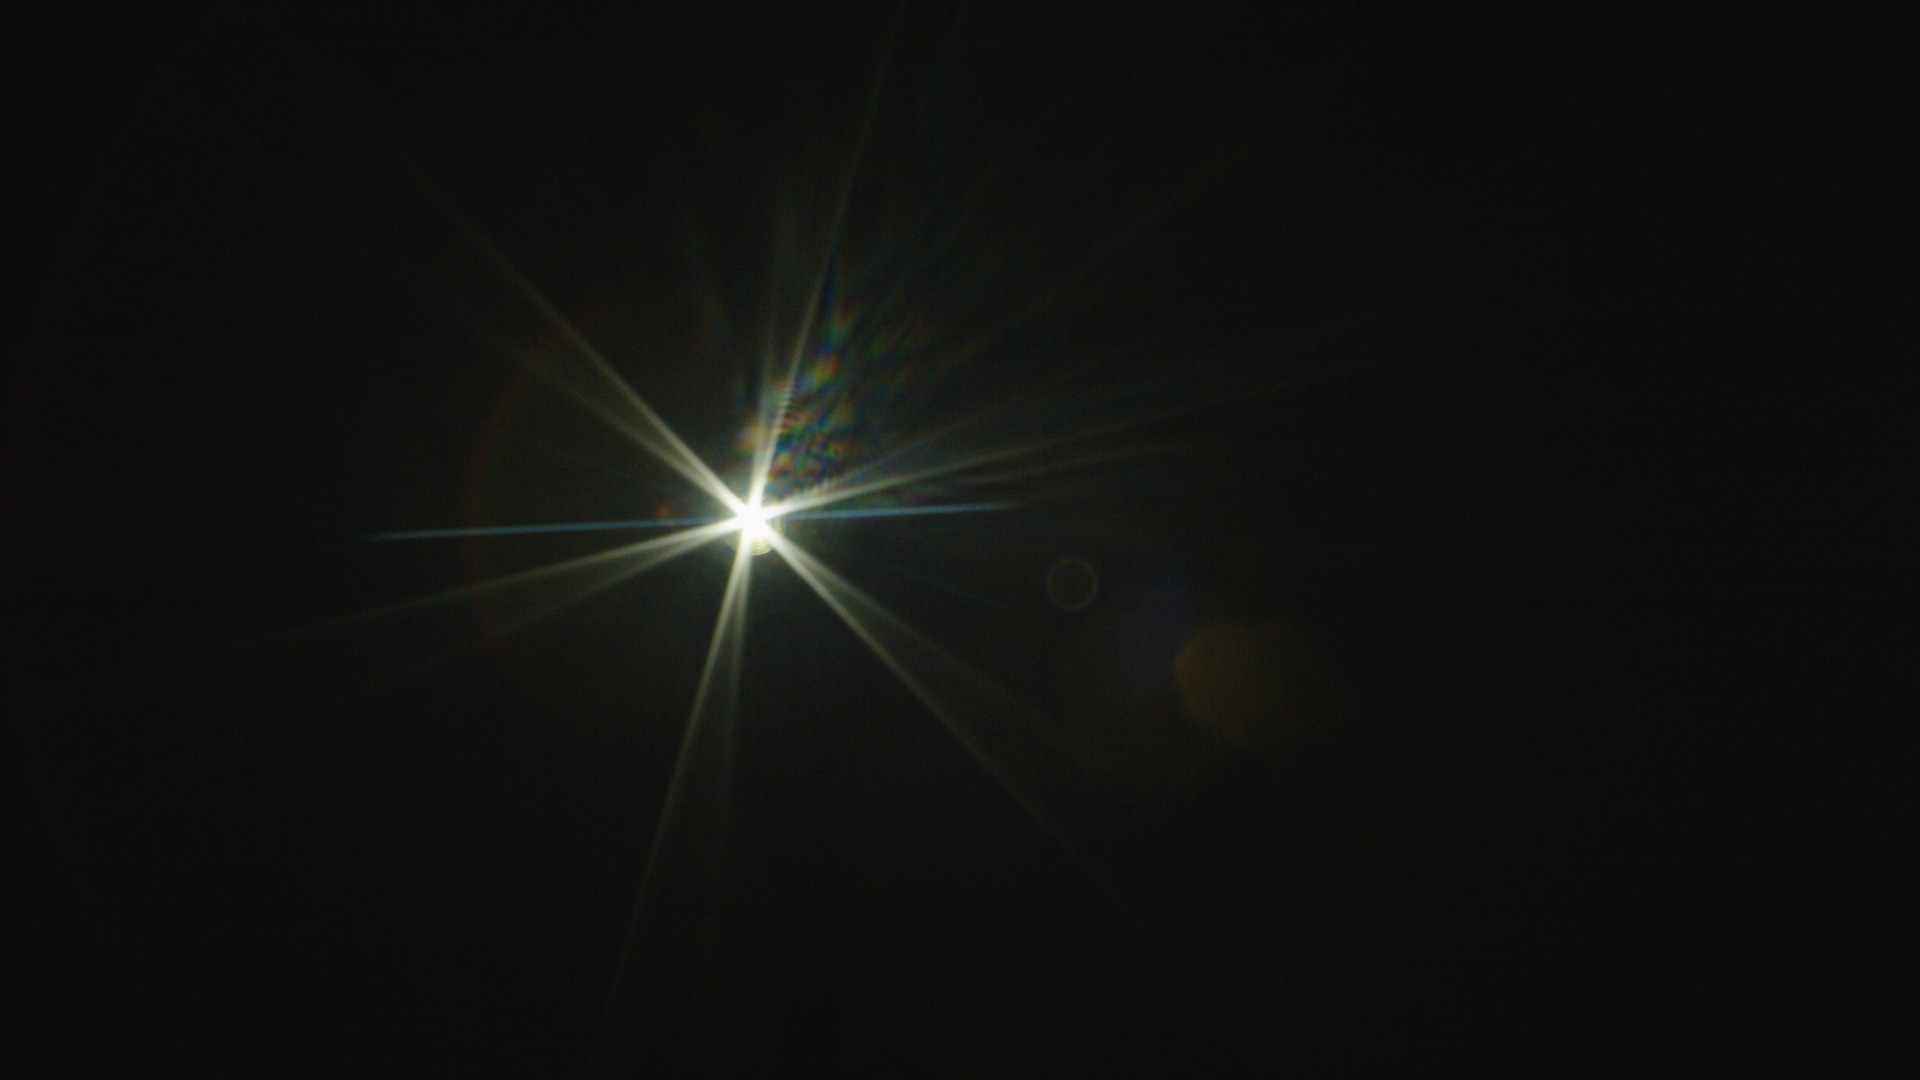
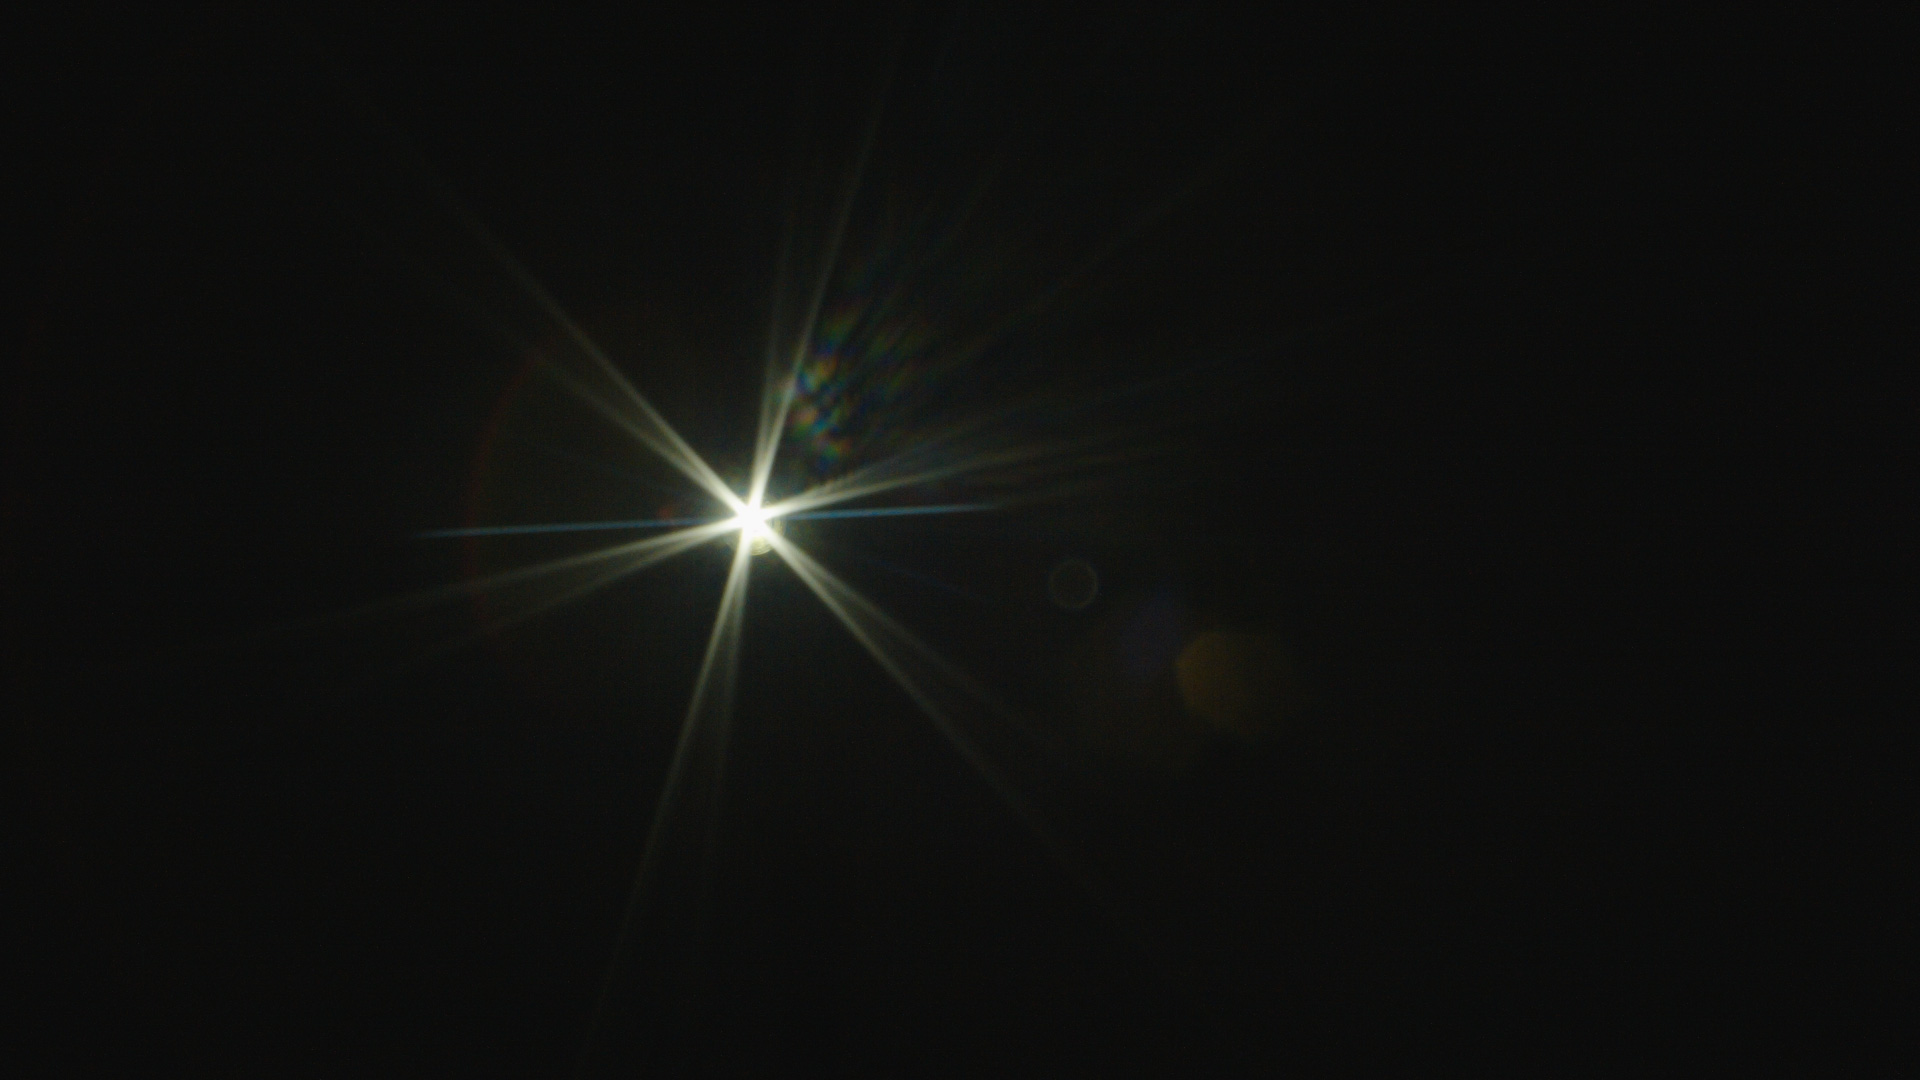
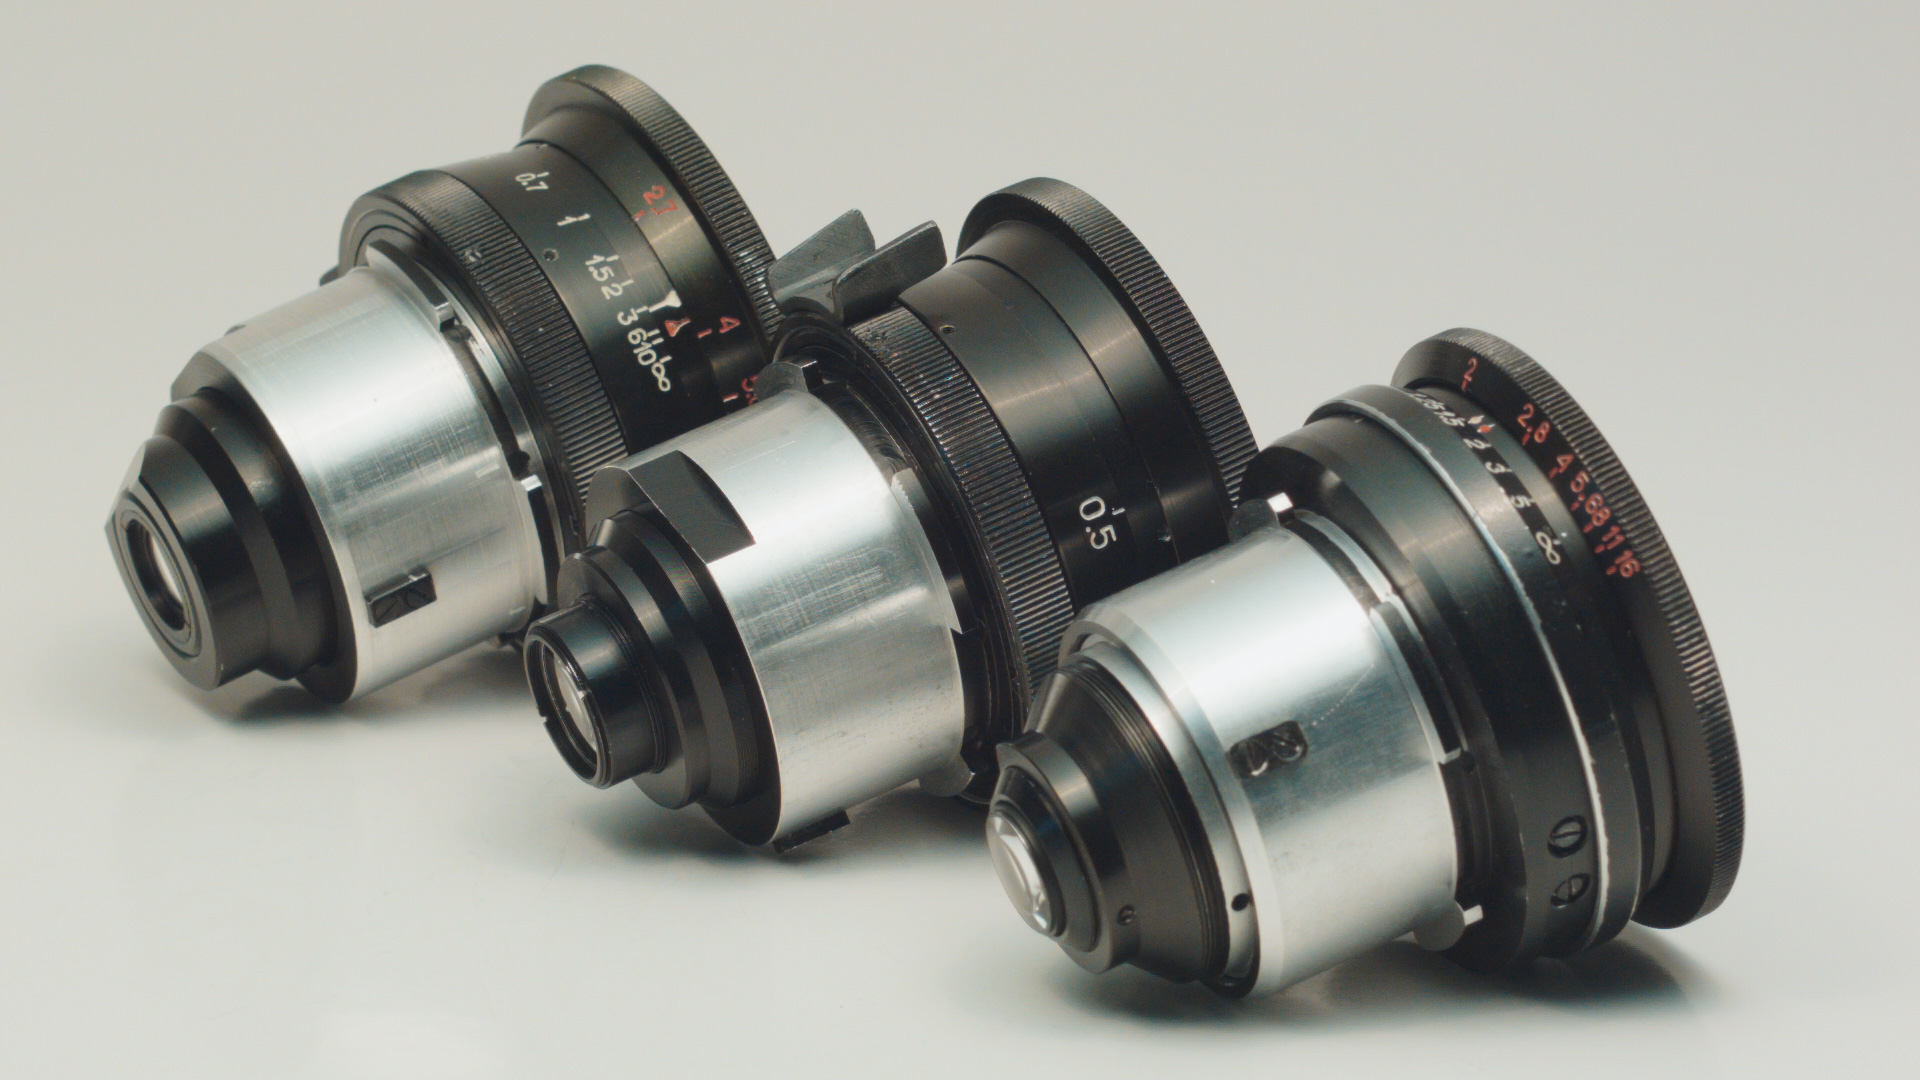
One more test with Vintage OKS (OKC) Kinor16 lenses. Lens Flare test. Added Yashica ML Zoom 35-105. Same as previous test all shoot in RAW, processed in DaVinci Resolve with ARRI LogC timeline and Alexa LogC to Video lut. No any additional color correction.
OKS-15mm-T2.0
OKS-15mm-T2.8
OKS-15mm-T4
OKS-15mm-T5.6
OKS-15mm-T8
OKS-15mm-T11
OKS-15mm-T16
OKS-20mm-T1.9
OKS-20mm-T2.8
OKS-20mm-T4
OKS-20mm-T5.6

OKS-20mm-T8
OKS-20mm-T11
OKS-20mm-T16

OKS-25mm-T2.7
OKS-25mm-T4
OKS-25mm-T5.6

OKS-25mm-T8
OKS-25mm-T11
OKS-25mm-T16

Yashica-28mm-f2.8
Yashica-28mm-f4
Yashica-28mm-f5.6
Yashica-28mm-f8
Yashica-28mm-f11

Yashica-28mm-f16

Yashica-50mm-f1.7
Yashica-50mm-f2
Yashica-50mm-f2.8
Yashica-50mm-f4
Yashica-50mm-f5.6
Yashica-50mm-f8

Yashica-50mm-f11
Yashica-50mm-f16
Yashica-Zoom35-105mm-35mm-f3.5
Yashica-Zoom35-105mm-35mm-f5.6
Yashica-Zoom35-105mm-35mm-f8

Yashica-Zoom35-105mm-35mm-f11
Yashica-Zoom35-105mm-35mm-f16
Yashica-Zoom35-105mm-50mm-f3.5
Yashica-Zoom35-105mm-50mm-f5.6
Yashica-Zoom35-105mm-50mm-f8
Yashica-Zoom35-105mm-50mm-f11
Yashica-Zoom35-105mm-50mm-f16
-
OKS lenses test on BMMCC. OKS1-25-1 T2.7, OKS2-20-1 T1.9, OKS3-15-1 T2 compared to Yashica ML 28mm and 50 mm
OKS 15mm T2.0 + ND
OKS 20mm T1.9 + ND
Yashica 50mm f1.4 +ND

OKS 15mm T2.8
OKS 20mm T2.8
OKS 25mm T2.7
Yashica 28mm f2.8
Yashica 50mm f2.8

OKS 15mm T4

OKS 20mm T4
OKS 25mm T4
Yashica 28mm f4
Yashica 50mm f4

OKS 15mm T5.6
OKS 20mm T5.6
OKS 25mm T5.6
Yashica 28mm f5.6
Yashica 50mm f5.6
OKS 15mm T8

OKS 20mm T8
OKS 25mm T8
Yashica 28mm f8

Yashica 50mm f8

-
So i tested Time Shaper with 60 fps source exported to 24 fps. It works well as fx tool to gnerate a very dreamy and unusual motion blur. It works very well for changing shutter angle in post. But the basic filmic shutter modes are behave a little strange. The blur is blocky because there is not enough source framerate. And there is no way to get a normal amount of 180dergee looking blur. With different shutter modes i got only too blured image or too unblured. This may be caused by non integer framerate conversation 2.5x. Also some shutters produce wired dark (overcontrasted) egges on the blurred objects so they are not too usable in situations when object moves over clean background.
also got a useful tip for exr import name structure for this app., if someone confused with error on file import.
QuoteFor my customers using EXR files, the naming standard has been to have a period (.) before the file number in the name (for example “someclipname.000043.exr”) That is not clear in the documentation, and in a future update it’ll be more forgiving of the numbering of the file.
-
12 hours ago, mercer said:
I I took a cheap half cage made for the pocket and attached it to the micro (they have the same height dimensions) and then attached a Slik quick release base to the top of the cage and the plate to the bottom of the monitor.
Nice idea with cage. Can you post a link to exact model of the pocket cage that fits micro camera? I search on ebay for similar cages but the dimensions seems smaller there.
UPD. Looked at the Pocket specs - its 66mm. The Micro camera is 66mm too, so any Pocket cage will fit to Micro. Seems its just a sellers mistake in cage description.
-
To be clear i got answer from Tessive support.
QuoteTime Shaper gives very nice results in a 2:1 downconversion (48 to 24 fps). For many applications, we do a 120->60fps downconversion, which is similar. We have several shutter waveforms specifically designed for this situation.
Of course, with a higher rate (120 to 24), there’s a lot more data to work with, and the results can be better, but there’s quite a bit that can be done from 48 to 24fps. As always, it works best with a 360-degree shutter to avoid gaps between frames.
So maybe will do some tests today with this plugin today. I also tested 60fps on BMMCC yesterday and there is a problem. When you shoot with 60fps/360shutter and then conform to 24 fps, the rolling shutter seems becames 2.5 times more stronger too.
-
5 hours ago, Nicky1983 said:
Shijan, where did you find these metal plank with adapted holes (1/4) ?
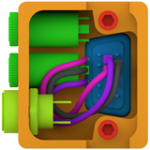
i find it in my box with other metal parts. it was a part of something... made of steel. 6.7mm holes drilled by hand drill. paint it with spray paint, than glue a peace of rubber pad to it for better contact with camera.
-
There is Tessive TIME SHAPER app but seems it needs more than 60fps source to mimic film looking motion blur http://tessive.com/time-shaper-info/
-
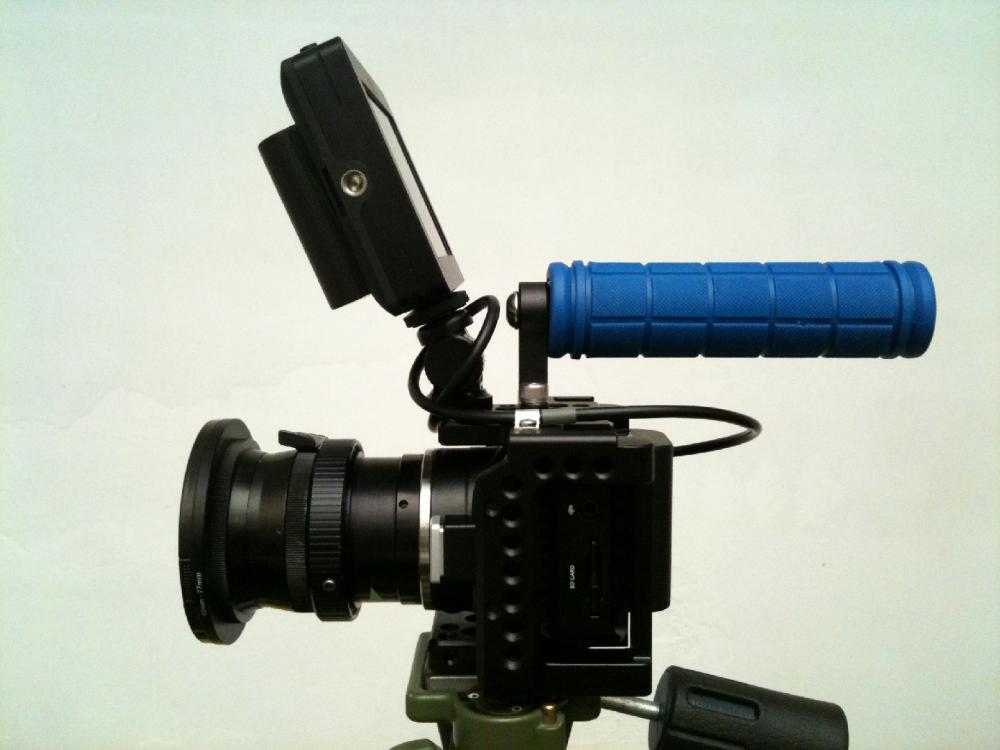
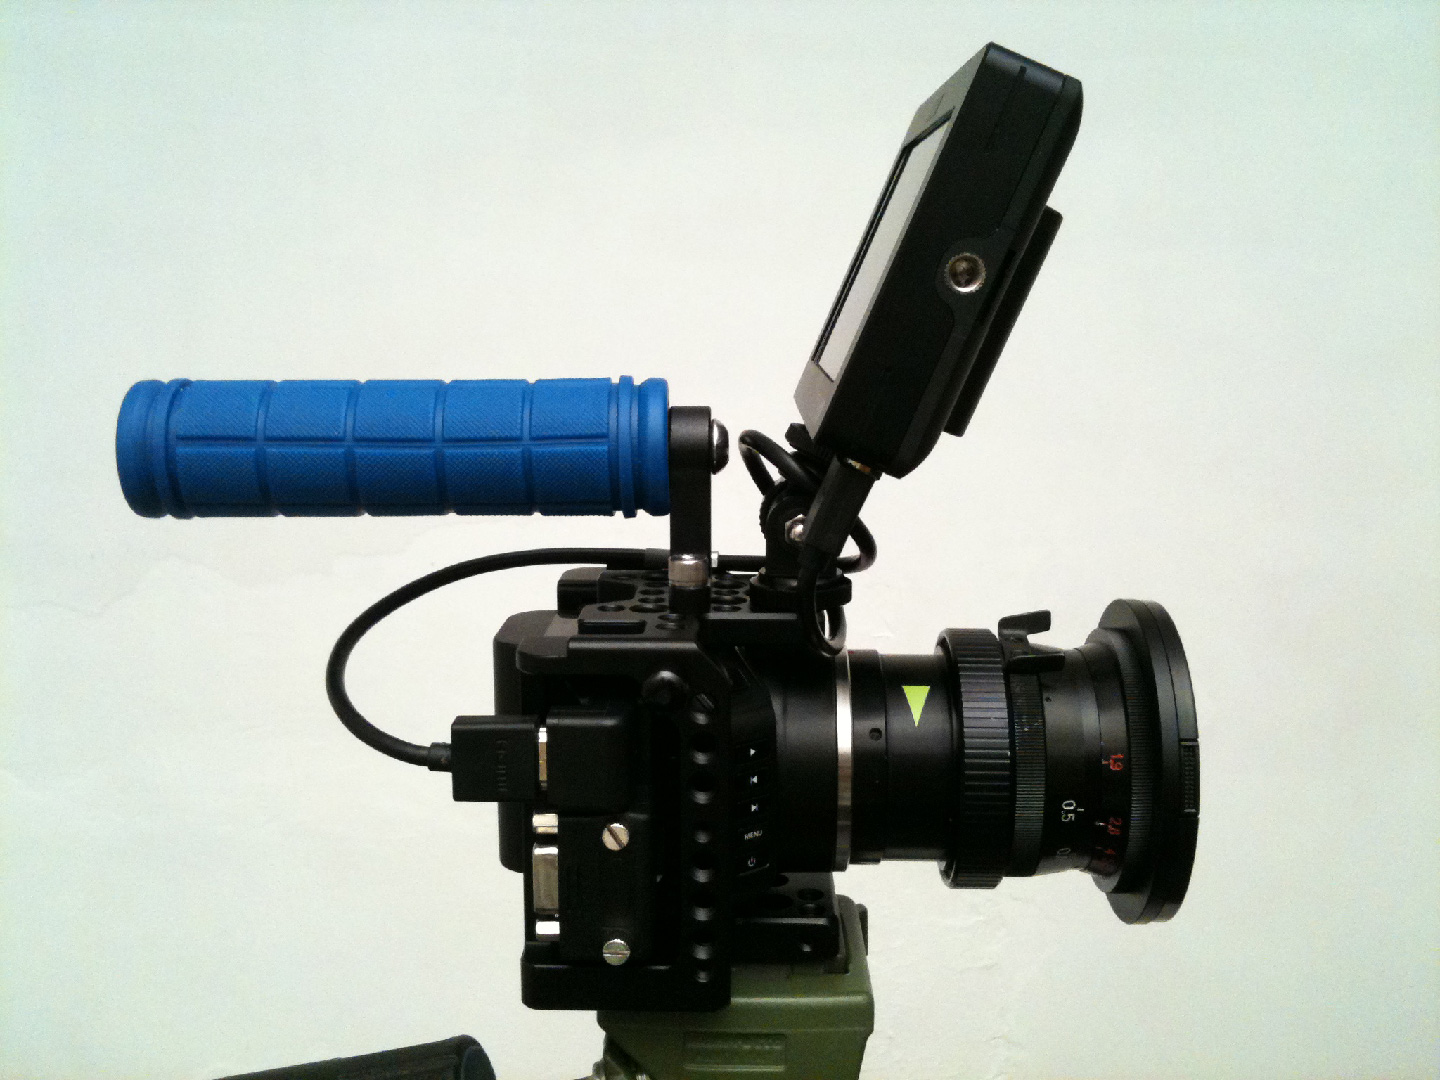
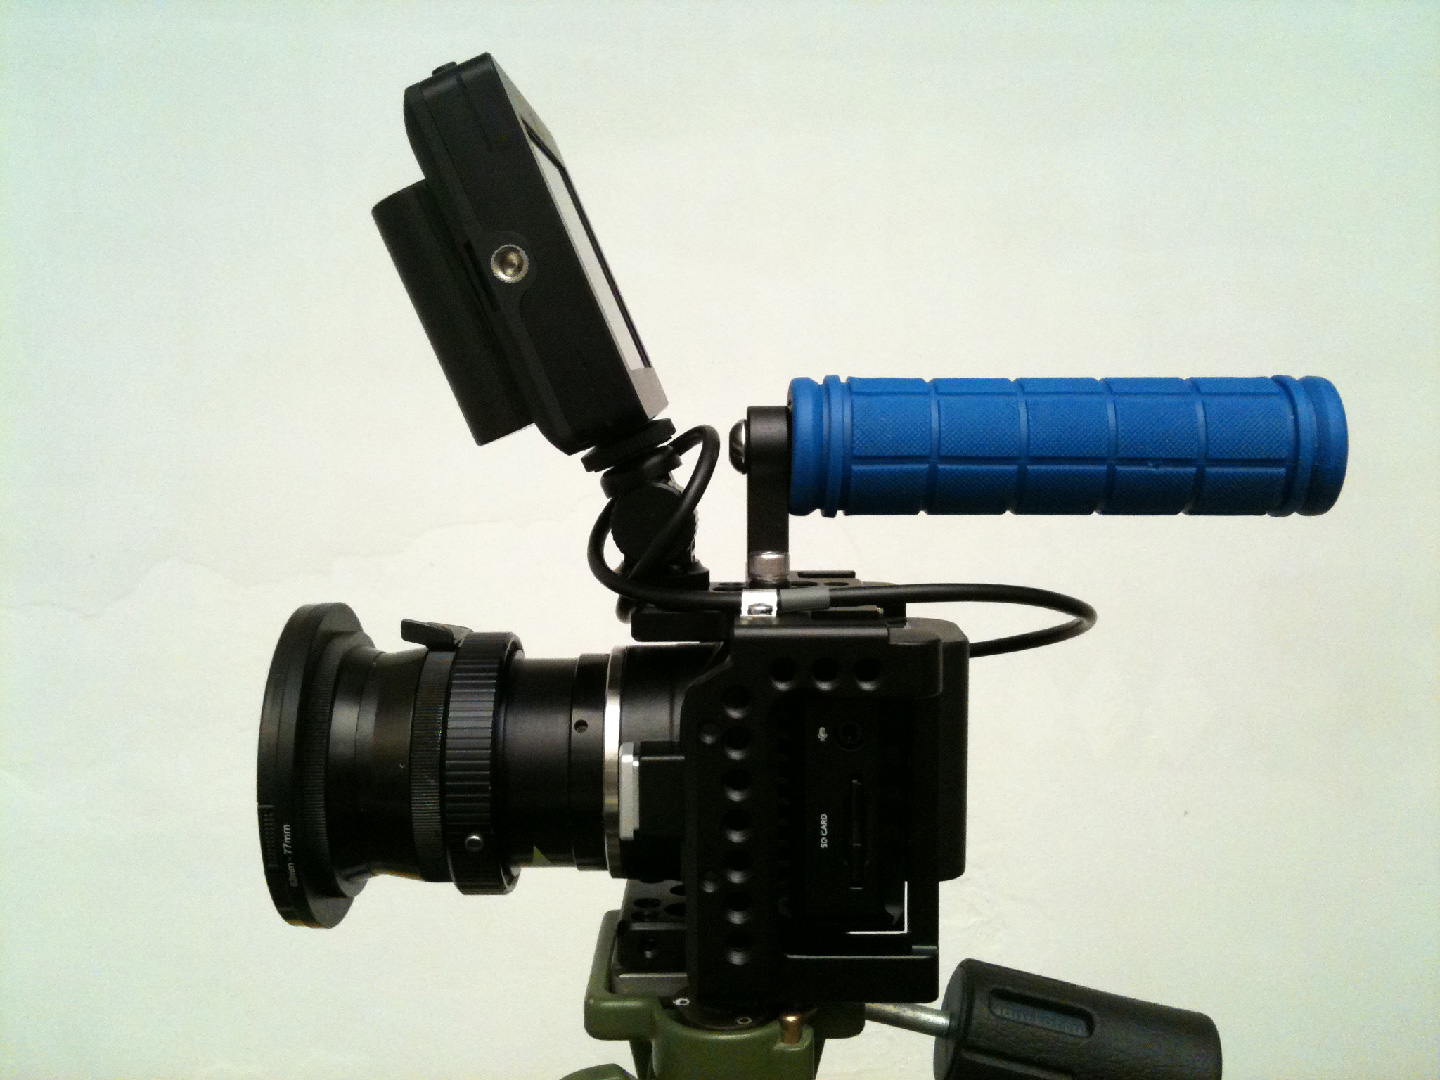
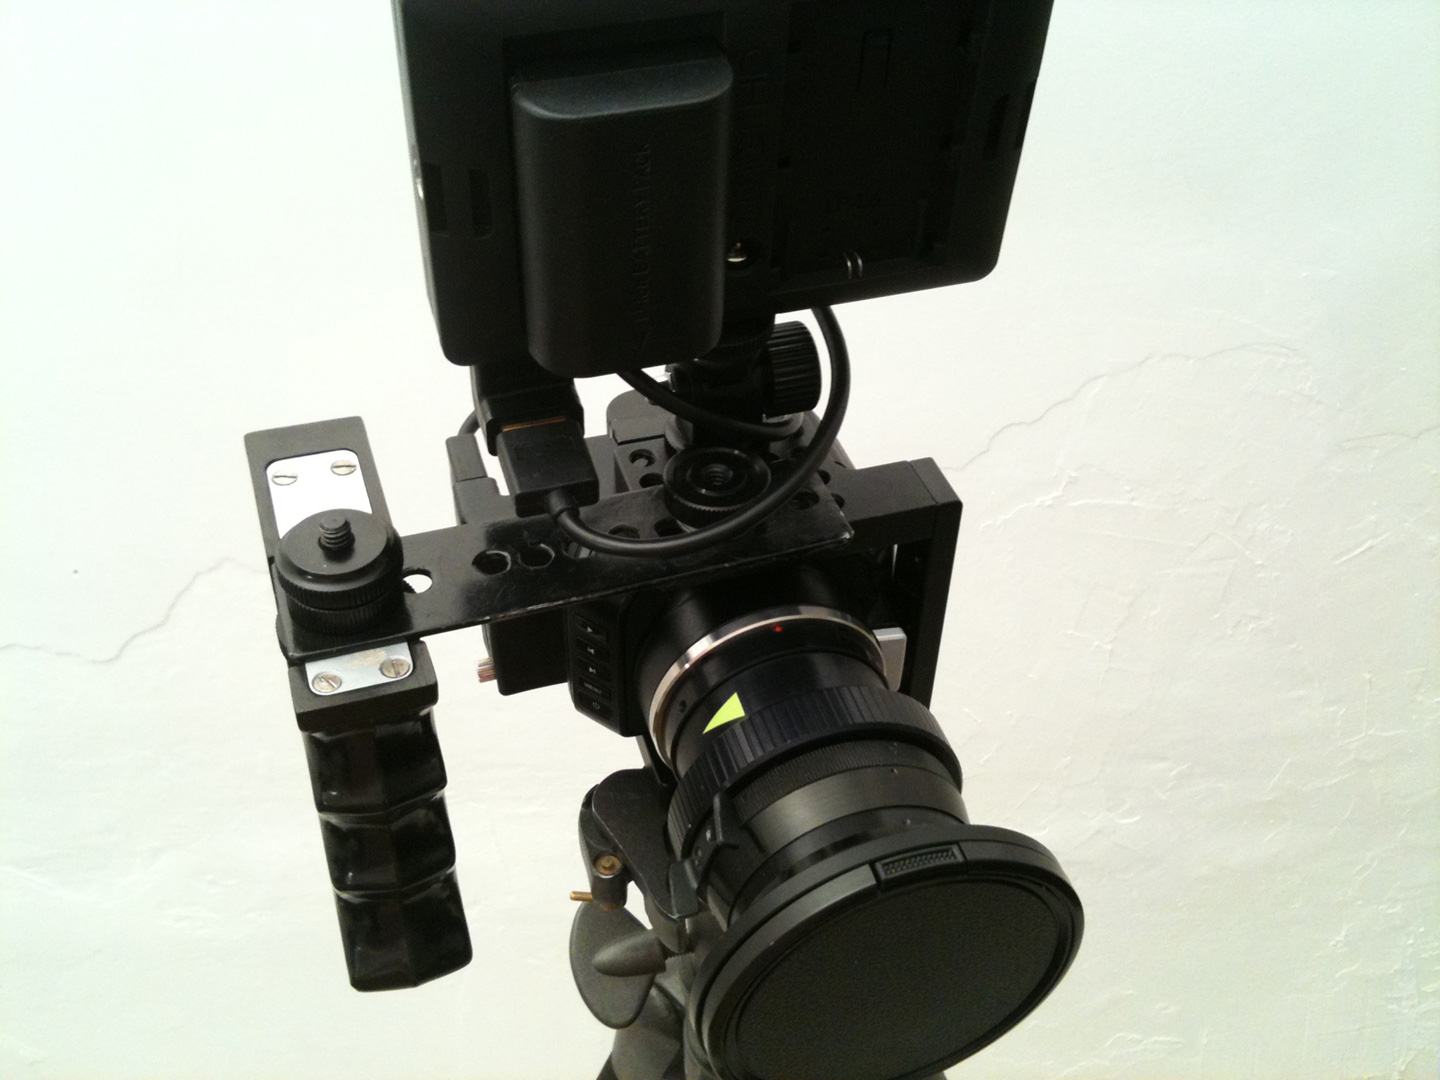
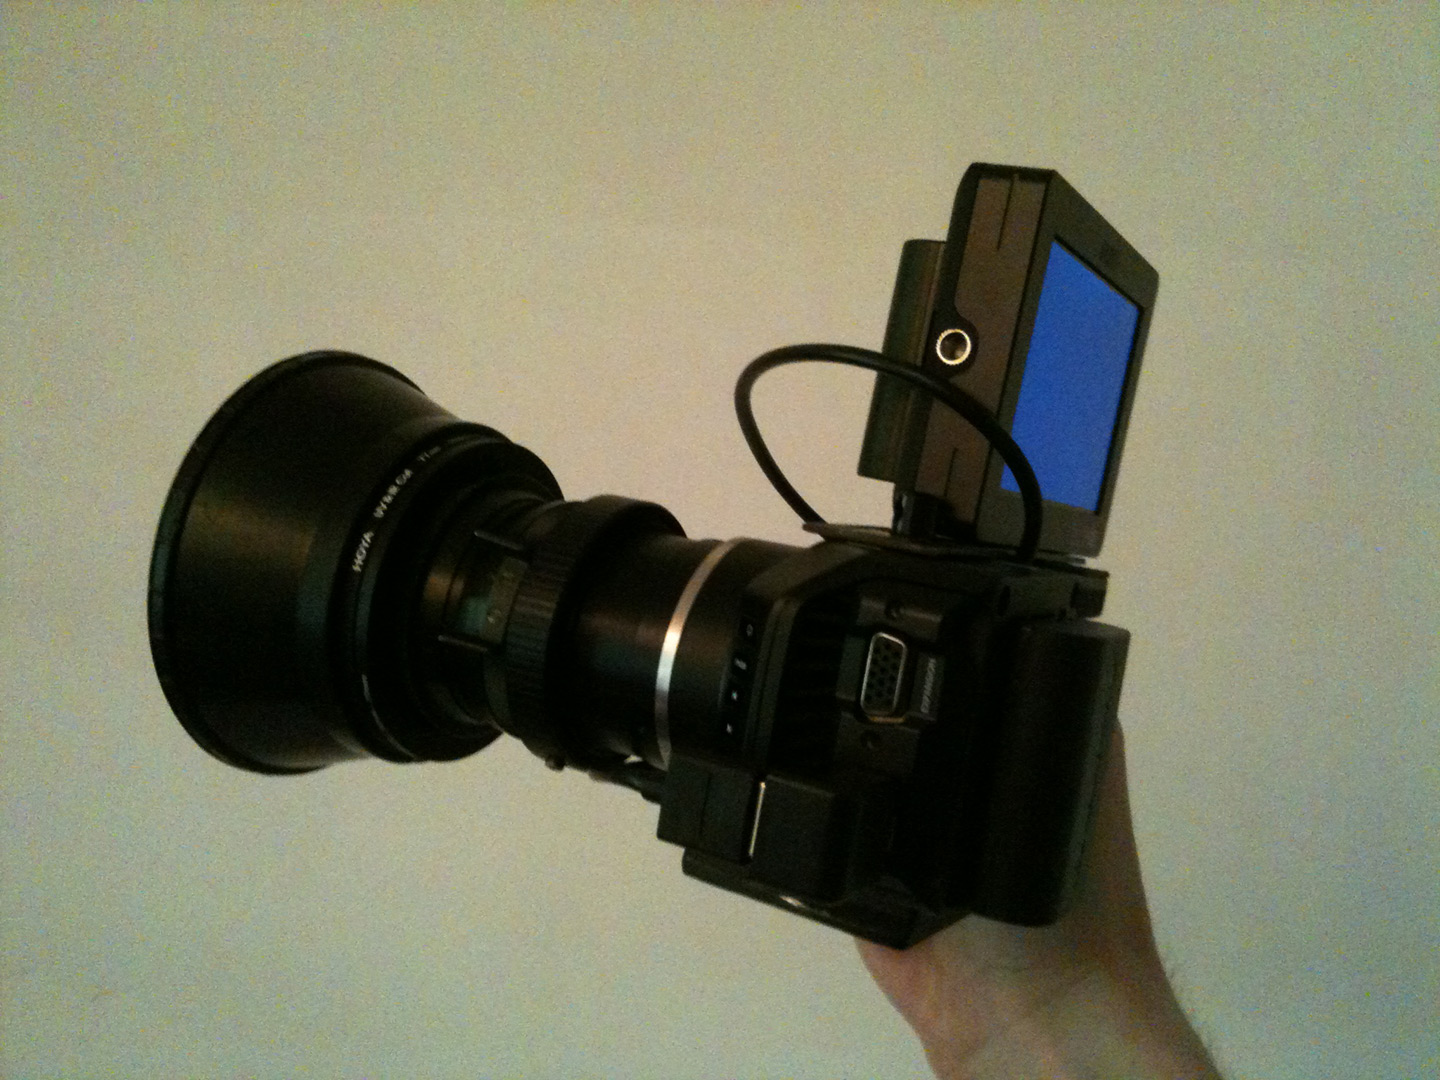
A little update. Drilled more holes in metal plank to add more space between camera and grip. Add grip and shoulder mount from vintage 8 mm camera "Krasnogorsk". Seems its stronger, more compact and more ergonomic than modern China grip.
Next need to add external PWM Rec/Stop button somewhere.

-
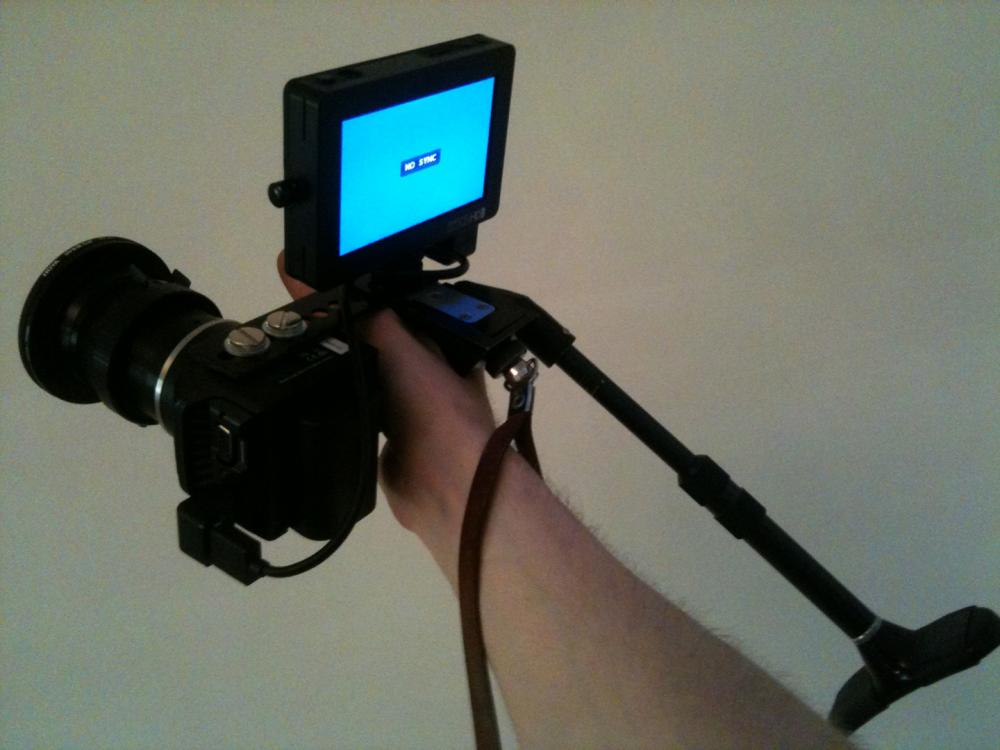
The only problem with flipped camera is when the image flipped with external monitor the camera menus and overlays became flipped too. Unfortunately there is no in-camera flip option, so there is a request for future firmware update.
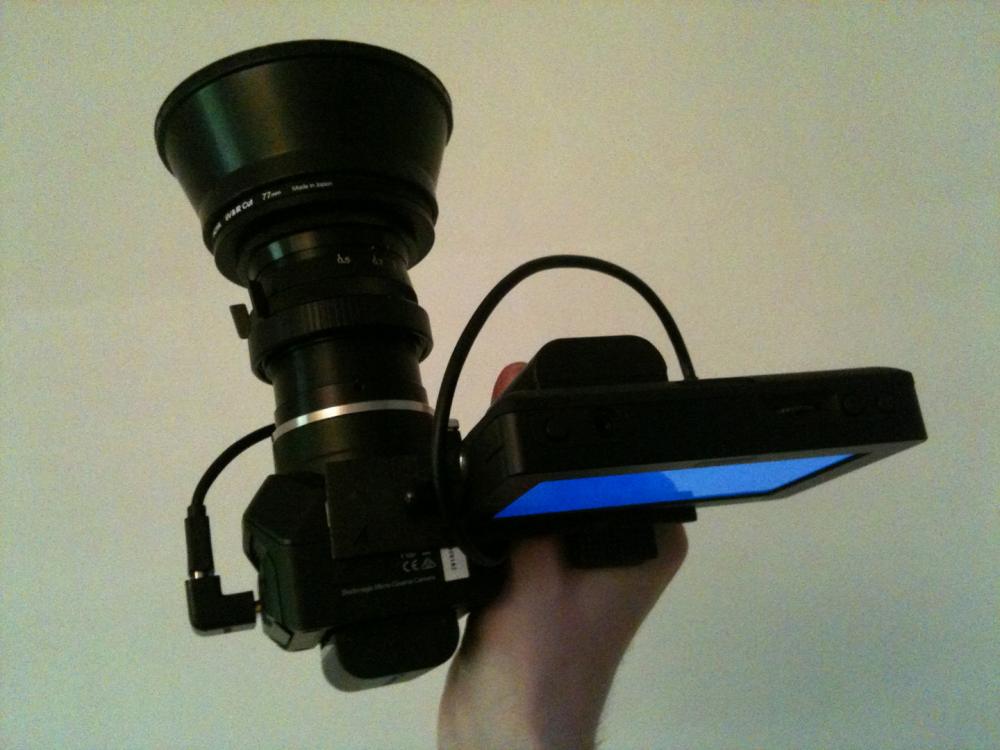
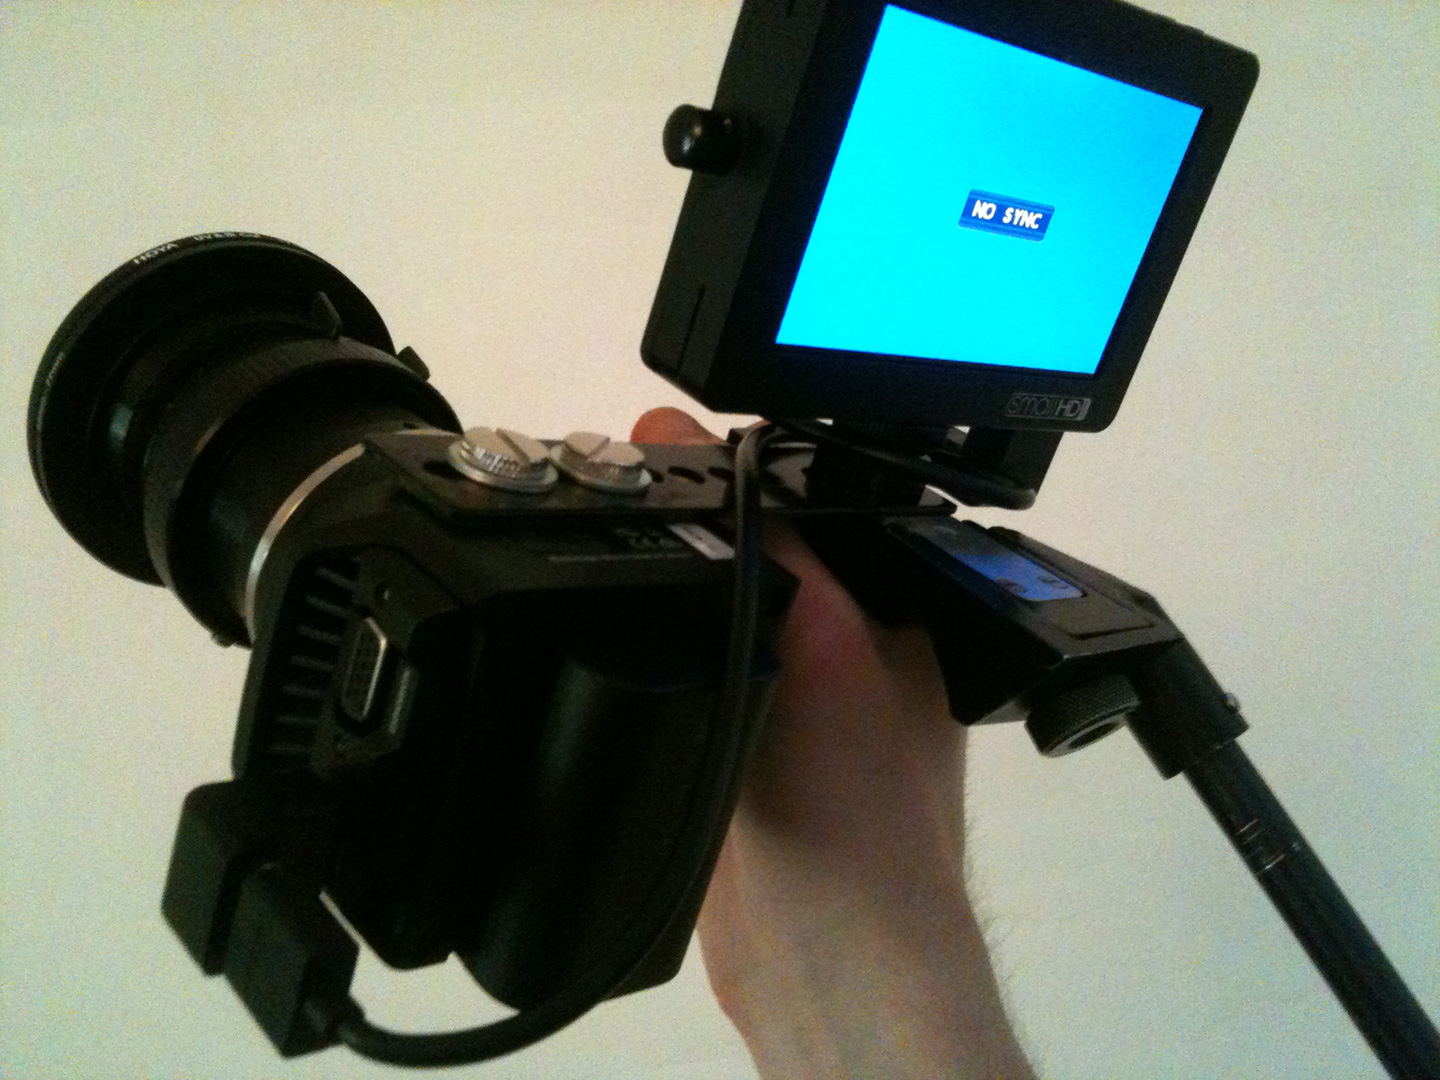
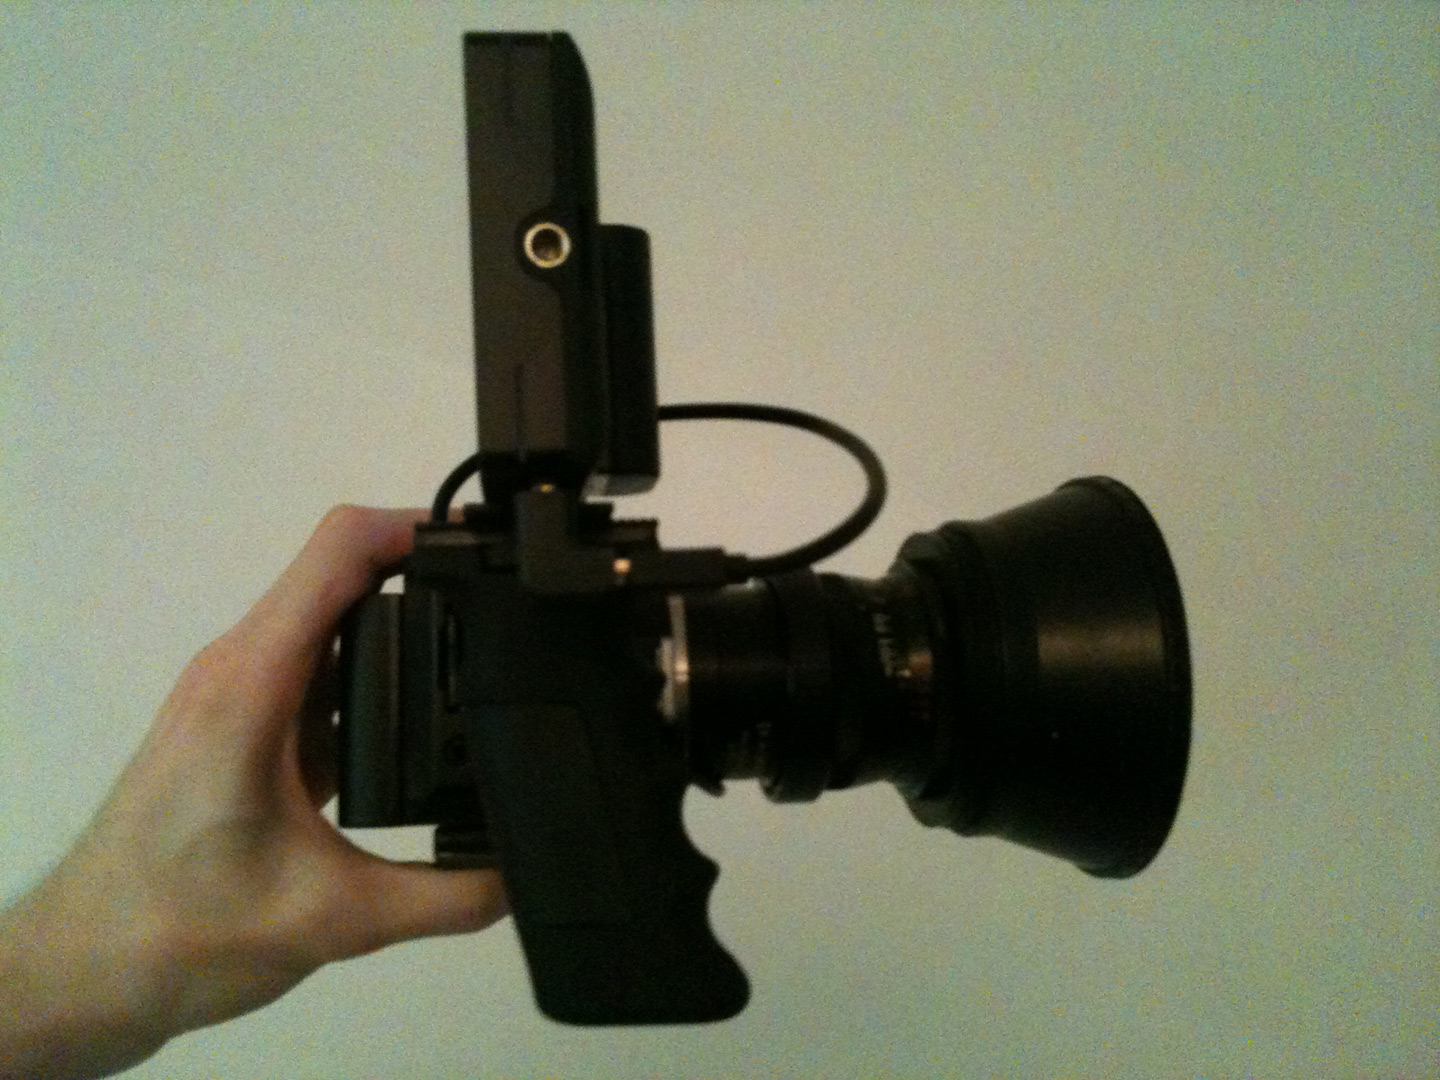
After some tests i really wondered with the weight arrangement! The monitor counterweights the camera so there is almost zero left-right tilt usual for DSLR cameras holded with one hand. Additionally mass center can be corrected with battery placement.
Also its better to add 1 cm height screw adapter under the monitor to add some space for hdmi connector.
And one more little bonus - the flipped camera don't blow to my eye with its little cooler anymore...
-
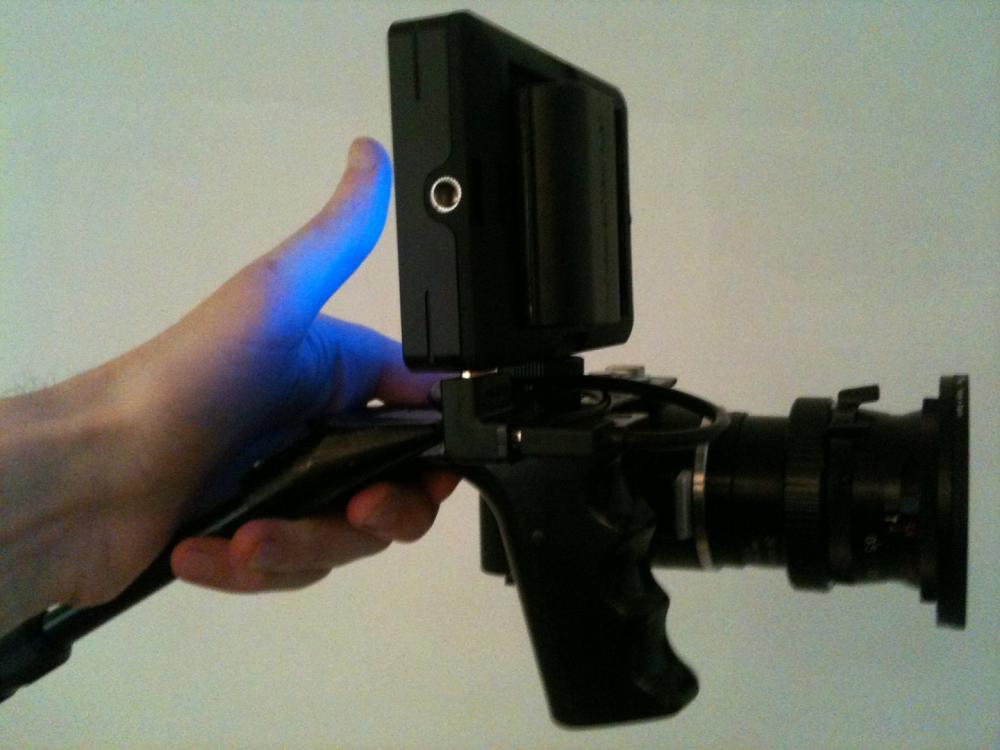
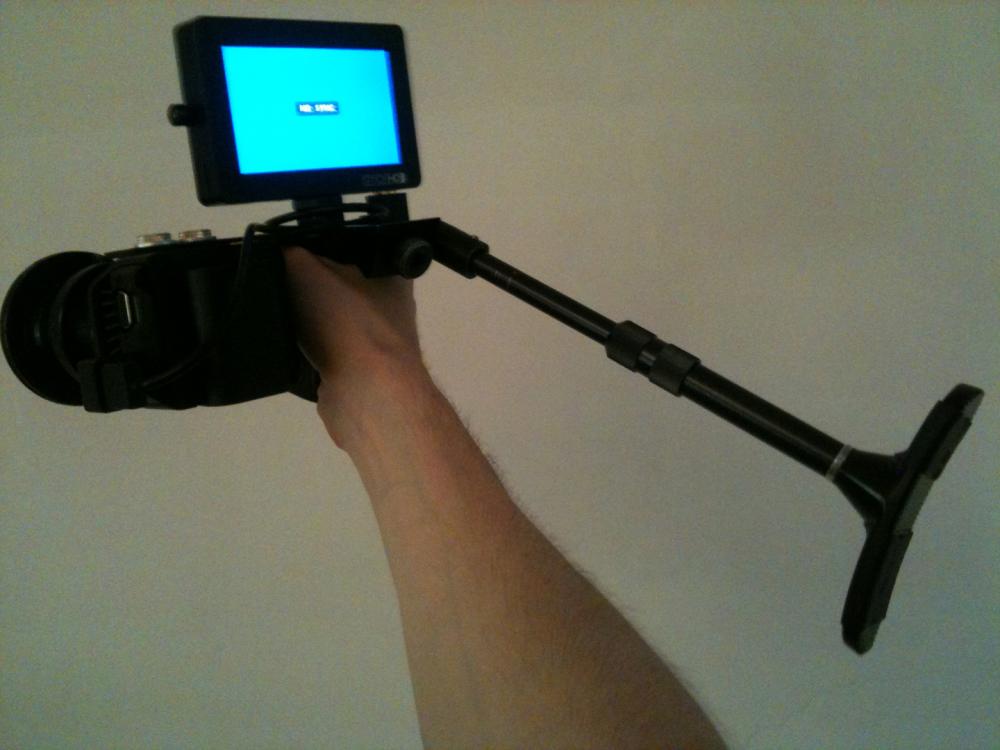
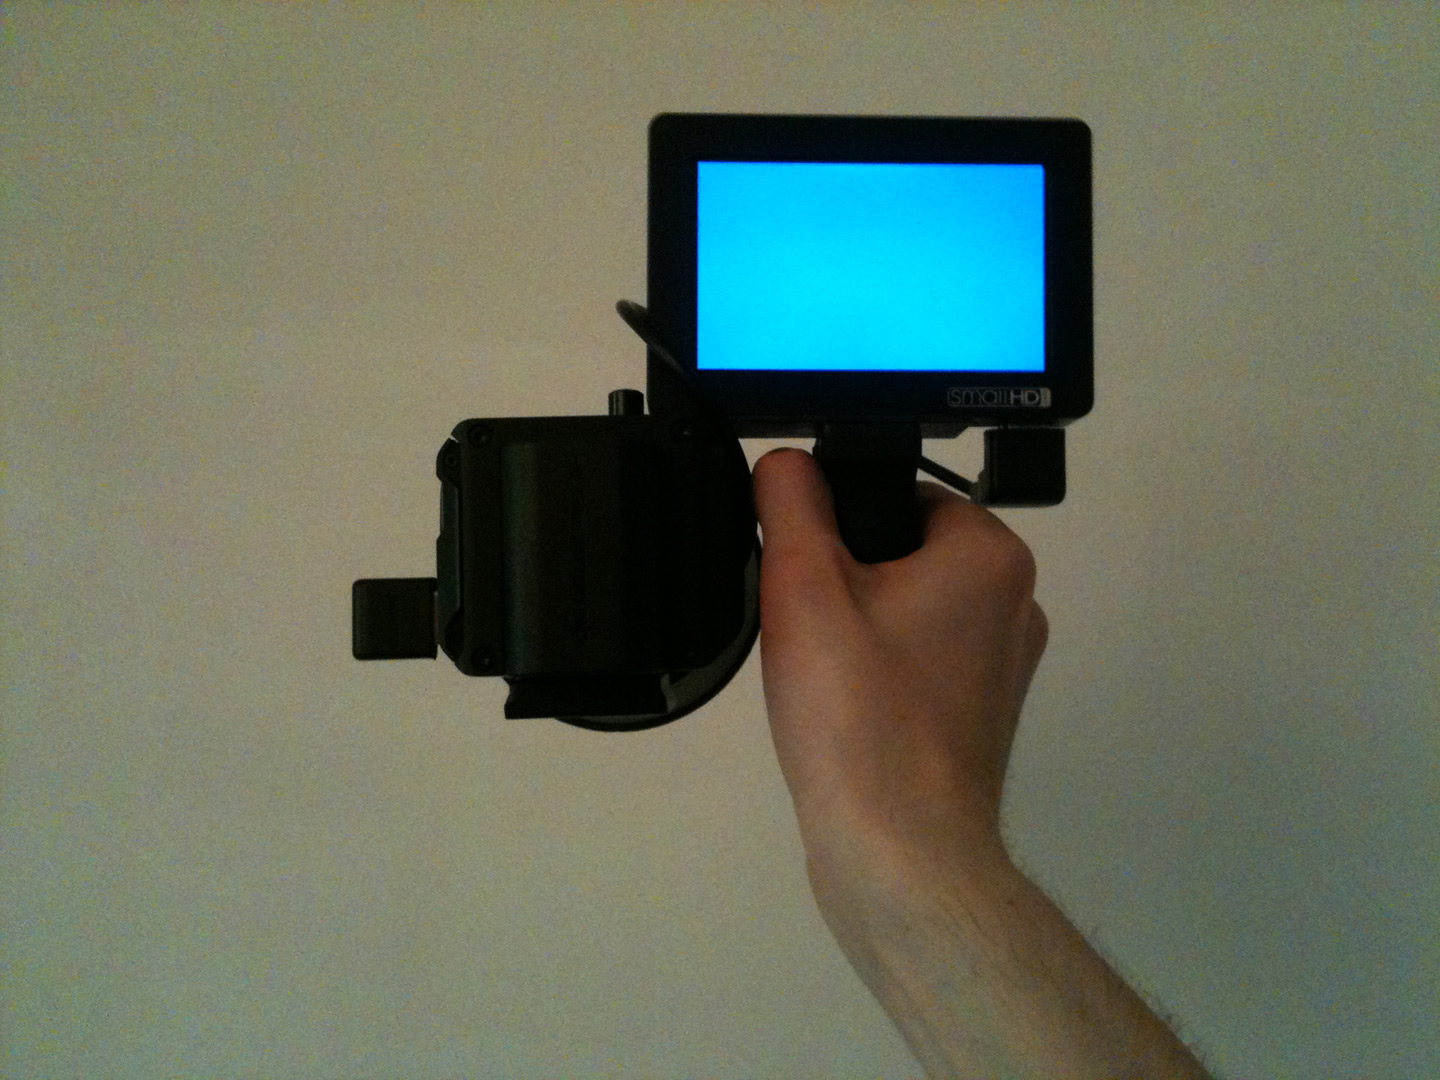
Just a metal plank with two (or better three) holes with $7 Pistol Grip Handle For Binoculars/Monocular. The handle screwed directly to monitor! Very simple, compact and way better balanced for handled shooting than pistol grip at the bottom. Also angle HDMI adapters helps a lot.


- benymypony, Axel, Don Kotlos and 3 others
-
 6
6
-
The Test. No any additional color correction or highlights tweaking applied.
Original 16 bit TIFF files here
https://www.dropbox.com/sh/8rvdej9n53bwvv8/AAD7gF0CcUjQl3sxfVV-i-CBa?dl=0Wonder how different can be the result from same camera! My personal conclusion from this test is to use as output profile Arri Alexa LogCtoREC709 LUT or DragonColor/REDgamma ONLY. ACES has potential but needs developing and implementation of some kind of proper contrast/gamma curve. Without it its unpredictable crap.
YRGB BMMCC DNG -> ARRI LogC timeline -> Arri Alexa LogCtoREC709 LUT

YRGB BMMCC DNG -> ARRI LogC timeline -> DragonColor2/REDgamma3

ACES BMMCC DNG -> BMDfilm input -> REC709

YRGB BMMCC DNG -> ARRI LogC timeline -> REC709

YRGB BMMCC DNG -> BMDfilm timeline -> BMDFilmtoREC709 LUT

YRGB BMMCC DNG -> BMDfilm timeline -> BMDFilmtoREC709v2 LUT

-
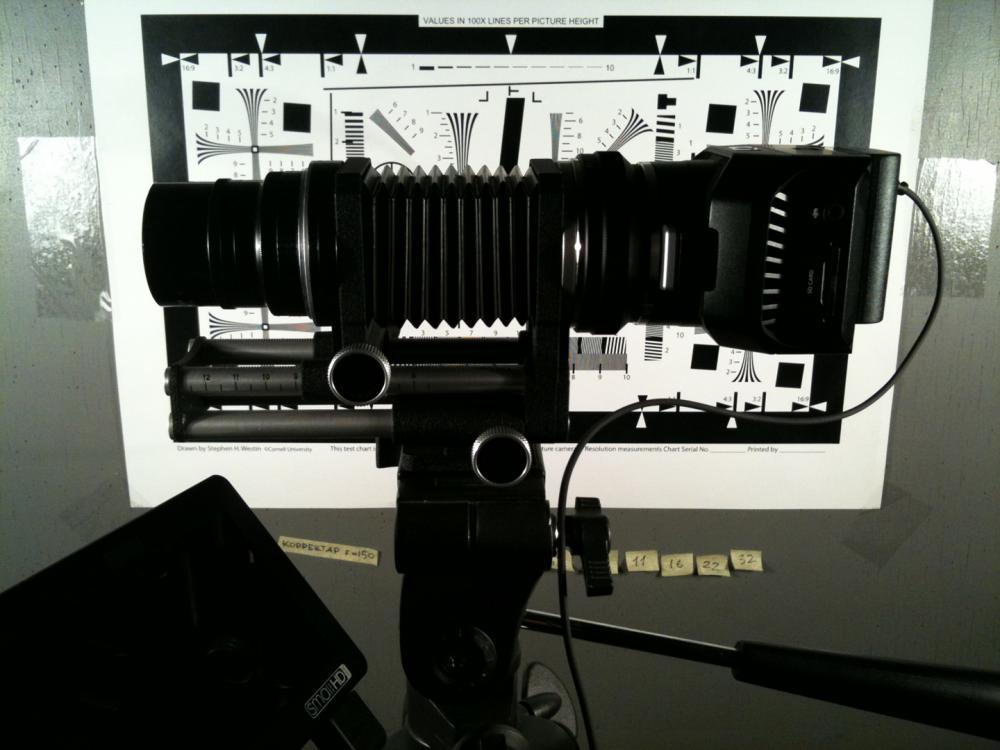
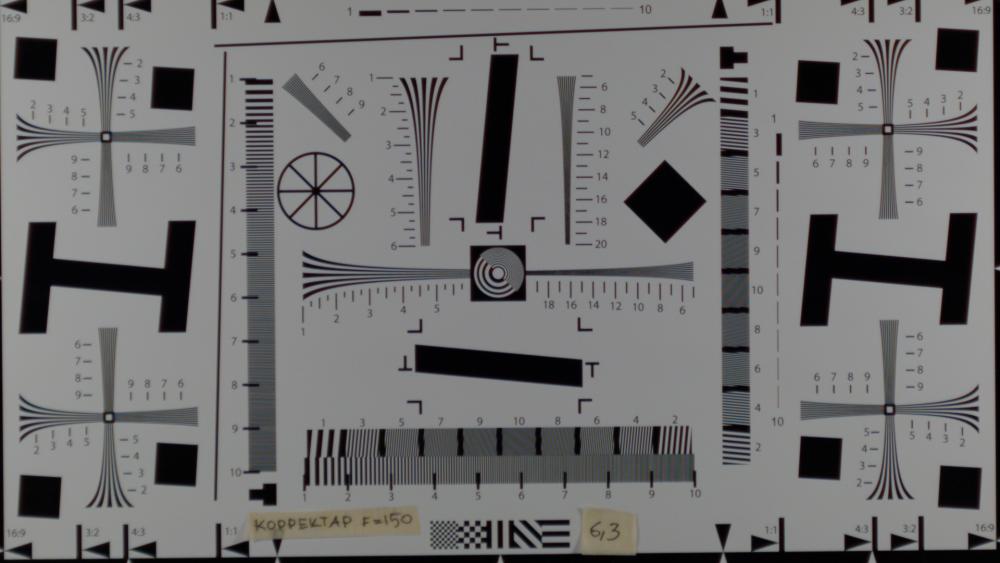
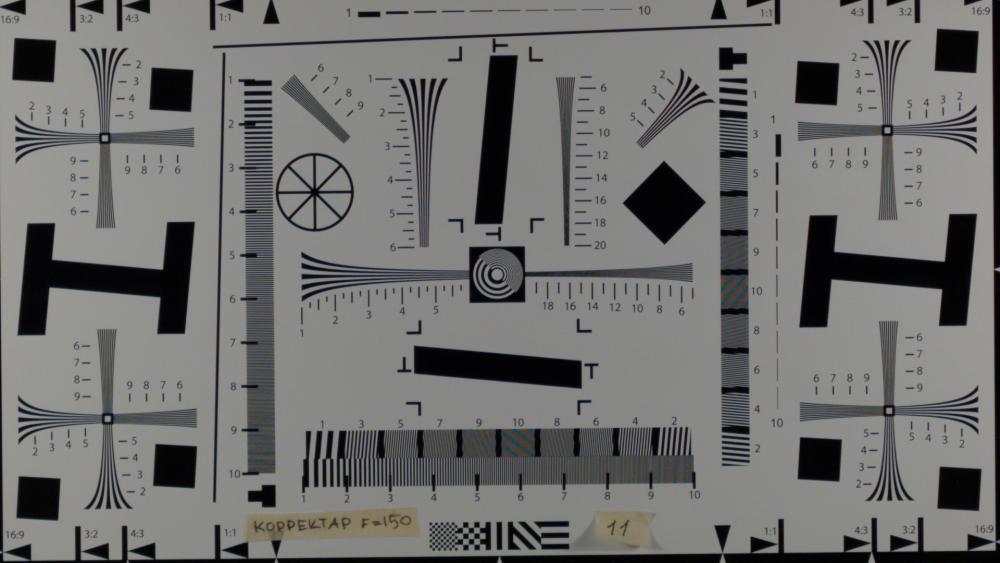
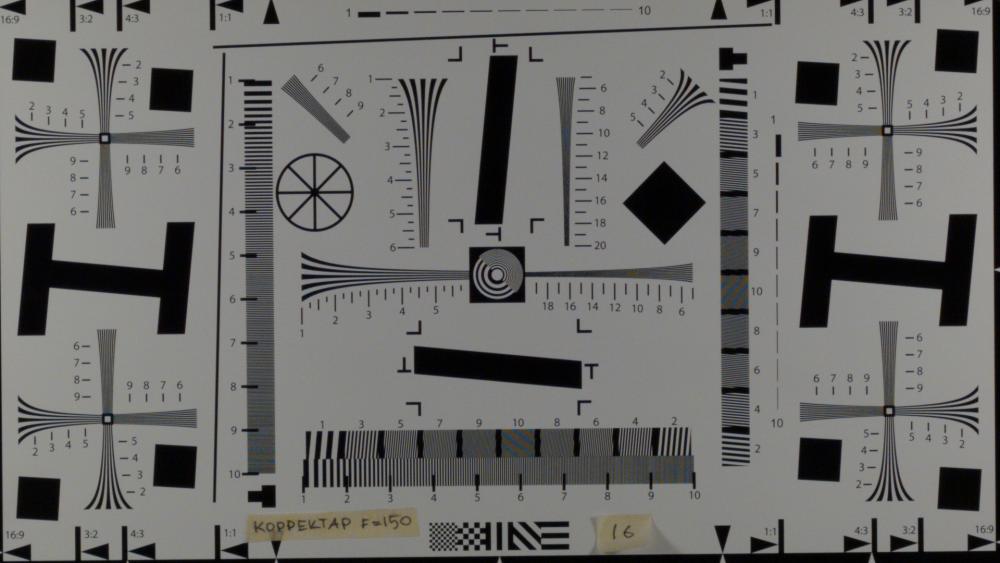
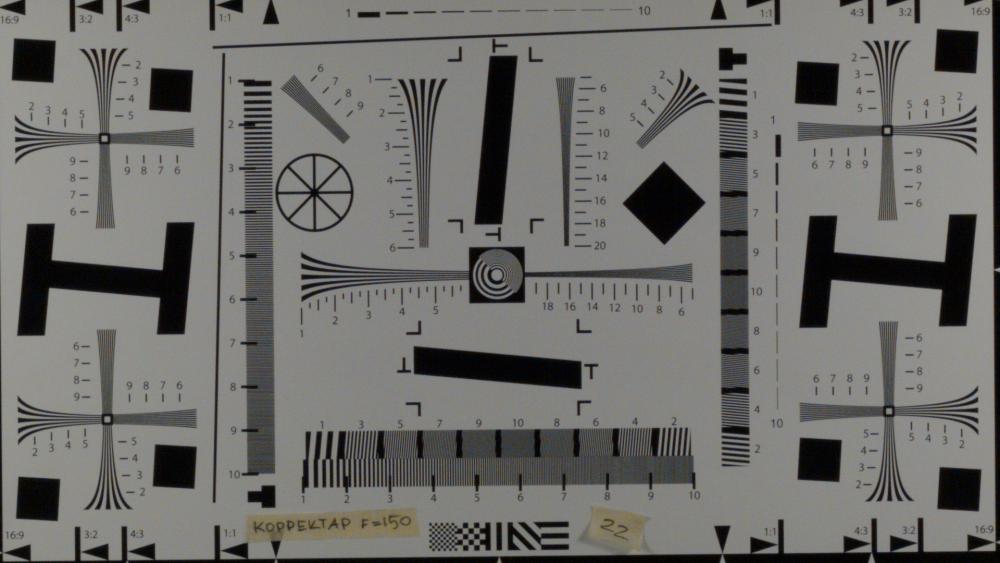
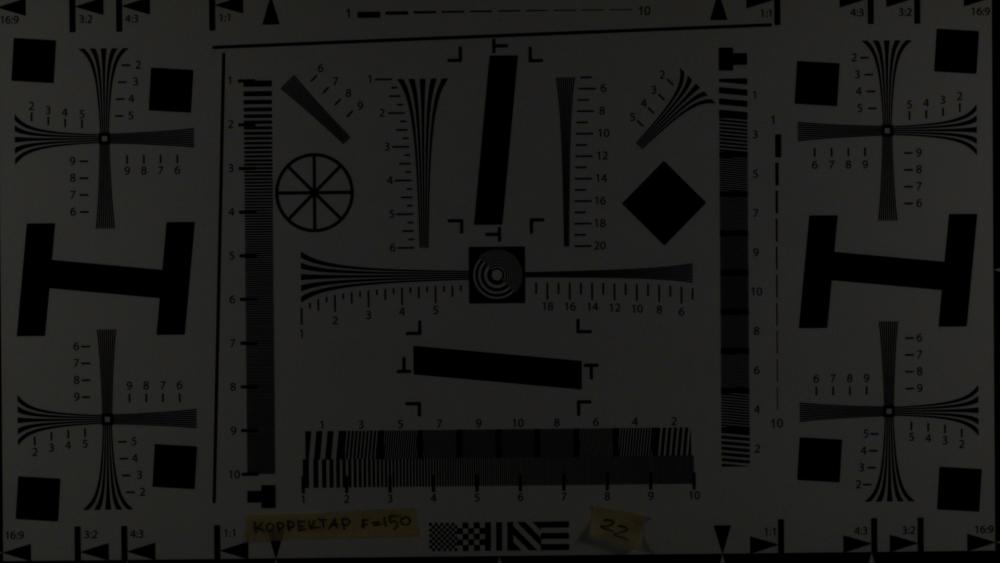
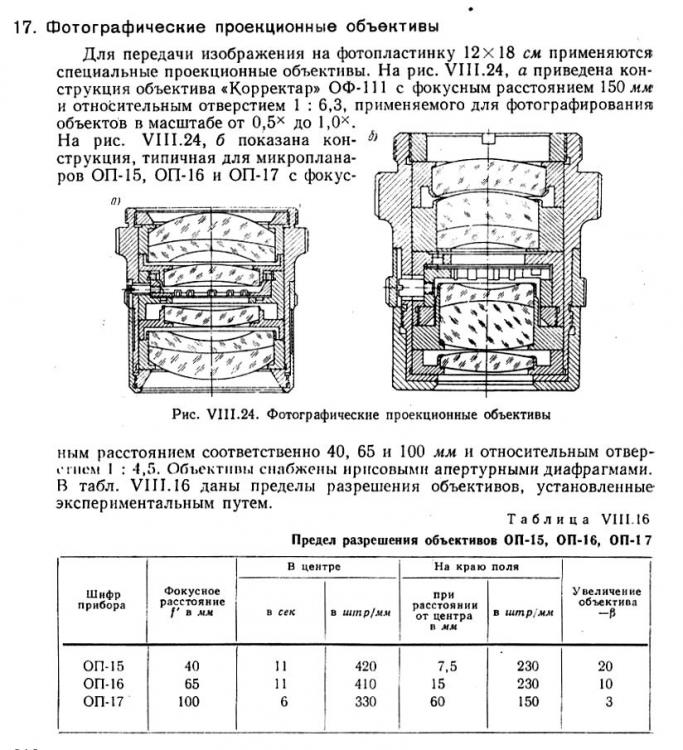
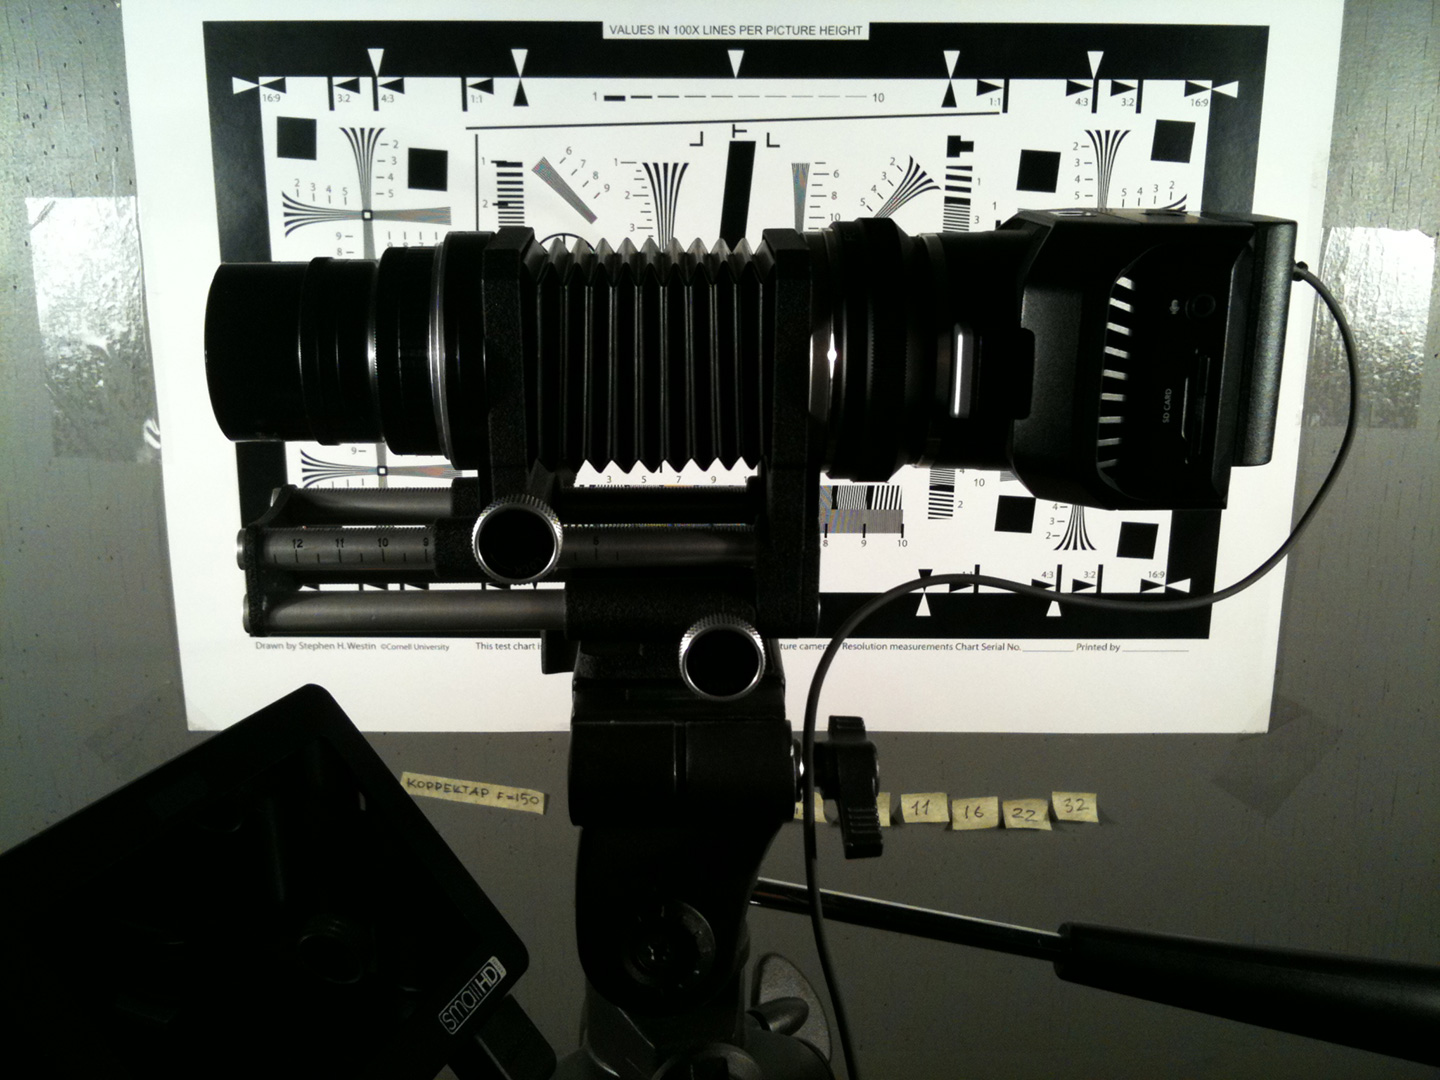
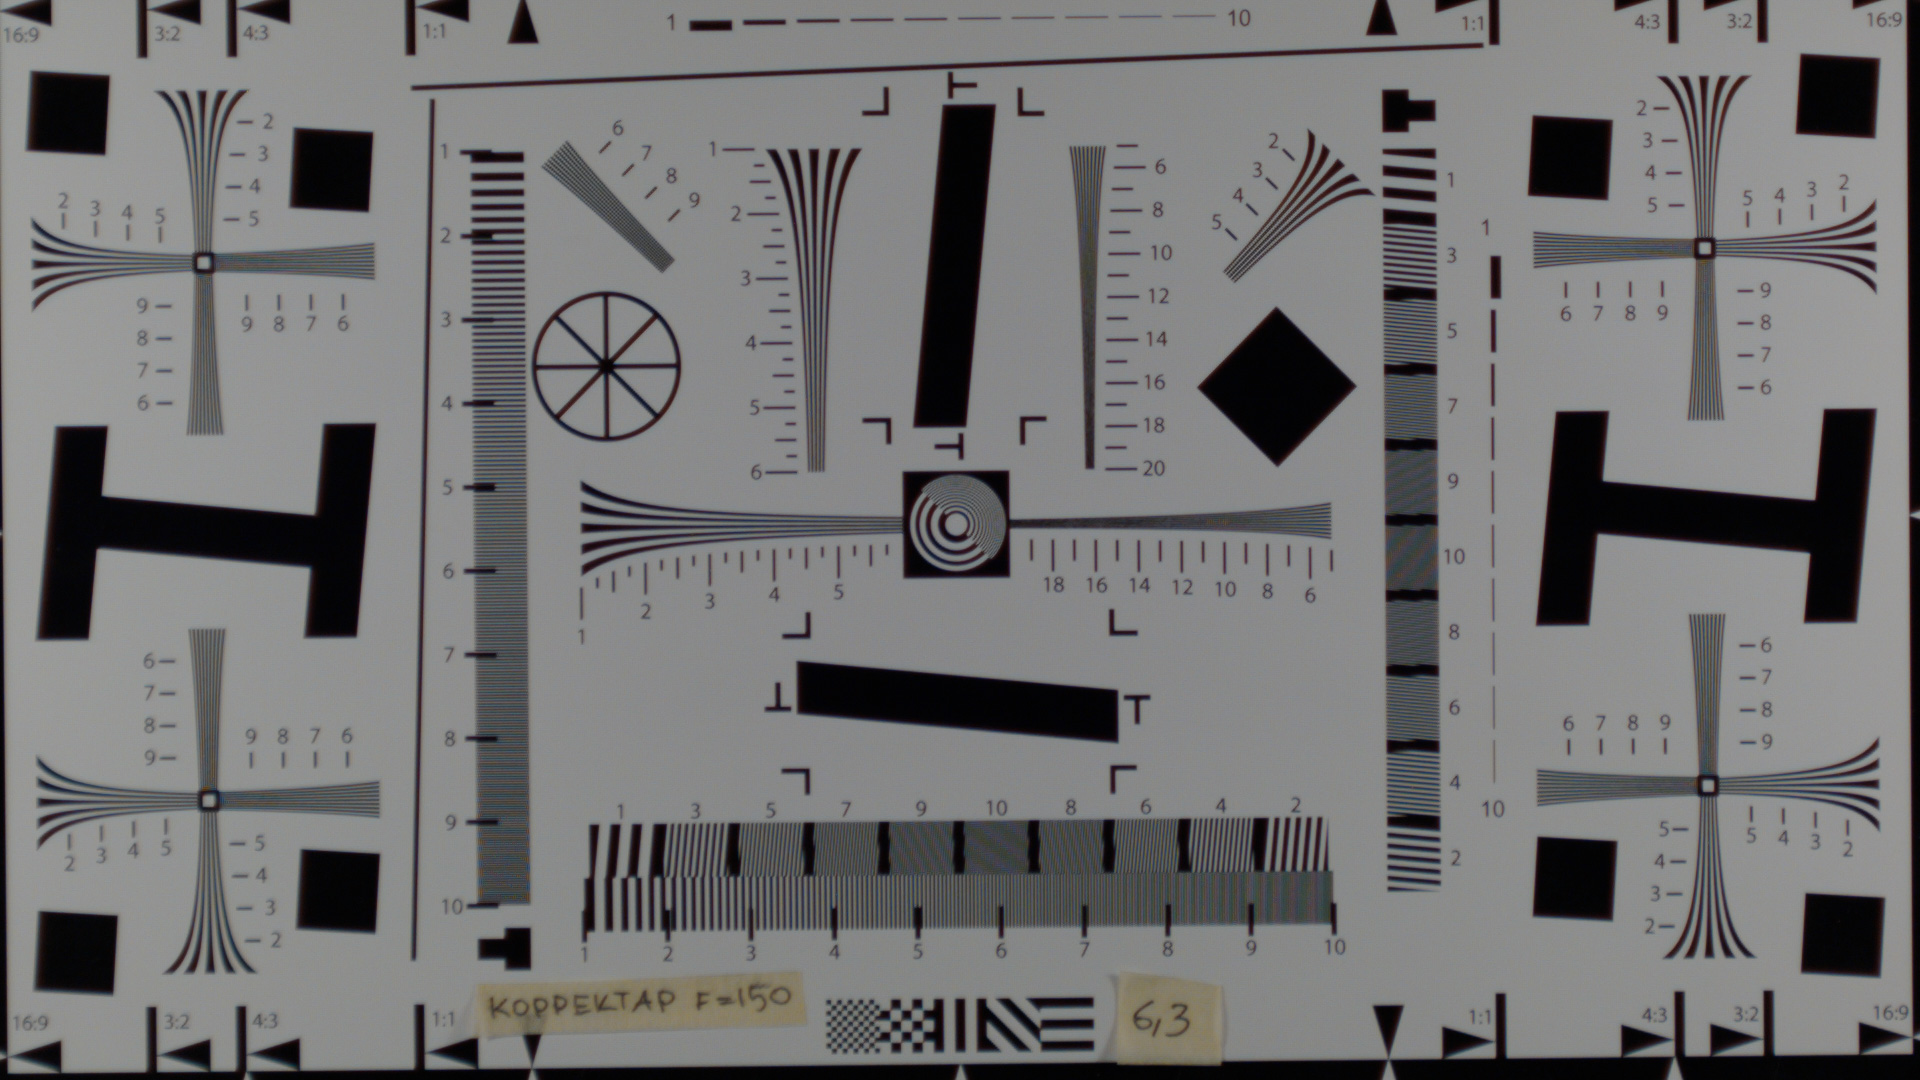
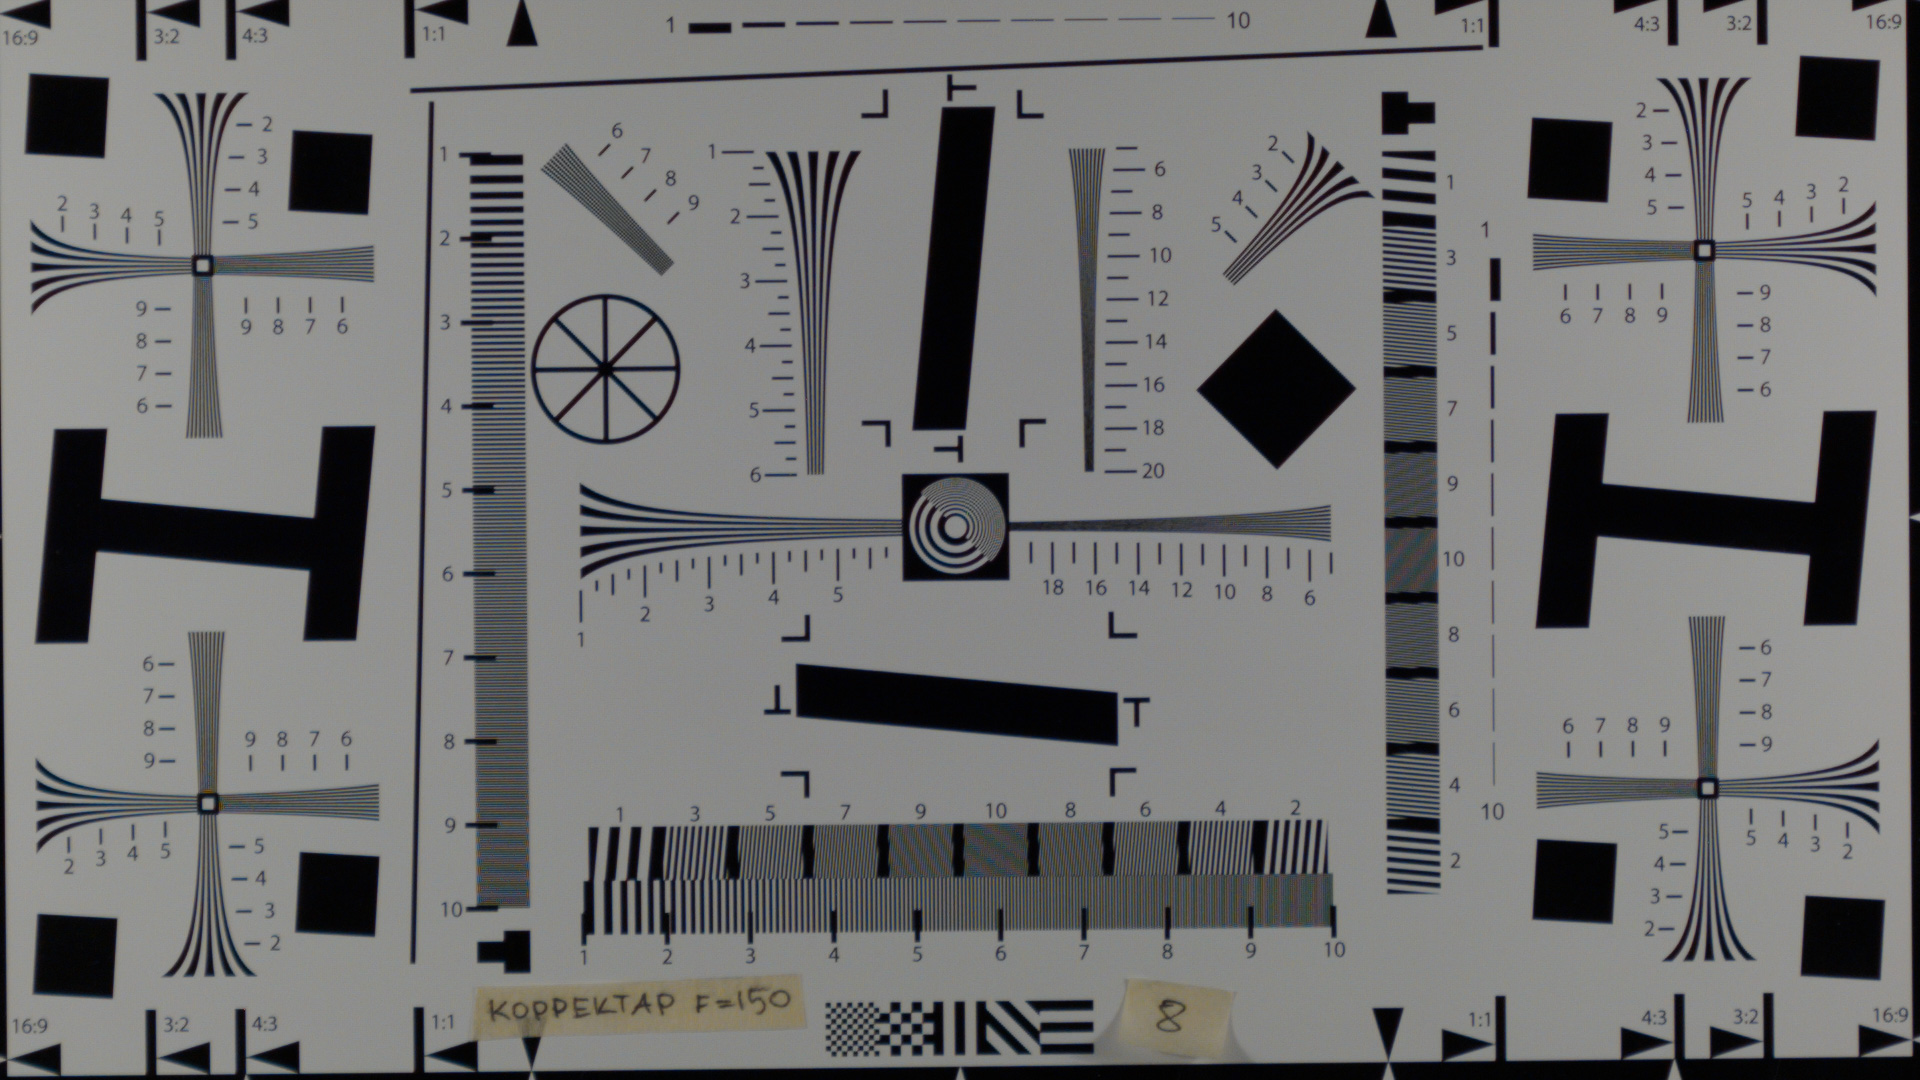
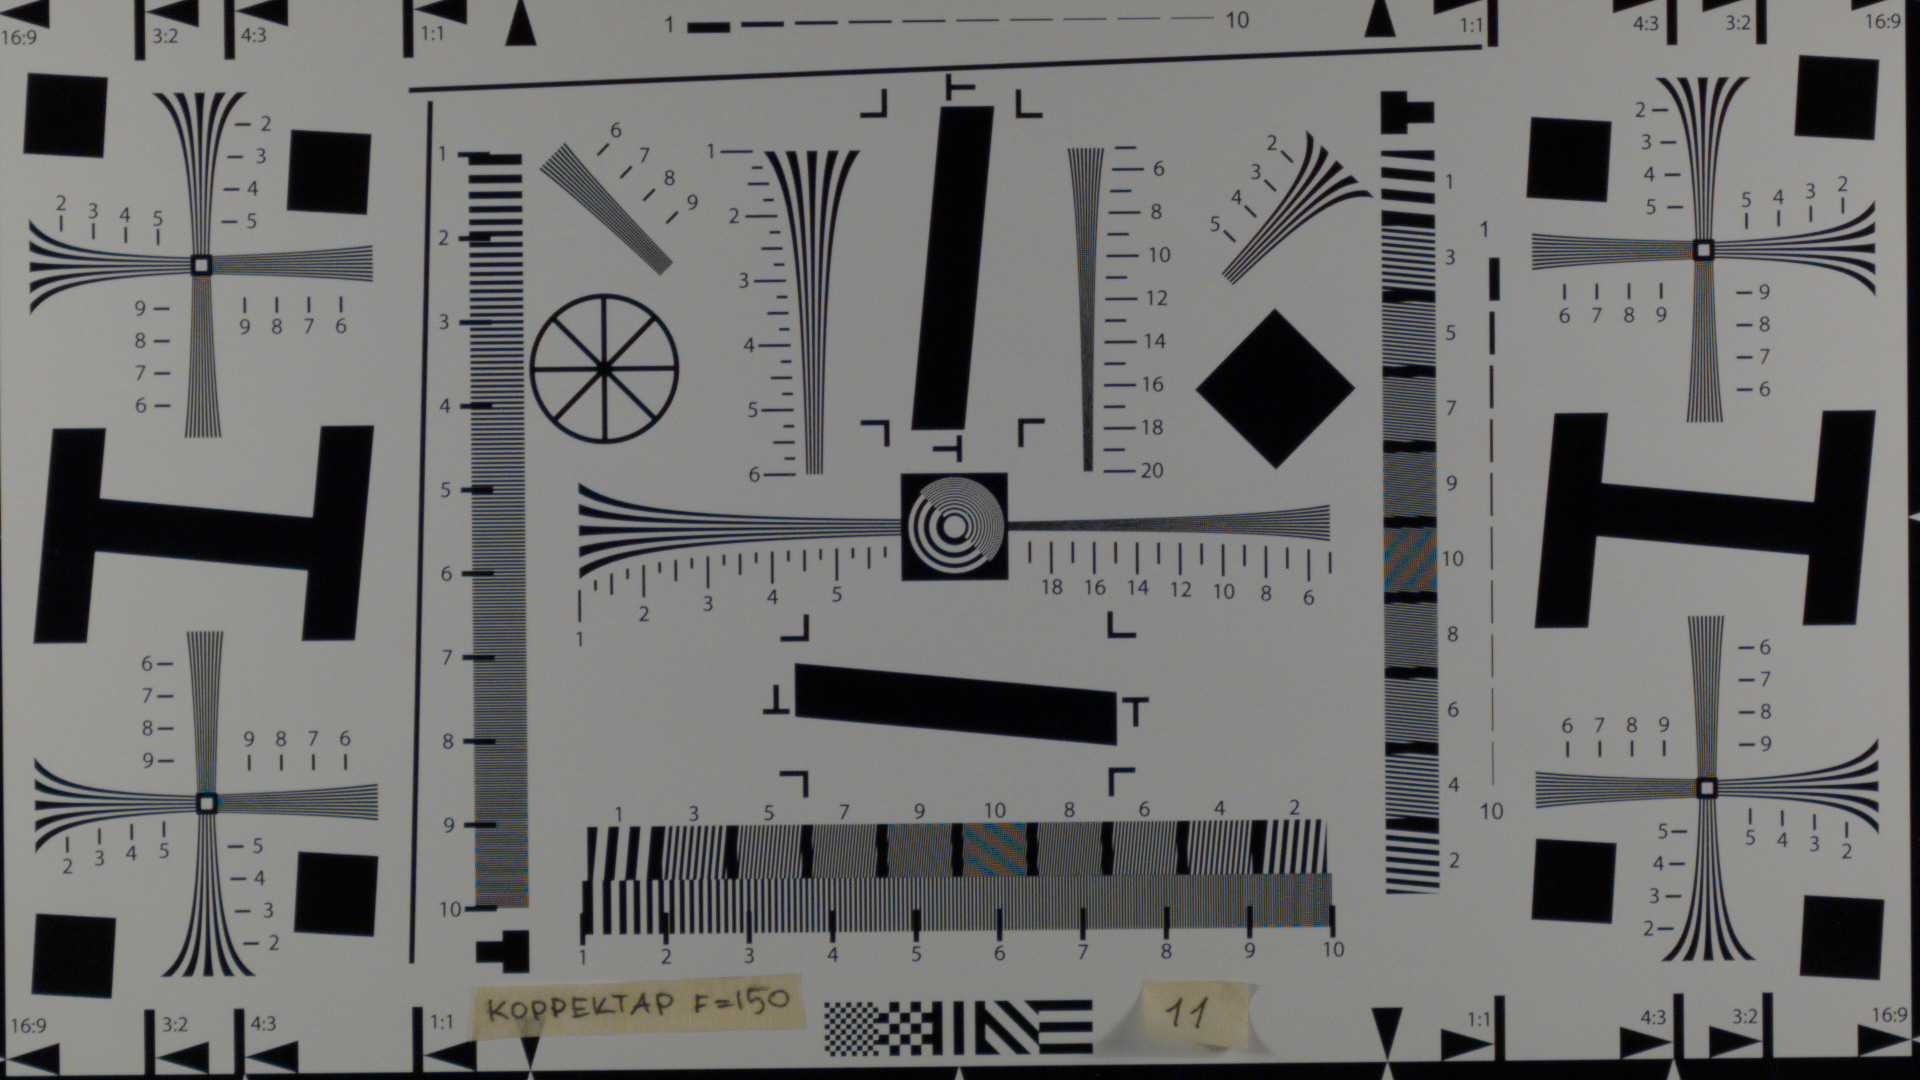
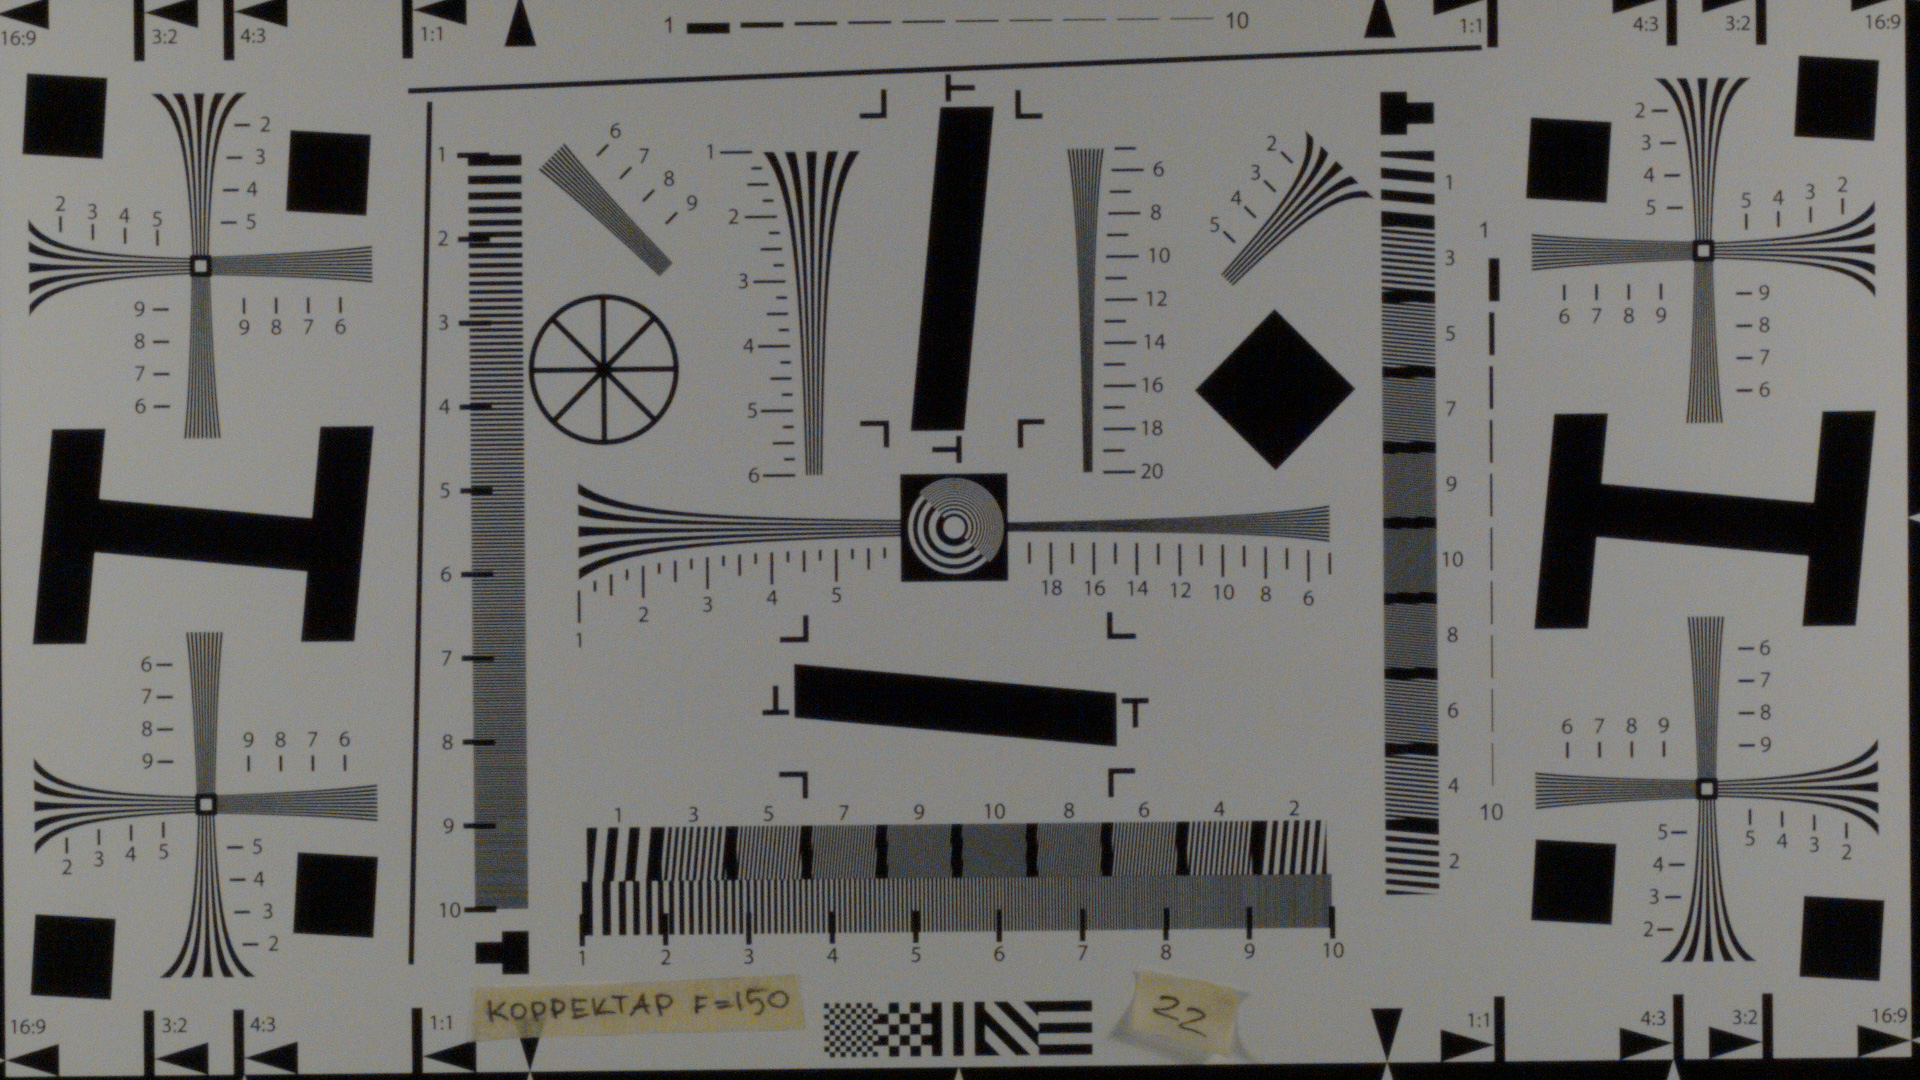
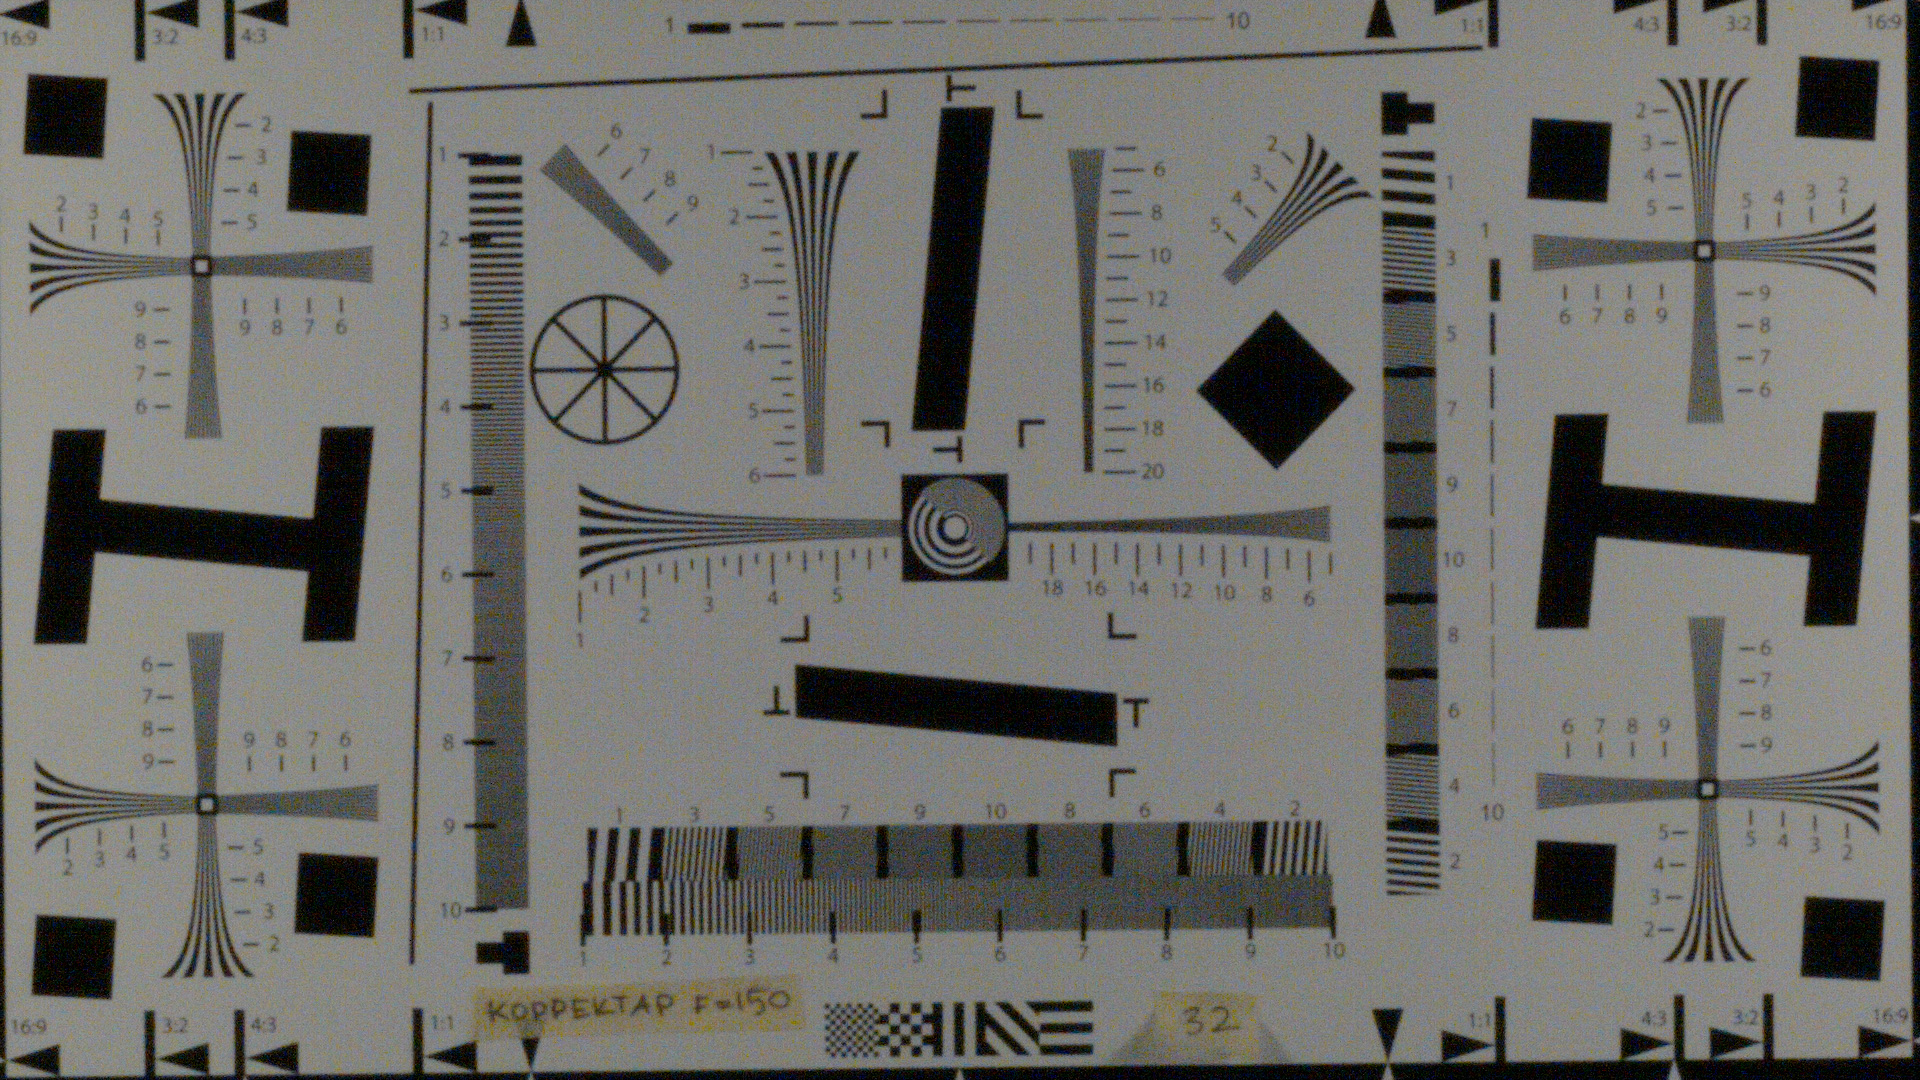
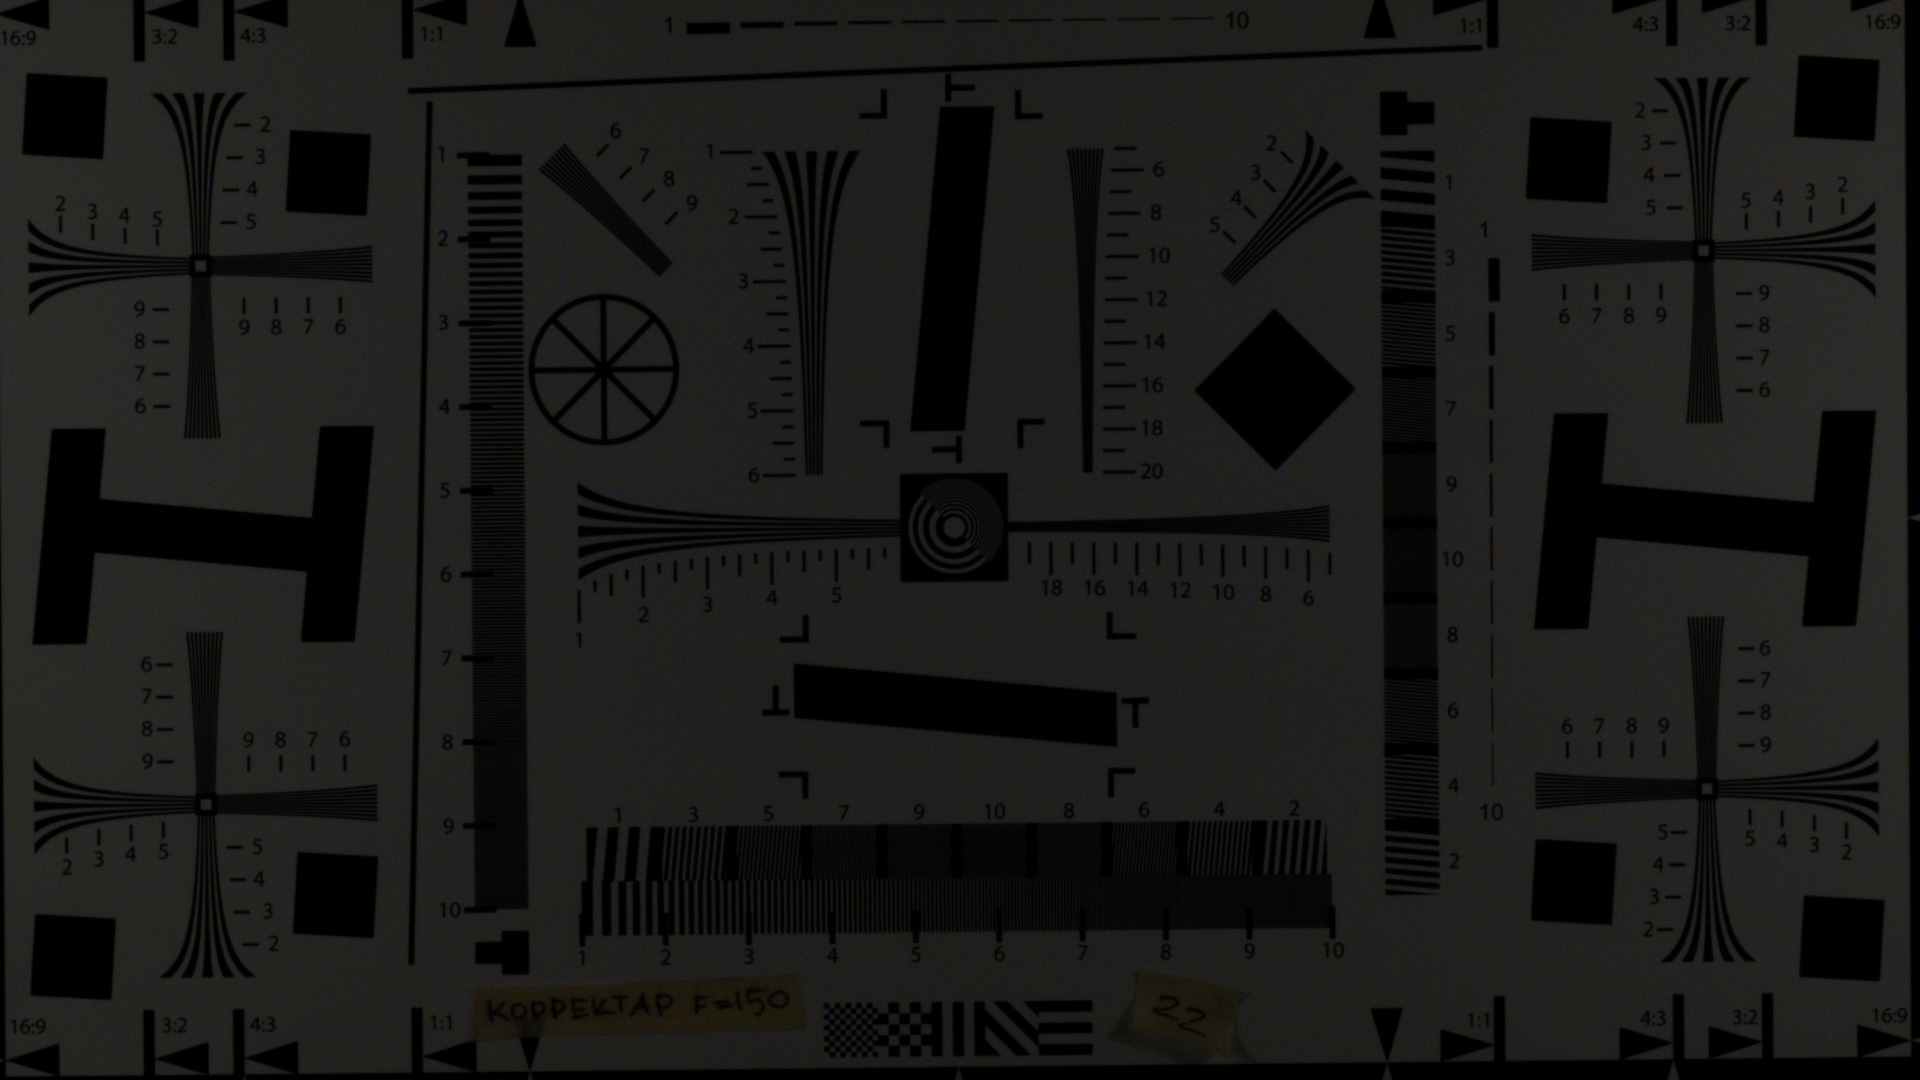
A little test of vintage lens KORREKTAR 150mm on BMMCC camera. The lens was made for some kind of reproduction machines and covers huge 12x18 cm frame. Probably another bad copy of industrial Zeiss or Nikon (as all things done in USSR). Although the specs calmed huge resolution for 12x18 cm frame, its not very sharp on tiny s16 sensor in regular (not macro) mode. The good thing about this lens is that in macro mode you can be very far from object. It has perfect round bokeh at any F-stop and very flat and even image area.
The test chart is DIY printed A3 paper so don't expect it to be very precise at high resolutions. The camera was located about 5 meters from the chart. For lighting i use two 100W incandescent bulbs. The images were shoot in RAW and processed in Davinci Resolve in ACES workflow. All images shoot at same camera settings and Gain (In ACES its same as Exposure) was boosted in post to keep them the same as F6.3. I also attached image shoot at F22 without Exposure boost so you can see how many shadow details this camera can recover in post.


-
probably Lilliput H5 (the HDMI only brother of Lilliput Q5) will be the best one if they release it in near future and if they don't overprice it.
-
-
as for me its not a vignetting, just a normal lens corners falloff (wider lens angle=less uniform). the real bad vignetting ( its oks3-10-1 10mm lens on bmpcc) looks like this :
-
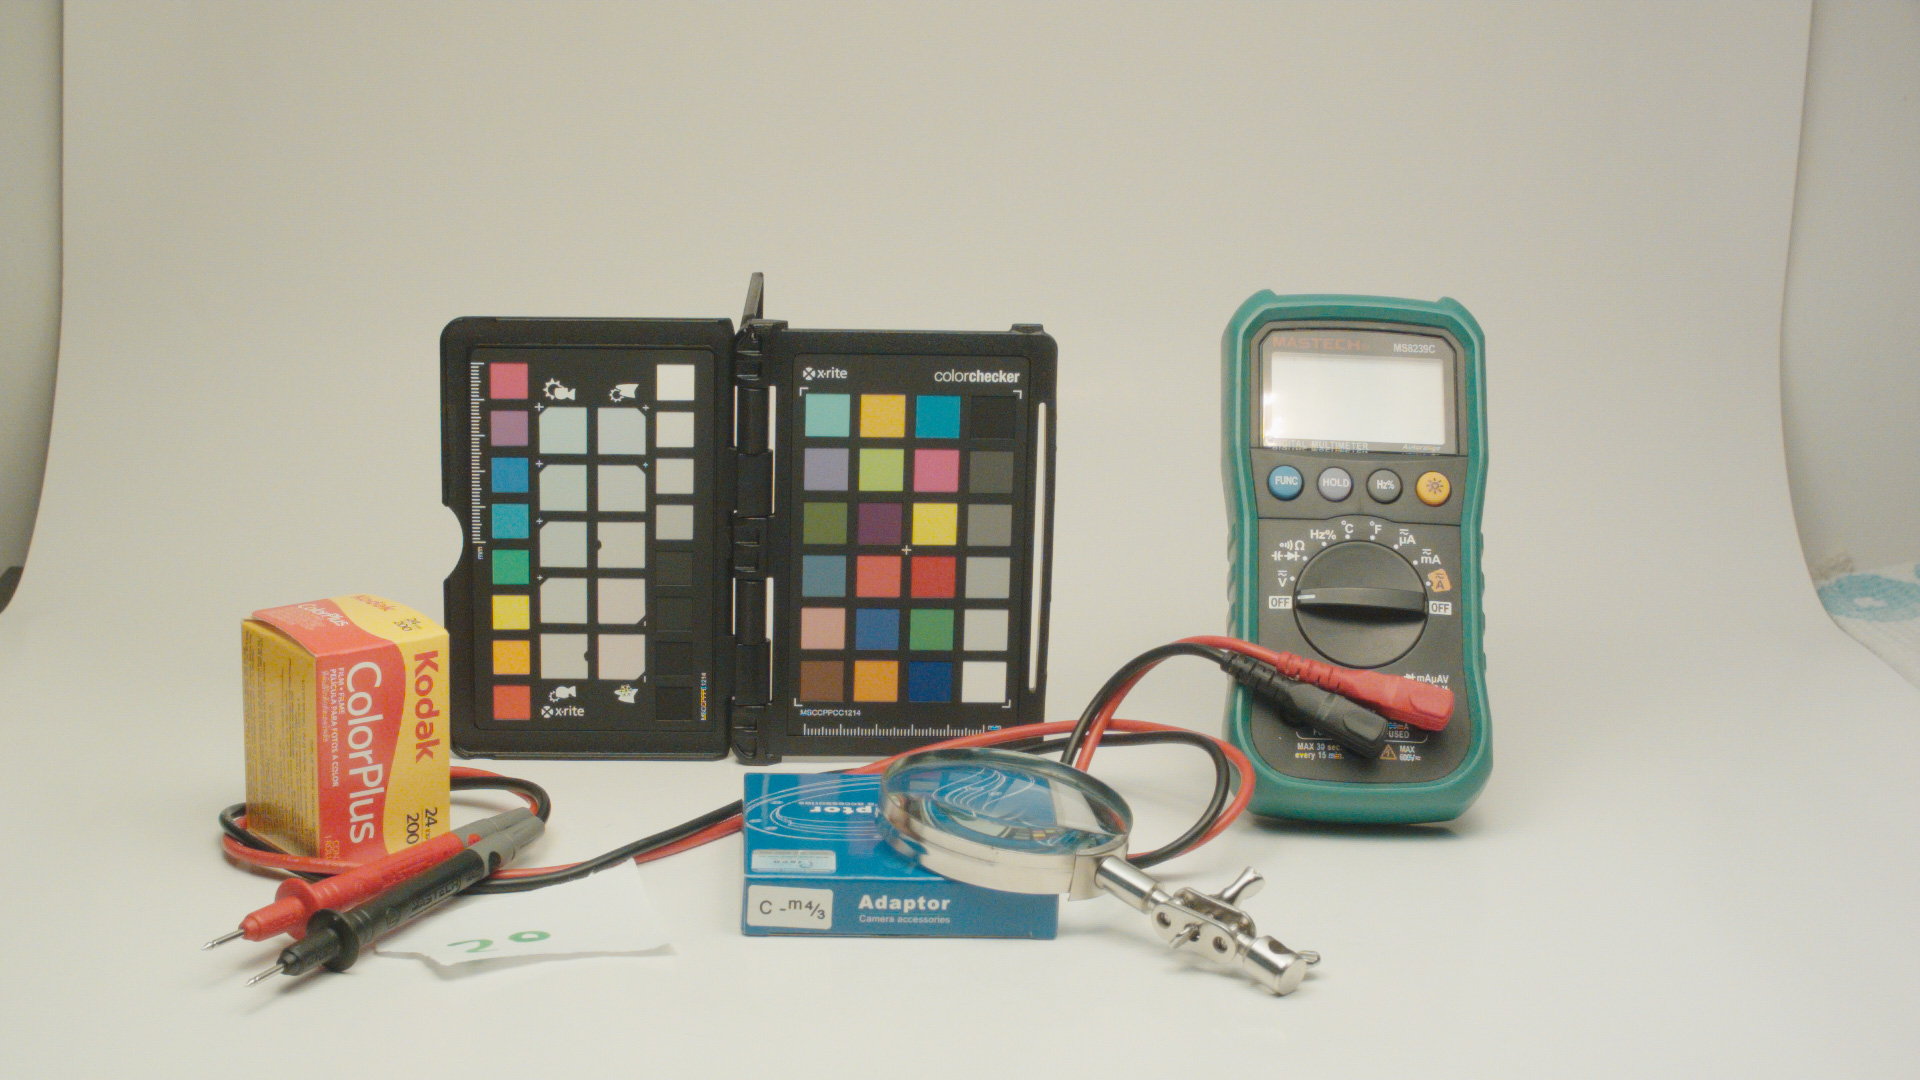
Anyone use this? Seems precise made and inexpencive (US $9.90 on ebay) compare to other rings. http://proactivegr.com/gears/
- The gears are designed for ANY LENS diameter from 50 to 93mm!
- Separate gear made for each diameter of 1 mm increments!
- The gears are made of rigid polyurethane, that stretches a little bit, when you put the gear on.
- The correct form of the teeth module 0.8.
-
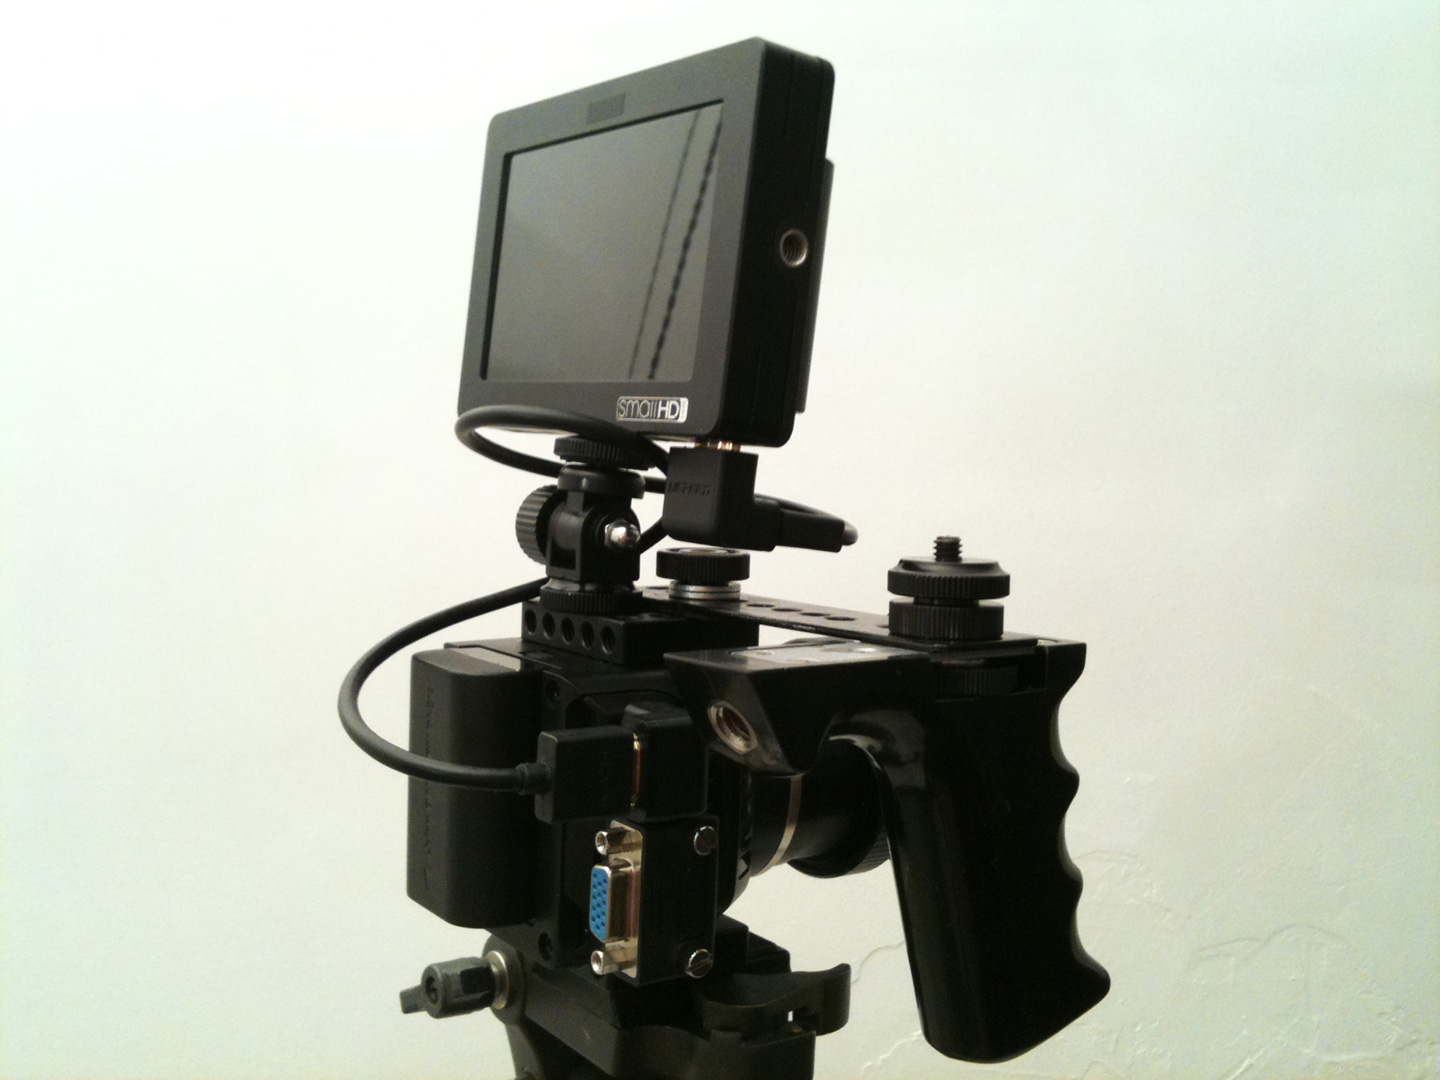
The only thing worries me is that this Smallrig cage seems can be easy bended if connect top handle and attach heavy rig at the bottom. There are only two thin connections with a lot of drilled holes between up and bottom cheese plates. Lets wrote them about this issue if you think same, maybe they can improve design.
-
new cage under development http://www.smallrig.com/SMALLRIG-Blackmagic-Micro-Cinema-Camera-Gage-1773.html

-
6 minutes ago, cojocaru27 said:
thx, shijan, the files seem to be corrupted or maybe i'm doing something wrong trying to open dng
they are 2:1 and 3:1 compressed DNGs so may not work in outdated apps and operating systems. use last version of Davinci Resolve for sure.
-
collection of BMMCC raw samples shared in different places by different people. It will be updated in future with new samples. https://www.dropbox.com/sh/u9a3t5j3dgxwizf/AABaG3o24vOwJBkAnZWVmpb8a?dl=0
-
if somebody interested here is my collection of BMMCC raw samples shared in different places by different people. It will be updated in future with new samples. https://www.dropbox.com/sh/u9a3t5j3dgxwizf/AABaG3o24vOwJBkAnZWVmpb8a?dl=0


The simplest BMMCC rig ever made :)
In: Cameras
Posted
I was experimenting with flipping the camera before, but SmallRig cage is not suited well for flipped usage, also i got a problems with monitoring, 1:1 glitches and overheating on smallhd DP4 in flipped mode. And the last problem is the camera menus can't be flipped so you always see them upside down, which is uncomfortable too.
The monitor mount is a semy-DIY. It was a cheap camera TILT Mount Clamp, i unscrew the top part and made a bottom plate for it (drilled a a gauge from used cold shoe mount). But it is made of plastic, all parts are very shaky, it can't operate by one hand because it uses mini rosette inside. So you need unscrew and screw it back every time to change an angle. It is a temporary solution.