

OleB
-
Posts
132 -
Joined
-
Last visited
Content Type
Profiles
Forums
Articles
Everything posted by OleB
-
Took some time today to create a few clips to test noise of the different ISO settings. Found me a clear light bulb...@Llaasseerr so you can have a look in regards to the highlight clipping. You can download the files here: https://www.dropbox.com/sh/cgm80q9w682oc19/AADWHieOS-Wka9JuD-GnXerca?dl=0 All ProRes RAW. Starting with ISO 100 up to ISO 12800 (keep in mind the metadata will tell you it is ISO 800 upwards) Have fun playing around 🙂
-
Guess those Meikes are also extremely good. We have so many great choices nowadays. 🙂 If I would build the set today, because that DC crop mode of the fp works so perfectly, I most likely would go for 25mm, 50mm and 100mm...Cover what is in between with the crop mode.
-
I am using the Vespid primes. 35/50/75mm with my fp and I love them. Sort of a little vintage rendering, sharp enough for what I like and colors are gorgeous and consistent between them. T2.1 also is good enough for my liking on FF. 🙂 Size is still okay, they have a 77mm filter thread which was perfect, because I did not have to buy NDs, Tiffen BPM etc. again had them laying around from my photo equipment.
-
Valid approach of course. So you would prefer keeping as much shadow detail in it as possible? I mean there is most likely a reason why usually with sky you try to keep the sun and what is close to it out of the frame? What I would think could help indoors to avoid blacks crushing is haze. So would add that to push them up. But then again this is also limited, because not for all scenes you can put in huge amounts. If it fits the story...If not fill lights. Guess we can agree that "the" film look might be only possible only when DR of the camera permits to keep both shadows and highlights. Always a pleasure to read through all of your experiences here, lots of knowledge to soak up. 🙂
-
Understand that with video you have to pay more attention as well to the series of shots. So that they look as similar as possible. ETTR for each and everything might not be desirable. Let us assume the following if that camera has 12.5 stops and we refer to the exposure values (https://en.wikipedia.org/wiki/Exposure_value) all scenes with more DR than the camera can capture would need a sacrifice. In my opinion, and this is very personal, I would rather try to get all highlights in which matter, like clouds and sky outdoors, and let the rest be black below the DR range of the camera. That feels cinematic to me. If I now would underexpose even further the highlights will go darker and even more in the shadows comes black. So nothing to win here unless I misunderstand something. Sure on a big set you can light up the blacks, or indoors you might decide to let go of a window or parts of it to have more light on the rest but that is a creative decision rather than technical I suppose.
-
Thank you for this extensive and comprehensive write-up. In regards to push DR like you have described. My understanding in regards to the overall dynamic range is that you measure stops above the point where nothing is anymore distinguishable from the noise floor of the camera. So if the fp has 12.5 stops that means above the black noise floor. So if you do not push the upper limit into the white clouds and underexpose them, what happens then?
-
@Llaasseerr would you mind explaining this ISO / DR and middle grey combination for me? I am not able to grab this. Have tried today with my incident meter to check if my exposure table is correct. ISO 800 (is proven ISO 100 as per meter) and 3200 (ISO 640) with closed down aperture to compensate looks exactly the same. No shift in DR can be seen whatsoever. Could it be that ProRes RAW is distributing the DR linear? So nothing changes no matter the ISO value? As long as you are not clipping the sensor all is good it seems. For more than one light source my approach is now the following, dial in the exposure needed for example to not blow a window which I would like to see through. (with NDs and/or aperture) and measure the exposure for the talents skin with either false color or with my incident meter and the correct ISO value as per my table. Adjust the second light source accordingly to match cameras settings. Confusion... Feedback highly appreciated 🙂
-
Exactly this! When you are increasing ISO from 100 upwards (no matter what monitor mode you use, even Rec709) the preview picture increases exposure, but the false colors remain the same until ISO 800, only from that you see a change in the clipping point and the exposure of the preview. 😄
-
I came to this because one year ago I was wondering why the false colors of the Ninja V are not working correctly above ISO 100. My expectation was that once you dial up the ISO (let us say in full steps) that the clipping should occur one stop earlier simultaneously. But I saw that false colors did not change at all until ISO 800 and only afterwards the behavior started which I was expecting. Next thing I checked was if there is headroom (pulled the files in FCPX) over the clipping point when doing that, there is nearly none if you dial in the exposure to the border of clipping as per false colors. So far so good. Then I built a lighting setup where I exposed for the practicals just so that they do not clip. Think that was on ISO 3200 setting in that first trial. I took my incident meter to dial in my key (of course setting that thing to ISO 3200) and guess what...key totally under. Confusion started and I was wondering if I am too stupid to understand the camera somewhat. Should at that stage better used the false colors to check skin color... But instead giving up I was investigating further and in the end figured out what in the end led to the conversion table. Now I can use my incident meter again for setting the lights, contrast rations etc. and last but not least, the false color screen is now confirming that I am ending in the correct exposure range doing so.
-
If you ask me the best explanation would be that for true RAW, via Ninja V, the ISO values of the camera are incorrectly transferred/named. The best hint we have is that manual from Sigma. The real ISO values of both channels are 100 and 640. So it seems for the cine mode they have decided to name them differently. So basically you have to dial in ISO 800 and get ISO 100 and so on, as in my table which I have mentioned way above. Comparing those "real" ISO values with an incident meter gives a match between false colors and the meter. Do not ask my why they have done this...
-
Actually the result for ISO 100 and ISO 800 settings is exactly the same. False colors are not changing at all so if you expose as per that, all is identical. They first do so if you go one step higher than ISO 800. Only thing you have to consider in FCPX is that if you directly shoot in ISO 100 you can leave everything as it is, if you shoot in ISO 800 and want to bring back the picture, because in FCPX it will look blown of course (being as you said ISO 100 pushed 3 stops), you can either select manual ISO 100 or just dial down the highlights. By now I prefer the later way. I decided to take the ISO 800 and upwards approach, because there the false colors are accurate and additionally the screen preview is at least workable.
-
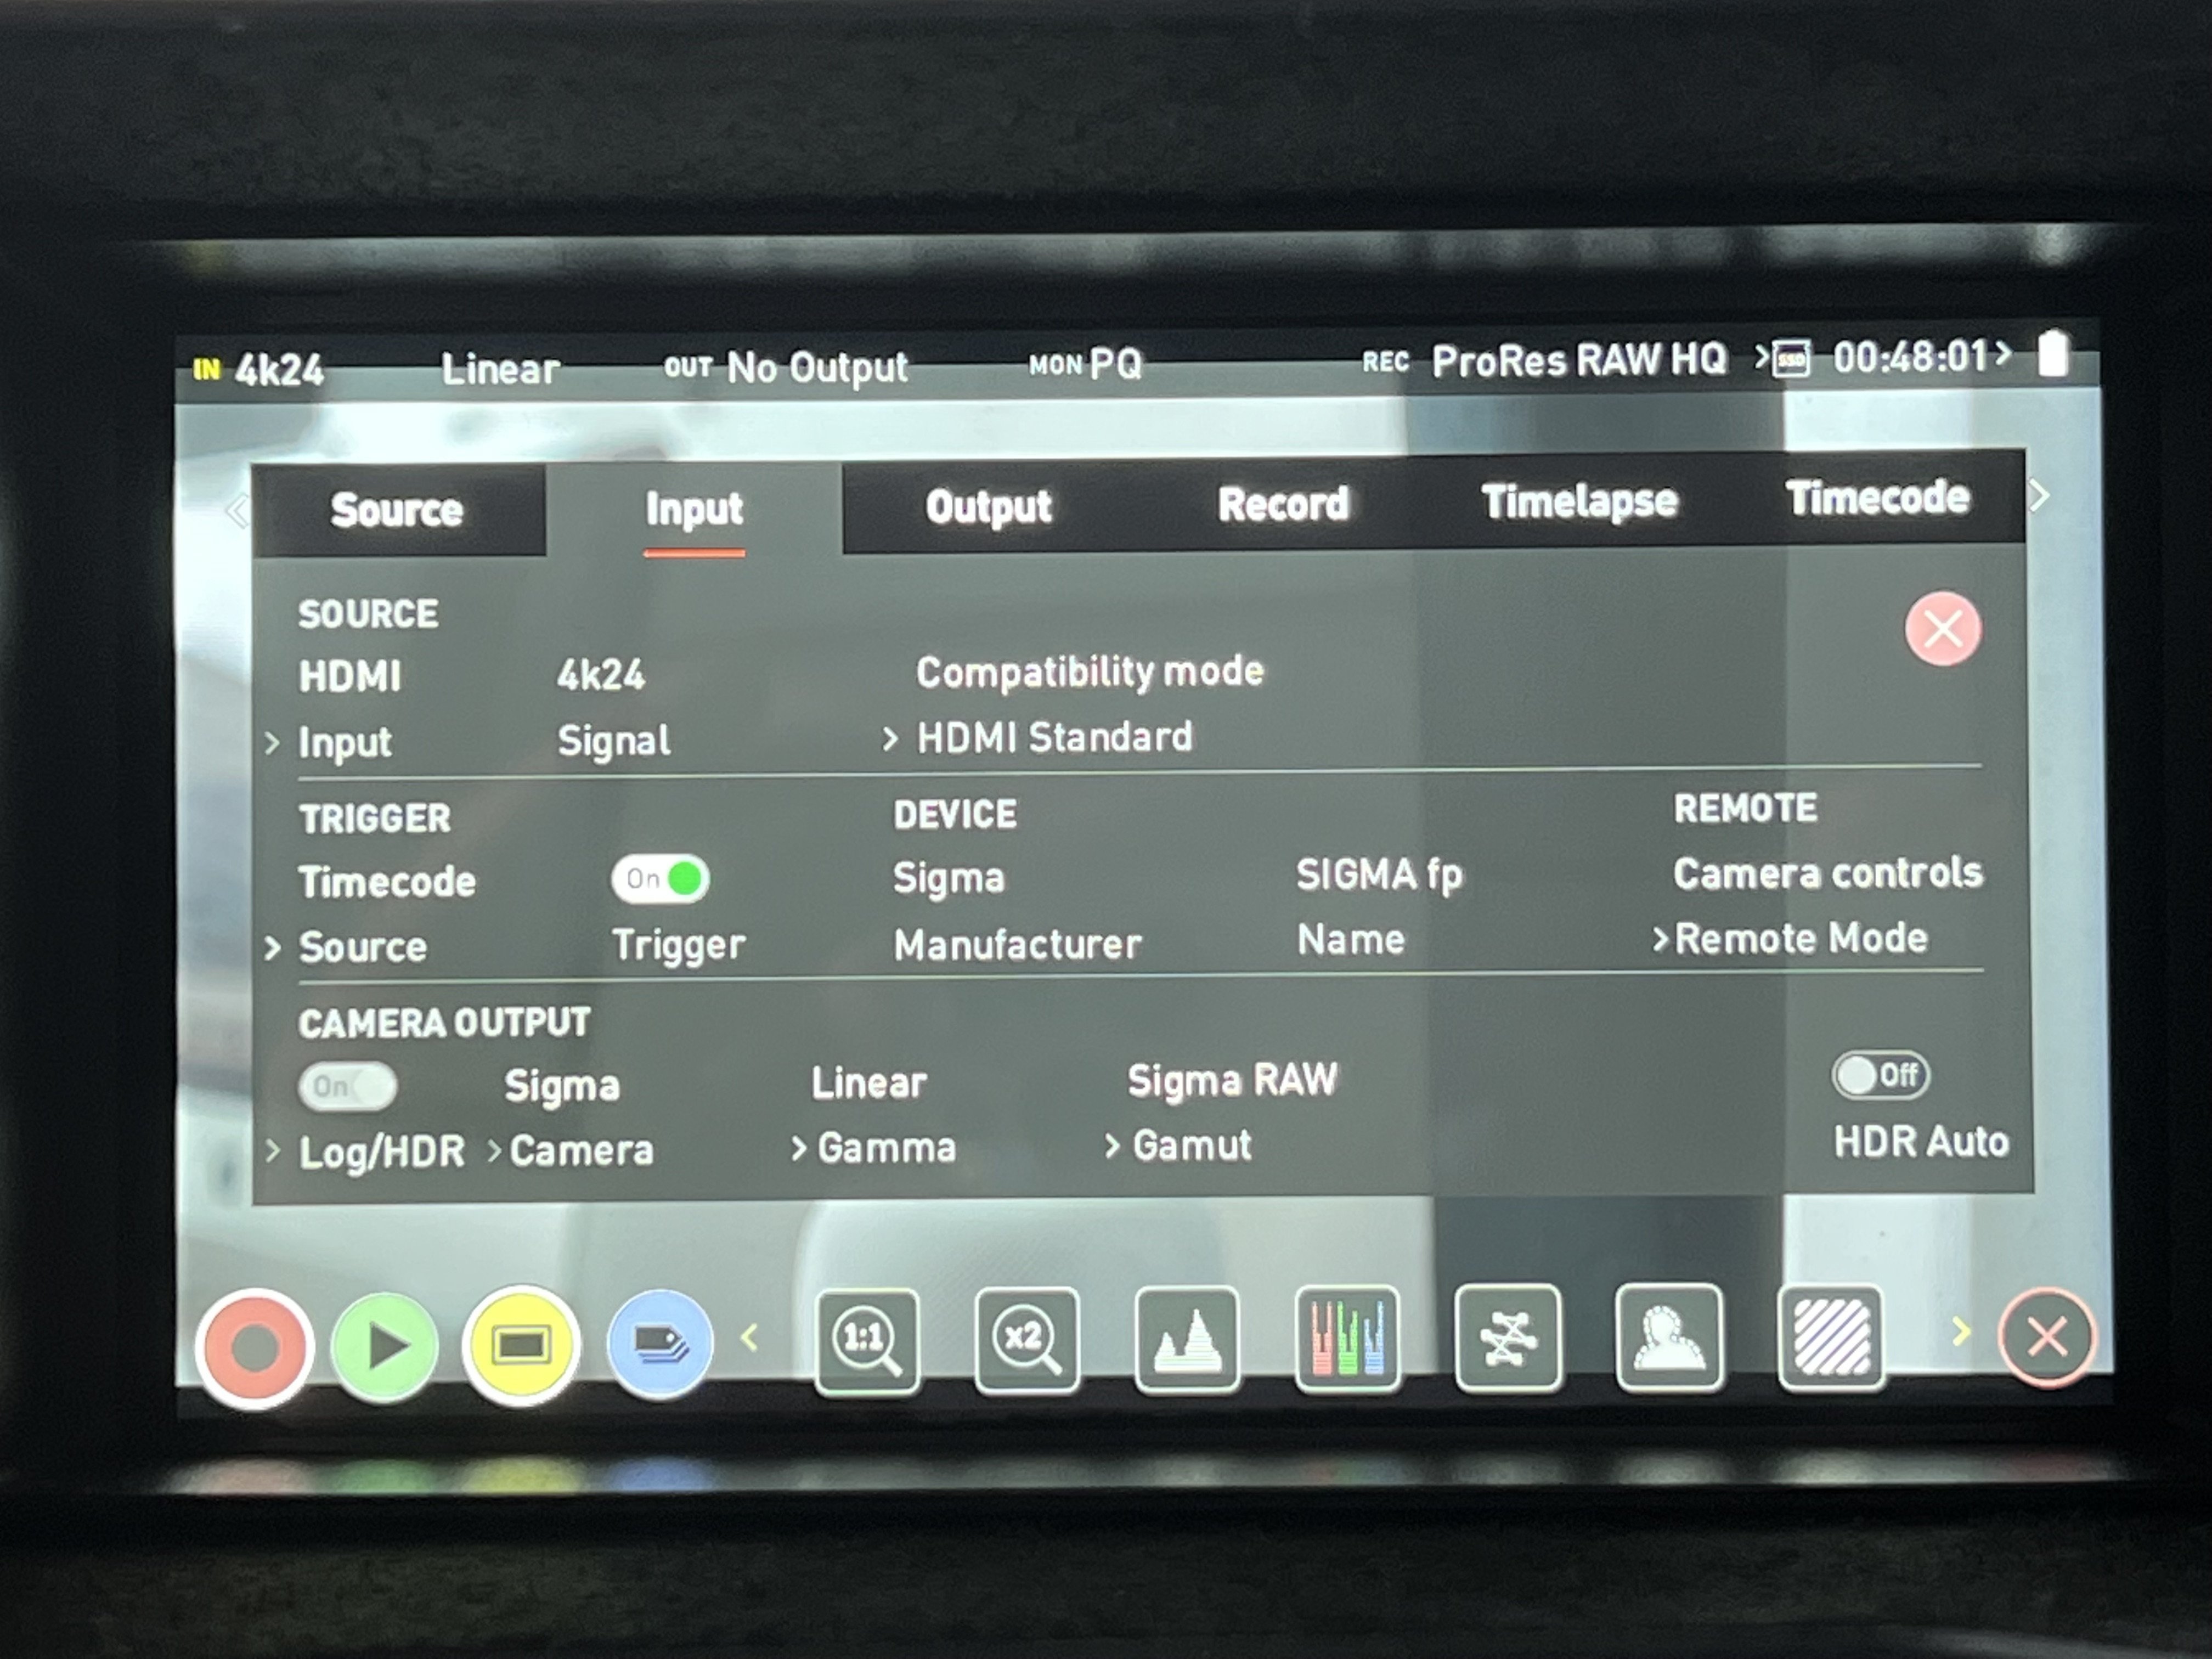
Actually you cannot change the settings at all, in the Atomos they look like this. Native monitoring looks a lot like LOG, but false colors are not working. However a RAW record should always be the same, no matter what you choose to monitor the picture with.

-
Wish is granted. 🙂 Here we go: https://www.dropbox.com/sh/cgm80q9w682oc19/AADWHieOS-Wka9JuD-GnXerca?dl=0 Same clip I have used for my YouTube video posted above. Recorded at ISO 800 => so ISO 100 in reality. Just so, that the sky highlights would not clip. For obvious reasons I could not prevent the sun from blowing, but thought it would be a good idea to have it in the frame as the ultimate highlight. Maybe I will do another clip with ISO 3200 in complete darkness soon, will also publish it here.
-
Sure, that should be possible. Can you be a little more precise what would be of help? In regards to ISO, I usually use 800 and 3200 for the both native ISO values and try to avoid what is in between if possible. For the 3200 value I suppose lighting up a match in completely dark room would be an amazing test to see if there is noise, no? Am not sure if I get your approach quite right yet with underexposing to have more highlights. Take this example, bright blue sky, white clouds. I expose with the false colors so that the white clouds retain details and are not clipping the sensor. What would be the benefit of underexposing them? Without clipping all details are already present, or do I miss something?
-
Inconsistent truly is the word for this...You can use the native preview, it will indeed show correct highlights, BUT false colors are not working and you would need to set the zebras for every ISO value to something different...not exactly an easy workflow. My goal was to have a workflow which gives me reproducible results and I am glad I have found one. Form factor etc and building a nice rig out of the camera with high quality parts (like the Sigma PL mount adapter and its shimming options) and all is perfect. Software connectivity between Sigma and Atomos is not... Maybe they get this right in a future firmware release if the word spreads.
-
I can only speak for the ProRes RAW workflow. And for that this is not the case. Assume that CDNG works exactly the same, there a plenty of YouTube videos about this topic on how to dial in exposure, including how many stops you can open up the aperture after setting the exposure and it still being captured while the camera already shows it as clipping. Only the false color screen on the Ninja V seems to be truly correct, at least for that workflow. It shows exactly the clipping points of the sensor for the mentioned ISO values. Preview picture, at least as good as it gets, is fitting the false colors only in PQ (Rec709 you are getting correct clipping values in false color but overblown picture, same as in camera). My assumption is that like Llaasseerr said, the camera is not doing anything in Rec709 to push the on top dynamic range into the picture, there is no log. That said only PQ seems to be quite close in resembling the dynamic range of the camera. To be precise following example. You expose in ISO 100 to the exact clipping point via Ninja V false colors, you can increase up to ISO 800 without any change to the false color clipping limits. The camera preview meanwhile looks totally over, while in reality it is not. It stays in its dynamic range. Guess that has to do with the ISO invariance of the sensor per each its two native ISOs. But there I am not an expert. Feel free to test this yourself if you have the chance to get hold of a Ninja V for ProRes RAW. However I have to say you could also use the camera your way of course. The image quality still is great if you go after what the camera says (and the Sigma manual) but in my opinion you are throwing away an even better image.
-
I am not too sure about middle grey either. Maybe that could be something you could try out, because I was focussing more on highlight protection and sensor clipping in my approach. When using my ISO conversion table the middle grey as shown in the Ninja V on PQ was matching what my incident meter said it should have been at the converted ISO value. Did not try this for internal metering in camera though. Can only assume that middle grey behaves like Sigma described in their manual.
-
Yes, I am afraid that is the case. At least if you consider sensor clipping as the point which it should be at its maximum.
-
Unfortunately in native the false colors of the Ninja V are not showing correct clipping values either. Tried that as well. All summed up left me with PQ. Agree it is not 100% a direct preview of how a potential Rec709 picture could look like. But at least it is a way to come closer to WYSIWYG compared to all other options available. Sorry for not being clear with the false color, only the ones from the Ninja V are correct in PQ with the mentioned ISO conversation. Internal is only working for ISO 100…
-
Yeah, give it a shot. It is working already nicely if you consider ISO 800 as ISO 100 and upwards and select monitoring: PQ. False colors from the Ninja V are accurate then. Giving you exactly the clipping point of the sensor. 🙂
-
Understand that you do not have a Ninja V available. So yes, I would try to use ISO 800 like Sigma intended. For the scenario you described, easily and ugly highlight clipping, they will recommend using ISO 800. Internal false color screen should help on setting exposure correctly. Have attached the additional fp manual from the developer, which tells you what ISO to use and when, including the chart. Keep in mind this is only true when you are using the in camera options including record to an external SSD. When recording ProRes RAW or most likely as well BRAW with an external recorder, you have to choose the approach which I have posted earlier to get the best quality. Hope that helps 🙂
-
May I ask how you determine the correct exposure? Because as stated earlier, all regular tools, including in camera metering, are only working for ISO 100. That ISO value tends to clip highlights indeed very quickly.
-
Agree! Unfortunately I came in too late for the V1 party. Bought the camera very well with V2 on it. Took me well over a year to figure out the correct settings, because of this misleading ISO behavior and combination with the Ninja V. But now I am extremely happy and even in direct sunlight find the DR not lacking at all. Most of the times I will even add more contrast back in the grade.
-
Hi all, have uploaded a small video file to YouTube for you to check. It was recorded the way which I have described above. Think the dynamic range of the fp is great. 🙂
-
Exposure metering is exactly the same quirky one as before... 😞 See other thread here for more details.


1.jpg.05e720c193b8e979f8100b8a54ab9b6e.jpg)
2.jpg.ec5118c58239e8e0eb56ee605394b1ad.jpg)
3.jpg.0089234816d86a560d8c19d290971855.jpg)
4.jpg.6718c552de45fe3f1ee5e374d7458038.jpg)
5.jpg.9a5925674ae0adec4a4795344482a12d.jpg)