kye
-
Posts
8,214 -
Joined
-
Last visited
Content Type
Profiles
Forums
Articles
Everything posted by kye
-
That was from 2012. I've had a number of replacement computers since then! At the time it seemed fine, but that was my first machine with an SSD, so it wasn't hard to impress me back then 🙂
-
To clarify, in the above I meant that science and everything else does a poor job of making sense of the meaning and morality of life. Obviously, science does a pretty good job of a lot of things, which is why we're able to chat on the internet about film-making and are not rural farmers lamenting the fact that half our children died before the age of 5.
-
I would argue that art is in the perception of the beholder. I used to write electronic music and was working with a friend on some hypnotic ambient music and we were sitting in silence and listening to the song we were working on when all-of-a-sudden next door locked their car and it gave the "boop-boop" sound, and it fit perfectly with the track. I mean, perfectly. We both looked at each other and immediately set out to create a similar sound to put into the song at that point. I don't expect anyone here to appreciate this because you weren't there, you probably don't like that kind of music, you probably don't think it sounds like art, etc, but in that moment a completely non-creative event created a very aesthetically pleasing result on two listeners engaged in the creation of something that's only purpose was for aesthetic appreciation. I don't have a good definition of art, but if that isn't art then I would argue that nothing is. What this means for AI art vs anything else, I have no idea, but from that experience, I don't think that art requires intent during creation to be perceived as such by the audience. From a practical point of view though, if an AI generated every possible sequence of 2minute digital sound, the percentage that would be enjoyed by anyone would be so low that it's simply impractical to approach it with anything resembling a brute-force strategy. Science does a very poor job of making emotional sense of the experience of life. Science also does a poor job of making sense of the meaning and morality of life (along with everything else). It doesn't matter that you see the world in a certain way, everyone is entitled to their opinions, but you actively refuse to acknowledge that anyone else is different to you, or if you do then you just assume them to be wrong. This is a form of aggressive behaviour, which is why it makes people disagree with you so much. Even your language in the above uses the word "correct" which implies that everything else is "incorrect" and that anyone who thinks differently to you (which is most people here) are wrong. This is a great way to make people dislike you. The more you post, the most I dislike you. You have a lot of knowledge, but you are needlessly making other people angry - you are not convincing anyone of anything. As a practical suggestion, I would recommend you speak only from your personal experience, and try not to criticise things you don't like or don't agree with. If this was a thread about ice cream, and someone said they liked strawberry, no-one would tell them they're wrong for liking strawberry and that the only correct choice is chocolate. This is basically what you are doing, only you're telling us that we're wrong for wanting film-making to be a certain way. Film-making is a creative process that is designed to be enjoyed by the audience. That is a fact. It CAN be used for factual purposes, but this is obviously not the goal of even the majority of film-making, so to judge it on that basis is ridiculous. Please try to adjust your behaviour to be more tolerant of how others see the world.
-
Interesting stuff. I can imagine that the 'pure' sources of data that are human-only will be worth more and more. I guess that each type of model will have its own weaknesses and blind spots, and it won't be until we get a unified AI model that is fed all the data in all the formats (across all the senses, all the styles, all the topics, etc) that certain integrated elements would be possible for it to understand. It really is down the rabbit hole that we're going. One area that is fascinating to me is that because AI doesn't see the world how we do, it will notice all sorts of patterns that we either miss, or don't pay attention to, or couldn't ever have found. Potentially it could bring enormous knowledge gains about the world and about ourselves. It has the potential for destruction as well, of course, but so much up-side too.
-
Thanks for sharing. You can really see how the puppy just didn't want to stop!
-
Depending on the DR of the scene and the DR of the FS7, you might find that to create silhouettes you need to pull the shadows down, which creates a new challenge, as you'll be adding contrast and stretching the image. If this is the case then you might want to test an ETTR exposure vs a normal exposure vs underexposing so that the silhouettes are down near where you want them and then you get more headroom. All these things really are situational, and would be difficult to predict. In reality, you've probably got a decent amount of flexibility, especially if you're not afraid to use a bit of NR. Internet camera folks seem to be allergic to any form of noise in the image, but professional colourists use it regularly, and cinema cameras are a lot noisier than internet people would even believe.
-
Unless someone has specific experience of this exact challenge, I'd suggest just doing a test prior. Any high DR environment should do, just shoot both profiles and then bring up the shadows in post and see which is cleaner. If the sun is in shot then it's practically an infinite-DR scene, although if the sun is low enough in the sky then you might be able to expose such that everything except the disc of the sun is below clipping and still get non-zero shadow detail. I've seen the latest high-DR cameras like A74 and FX3 do a passable job of having recognisable humans in the foreground with the sun in shot behind them, but it's still likely a stretch for whatever codec and colour space you're working with.
-
Agreed. Most of the YouTuber crowd I see editing on laptops have some sort of mechanism to attach an SSD to the lid of their machine for editing from. Velcro appears to be popular. I used to edit on my laptop on the train and the seats are often so narrow that any plug sticking out the left or right of the machine would get bumped as people sit down or stand up from sitting next to you. I solved that issue by upgrading to a 1Tb SSD in my machines, which gives enough room to edit a few projects on the go if I need to. I only shoot h264/5 so files are reasonably sized. Most of my hardcore adventures into SSD optimisation were from the first Mac I ever bought - a 64Gb 11" MacBook Air from ~2012. When I bought it I expected to keep my files on external USB sticks but never considered that I'd need more than 64Gb for the OS and applications alone. I ended up buying a slim-fitting USB drive that basically didn't protrude from the chassis and mapped a bunch of system folders to it. I think I even ended up with the entire /Applications folder on it. It worked well but I made sure to buy a larger drive next upgrade!

-
It's an interesting question, and I think it depends. If we fed the AI every film / TV episode / etc and all the data that says how "good" each one is, then I think the AI will only be able to predict if a newly created work is a good example of a previously demonstrated pattern. For example, if we trained it on every TV episode ever and then asked it to judge an ASMR video, it would probably say that it was a very bad video, because it's nothing like a well regarded TV show. However, if AI was somehow able to extract some overall sense of the underlying dynamics at play in human perception / psychology / etc, then maybe it would see its first ASMR video and know that although it was different to other genres, it still fit into the underlying preferences humans have. I think we are getting AIs that act like the first case, but we are training them like the second (i.e. general intelligences) so depending on how well they are able to accomplish that, we might get the second one. The following quote contains spoilers for West World and the book Neuromancer:
-
Both can be innovative by doing things that diverge from what was already discovered to be "good", that's definitely true. The difference is that when AI deviates, it can't tell if the deviation is creative or just mediocre, because the only reference it has is how much the new thing matches the training data. If a human deviates, they can experience if it is good according to our own innate humanity. A human can experience something that is genuinely new, and can differentiate something mediocre from something amazing. The AI can only compare with the past. This is, I think, what great artists do. They try new stuff, and sometimes hit upon something that is new and good. This is the innovation.
-
..and the DigitalRev TV channel just reposted about 20 of the videos. Who knows what is happening at their end.
-
Sounds relatively straight-forwards if you work methodically. I suggest the following: Start with a working DCTL that does similar things Make a copy of it in the DCTL folder, run Resolve and get it loaded up and confirm it works Open it in a text editor (Once you've done this you can save the DCTL file, and reload it in Resolve without having to restart) Then make a single change to the DCTL, reload it, and confirm it still works If it doesn't work then undo whatever change you made and you should be back to having it work again, and have another go. Depending on your text editor the save might clear the un-do history, so maybe keep a copy of the whole thing in another document ready to paste back in if you have a challenge Keep making incremental changes until you get it how you want it You should be able to copy/paste functions from other scripts, change the math / logic, add controls to the interface etc. The key is doing it one change at a time so that you don't spend ages making lots of changes then even more time trying to troubleshoot it when it doesn't work.
-
I have a small amount of experience with them. What are you trying to do?
-
It seems that all the original files for the videos magically appeared on Lok's hard drive...
-
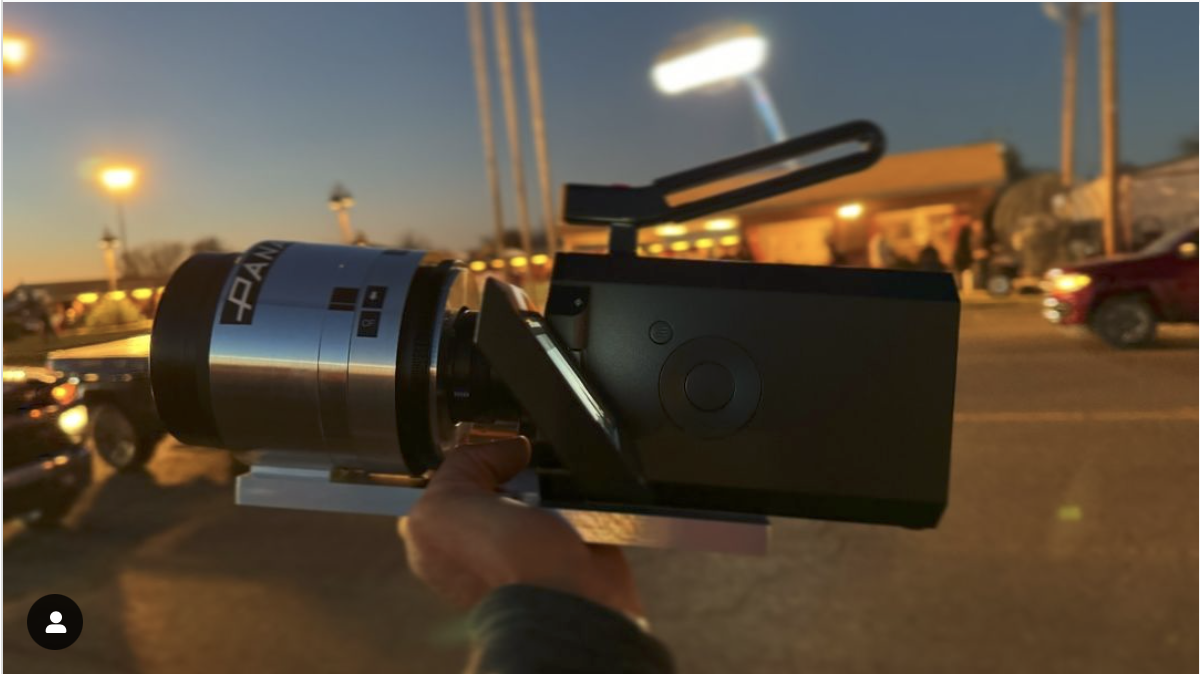
I read the link.. it said .... Dan Sasaki @panavisionofficial engineered anamorphic “ adapter “ If you look at the setup, there's a pretty large gap between what is the Panavision component and the body of the camera, and it is easily large enough to accommodate a decent percentage of 8mm lenses ever made, plus the flange distance for 8mm film is very small, so combining those factors, I did take it that it might actually be an anamorphic "adapter". I know enough about anamorphic lenses to know this setup is very common and completely plausible. Therefore, a question about the "adapter" and also about what the taking lens might be seemed warranted. Do you have further information? I haven't seen anything so far that convinces me it's a lens rather than an anamorphic adapter, and even if it was, my original question about what lens it is still stands? Pointing me to a link that obviously doesn't provide any conclusive answers is not very helpful.
-
What on earth is that lens?
-
I absolutely agree with @Ty Harper that with enough data it will be able to differentiate the movies that got nominated for an academy award from those that didn't, those that did well in the box office from those that didn't, etc. What it won't be able to do, or at least not by analysing only the finished film, is know that the difference between one movies success and the next one is that the director of one was connected in the industry and the second movie lacked that level of influence. But, if we give it access to enough data, it will know that too, and will tell a very uncomfortable story about how nepotism ranks highly in predicting individual successes... I also agree with @JulioD that the wisdom will be backwards-looking, but let's face it, how many of the Hollywood blockbusters are innovative? Sure, there is the odd tweak here or there that is enabled by modern production techniques, and the technology of the day changes the environment that stories are set in, but a good boy-meets-girl rom-com won't have changed much in its fundamentals because humans haven't changed in our fundamentals. Perhaps the only thing not mentioned is that while AI will be backwards looking, and only able to imitate / remix past creativity, humans inevitably use all the tools at their disposal, and like other tools before it, I think that AI will be used by a minority of people to provide inspiration for the creation of new things and new ideas, and also, it will give the creative amongst us the increased ability to realise our dreams. Take feature films for example. Lots of people set out to make their first feature film but the success rate is stunningly low for which ones get finished. Making a feature is incredibly difficult. Then how many that do get made are ever seen by anyone consequential? Likely only a small fraction too. Potentially these ideas might have been great, but those involved just couldn't get them finished, or get them seen. AI could give everyone access to this. It will give everyone else the ability to spew out mediocre dross, but that's the current state of the industry anyway isn't it? YT is full of absolute rubbish, so it's not like this will be a new challenge...
-
No, it's not an echo chamber, and people are free to have whatever perspectives they want. But take this thread as an example. It started off by saying that 24p was only chosen as a technical compromise, and that more is better. Here we are, 9 pages later, and what have we learned? The OP has argued that 60p is better because it's better. What does better even mean? What goal are they trying to achieve? They haven't specified. They've shown no signs of knowing what the purpose of cinema really is. You prefer 60p. But you also think that cinema should be as realistic as possible, which doesn't make any sense whatsoever. You are also not interested in making things intentionally un-realistic. Everyone else understands that 24p is better because they understand the goal is for creative expression, not realism. If we talk about literally any other aspect of film-making, are we going to get the same argument again, where you think something is crap because you have a completely different set of goals to the rest of us? Also, the entire tone from the OP was one of confrontation and arguing for its own sake. Do you think there was any learning here? I am under no illusions. I didn't post because I thought you or the OP had an information deficit, but were keen to learn and evolve your opinion. I posted because the internet is full of people who think technical specifications are the only things that matter and don't think about cameras in the context of the end result, they think of them as some sort of theoretical engineering challenge with no practical purpose. A frequently quoted parallel is that no-one cared about what paint brushes Michelangelo used to paint the Sistine Chapel except 1) painters at a similar level who are trying to take every advantage to achieve perfection, and 2) people that don't know anything about painting and think the tools make the artist. I like the tech just as much as the next person, but at the end of the day "better" has to be defined against some sort of goal, and your goal is diametrically opposed to the goal of the entire industry that creates cinema and TV. Further to that, the entire method of thinking is different too - yours is a goal to push to one extreme (the most realistic) and the goal of cinema and TV is to find the optimum point (the right balance between things looking real and un-real).
-
The ability of an AI to make a single still image does not mean that AI can generate a series of images that are coherent with each other. The ability of an AI to make a series of images that are coherent with each other does not mean that AI can generate a 3D world that feels like our reality. ....and even if an AI can do that it doesn't mean that the people in that reality will move how we move. ....and even if an AI can do that it doesn't mean that the movement of the people will be believable in-context. ....and even if an AI can do that it doesn't mean that the movement will be emotionally relevant to the situation. ....and even if an AI can do that it doesn't mean that the emotional appearances will be of note, let alone at the standard of winning awards. There is a huge way to go. In a discussion about cinema, pointing to an image generator is like having a discussion about poetry and pointing to a video where a monkey can write basic words with a crayon. No disrespect intended here, but it really seems to me that cinema is an art-form that you don't seem to really understand, and don't really seem to be interested in understanding. All the discussions that I've seen you participate in seem to be where your approach is just at-odds with the entire concept. There is a huge body of discussion and debate about cinema and even what is an isn't cinema, but I haven't seen a perspective so remote from the others. I feel like I'm trying to talk about poetry with someone who thinks that everything should be in full sentences, and the only purpose of the written word is to communicate factual data, that the purpose of life is to optimise human productivity, and that everyone else also thinks this because it's obviously true. The discussion of details is wrong because the context is wrong because the entire nature of what you think is going on and what we are trying to achieve is just wrong. I don't really see how much else can be accomplished with such fundamental differences of thought, when it's pretty obvious that you weren't welcoming of the idea that other people see this very differently to you and you're not really interested in learning about this seemingly new other perspective, despite the fact that this other perspective is integral to the entire way that the entire art-form operates. I wish you the best of luck filming your ultra-realistic nature videos.
-
Sure, but how does this relate to what I posted about?
-
Not sure. I've only had it happen a few times, and although it became really slow, I was able to bring up the Finder window and delete some large files I could replace, then wait for it to recover, then restart it and free up a bit more space. Sometimes that process would involve you clicking on something and then going to get a snack and giving it 5 minutes to process that click. It would normally only occur when I was downloading something and accidentally filled up the drive. Other times it will warn you that you don't have enough drive space (e.g. to copy files) or it will warn you that drive space is low, so you can free some up before it hits the wall. It certainly teaches you to be careful though! Both in downloading, but also in buying the right sized SSD when buying a new machine.
-
Of course, 24p doesn't make the magic of cinema! But, the counterpoint is pretty strong - for many/most (as evidenced by this thread) the absence of 24p sure destroys it. I think that perhaps one of the most overriding (and infuriating) principles at work here is that to make something truly cinematic requires that everything be at a high standard - there's very little room to move on the knife edge. Of course, how much you can deviate from perfect and not ruin the whole thing is different for each element - the quality of acting or production design or sound design or writing might be more or less important than other elements, and are also going to depend on the viewer as well - one person is tolerant of mediocre acting and the next person will walk out of the cinema because of it. For whatever reason, these forums tend to focus the discussion on the image. At our best we talk about it with a certain emphasis over other aspects, and in our worst moments we talk about it like no other aspect of film-making exists. For better or worse this often attracts people to drop into the forums who have no concept that the other aspects even exist, then the resulting discussions are just separated from the reality that almost everyone else lives in. I think AI will replace the farcical comic-book blockbusters that the Hollywood sausage-factory is currently configured to create, but to confuse the seemingly infinite stream of Insect-man and the Saviours of the Metaverse sequels for the entirety of "movies" is a mistake. Cinematic "realism" is a much more nuanced concept than you might think, because I want movies to be intellectually "realistic" and/or emotionally "realistic". People don't react well to serious movies with shallow and contrived plot lines, nor do they react well to bad acting, these are both forms of the movie not being realistic in other ways that do matter. I've been contemplating this concept of "realism" and to be perfectly honest, the more I think about it the more I realise the entire concept is completely non-sensical. If we take "realism" to its logical conclusion then: Gone With The Wind, a movie that takes place over the course of the US Civil War and its aftermath, would have been over 5 years long - jumping forwards in time to just look at the "important" bits isn't even remotely realistic. During screenings the audience will be made to partly starve due to the war-torn conditions. John Wick would be awful. Making it realistic would result in something like this: You get told to go kill John, you are nervous on your way there, you see him and run at him yelling, he almost immediately shoots you in the head, the movie is over in 17m42s. The theatre has specially designed seats that break your legs at the 17m12s mark. or, You are John Wick, to be realistic from the perspective of almost every audience member worldwide, the 78 people in the first scene who are sent to kill you succeed. You die in 3m27s. The seats stab you from 5 different directions to simulate being shot. etc. If you think these are completely preposterous, which they absolutely are, then you need to accept that some aspects of film-making are not best when made more "realistic". From there it is possible to start to have a sensible discussion. Human beings are exceptionally finely tuned animals when it comes to certain things like facial expressions and how things move in 3d environments etc, so I suspect that the uncanny valley will take a while to cross, probably a lot longer than most would imagine. However, I think it will be crossed eventually because people are also great at personification and interpretation, as things like the Kuleshov effect show, especially if we are invested in the subject matter. With enough data, AI will get there. I find that people mis-interpret AI. Here's how I suggest that you think about it. The CPU of a computer has about as much sophistication as a pocket calculator. I'm not kidding, they can literally only do binary logic operations. Modern computers are billions of tiny little pocket calculators built to go screamingly fast. AI is us programming them to analyse a bunch of input data and then make output data that fits the pattern. ChatGPT is literally trillions of screamingly fast tiny calculators playing a game of "what comes next?" with a gargantuan database. If the tiny calculators can learn to write a doctoral thesis, in English, or learn to make a photorealistic image of a monkey climbing a tree, then there is no logic in saying that it can analyse and mimic those things but not a nice edit. In my mind it's like saying that someone has walked 10,000 miles and has made it to the outskirts of the city, but that there's no way it could ever make it to the central train station.
-
I wasn't saying that you did all those things, just explaining the context so you might understand the reaction that some people had. The experts are human too, so don't confuse their expertise and time/effort in trying to help with any human foibles that it is inevitable that everyone has. As far as I am aware, these forums are perhaps the best place online to discuss the video capabilities of hybrid cameras, as the vast majority of people here use hybrid cameras because they take stills as well as video, so by setting the context as a cinema-camera only discussion you not only skewed the discussion away from accessing the majority of knowledge and experience of the members, but you also targeted the involvement of those members who do specialise in video-only cameras. Perhaps, above all, the people who participated in good faith don't react well to helping someone who deliberately misrepresented their position at the outset.
-
It sounds like you missed the point. I didn't post the video saying that it was an example of great image quality, I posted it to make the point that a lot of the techniques being used in cinema are also being used for creative YouTube videos. This entire discussion has been about if film-making should be more or less realistic, and the point that many of us have been making is that almost all of the tools and techniques used in cinema deliberately make things less realistic. The video I posted was an example of many techniques that improve the creative aspects, but make the end result less realistic, including: cutting up clips into sequences that aren't 'continuity editing' but are more emotive combining multiple images at a time (e.g. the top-down shot in the bedroom) splicing in audio clips that were recorded at a different time than the visual being shown overlapping audio clips and other foley and SFX to create a creative rather than realistic sound design non-realistic colour grading filming insert shots (like the hanging of the clothes in the closet) for the purpose of association rather than limiting the edit to 'real' events production design techniques like use of lighting and light modifiers, smoke machines, etc in-camera visual effects like the top-down shot of the medium format camera etc. there are likely lots more, these are just the things I could name off the top of my head From this perspective, such a video is an example of a great many techniques that are employed by film-makers to make the finished product more appealing, but do so specifically by making the end result less realistic. You didn't like it, and that's fine, but my point was that there are deliberately non-realistic techniques being used on YT and the example shows a variety of them in use. It didn't share it because I thought everyone would like it, it was an example to discuss the techniques.
-
As someone who cares a lot about camera size, I find that discussions often ignore a number of important variables. For example, larger cameras can: Attract additional attention (sometimes very negative attention) making the shooting process more difficult in some situations When shooting candid situations they make the people in the frame act very differently, which completely overrides any image quality advantage they might have Make you feel more awkward, leading to a less enjoyable shooting experience, and negatively impacting your creativity in terms of compositions, camera movement, etc Make you feel more awkward, leading to people around you also being awkward (body language is a powerful thing) Make you more tired, leading to worse footage If shooting outside controlled situations, you can be blocked from shooting by security guards and other "official" folks, who will decide who is allowed to shoot and who isn't based solely on the size and appearance of the camera Etc. For my family and travel shoots I have swapped from my GH5 to the GX85 purely for these reasons. The image on the GH5 is great, but high-quality capture of compromised shooting of awkward people isn't as good as a lower-quality capture of creative shooting of relaxed people. Not by a long shot. I understand the pull of the nicer cameras / codecs / DR / colour science / etc, but encourage you to consider the big picture - the end goal is to get the nicest possible finished edit, right? Another factor to think about is lenses and how large they are. You'll likely be trading off elements such as: size weight image stabilisation AF performance (and even AF vs MF) aperture / low-light / depth-of-field primes vs zoom / zoom range cost To this end, I have decided to move from MF primes with large apertures to a single (comparatively) small aperture zoom lens. This is because I have found that working backwards: the best edit comes from having the most options in the edit the most options in the edit comes from having 1) a greater number of shots of a scene and 2) a wider variety of shots having a greater number of shots is enabled when you can work fast, which means AF instead of MF having a greater variety of shots is enabled by having a variety of focal lengths quickly available, which means a zoom rather than primes (and the time it takes to swap lenses) In terms of the overall aesthetic, I'm a bit of a niche player in that I want the most cinematic images I can get, but (unlike almost everyone else on the internet) I've actually looked at images from cinema and realised they don't have a crazy shallow-DoF (and a large percentage have everything in focus) and cinema doesn't have super-sharp images, even in the normal theatre which is projecting in 2K. Combine this with the ability to colour grade images nicely (even rec709 images) and it makes it very clear that while a camera like the S5iiX is a very impressive piece of equipment, it isn't even close to the optimal for how I shoot. Obviously these are my thoughts and your situation will be very different, but hope this is useful.