CaptainHook
-
Posts
69 -
Joined
-
Last visited
Content Type
Profiles
Forums
Articles
Everything posted by CaptainHook
-
The Blackmagic RAW highlight and shadow rolloff sliders affect the roll off of the "S" contrast curve you create with the custom gamma controls. If you add no contrast, they will do nothing as there's nothing to roll off. Increase (or lower) contrast and they will start to take affect. Choose "Extended Video" from the gamma selection in the Blackmagic RAW panel and you will see it's actually just a custom S curve with saturation preset via the custom gamma controls - you can start to modify it to your taste and the "gamma" automatically changes from "Extended Video" to "Custom". Or you can start from scratch with "Blackmagic Film". If you want the highlight/shadows sliders that were in DNG panel, those are not RAW specific controls and are still available in the 2nd tab of the primaries (same algorithm as found in DNG tab and same exact effect on Blackmagic RAW clips as DNG). If transforming to another log curve or colour space helps you get what you want faster, great! Different log curves like ARRI/Red or using highlight roll off sliders/presets don't give you anything you can't do yourself by using the curves tool etc, but not everyone is experienced with that stuff. Our log curves preserve the full sensor dynamic range though so the highlight roll off is completely in your hands, or you can start with another log curve if it suits. Something I tend to do a bit is expose for the native ISO in camera, then later in the RAW tab I switch to the highest ISO possible and compensate middle grey with the exposure slider which will lower contrast and have the most highlight roll off we offer in our log curves for a particular camera. I start with Extended Video from the gamma drop down and tweak the contrast/sat and highlight/roll off sliders for the shot. Adjust white balance/tint and that gets me 90-95% there with most footage.
-
 Not that it changes your point but that figure is either old, just plain wrong, or only speaking about the amount of staff in Melbourne (which is fairly close).
 -
It reconstructs data in clipped channels from non-clipped channels. i.e Will do nothing if all channels are clipped. And the reconstructed data is generally absent of colour information since it's not known what was missing in the clipped data, and just heads to the white point. I'm not sure what's available with the C200 rawlite files as I'm not in the Resolve team so my "inside" knowledge only surrounds our cameras and what we provide to the Resolve team (Blackmagic RAW is developed in the camera team). I do know for instance though the C300 mk2 raw output over SDI has white balance information "baked in", which means all 3 channels are clipped (to avoid non-white highlights) so highlight recovery would not be possible on such data.
-
There was no change in "highlights" to our log curves or otherwise. The previous manual dynamic range chart was incorrect, and was corrected. There is also no inherent "highlight rolloff" in digital cameras from the sensor. They are all (mostly) linear capture devices. Same with Alexa, Red, etc. When they all clip in linear, they all clip suddenly/harshly. All of them. "Highlight rolloff" is really about total dynamic range, how you expose, and curves (which you can manipulate yourself). Our log curves are optimized to store data in 10bit SDI and video files so the highlight roll off in our existing log curves is merely a function of optimising the dynamic range to fit in this data range with relation to the "native sensitivity" and desired ISO. The more dynamic range the sensor has the more highlights will roll off in the log curves, the same with Alexa/Red/etc. You want to use your own curves after in grading to create the roll off you want. Expose the sensor so middle grey is lower and leave more dynamic range in the highlights, and you can create a very nice gradual highlight rolloff in grading - with mostly any modern digital camera. But it's pretty much all down to total dynamic range, exposure, and curves.
-
-
Yes, since Resolve 15.1 BUT you want 15.2.3 or higher for Pocket 4K Blackmagic RAW support.
-
This is not what noise looks like from the ADC. This is not natural and its not the finest details captured, its MORE. The information is made up in the debayer. I know it is. People also seem to think cDNG has no processing before the file is stored in camera but cDNG is subject to calibration (which attempts to reduce noise and other issues) and other processing before those "RAW" pixels are stored as DNG also. Its okay to like it more too. Doesn't mean its the same process or the same thing. An OLPF can look similar to Gaussian Blur too. I get some people prefer cDNG, that's totally fine. But some people are acting like the image was faultless, which it certainly was not. And when there are incorrect statements made as fact, I will try to correct when I'm able to (IP and other concerns restricts my public involvement). The decisions made over a 2 year process developing Blackmagic RAW were not arbitrary or taken lightly either.
-
Ignoring the made up numbers here, in terms of debayer quality the method for cDNG is much older as not anywhere near as good as Blackmagic RAW. I see a lot of people mistake the artefacts of the DNG debayer as sharpness. Its not that the cDNG debayer is necessarily keeping more details, but it IS creating false detail. An interesting comparison was just posted here that's worth looking at : https://forum.blackmagicdesign.com/viewtopic.php?f=2&p=510320#p510320 Especially this image - what you're seeing on the DNG is not real information the DNG retained, it's CREATING it (falsely) and it can look like sharpness/detail when it's over areas of real detail, but it's a very "hard" and digital feeling look IMHO : But also pay really close attention to the resolution image at the above link. You can see on the right hand side the artefacts between the red and yellow resolution lines and around the edges of the circle. These artefacts are not real detail or sharpness that you lose with Blackmagic RAW, they are created in error. Something to consider as well is we get a lot of feedback from customers that 4.6K Blackmagic RAW still has more resolution than some "other" cameras 8K RAW images - likely because of strong optical low pass filtering that without could produce similar artefacts as shown in DNG. The highlights and shadows sliders in cDNG are NOT debayering RAW controls and work on debayered data only. They are the exact same (mathematically) as the ones in the primaries tab and work exactly the same on Blackmagic RAW as the DNG RAW tab ones. I demonstrated this for someone on Facebook last year..
-
Resolve 15.3 has a build of SDK 1.3 which does support LUTs in the sidecar, they just need to be manually placed in the sidecar at this time (we would like to add the ability to add LUTs to the sidecar through the Resolve UI in a future update). If you're brave I've attached a sample sidecar with a 3DLUT (B&W to make it easy to tell its working) which shows the syntax needed. Open the sidecar in a text editor and you can copy in any Resolve formatted 3DLUT (can also open LUTs in a text editor) into the sidecar file data section (inside the quotes) and make sure the "post_3dlut_sidecar_size" number matches the "LUT_3D_SIZE" from the 3DLUT. Just rename the sidecar file to the same as your clip. If you are going to add it to an existing sidecar, put it at the top of the sidecar data inside the curly brace (the current build in Resolve requires it but a future build will not be as strict) and put a comma after the LUT data quote (this is JSON syntax). If you already have the clip in a Resolve timeline, you'll need to remove the clip from the timeline and from the media pool and relink it as Resolve will cache and not pick up the sidecar change. If you just want to test, making a new project and bringing in the clip might be faster. You'll need to use Blackmagic RAW player 1.3 which is inside the Resolve app bundle so make sure that version is the one being used when viewing clips not using Resolve. In general though so you are aware the sidecar is just for the controls you find in the RAW panel, the SDK (and applications using it) can't recreate all the complex colour grading operations you can do in Resolve. I've also attached a sample Blackmagic RAW frame with an embedded 3DLUT. If you view this in Resolve, go to the RAW panel and change to clip decode and you will see you can enable/disable the 3DLUT, and change from the embedded 3DLUT to the sidecar LUT. This gives you more options for making sure when passing around clips the intention of how you want it to look is preserved non-destructively in any app that supports SDK 1.3+ (when released) which i think is pretty cool! sample.sidecar sample.braw
-
What version of the player and what Resolve version are you using? What GPU and OSX version?
-
It did, at calibration time during manufacturing. But more can develop over time like all sensors, and in unfortunate situations even before the customer receives it. Some companies have publicly known policies on how many "defective" pixels are acceptable, including for displays etc.
-
By that definition you have probably never used raw then, as I haven't come across any camera that supports uncompressed/lossless raw that doesn't alter the sensor data in a process referred to as "calibration" - where every pixel is altered. That can include noise reduction and other processing that's already applied before the raw file is created. Some sensors do this on chip before the ADC! I've also never seen a camera that doesn't do pixel remapping as all sensors suffer hot/dead pixels. Some even offer user initiated pixel remapping to address this as it can occur over time. Which means lots of pixel data is CREATED because the sensor didn't provide useful information. So yeah, no camera from any manufacturer I have seen or used would qualify as offering "raw" to your standard. People seem to have a romantic and idealised notion about what raw is.
-
We write the file headers/close the file every 5 secs during record, our cameras since the BMCC have always periodically written the headers/closed the file so at most if you lose power you might lose the last 5 secs of the clip. If you lose power before 5 secs of recording, then it could be an issue.
-
Gen 4 uses a common defined gamut so you can use Broadcast Film for space (Broadcast Film gamut is the same as Pocket4K/UMP/etc Gen 4 gamut) and Pocket 4K Film for gamma. Hopefully this will be cleaned up a little in a future update.
-
It was a correction to the original chart.
-
Looked into this and the steps that some lenses report will result in a value that's smaller than the precision of the numbers we show. So for instance the lens may allow two settings around f14 where the "second" one is still closer to f14 than f15 so we display both as f14. The opposite can also happen where some lenses will report settings where it DOES fit in a our precision to show two different values but the lens doesn't actually change aperture enough to see any difference. We assume Panasonic etc know of these settings across the lenses and compensate/ignore them etc as necessary in their cameras.
-
If you can let me know exact MFT lens models and describe the issue in repo steps I can follow it up. There is one known issue at the moment that some times the lens won't set the correct aperture we tell it to, but for the aperture number to stay the same on the camera UI display but the lens actually change sounds like something different. Will look into what you mention nRF Connect too.
-
What lenses is this happening with? I've scanned the thread but every mention seems to indicate a focal reducer of some kind which may actually be the issue, rather than direct control of an MFT lens.
-
FYI just in case you're not aware, midtone detail is also available in the primary tab and is not a raw tab exclusive control.
-
Historically (not that we've made cameras THAT long) we've always converted internally to YUV/YCbCr no matter the codec for SDI output etc. It's then convenient and easier on resources to do image statistics on just luma for zebras/false colour and that has not changed. RGB would be more ideal, yes. Personally I always set zebras to 95% for some slight headroom (even before I worked for the company and learnt how it worked) and after i joined and we added false colour, the "red" (highlight clipping) on false colour is actually at 95% for the same reason.
-
Zebras are currently based on Luma or the Y channel of YCbCr (as it has been since the first BMCC).
-
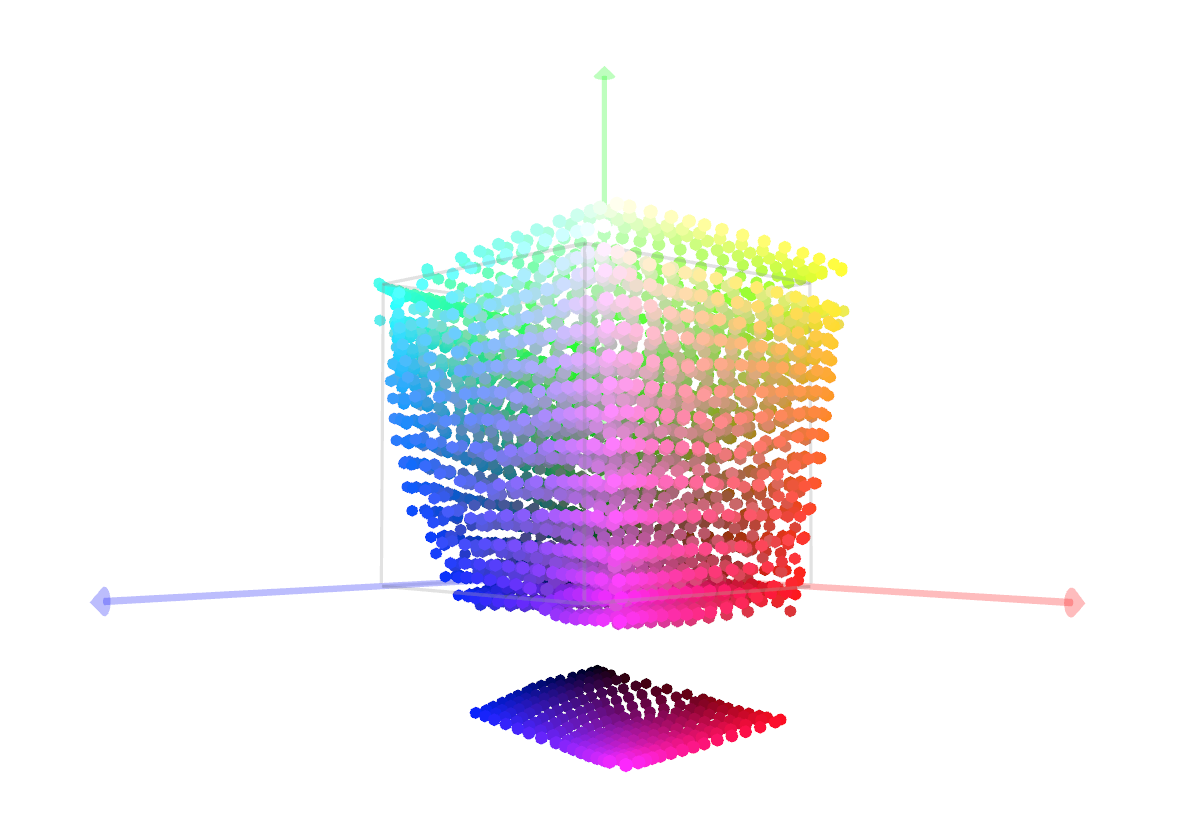
As others noted, the camera accepts either 17^3 size cubes, or 33^3 size cubes. Yours is 16^3. I've converted your LUT to 17^3 using Lattice and this should work. Custom_Made_17.cube FYI, i would be careful with your LUT as you can see from the cube visualization there an odd gap at the bottom and the curves are not overly smooth (though I've seen much worse curves).

-
There are two parts to BMD Film, the log curve (gamma) and the "colour space" (gamut). The log curve is always optimized for the sensors dynamic range so the curve you get for cameras with different sensors will vary. Some will have more contrast than others. The gamut in previous versions would vary across cameras as well but with Gen 4 it is the same for any of our cameras using it and like Gen 3 it is more saturated to make it faster/easier to grade. Note shot it.
-
You get the full studio version of Resolve with the Pocket 4K camera. The differences between the versions available are listed here: https://documents.blackmagicdesign.com/DaVinciResolve/20180404-10399d/DaVinci_Resolve_15_Feature_Comparison.pdf
-
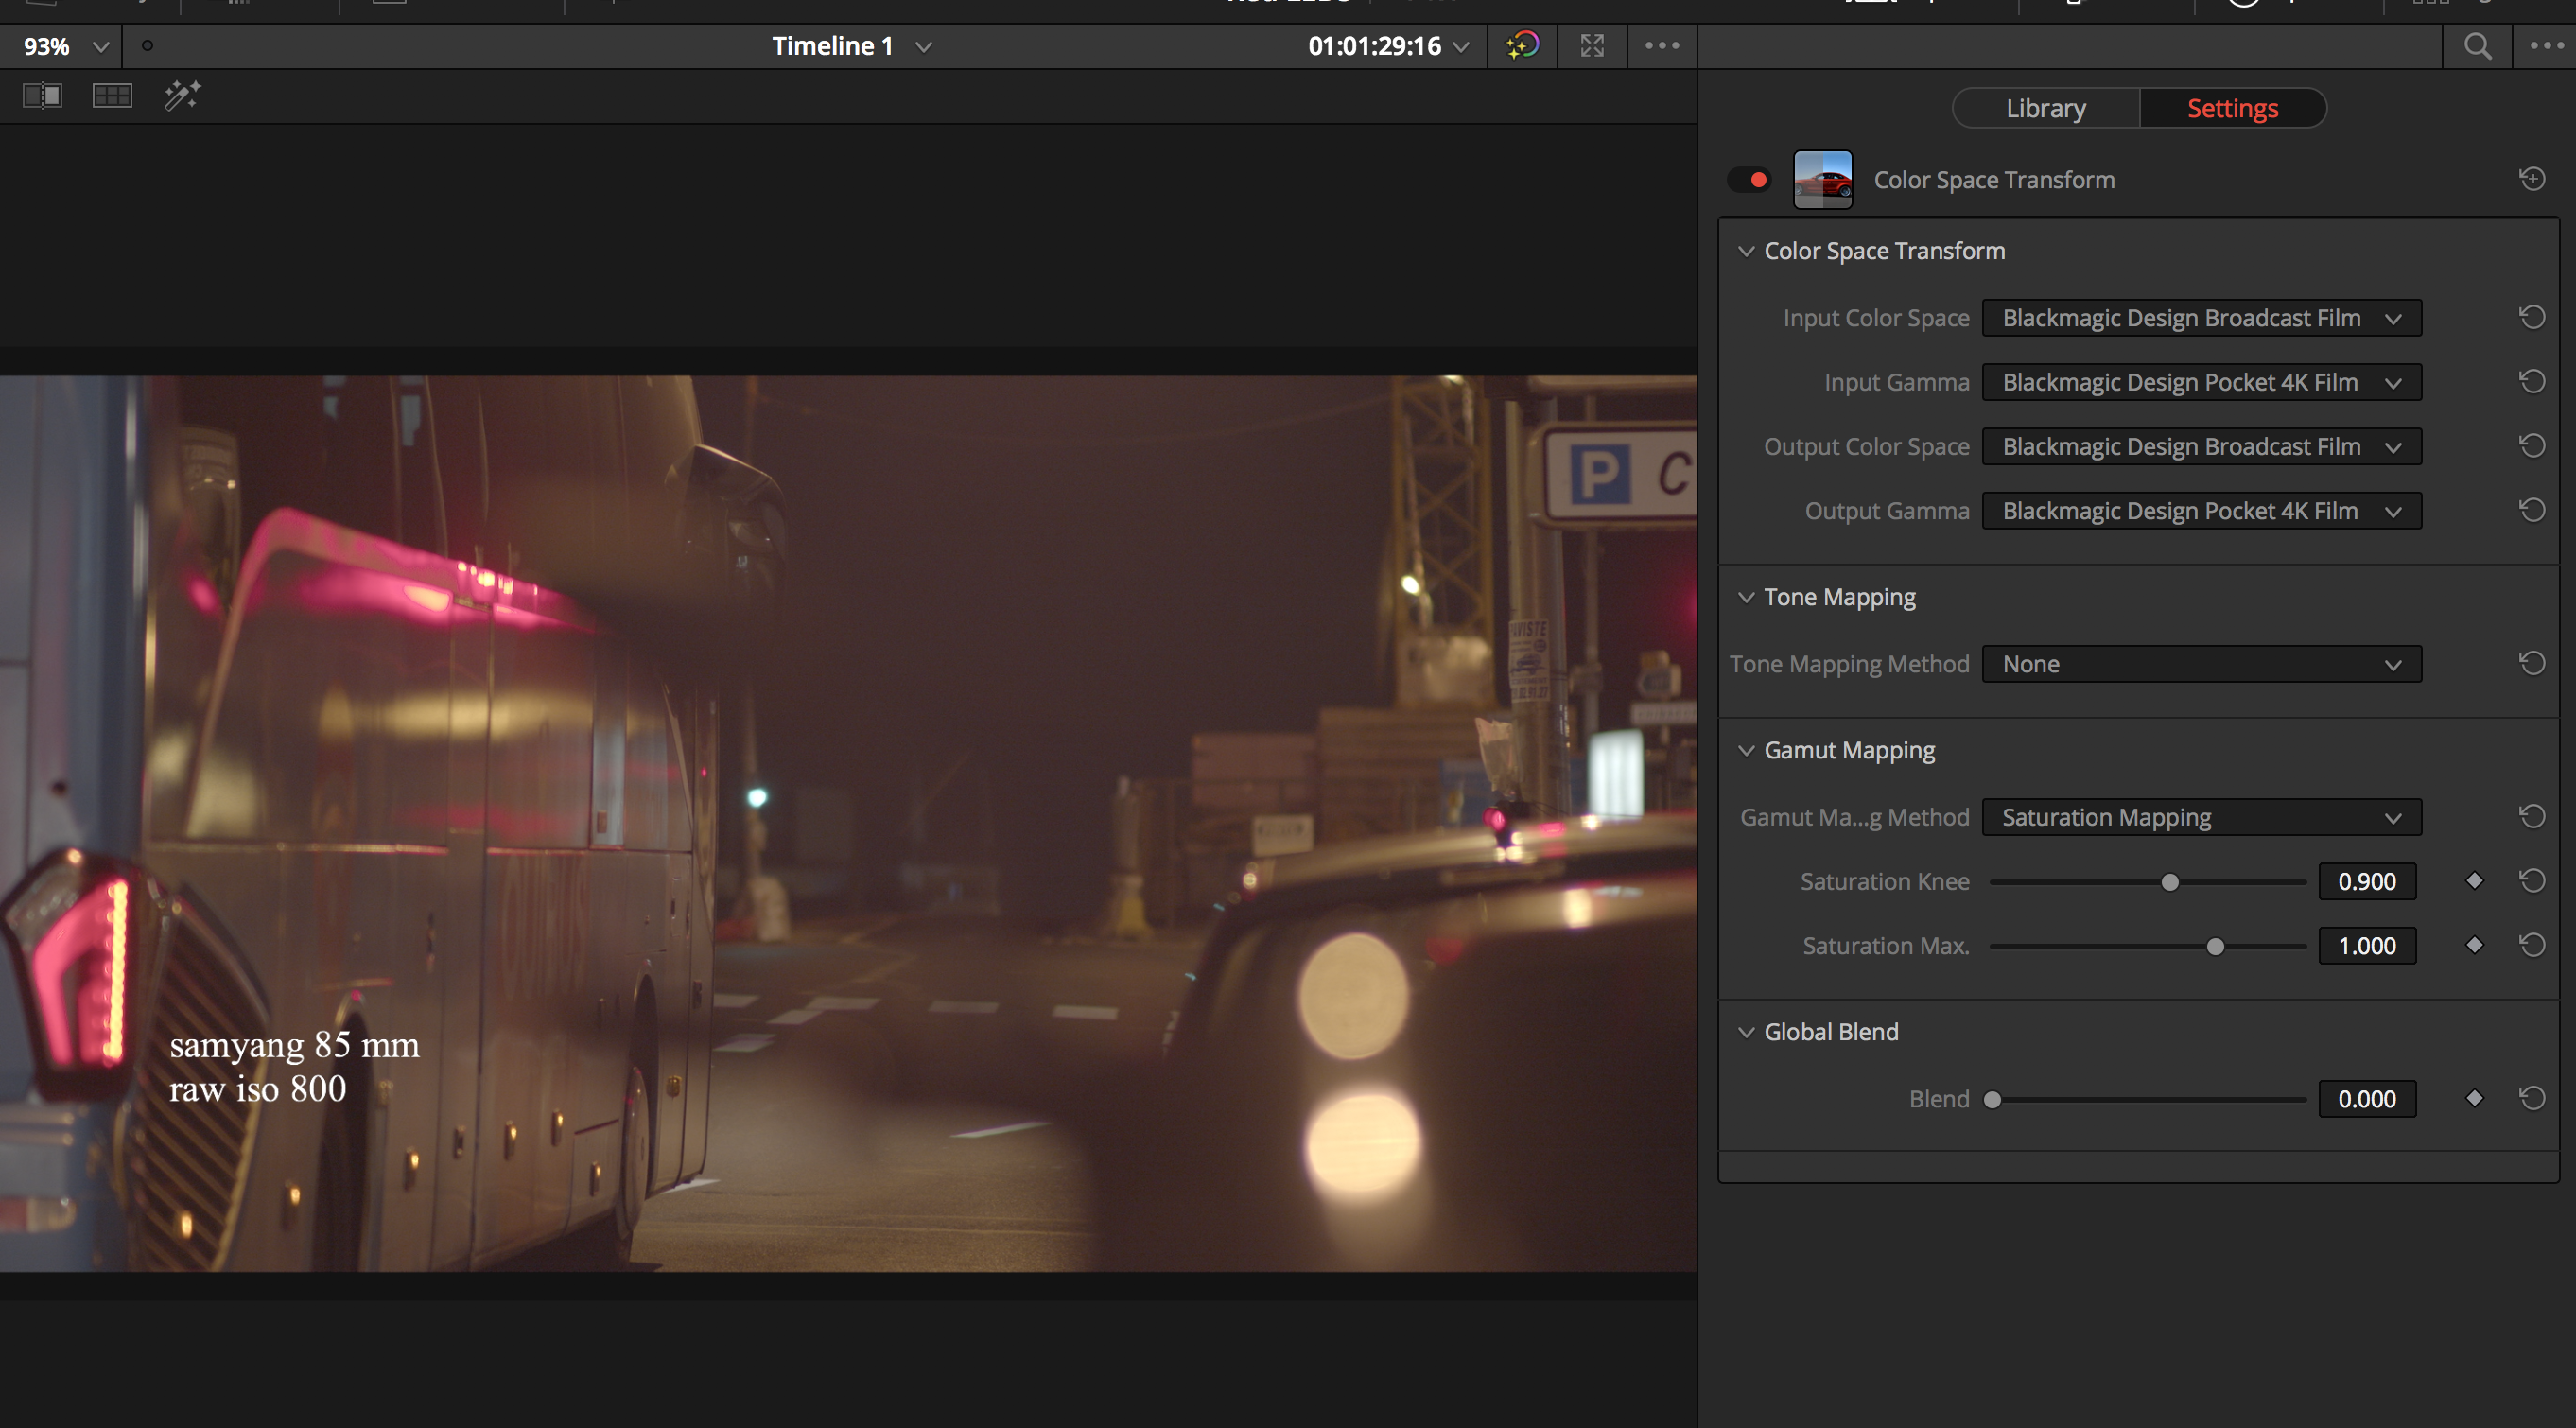
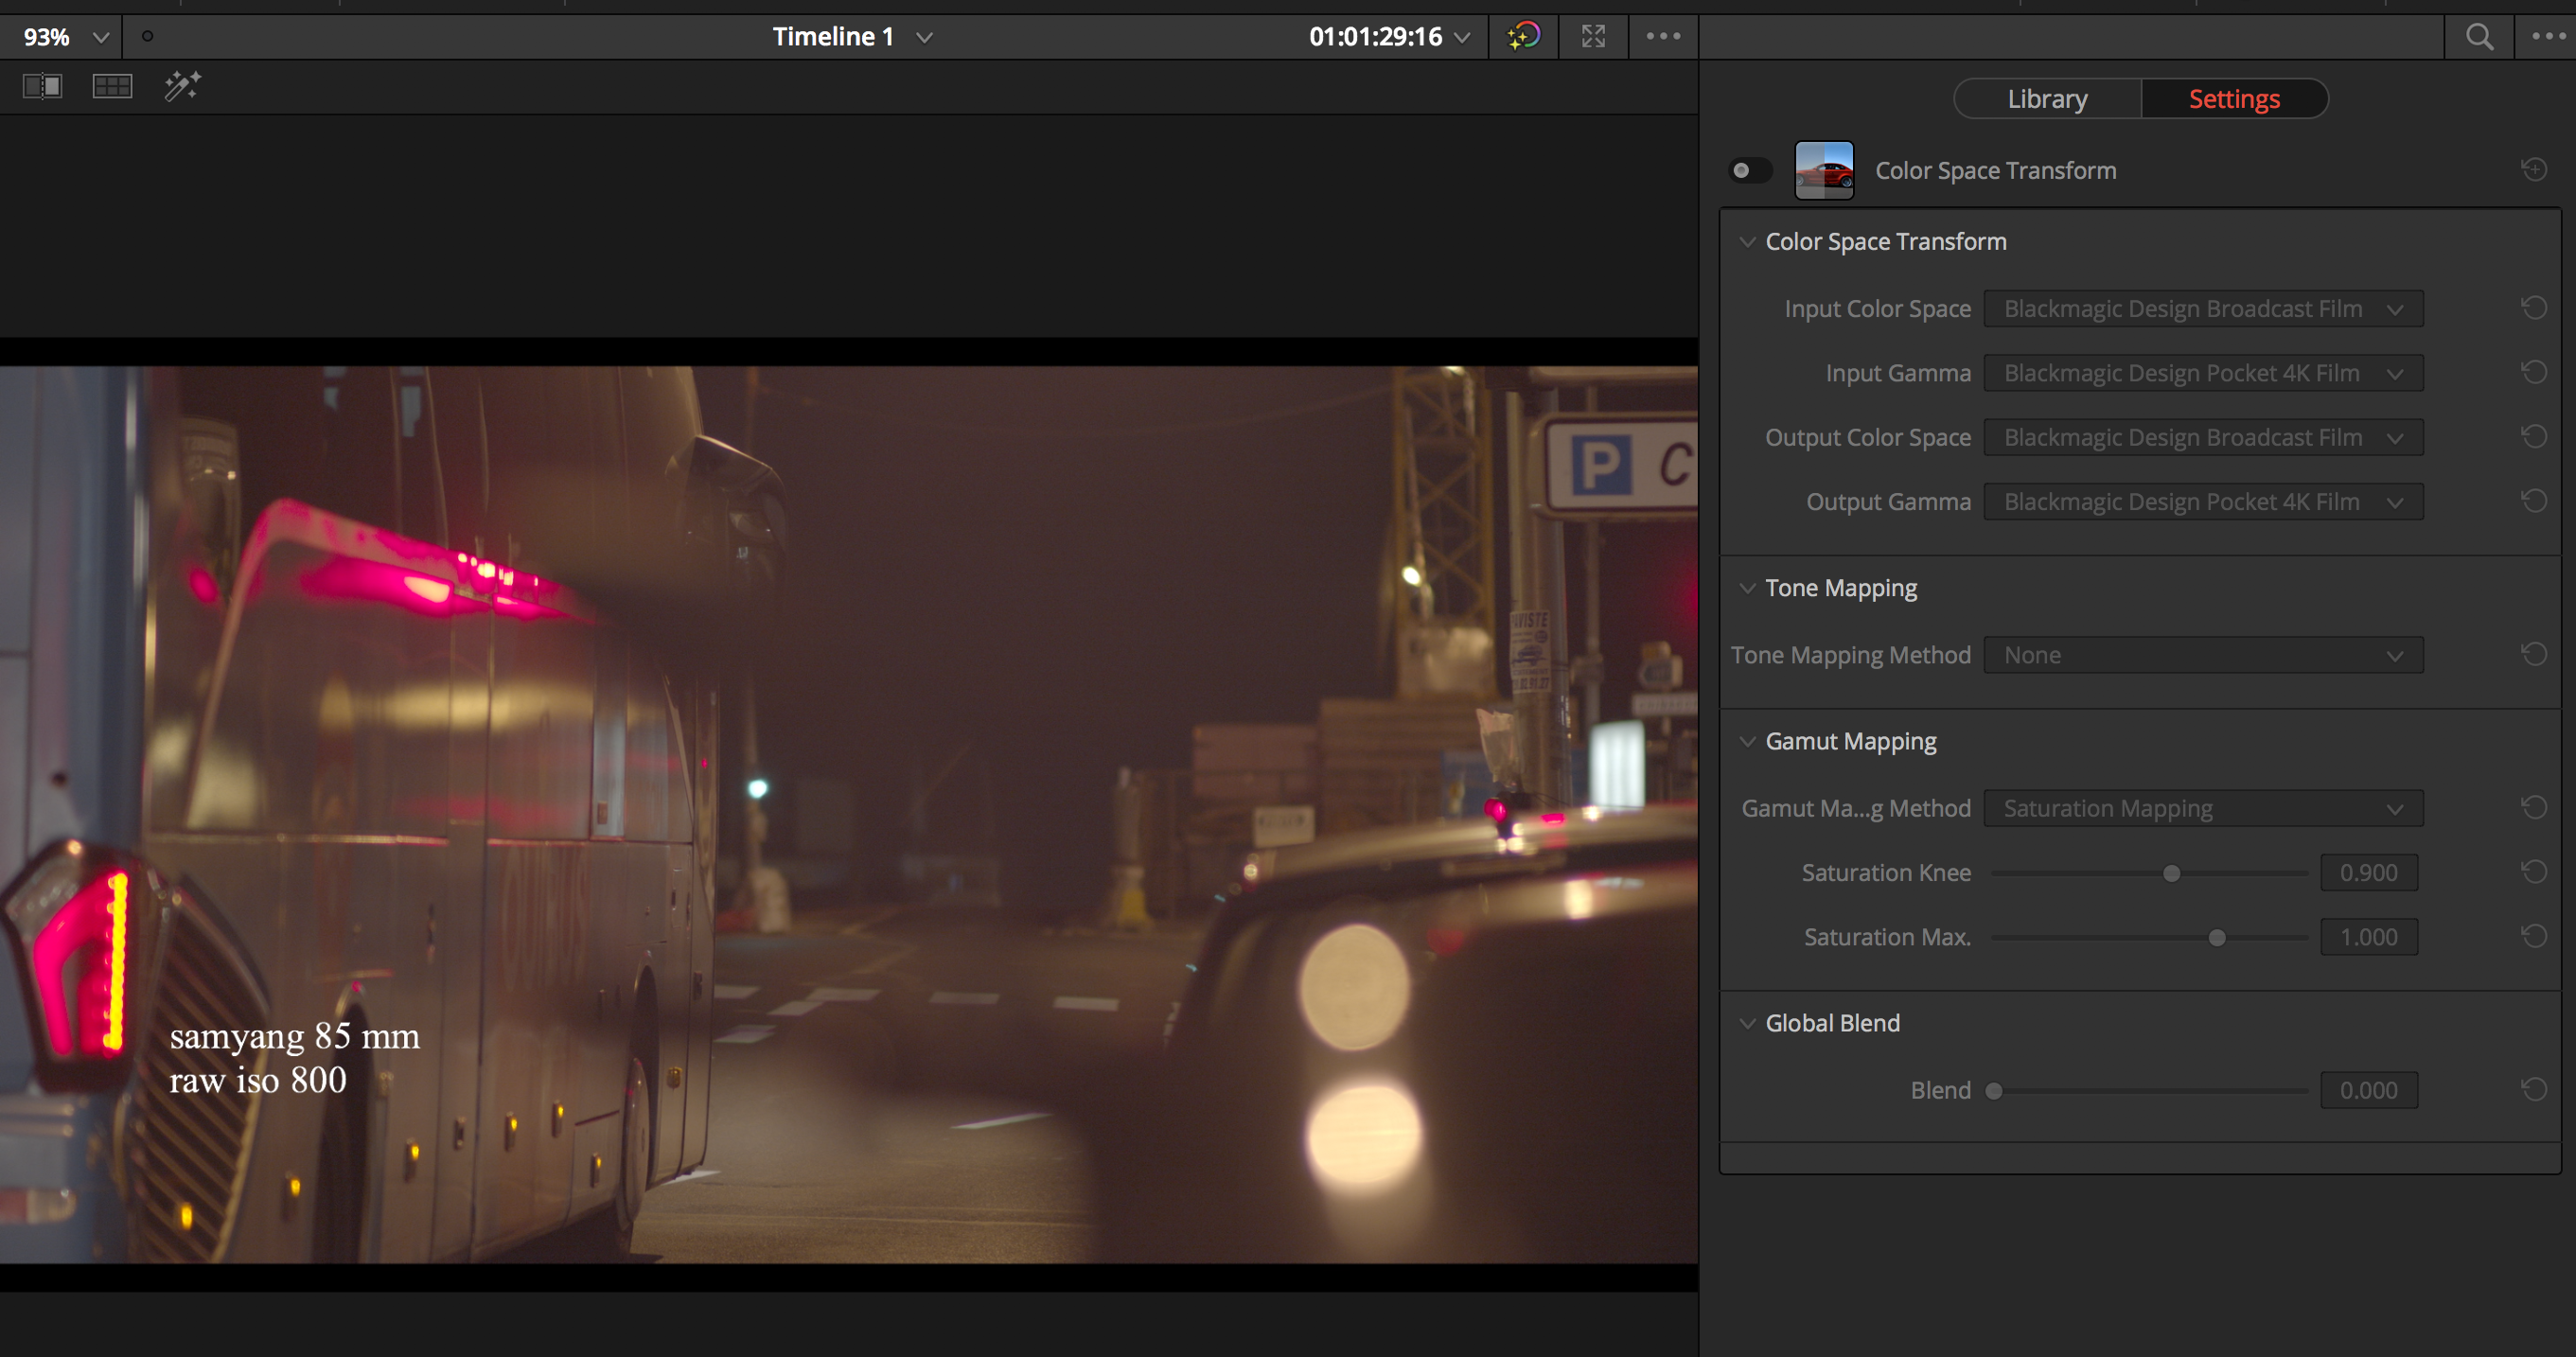
The overexposed super saturated LEDs are clipping the gamut. This will happen with Gen 4 on 4.6K too. You can reduce the issue by soft clipping the gamut using the colour space transform Resolve FX plugin. Here I am using the Broadcast gamut because the Pocket 4K option isn't in the colour space transform plugin at this time but they are actually the same gamut/primaries anyway. Without soft clipping the gamut: