Ryan Earl
-
Posts
54 -
Joined
-
Last visited
Content Type
Profiles
Forums
Articles
Everything posted by Ryan Earl
-

"Looking" professional and how important is it?
Ryan Earl replied to newfoundmass's topic in Cameras
I once had a client who thought I brought a ‘different’ (better?) camera from one shoot day to the next because I had Canon IS lenses on the first day and a cine lens and matte box on the next. And it was a heavy setup either way, 15lbs - Ursa Mini. A good compact matte box alone like the Arri MMB-2 can help you work better and faster. I have a big collection of 4x4 and 4x5 filters and the kit has outlasted many cameras. I paid more for the Arri matte box than my Sigma FP. And the Arri sticker has long come off so it appears unbranded. As soon as you get a cage and a cine lens and rails on small cameras they become ‘compact cinema’ cameras to the client. It all blends together. -
Is the comparison with the Alexa in 2K or 4K?
-
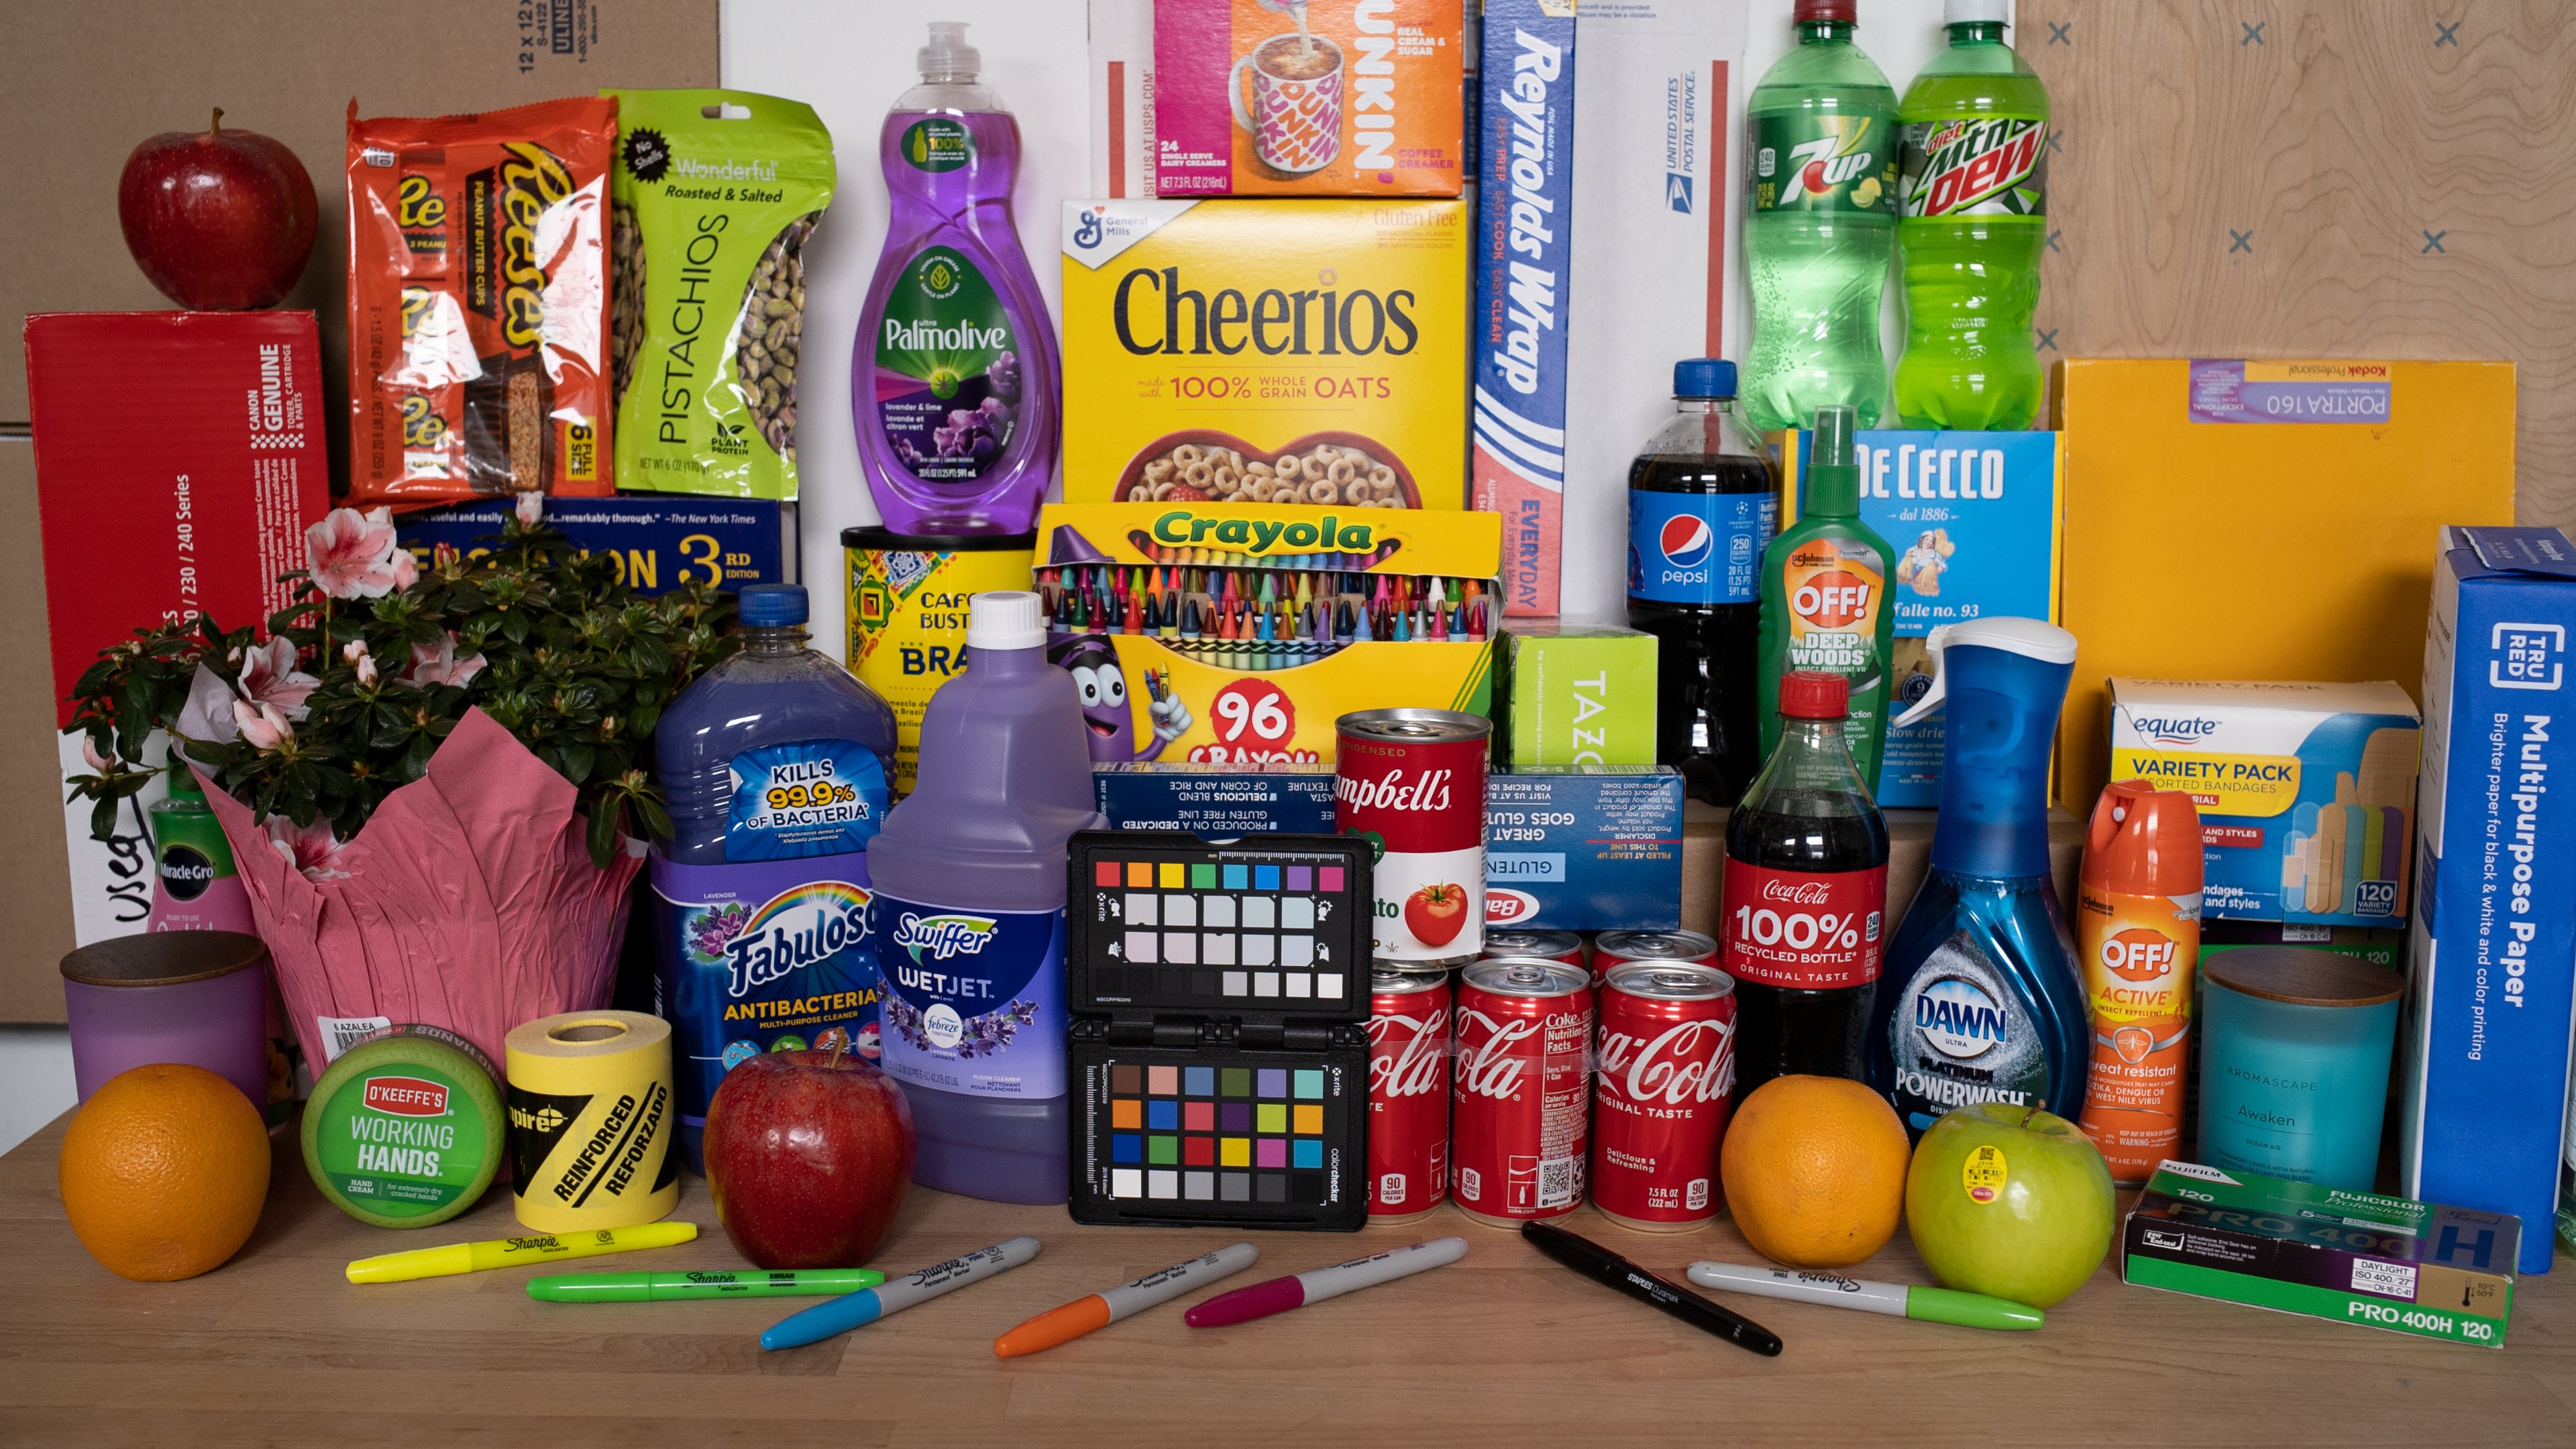
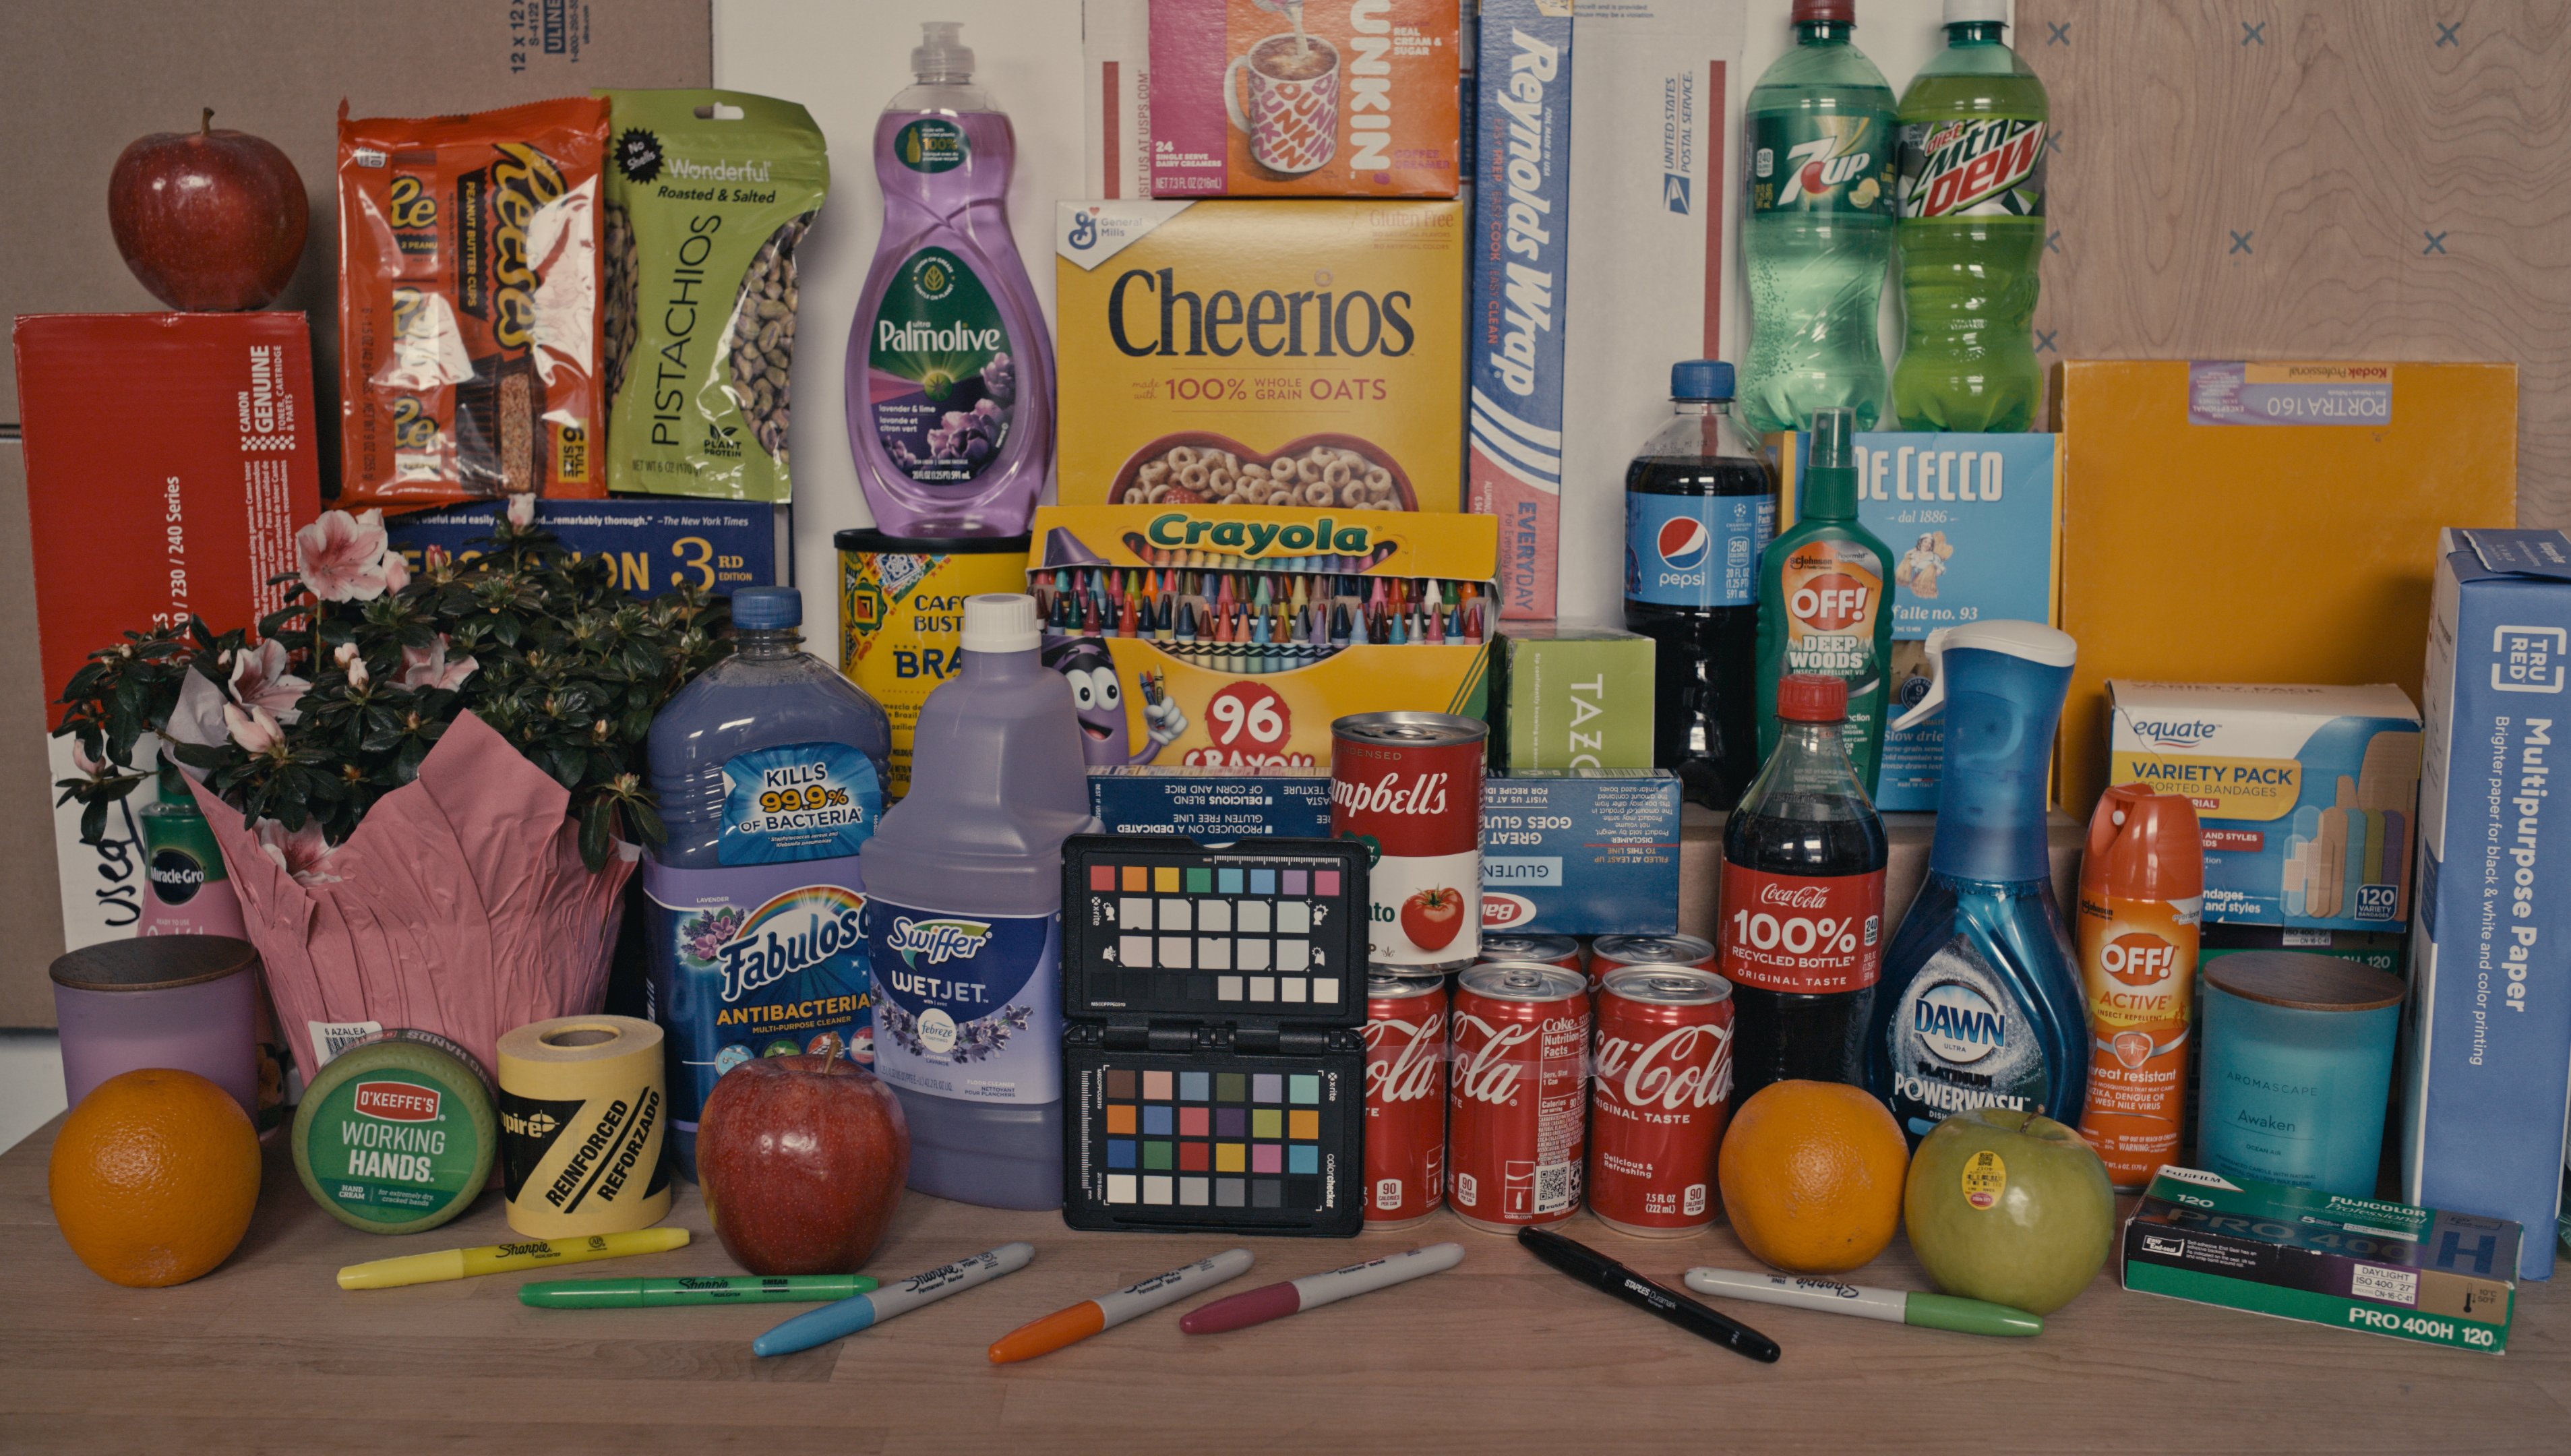
The HD capture in camera in 12 BIT DNG is where I've seen moire and aliasing in more normal shooting conditions, like hair and details like eyebrows. Though the rolling shutter is much better. It's supposed to be half of UHD I think, about 10 ms? With the UHD, I've haven't seen it where it ruins a shot, but have had it ruin shots on the Blackmagic cameras, so I have bought the OLPF and IR Cut where I could. Like a fashion / clothing shoot on the URSA 12K when I was initially trying that camera on its v1 firmware. Huge parts of a jacket were unusable, so I actually cropped in around it to a head shot later. The RAWlite helps a lot adding extra IR Cut too. The original URSA 4.6K that I still have is without one, there I've used a Schneider 1/4 Classic Soft or softer lenses and a Hoya IR Cut. In ProRes 4444 vs DNG the artifacts are blurred enough so I don't worry about it. With the Sigma FP I've been surprised I haven't seen it in normal shooting, and it's much cleaner in terms of IR. It doesn't need the extra IR cut. Though it can have a digital sharpness where I will still cut it with soft filter. In a test shot, with a lot of detail and packaging with tiny print the Sigma FP does better than the URSA 4.6K. The URSA 4.6K will have more artifacts spread through the objects and print details where it isn't there on the Sigma FP. Though in the color checker and charts it is there in ultra fine details but looks better again than the URSA 4.6K. So I'm not personally wishing I had an OLPF if it existed or thinking it necessarily should have been added.
-
I used a Leica CL with a 40mm for a long time for stills and the Sigma FP comes really close to that idea of minimalism. I think the FP is very convenient. And I haven't actually come across any aliasing in practice with the 4K DNG vs the URSA Mini 4.6K where I have it in the test scene (showing on the URSA on the color checker) when I compared the two cameras. The FP is very clean and vibrant. I bought SmallRig accessories, cage, rail adapter, and ssd holder and a top handle when I need to adapt the Sigma FP into a larger setup, but also just using it bare bones with the EF adapter and an Canon IS lens has really been smooth. I've remapped the False Color to the 'AEL' button on the back as well as the 'Mode' button to ISO and 'Tone' to Peaking. Then with the aperture / shutter dials enabled in cinema I can bump around exposure. I have a few Hoya Pro NDs and a magnetic adapter ring. I have a Canon 5DS for stills and while the colors are slightly different out of the box I don't have any issues trying to match it if that's what's needed. And the post workflow is honestly very quick if you drop into a DaVinci Color Managed or ACES project and not any different really than taking the stills to Lightroom / Photoshop Camera Raw or Capture One. I don't expect it to be an Alexa, but I think there is plenty of runway in the files for any kind of imagery you want to make with it.
-
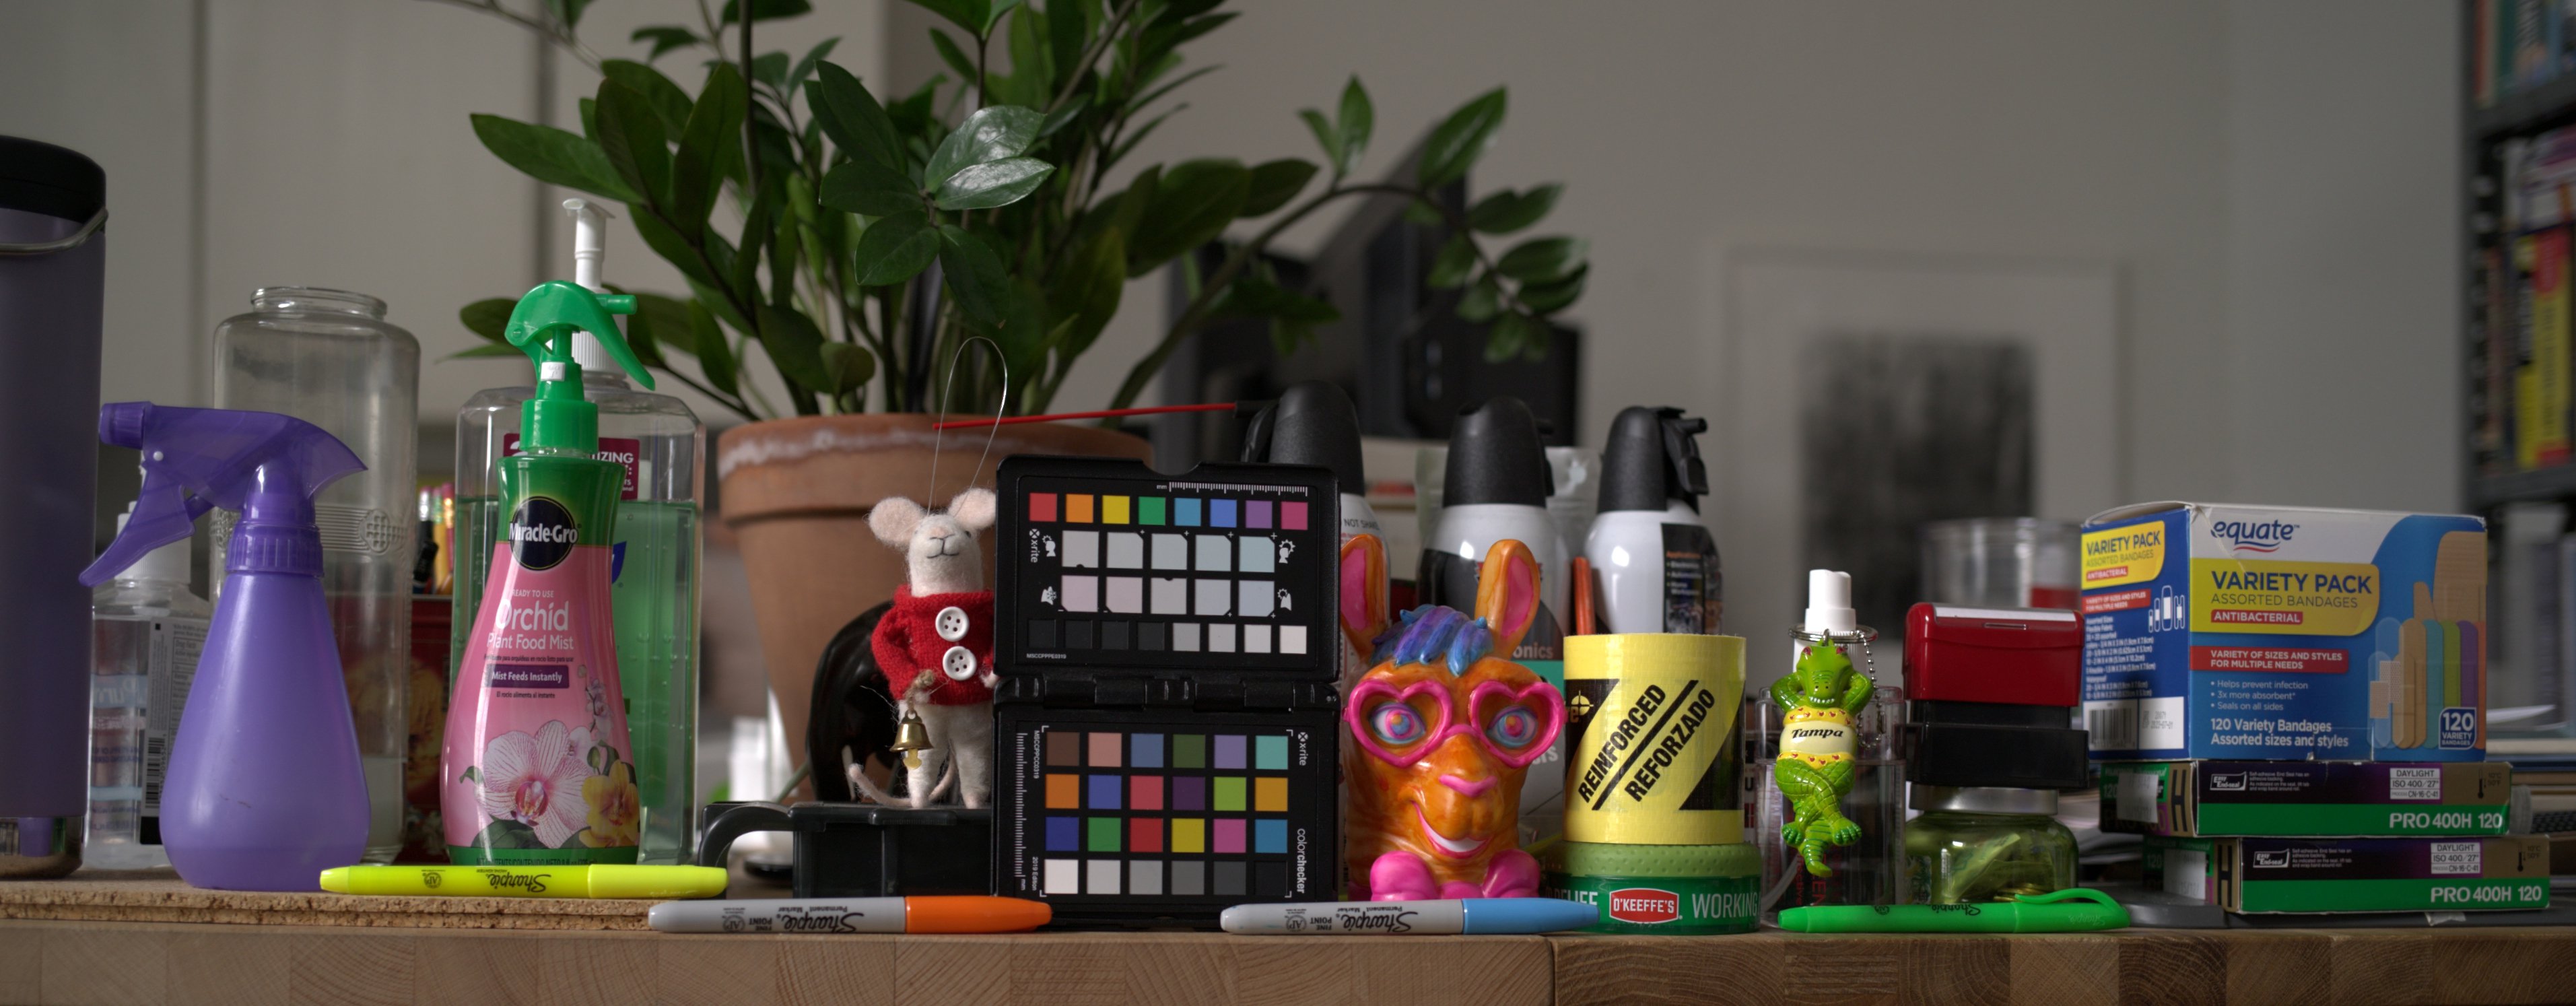
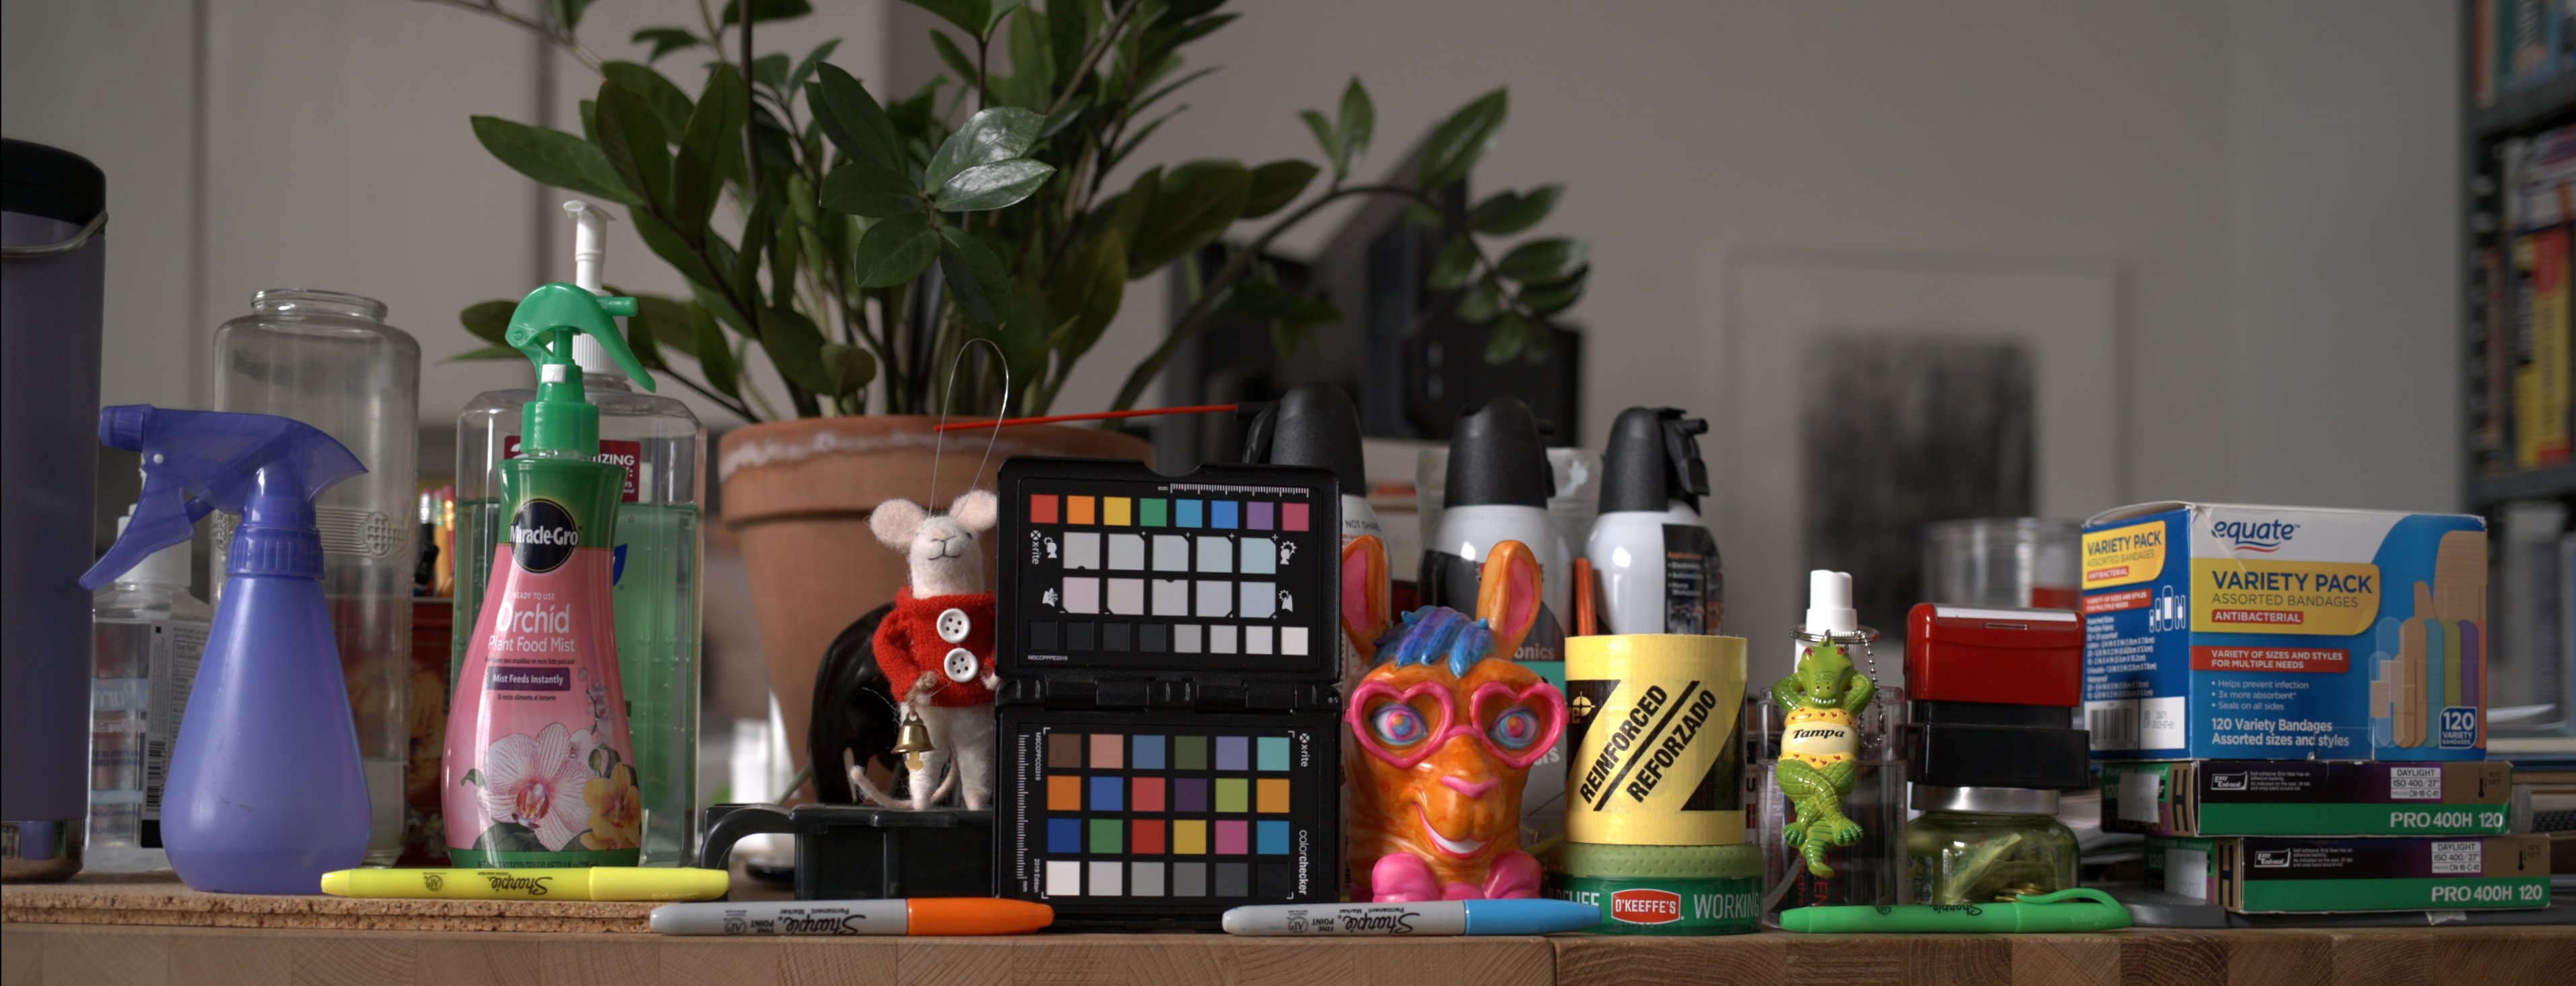
This might be too dirty of a comparison, but the earlier posts concerning the chart have been helpful when looking at my images so I though I would post it anyway. I pulled these from ACES versions of my two images. I blocked the Adobe Standard Profile from hyalinejim on the far right and the initial one from Llaasseerr on the far left.

-
Yeah, very good info. It's kind of a vintage look with the saturation pushed down with the Kodak LUT for all of the consumables in the scene. I forgot to paste the link to the DNGs in the previous post: https://we.tl/t-KABtBkd3OT This is how it looks with Adobe Color in Photoshop Camera Raw without any adjustments besides the default 'adobe color.' It's using the opposite window as a light source and I have the camera set to 'daylight.'
-
But do they? LOL I attached two more DNG files to check out if anyone is interested with lots of commercial objects including some coke cans. Color "On" with a Kodak Film LUT.
-
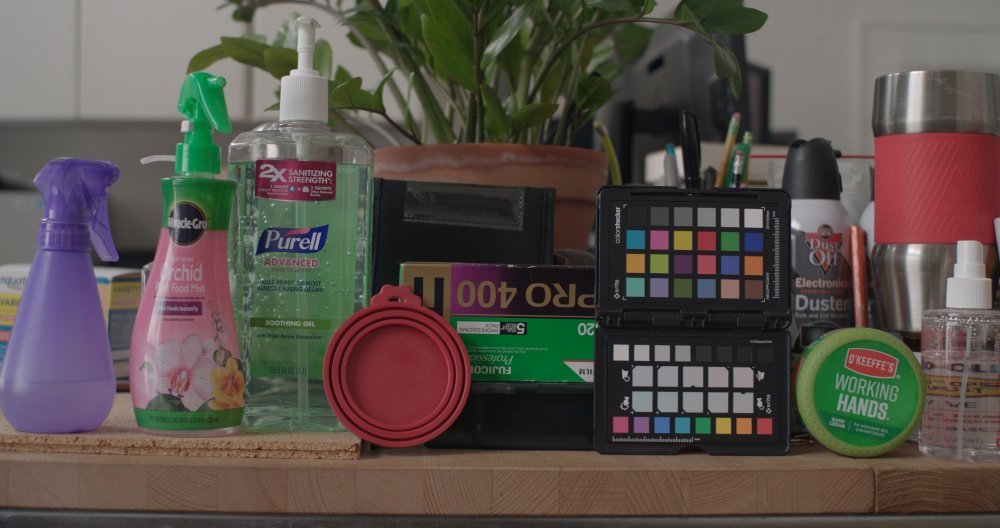
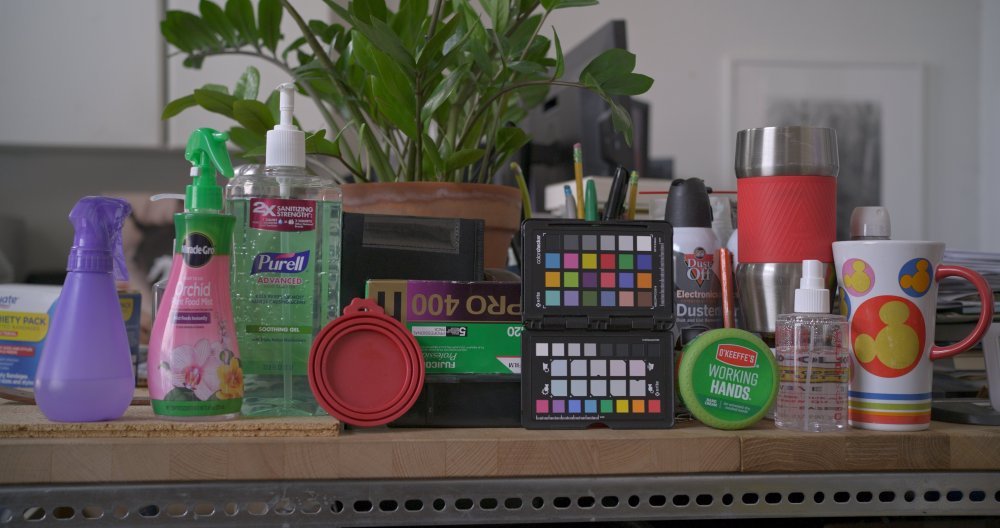
Yeah, the blue patch might be too purple in the "on" image. The other way I was looking at it, going along with how to interpret the DNGs in Resolve REC709 or BMD Film Gamma etc. was to compare it to the original Ursa Mini 4.6K DNG with Color Science 3. I was thinking that I would be using mostly BRAW with the Sigma FP in studio but now have found my way back to DNG. I posted my example in another thread, but I'll repost here. Keep in mind both images have the same WB and Tint settings in the RAW tab. If I decode Ursa Mini 4.6K Color Science Gen 3 with Blackmagic color and gamma, in DaVinci YRGB REC709 Gamma 2.4 I get the following: URSA Mini 4.6K ISO 800 WB 5194 TINT 13.79 Then Sigma FP I transformed to REC709 with the CST method from Linear to get this: Sigma FP ISO 800 WB 5194 TINT 13.79 Interesting that the Tint and WB can be set to the same values. Though in the earlier examples just comparing ON & OFF, Sigma FP was set to "DAYLIGHT" in camera then in Resolve's RAW tab there were too different values for the "AS SHOT" WB & TINT. The "on" setting seemed to be around 6500K and the "OFF" around 5600K. Then you'll get the "off" color if you put the "on" DNG into BMD color and gamma so it gets even more confusing. I can upload these DNGs too and their 'off' DNG counterpart that was taken at the same time if anyone wants to play around. What I was having trouble with is getting the violet spray bottle and the red disk to be the color 'as seen' and 'as in' the URSA 4.6K since that is my 'known' workflow for product work. As I tried to move the bottle from blue to violet I would throw off everything and have to make too many selective adjustments where in the 'on' file all the color relationships were more intact. So if the blue patch in the color chart was too violet for example in the 'on' DNG than a simpler global adjustment will work without throwing off the spray bottle or the red disk. Again, I don't think the color is ruined in either 'on' or 'off' but does the "off" profile have less color available? Does it restrict the gamut when you turn the color "off"?
-
My point I think as it pertains to the thread, is that the ‘off’ profile is the only option when recording out hdmi to braw. So that’s where I initially noticed the color difference, doing dng and braw but I didn’t have ‘off’ set initially in camera for dng. It’s a great sensor / camera without a ‘known’ or tried and true workflow.
-
ACES is looking like the way to go, I’ve found that especially at IS0 800 the shadows are not so crunchy in some of my footage compared to the CST method.
-
Sure, here is a link to 2 DNG Frames. Let me know what you think. Anybody can download until the link expires. https://we.tl/t-uRbyLstW0Y
-
It's confusing, I might have written it out in a confusing way, but I don't think the "off" mode or decoding to BMD color and gamma are as accurate, so personally I'm not using them. I set the profile in the camera to "Portrait" then record in 12 Bit DNG then use DaVinci Color Managed because I'm often using it for reproducing objects that require accurate color. I would consider the "off" mode to be a shifted 'cinema' mode like a Kodak film stock, where green isn't green, it's a little brownish green. It could be better for skin tones for example and pleasing, but I don't see it as 'accurate.'
-
Sigma FP Color Mode "ON" Portrait, Standard, etc - UHD DNG - WB - Daylight Sigma FP Color Mode "OFF" Portrait, Standard, etc - UHD DNG - WB - Daylight It's a shift that could be meaningful for some, the violet spray bottle on the left side of the image stays true with color mode set to anything but 'off.' The reds also get orange and the greens go a little brown. It's not just less saturated, I don't know, it seems shifted. Then 'ON' and 'OFF' will match BMD color and gamma. Where you will see both or a difference is in ACES or DaVinci Color Managed. It's a strange behavior, that's why I think they went in reverse from BMD film to the color mode "off" which I think was added later.
-
Another way to look at it is to use DaVinci YRGB color managed in your project settings and record the same scene with color mode 'off' and one with 'standard. Then bring them both into a timeline and with those settings DaVinci handles the decode so it's grayed out in your raw tab. You'll see that they are different even though both were recorded as cDNG. So there must be different metadata. It's almost like Sigma saw what the DNGs looked like decoding to BMD film in Resolve and went backwards to the camera and created color mode 'off' and the BRAW output to match. So maybe it's more like an intentional workaround or hack.
-
If you're working in the color mode 'off' setting as they recommend then BMD color and gamma are fine. I think it is giving you the intended look. If you recorded in anything other than color mode 'off.' For example you recorded in DNG but had 'portrait' as the profile set, and you want what I think is the more accurate color, then an ACES project might be a better fit. If you record to anything but color mode 'off' like standard or portrait and decode as BMD color and gamma you will get the same result I think as if you had recorded in 'off.' But interestingly you can see the primaries shift if you decode to REC709 or P3-D60 with the same clip.
-
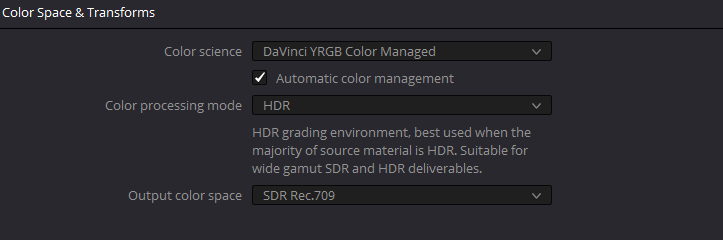
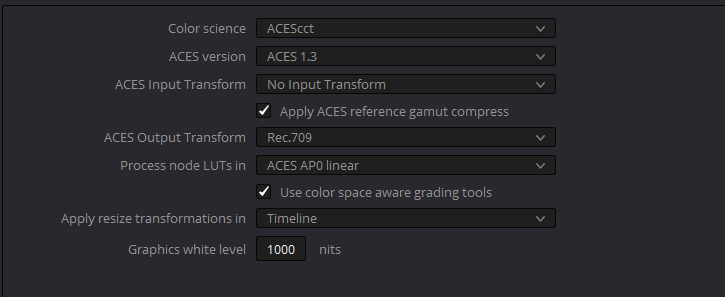
I'm not too familiar with ACES, I've just tried these project settings and all the highlights seem available, lift gamma gain tools are responding great, color seems good: How would you suggest setting it up for ARRI log C?
-
I've been importing the cDNG through SlimRAW as 3:1 and they playback much better and I'm able to upscale slightly to DCI 4K for monitoring / exporting. I should clarify that I think when working in CDNG and 'naked' without BRAW or ProRes RAW it does appear to show the correct false color values on the rear lcd screen with the new firmware, but that false color reading is in conflict with the waveform, zebras and preview.
-
I think the main issue with exposing for highlights, as was already discussed, is that you don't get a sense of exactly where the camera is clipping. I don't think it's a huge issue though and in practice I now use the camera's false color and the exposure meter, even in manual mode I just pay attention to whether or not I am under or over exposing and by how much. Then put it through your chosen workflow to roll off the highlights.
-
No, it's accurate across the ISO range. The camera's internal exposure meter is really good too, along with the auto white balance, it's one of the reasons why I like using the camera. Next to the aperture number on the rear lcd screen you get a +/- exposure indicator and it works well if you don't have time to use false color. You can then place a gray card in the scene if you have time or use a skin tone for false color measurements.
-
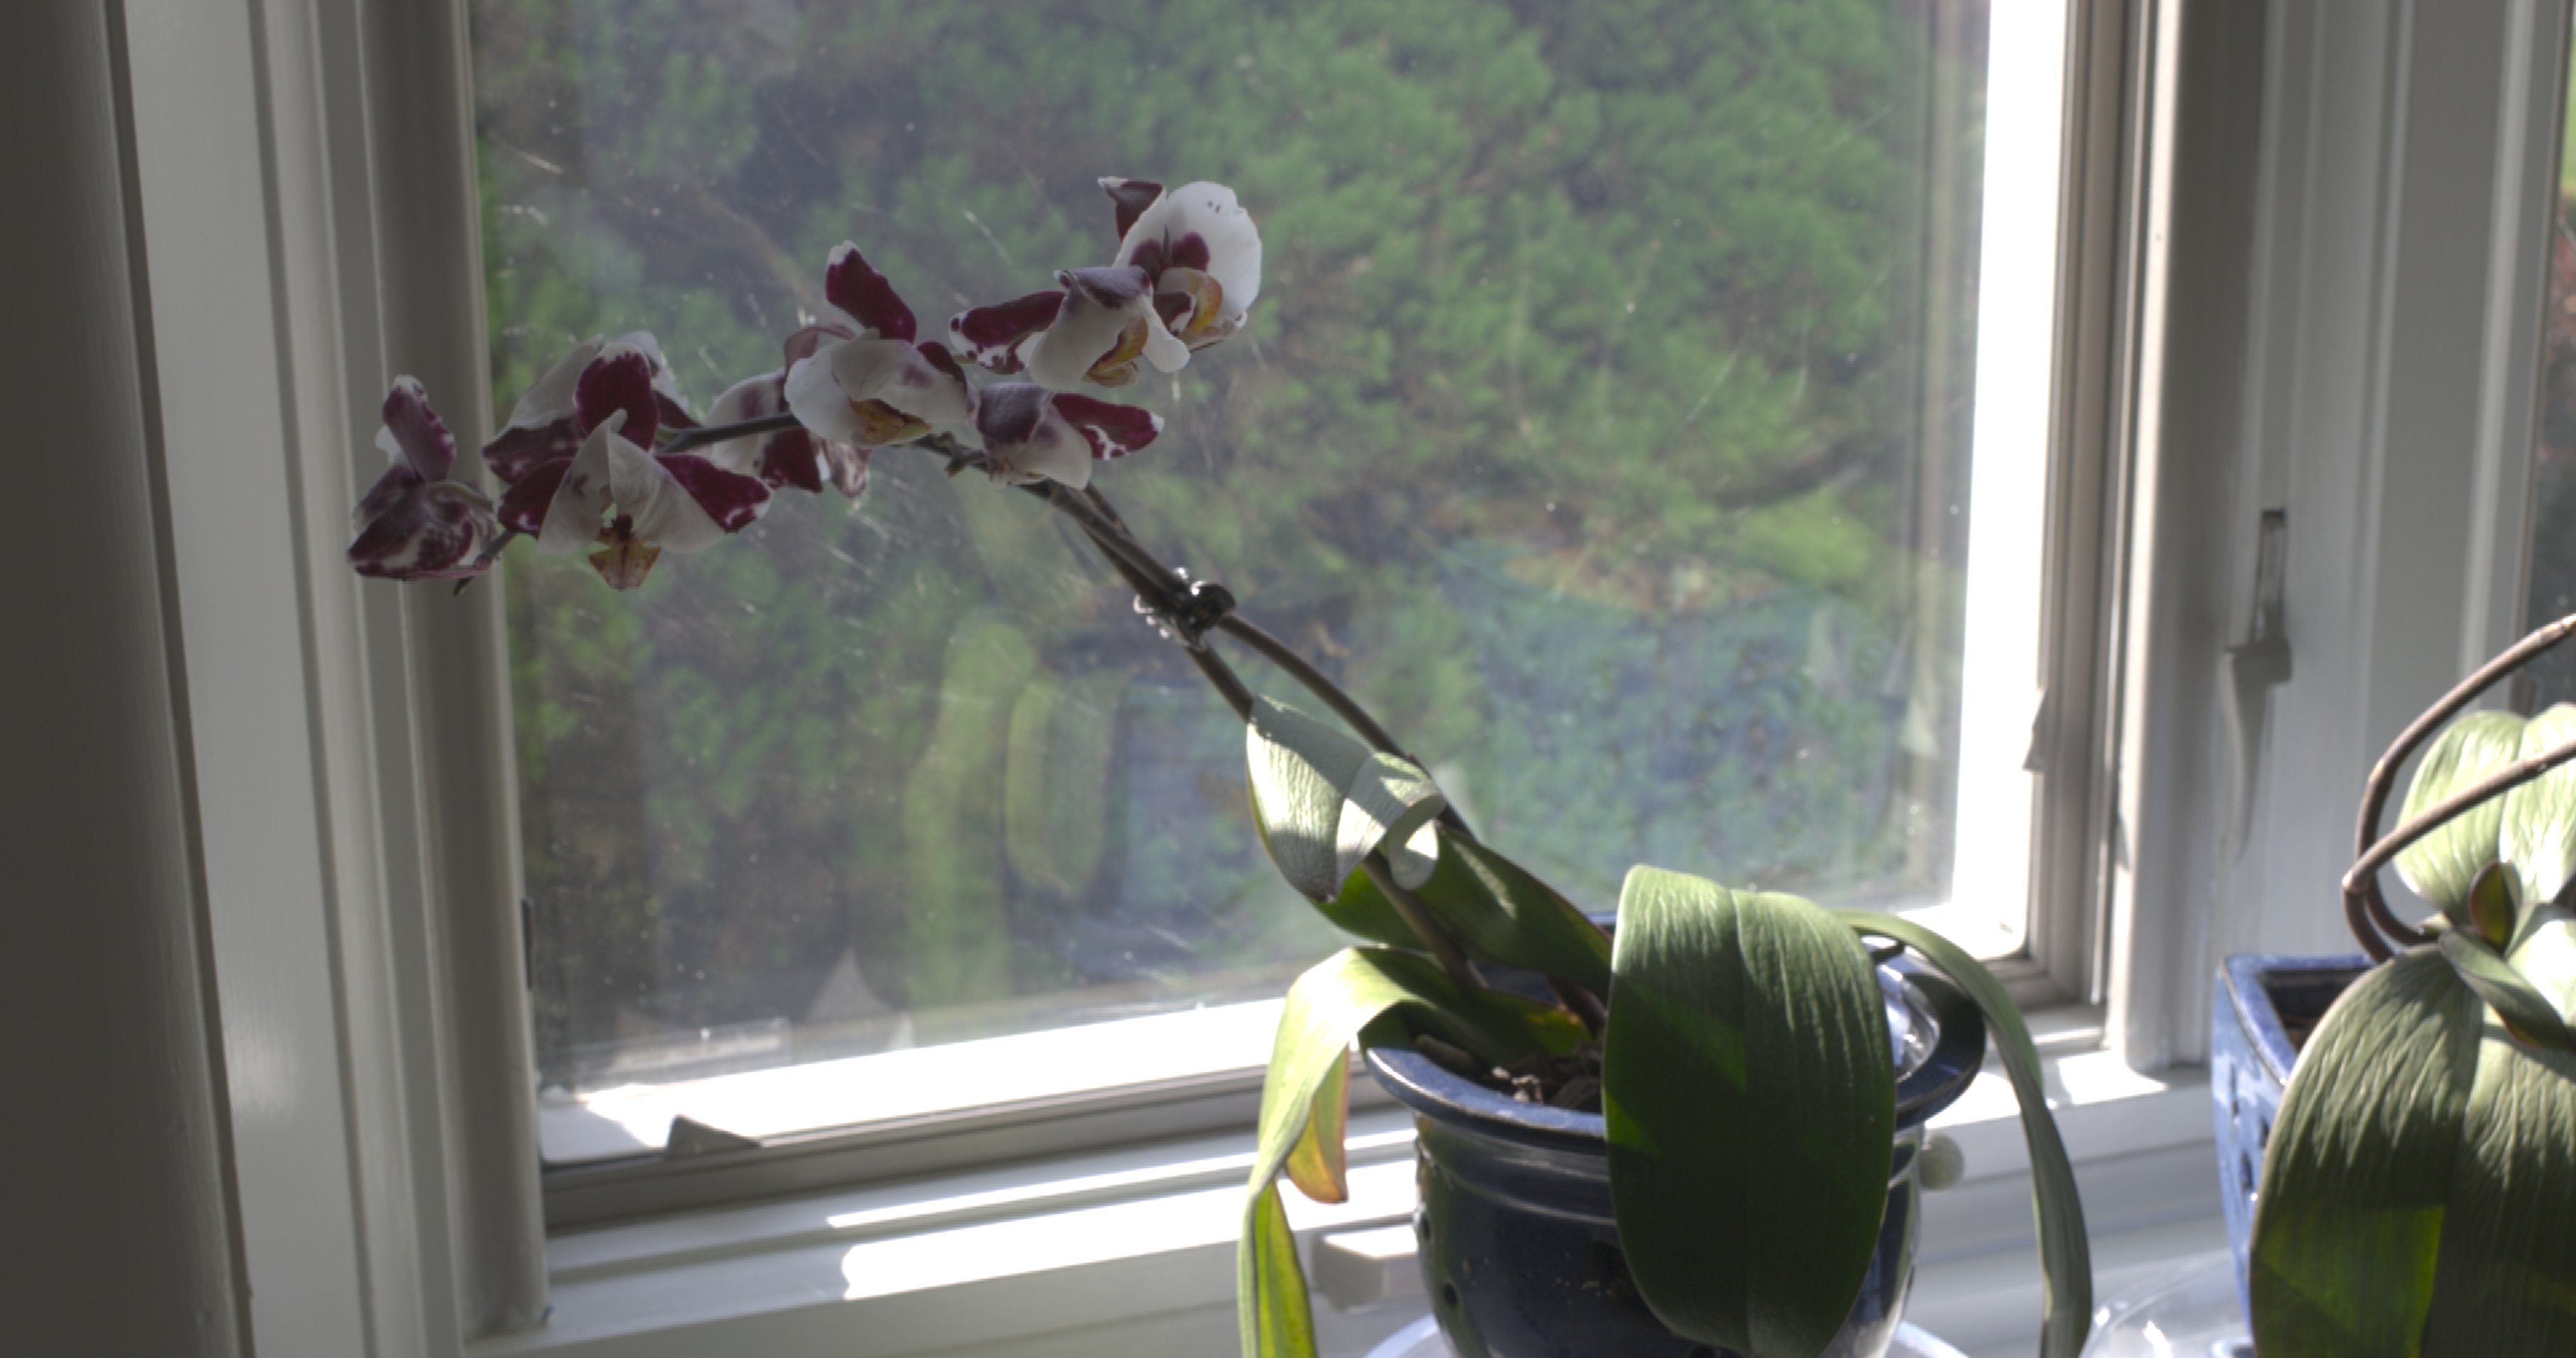
The monitoring situation is tricky. With the following image recorded in 1080 12bit DNG the whites of the window sill were considered clipping on the camera's monitor and the waveform. The ISO is 160 and it pretty much looked this way on the camera's monitor. I think you will struggle to pull them back down while working directly in REC709 - GAMMA 2.4 or SRGB. Then below is a transform to Blackmagic Wide Gamut and Blackmagic Film Gen 5 with the CST tool from P3-D60 and Linear. Then from BMD GEN 5 a 2nd transform to REC709. You can also try transforming to the RED or ARRI spaces if you have luts for those already. I just added a bit of saturation on top without exposure adjustment, but you can see that I'm underexposing the flowers to hopefully pull them back up.
-
I agree ISO 800 will protect the highlights better. You can also post a DNG frame or two to compare developing methods.
-
What I understand is that the Blackmagic Design Color Space and Blackmagic Film Gamma was specific to Blackmagic's cameras like the original Blackmagic Cinema Camera and URSA 4.6K. The conversion will be inaccurate but some users have found it pleasing or workable. I personally compared the DNGs as P3 D60 and Linear to the URSA 4.6K in Blackmagic and found the colors to be more accurate with a transform to REC709 and with the tone mapping tool better access to the highlights from the Sigma. I think as the Sigma happened to use DNG people just started using the Blackmagic gamma because it gave you an instant log to grade but since Sigma had not given a log profile for it, it's linear, then it's most appropriate to transform from linear.
-
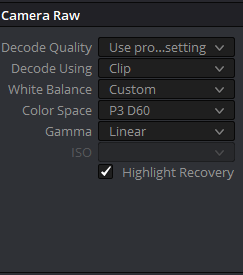
In Resolve you can start to decode to P3-D60 and Linear in the RAW tab then do a "Color Space Transform" from the effects tab. Transform to your timeline space, like REC709 Gamma 2.4 then check the box "use custom max input" under "Tone Mapping" and set it above your screen brightness like 250, 500, 1000. You should see your highlights snap back and roll off nicely if they were available. I wouldn't underexpose to try and get them if you are at ISO 800 because the shadows can block up. I usually do Noise Reduction in the first node, then CST in the 2nd node, then color and contrast correction in the 3rd with the lift gamma gain tools. I attached two screen shots of the decode and CST.
-
The HDMI on my BMPCC broke off somewhere in 2014! I think the FP is an interesting replacement option because of the 12 Bit CDNG HD to SD cards vs the 8bit UHD recording in camera. I've been recording mostly with the USB C port to a Samsung T5 so now I'm worried about that! I bought the SmallRig cage but can't find their cable clamp attachments that would fit. The Sigma made attachment does work pretty well to lock in the HDMI cable though and comes with the kit that includes the 45mm lens. I've been monitoring with the BMD video assist 12g. The zebras on the Sigma and the video assist have me thinking I'm clipping 2 stops into the highlights when the Sigma's exposure indicator is at "0" which are actually mostly recoverable in Resolve. I've been using ISO 800 exposing using a gray card with the false color on the BMD Video Assist. So I get green on the gray card, think I'm clipping, then bring them back, though I have to make sure it's not clipping more than 2 stops. I'll have to read through the threads on here to find an easier way to expose it, but for now I'm fine even with a few hard clips and using Resolve's soft clip tool to roll them off a little better.
-
ProRes Raw also has the color shift. It seems by design with a look imprinted into the footage or a kind of LUT. So you have to want to work with the colors you are getting from it I think, not sure if there is a way around it.