
Jim Chang
-
Posts
52 -
Joined
-
Last visited
Reputation Activity
-

 Jim Chang reacted to Ian Edward Weir in Rectilux Core DNA - non-rotating single-focus attachment for anamorphic lenses
I can tell you the pros and cons between the Core DNA and SRL Magic Rangefinder. I don't own the 3FF
The Rangefinder and Rectilux each have there strengths.
Rangefinder :
Pros - Is built better then Rectilux. Feels more solid and does not make any noise when rotating. Rotating gear is much smoother.
You could get it with distance marks. 82mm is easily to mange then 86mm via diopters. 77mm is very nice when connecting to anamorphic verses 75mm but I was lucky it fit my Redstan Baby Hypergonar jacket perfect! Half the price of Core DNA.
Rectilux Core DNA :
Image quality is better, sharper and does not tint the image on the warm side. The Core DNA is tac sharp at 1.2 and the Rangefinder needs 2.8 or higher. I'm not a big fan of Rangefinder blue flare blobs. The Core has a non rotating front, which is important to me for a circular polarizer and ND filters being I love shooting nature. For me it was well worth the extra cash.
A short video I shot with it.
https://www.youtube.com/watch?v=5zS1pw5p7yc&list=PLIEXyH1Xyq4ToDcZ0ZVCl6bVk060hc_O-&index=3
Here is a list of extras I have compiled to take the Core DNA to the next level.
I would highly recommend getting these extras to make the Core DNA ready for use.
1. M3/M4 Stainless Steel Nylon Head Grub Screw Plastic Brake Buffer Bolt Screws Hex
This is so you don’t scratch up the coating of your anamorphic lens or housing.
http://www.ebay.com/itm/281858121964?_trksid=p2057872.m2749.l2649&var=580836260280&ssPageName=STRK%3AMEBIDX%3AIT
2. 86mm UV filter to protect the front of the Core DNA glass.
3. Metal back cap for whatever size you end up using for your coupler if bigger then 75mm.
4. A custom coupler made from this lens hood fits perfectly. “FOTGA Screw Mount 67mm Standard Metal Lens Hood for Canon Nikon Pentax Sony Olympus”
http://www.amazon.com/FOTGA-Screw-Standard-Pentax-Olympus/dp/B009GFY858
Then a step down ring or step up ring for whatever the size of your front anamorphic thread is. I’m doing 77mm because this is what most of my front clamps are. I’m making a custom 75mm to 77mm coupler for Kowa 1.5x and Kowa 1.75x.
5. 86mm Fixed Spacer Ring
http://srb-photographic.co.uk/86mm-fixed-spacer-ring-5713-p.asp
You want a uv filter to protect the glass but having it on you can’t completely go to infinity. Lucky, even with the uv filter on and not being able to turn the Core DNA to infinity, I’m sharp for over 100 feet. This spacer is for clearing the full range of the focus and using filters.
6. You want to get some 86mm or higher diopters. You need them if you want to get sharp and close.
-
 Jim Chang got a reaction from PepperJay in Rapido Anamorphic Lens Clamp V2 with Rail Support
Btw, sliding V2 clamp with anamorphic lens on a rail is possible, so changing taking lens can be quickly done.
People asked about how solid is the V2 clmap. I tried HIFI-2 (3.48lb), Bauch & Lomb attachment I (3.68lb), Bell & Hewell (6.49lb), See picture of holding them with the clamp on the rail. My tripod mount start titling when mounting the Bell & Hewell, but the clamp is still showing no sign of deflecting.
When playing with this clamp, I realize it could be also used as a handheld arm for holding the anamorphic lens & the camera together, just like the director view finder, see the picture below of KOWA 35mm anamorphic lens, Rokinon 85mm and GH4 held together by the V2 clamp.
It is coming, it will be a dedicated variable diopter, which is optimized for the modded lens, but it has standard thread size, not 75mm for sure, you can reuse it for other anamorphic lens, but result is not guaranteed.
-
Jim Chang reacted to tweak in Clamp options for Kowa 16-H
I don't know if you've seen but Raf actually makes a 16-H clamp now that is exactly the same as a Redstan (but costs a 1/4 the price).
-
Jim Chang reacted to SassySpaceMan in Projection anamorphic adapter 35 NAP 2-2 modified sample video
Thank you! In the case of these larger lenses projector lenses, their minimum focus distance is around 15m-20m and their maximum focal distance extends past infinity for the focal plane of the camera. Thats why shortening the distance is required for this lens. I recently came by a lot of well preserved yet massive anamorphics for basically nothing in auction, in their current state they are very impractical for filming but since I have so many I can hack away, experiment and adapt.
-
 Jim Chang got a reaction from Tito Ferradans in Rapido Anamorphic Lens Clamp V2 with Rail Support
Btw, sliding V2 clamp with anamorphic lens on a rail is possible, so changing taking lens can be quickly done.
People asked about how solid is the V2 clmap. I tried HIFI-2 (3.48lb), Bauch & Lomb attachment I (3.68lb), Bell & Hewell (6.49lb), See picture of holding them with the clamp on the rail. My tripod mount start titling when mounting the Bell & Hewell, but the clamp is still showing no sign of deflecting.
When playing with this clamp, I realize it could be also used as a handheld arm for holding the anamorphic lens & the camera together, just like the director view finder, see the picture below of KOWA 35mm anamorphic lens, Rokinon 85mm and GH4 held together by the V2 clamp.
It is coming, it will be a dedicated variable diopter, which is optimized for the modded lens, but it has standard thread size, not 75mm for sure, you can reuse it for other anamorphic lens, but result is not guaranteed.
-
 Jim Chang got a reaction from SigurdW in Rapido Anamorphic Lens Clamp V2 with Rail Support
Btw, sliding V2 clamp with anamorphic lens on a rail is possible, so changing taking lens can be quickly done.
People asked about how solid is the V2 clmap. I tried HIFI-2 (3.48lb), Bauch & Lomb attachment I (3.68lb), Bell & Hewell (6.49lb), See picture of holding them with the clamp on the rail. My tripod mount start titling when mounting the Bell & Hewell, but the clamp is still showing no sign of deflecting.
When playing with this clamp, I realize it could be also used as a handheld arm for holding the anamorphic lens & the camera together, just like the director view finder, see the picture below of KOWA 35mm anamorphic lens, Rokinon 85mm and GH4 held together by the V2 clamp.
It is coming, it will be a dedicated variable diopter, which is optimized for the modded lens, but it has standard thread size, not 75mm for sure, you can reuse it for other anamorphic lens, but result is not guaranteed.
-
 Jim Chang got a reaction from Bold in Rapido Anamorphic Lens Clamp V2 with Rail Support
Btw, sliding V2 clamp with anamorphic lens on a rail is possible, so changing taking lens can be quickly done.
People asked about how solid is the V2 clmap. I tried HIFI-2 (3.48lb), Bauch & Lomb attachment I (3.68lb), Bell & Hewell (6.49lb), See picture of holding them with the clamp on the rail. My tripod mount start titling when mounting the Bell & Hewell, but the clamp is still showing no sign of deflecting.
When playing with this clamp, I realize it could be also used as a handheld arm for holding the anamorphic lens & the camera together, just like the director view finder, see the picture below of KOWA 35mm anamorphic lens, Rokinon 85mm and GH4 held together by the V2 clamp.
It is coming, it will be a dedicated variable diopter, which is optimized for the modded lens, but it has standard thread size, not 75mm for sure, you can reuse it for other anamorphic lens, but result is not guaranteed.
-
Jim Chang got a reaction from SigurdW in Rapido Anamorphic Lens Clamp V2 with Rail Support
The mod project still going on, I am working on the front variable diopter solution now. The Modded lens will be mounted in the V2 clamp with dedicated variable diopter in the front. :-)
-
Jim Chang got a reaction from Bold in Rapido Anamorphic Lens Clamp V2 with Rail Support
The mod project still going on, I am working on the front variable diopter solution now. The Modded lens will be mounted in the V2 clamp with dedicated variable diopter in the front. :-)
-
Jim Chang reacted to Vladimir in Super anamorphic project
thanks, u can send me some and i will review them with finished setup) that can be my first review ever
i believe i do, but first im gonna do more test (thanks Louis, now i have every component i need). Actually i'm totally ok with sharpness i've already got
-
 Jim Chang got a reaction from buggz in Rapido Anamorphic Lens Clamp V2 with Rail Support
Finally got some new products out by this year. When busy with the Rapido Mod project, realize I would need a real solid clamp for adapting larger anamorphic lenses. Thus, here comes the Clamp V2 with rail support. This clamp is designed based on the original M67-M77 verion of the clamp with additional features:
1: Anti-slip feature, the front of the clamp has standard 82mm male thread, and a lock ring is screw on to prevent the anamorphic lens from fall off during adjustment
2: Rail support feature, the external ring is connected to a beam, which can be assembled with standard 15mm rail based lens support bracket, like the one from Neewer, to provide rail support of the anamorphic lens.
3: Additional mounting options, the external ring has multiple standard M4 screw holes, which can be used for mounting additional accessories, like monitors, and etc.
4: Fast & easy change of anamorphic lens or taking lens, loosen the lock ring and three screws, the anamorphic lens is ready to be slide off from the clamp. Changing another taking lens is possible without readjusting the front anamorphic lens, just loosing the lens support bracket, and unscrew the taking lens from the camera, then you can screw in another taking lens to the clamp, and carefully locate the lens mount into camera.
5: Compatible with your existing step down/up rings, you can reuse existing step down/up rings, and pair them with this clamp. Say, you purchased a package before from us for your KOWA B&H lens, all you need is the V2 clamp to work with your KOWA and taking lens. No additional purchase needed.
Following is the setup process using Rokinon 85mm as taking lens, pair with Hypergonar H.F. 2X anamorphic lens on GH4 camera:
Step 1: screw the correct step up ring on the taking lens
Step 2: screw the external ring onto the taking lens
Step 3: assemble the rail support onto the external ring, having the beam pointing down
Step 4: attach the lock ring onto the anamorphic lens
Step 5: screw the step down ring onto the anamorphic lens
Step 6: secure the camera on the rail
Step 7: attach the rail support to the Lens Support Bracket Mount Clamp from Neewer
Step 8: slide the anamorphic lens from front, and screw the lock ring onto the external ring
Step 9: adjust the orientation of the anamorphic lens by rotating the anamorphic lens
Step 10: lock down the anamorphic lens by tighten three M4 screws
-
 Jim Chang got a reaction from SassySpaceMan in Projection anamorphic adapter 35 NAP 2-2 modified sample video
Shortening the distance between the front & rear anamorphic lens will not only change your squeeze ratio, but you will loose infinity for longer focal length taking lens, because you have changed the afocal arrangement in the original design. You have to be very careful in picking your taking lens. Adding diopter in the front is more universal. :-)
-
 Jim Chang got a reaction from Flynn in Rapido Anamorphic Lens Clamp V2 with Rail Support
Finally got some new products out by this year. When busy with the Rapido Mod project, realize I would need a real solid clamp for adapting larger anamorphic lenses. Thus, here comes the Clamp V2 with rail support. This clamp is designed based on the original M67-M77 verion of the clamp with additional features:
1: Anti-slip feature, the front of the clamp has standard 82mm male thread, and a lock ring is screw on to prevent the anamorphic lens from fall off during adjustment
2: Rail support feature, the external ring is connected to a beam, which can be assembled with standard 15mm rail based lens support bracket, like the one from Neewer, to provide rail support of the anamorphic lens.
3: Additional mounting options, the external ring has multiple standard M4 screw holes, which can be used for mounting additional accessories, like monitors, and etc.
4: Fast & easy change of anamorphic lens or taking lens, loosen the lock ring and three screws, the anamorphic lens is ready to be slide off from the clamp. Changing another taking lens is possible without readjusting the front anamorphic lens, just loosing the lens support bracket, and unscrew the taking lens from the camera, then you can screw in another taking lens to the clamp, and carefully locate the lens mount into camera.
5: Compatible with your existing step down/up rings, you can reuse existing step down/up rings, and pair them with this clamp. Say, you purchased a package before from us for your KOWA B&H lens, all you need is the V2 clamp to work with your KOWA and taking lens. No additional purchase needed.
Following is the setup process using Rokinon 85mm as taking lens, pair with Hypergonar H.F. 2X anamorphic lens on GH4 camera:
Step 1: screw the correct step up ring on the taking lens
Step 2: screw the external ring onto the taking lens
Step 3: assemble the rail support onto the external ring, having the beam pointing down
Step 4: attach the lock ring onto the anamorphic lens
Step 5: screw the step down ring onto the anamorphic lens
Step 6: secure the camera on the rail
Step 7: attach the rail support to the Lens Support Bracket Mount Clamp from Neewer
Step 8: slide the anamorphic lens from front, and screw the lock ring onto the external ring
Step 9: adjust the orientation of the anamorphic lens by rotating the anamorphic lens
Step 10: lock down the anamorphic lens by tighten three M4 screws
-
Jim Chang got a reaction from Tito Ferradans in Rapido Anamorphic Lens Clamp V2 with Rail Support
Finally got some new products out by this year. When busy with the Rapido Mod project, realize I would need a real solid clamp for adapting larger anamorphic lenses. Thus, here comes the Clamp V2 with rail support. This clamp is designed based on the original M67-M77 verion of the clamp with additional features:
1: Anti-slip feature, the front of the clamp has standard 82mm male thread, and a lock ring is screw on to prevent the anamorphic lens from fall off during adjustment
2: Rail support feature, the external ring is connected to a beam, which can be assembled with standard 15mm rail based lens support bracket, like the one from Neewer, to provide rail support of the anamorphic lens.
3: Additional mounting options, the external ring has multiple standard M4 screw holes, which can be used for mounting additional accessories, like monitors, and etc.
4: Fast & easy change of anamorphic lens or taking lens, loosen the lock ring and three screws, the anamorphic lens is ready to be slide off from the clamp. Changing another taking lens is possible without readjusting the front anamorphic lens, just loosing the lens support bracket, and unscrew the taking lens from the camera, then you can screw in another taking lens to the clamp, and carefully locate the lens mount into camera.
5: Compatible with your existing step down/up rings, you can reuse existing step down/up rings, and pair them with this clamp. Say, you purchased a package before from us for your KOWA B&H lens, all you need is the V2 clamp to work with your KOWA and taking lens. No additional purchase needed.
Following is the setup process using Rokinon 85mm as taking lens, pair with Hypergonar H.F. 2X anamorphic lens on GH4 camera:
Step 1: screw the correct step up ring on the taking lens
Step 2: screw the external ring onto the taking lens
Step 3: assemble the rail support onto the external ring, having the beam pointing down
Step 4: attach the lock ring onto the anamorphic lens
Step 5: screw the step down ring onto the anamorphic lens
Step 6: secure the camera on the rail
Step 7: attach the rail support to the Lens Support Bracket Mount Clamp from Neewer
Step 8: slide the anamorphic lens from front, and screw the lock ring onto the external ring
Step 9: adjust the orientation of the anamorphic lens by rotating the anamorphic lens
Step 10: lock down the anamorphic lens by tighten three M4 screws
-
 Jim Chang got a reaction from Justin Bacle in Super anamorphic project
You would need a real solid lens rail support for sure, for this type of experiment, check my new V2 clamp with rail support, :-)
http://www.rapidotechnology.com/products-services/rapido-anamorphic-lens-clamps-with-rail-support
-
Jim Chang reacted to Andrew Reid in My review of The Revenant, shot on the Alexa 65mm in only natural light
I quite enjoyed it when all the dialogue faded away and we were left with the survival stuff. Fun to be an observer in that situation, albeit a sadist one!!
-
Jim Chang reacted to SeanM in My review of The Revenant, shot on the Alexa 65mm in only natural light
Unfortunately there was only a small amount of this film shot on the Alexa 65. Lubezki estimated that only 13% of the movie was shot with it. They received the camera well after production was underway and was only planning on using it for establishing shots. It would be fun to know what was and wasn't shot on the new camera.
-
Jim Chang reacted to tonydtv in Single Focus Instructions for Anamorphic Projector Lenses
Might as well throw this into the anamorphic forum explosion!
I came across this focusing solution earlier this year by taking my 20% understanding of comments made on varied forums about optics and vaguely knowledgeably combining elements from the large amount of random glass I've amassed over the years. I don't claim to know much about optics, and I'm certainly no engineer, but this technique has worked when I didn't have the budget to rent a set of Kowas or the like.
This is definitely a lo-fi, DIY solution. The other products popping up around the forum are higher quality than this, and really this solution's quality depends on the quality of glass you use. Also, I could be totally wrong about how and why this is working.
But if you like to tinker as much as I do, and don't mind a lo-fi aesthetic, then, here:
(handheld the optics, hence the wobbles)
In a nutshell, arrange the following items in the following order:
a. Camera
b. Taking Lens
c. Anamorphic Adapter
d. Achromat
e. Wide Angle Adapter
Instructions:
1. Mount camera, taking lens and anamorphic adapter together.
2. Attach achromat to the front of the anamorphic adapter, as close to the glass as possible.
3. Place the wide angle adapter as close to the achromat as possible.
4. Through your viewfinder (and not lens markings) set infinity focus.
5. Move the wide angle adapter away for close focus.
At some point you'll start to vignette from the front element getting to far away. If you want closer focus, reset your 'infinity focus' to something closer, like 15ft. That's what I did in the embedded video.
There's more notes in the video description, but here's a couple more to get you started:
The trickiest part is finding the relationship between strength of the achromat to the strength of the wide angle adapter. I'm sure someone with knowledge of optics will say how. Loudly. Before dropping cash on any achromat, you can use closeup filters to ballpark a strength. In fact, you can use closeup filters, but image quality will suffer. But good if you want to experiment.
Also, old DVX or HVX wide angle adapters are a good starter to tinker. 72mm or higher gives you more travel before vignetting.
Any questions, ask away!
-
Jim Chang reacted to artiswar in Single Focus Instructions for Anamorphic Projector Lenses
Well since we're hammering away at this, I'll chime in.
I'm all for the democratization of technology. I saw these (FM whosawhatzit) and immediately started pouring over patents and the such, shortly finding that Iscos are afocal blocks with a variable diopter in the front. So here we have to individuals capitalizing on this "revelation." God Bless America. I, on the other hand, and planning on finding a cheaper solution with some "surplus" (surplusshed.com) and some shoddy test builds. Lucky for me, I have a friend that currently has a satellite (imaging, of course) in orbit and he's more than happy to hash out some details. Once I have some concrete findings, I'm sharing it with the world wide web. Every creative can benefit from this.
Preach on @tonydtv!
-
Jim Chang reacted to richg101 in Anamorphic Base Lens Help Needed!
When selecting a taking lens for an anamorph it's worth researching what the original taking lens would have been. and if there are various options you want to go for the middle focal length or the one the lenses are typically used on.
So researching your cinelux 2x anamorphic lens you'll see that there are many focal length primes available for projection.
as far as I can see, the gold cinelux 2x anamorphics could be paired with anything from 42.5mm/2 up to 100mm/2 from a range of primes. They'll have therefore designed the lens to perform best at the mid point. =70mm, (or they may have been designed to work best with a specific focal length to project from a certain distance onto a certain size screen.)
However lets assume they went with the most obvious solution - design for 70mm primes with enough performance to cater for a different focal length.
So lets say the best performance can be had from the cinelux at 70mm/f2 on s35mm (aps-c for simplicity) on full frame to match the performance closely you'll want a 100mm/2.8 on full frame.
So assuming you went with something close to a 70mm/2 as a typical lens it would mean you could get away with using it in aps-c for optimal IQ or when used on full frame you could close down to 70/2.8 and get similar fov and perfomance to that you would expect from the schneider 42.5mm/2 prime (which would be considered 'within spec' by the schneider techs in terms of performance.
Performance is always better from projection anamorphics with double gauss designs (all of the schneider projection lenses are of this design). I think the closest 'full frame capable' lens that is affordable and gets close to the optimal 70mm/2 focal length, while also being a double gauss design is a medium format 80/2.8 like a biometar 80/2.8. You will find 75mm/2 lenses which closely match the criteria but they're rare and often made by collectable brands.
If you can live with moderate vignette on full frame then go with a late helios 44 - a helios 44-3 or later will have multi coatings that match the coatings on the cinelux very well. aps-c with the helios 44-3 will deliver outstanding results only slightly less refined than my estimated optimal 70mm FL
this makes performance even more important since viewers tend to need more refined in focus areas when you're shooting stills. I still think the helios 44-3 is a superb option and only slightly out of optimal spec for aps-c. and only slightly pushing things on the wide end. however the drop in iq will be at the edges anyway and will likely be a desirable aesthetic (particularly for portraits)
-
Jim Chang reacted to arant.joseph in Anamorphic Base Lens Help Needed!
Hello everyone. I just purchase my first anamorphic lens, and I need help with the best base lens for the job. First here is my gear:
- Schneider Kreuznach 2x anamorphic lens
- VidAtlantic adaptor
-Diopter
-Nikon d750
Notice I havent included a base lens. Since the d750 shoots in fx or dx modes, I am torn between a 50mm lens purchase vs a 85mm lens purchase. Furthermore, whenever I see these anamorphic setups, the base lens always seems to be an older model (I.e. manual focus and aperture control). Is there any reason the newest models couldn't be used?
Thanks in advance for your assistance. P.S. I will be doing photography as well as film with this setup.
-
Jim Chang got a reaction from Bold in Seeking Info About the Bausch & Lomb Projection Lens
I have a new housing, which has rim groove inside to reduce the reflection.... :-)
Customized machining, material: AL_7072. it's tricky to pull the glass out though.
-
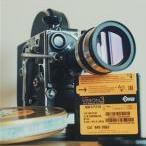
Jim Chang reacted to Brian Caldwell in Rectilux Extreme Low Light Test (f/1.2)
Optics is mostly simple, with some occasional complexity thrown in to make it interesting. In fact, I've almost completely forgotten all the fancy math I learned after high school, since by and large all the math you need to know to be a successful lens designer is geometry, trigonometry, and a bit of algebra.
In your case, assuming that the anamorphic portion is working at infinity (i.e., parallel light in and parallel light out) the aperture of the optical system is determined by the diameter of the iris diaphragm in the taking lens *unless* there is some other limiting aperture in the system. Imagine that you take a pin and poke a tiny hole in a large piece of aluminum foil. Next, open the f/1.2 taking lens wide open and place the aluminum foil in front of your Rectilux so that the pinhole is centered on the optical axis. Clearly, in this case the f/# of your lens system is determined by the diameter of the pinhole and not by the diameter of the taking lens' iris diaphragm. So we would say that the pinhole is the limiting aperture in your lens system.
In your case the clear aperture of the back of the anamorphic section is 43mm in diameter (assuming it is round and not rectangular). This means that the collimated on-axis beam of light exiting your anamorphic section cannot exceed 43mm in diameter, and may be less if any of the other optical surfaces in the Rectilux or your anamorphic group are limiting apertures. The entrance pupil diameter of your 85mm f/1.2 taking lens (most likely 1/3 stop faster than f/1.4, or f/1.2599 in reality) is 85/1.2599 = 67.5mm. Since 67.5mm is bigger than 43mm you are underfilling the entrance pupil of the taking lens. As a consequence, you could stop down the taking lens until its entrance pupil is reduced to 43mm, and have no impact on the actual f/# of the system. In your case, the actual maximum f/# would be f/(85/43) = f/1.98 ~ f/2, and not f/1.2. Again, this assumes that the limiting aperture of the system is the rear aperture of the anamorph, and not some other surface in the Rectilux or the anamorph. If either of the latter is true then your true f/# would be slower than f/2.
-
Jim Chang reacted to Brian Caldwell in SLR Magic Rangefinder vs. FM vs. Rectilux..?
The front element diameter doesn't have any direct affect on sharpness in the sense that you can always conjure up a counter example. For instance, I could add a foot diameter filter to the front of any taking lens and the sharpness would hardly be effected at all. Again, what really matters a lot is the entrance pupil diameter, which is the diameter of the image of aperture stop as viewed from the front of the lens.
Of course, there are limits to the sharpening effect of using a shorter focal length taking lens. If you go too short then you'll encounter aberrations and/or vignetting in the outer parts of the image.
-
Jim Chang reacted to Bold in Seeking Info About the B&H Projection Lens
Hi Rich - Thank you for your response!!! This certainly seems like a more affordable solution than finding a machinist to fabricate a new front element. I made the following diagram to make sure I understand the process:
Transfer the glass from the B&H front element to a suitable helicoid (using step/filter rings as needed). The helicoid with the B&H glass then replaces the old front element and is joined to the rear assembly. The old front element is not needed and can be stored in case it's ever required again. Is this correct? If so:
Which kind/brand of helicoid did you use (or would you recommend)? Will the helicoid require any adaptation or modification to join the rear assembly of the B&H? Which kind of step/filter rings did you use (or would you recommend) for the glass? If you're able to go down to 58mm on aps-c with little or no vignetting, what would be the shortest lens usable on m43? 40mm-ish? And the million-dollar question: Since the B&H is doing the focusing and not the taking lens, can it be used with a parfocal zoom? Thanks again for the info, I'm excited to reach the point where I can start putting this modification together and share some test footage. if anybody else has anything they can share, it would be hugely appreciated - I'm hoping to consolidate enough info to add back to the Anamorphic Lens-opedia.
Cheers,
|. . | .|